Work Progress Images
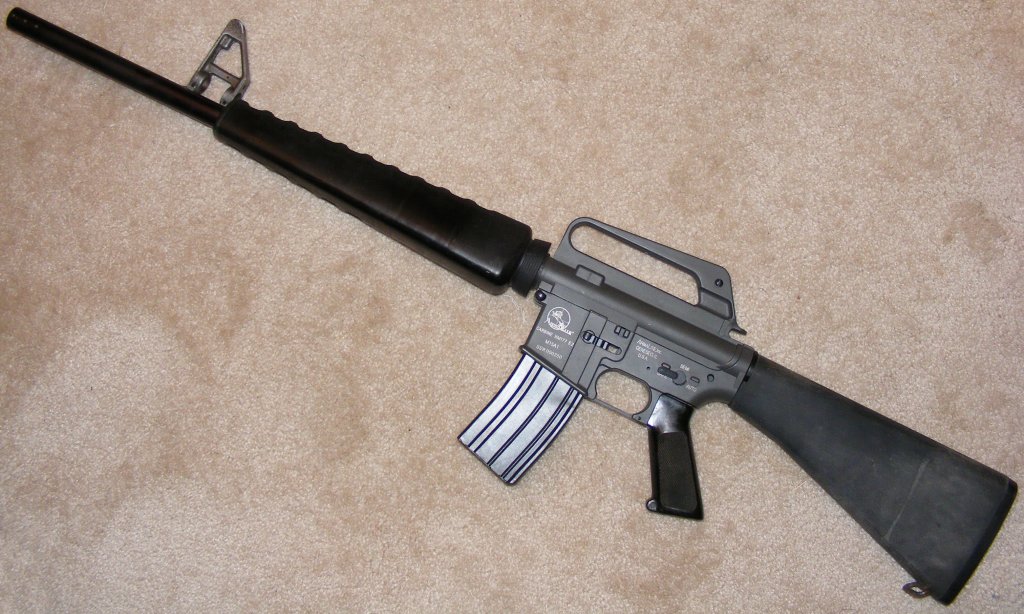
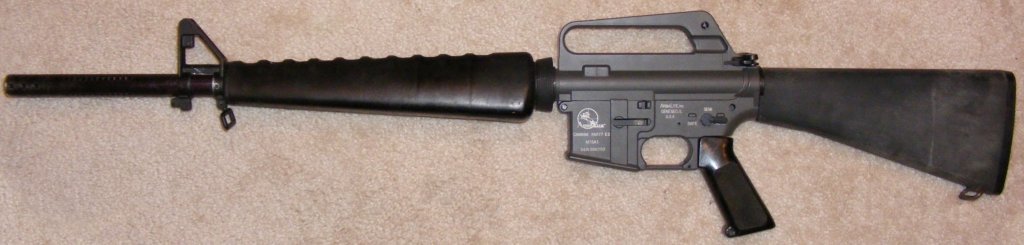
First Layout 01/22/08: butt stock, handguards, delta ring, end cap - all from the real weapon. Front sight getting replaced. Classic Army metal receiver set. 21" CMI barrel.
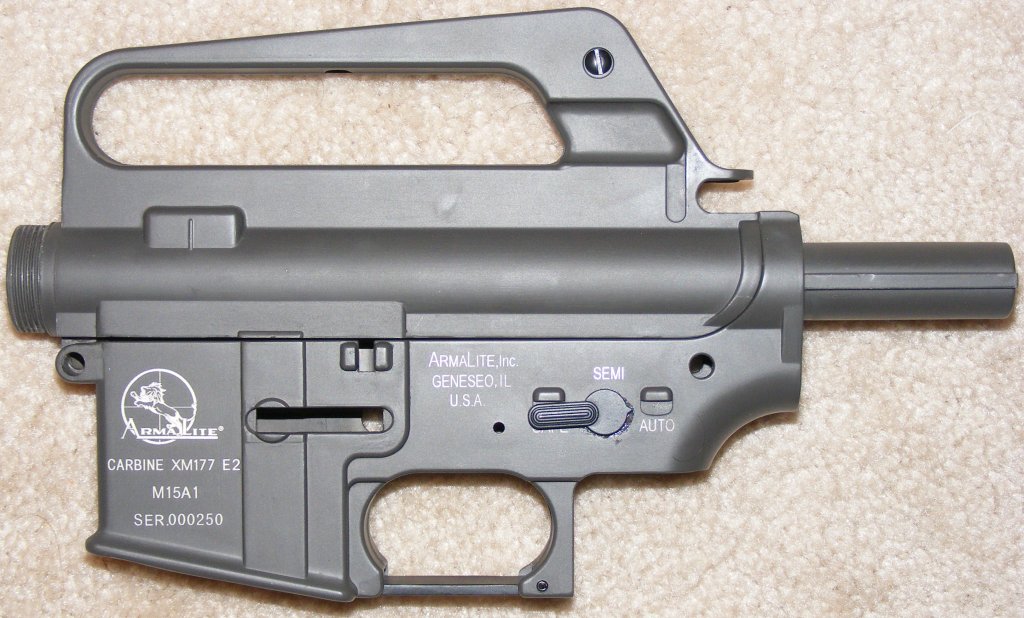
The Classic Army metal receiver set for an AirSoft XM177 E2 Carbine - close enough.
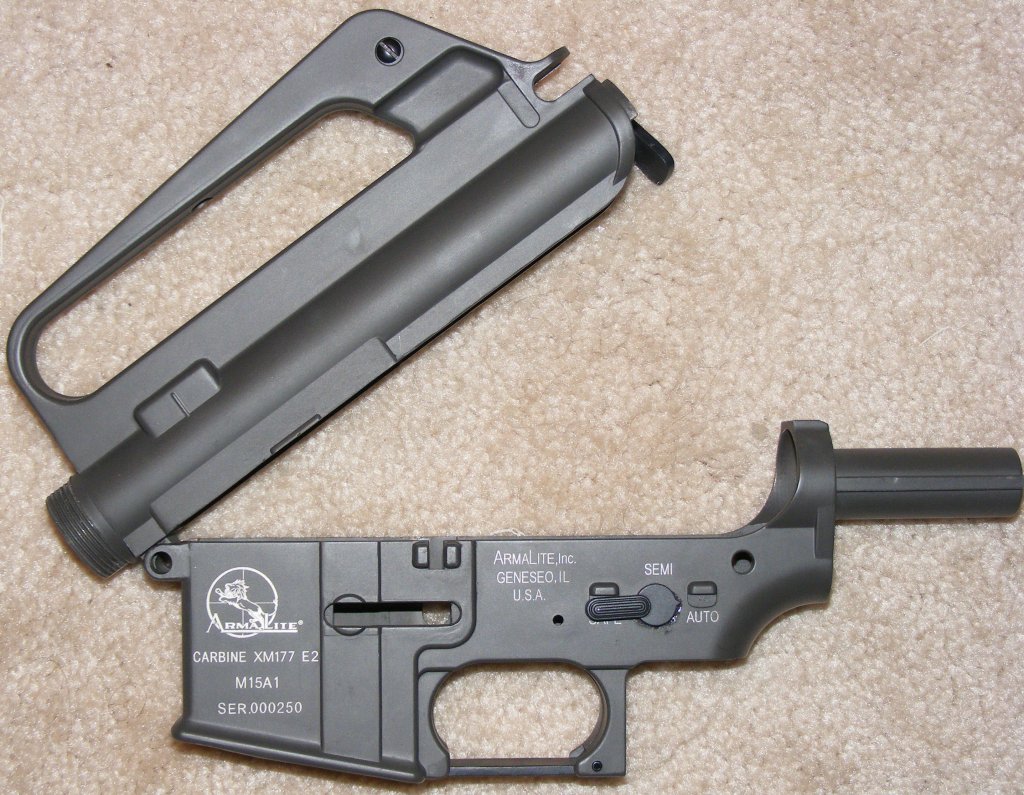
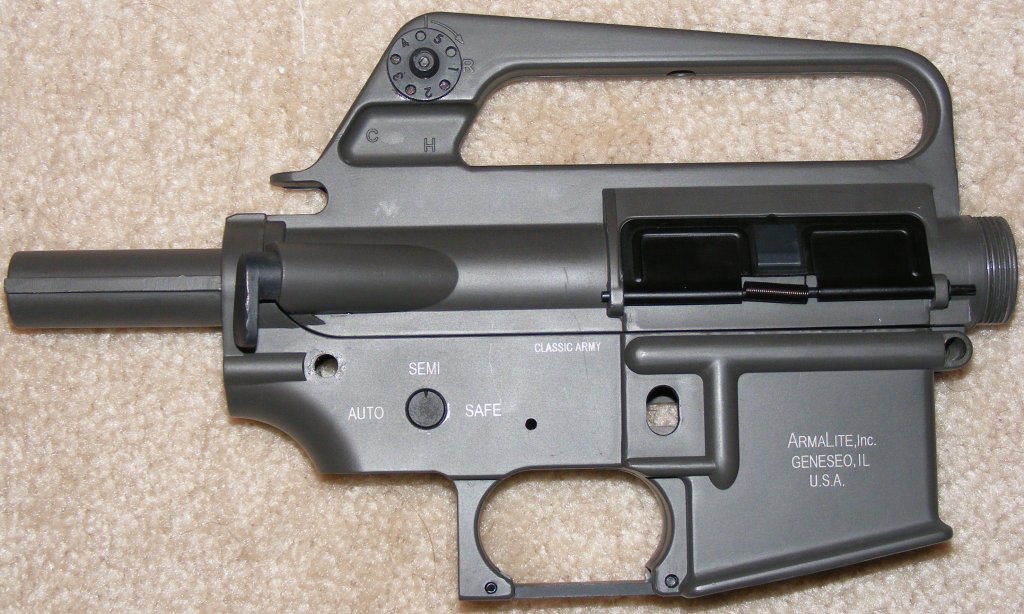
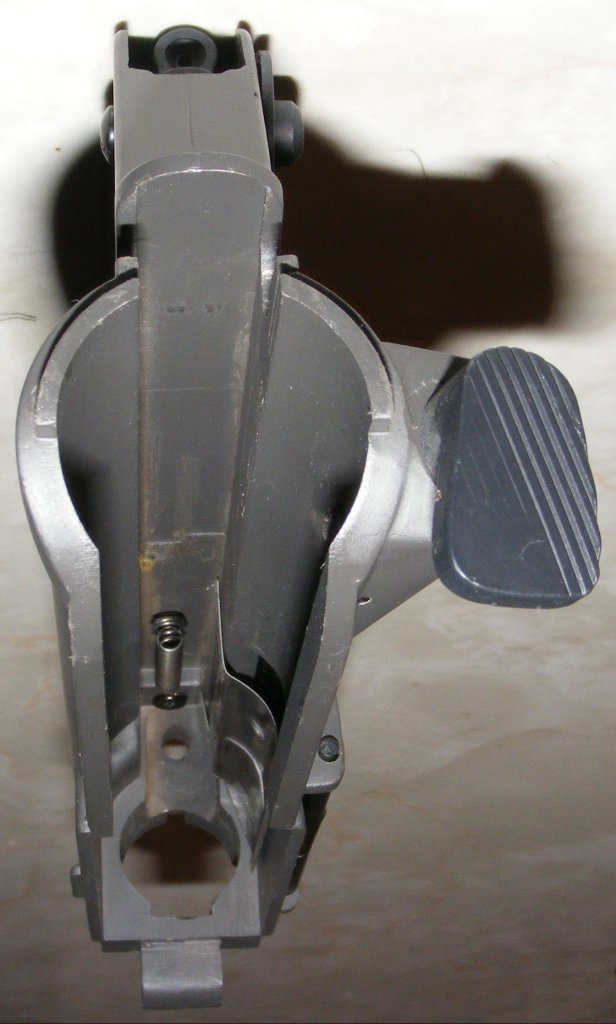
Looking into the upper receiver.
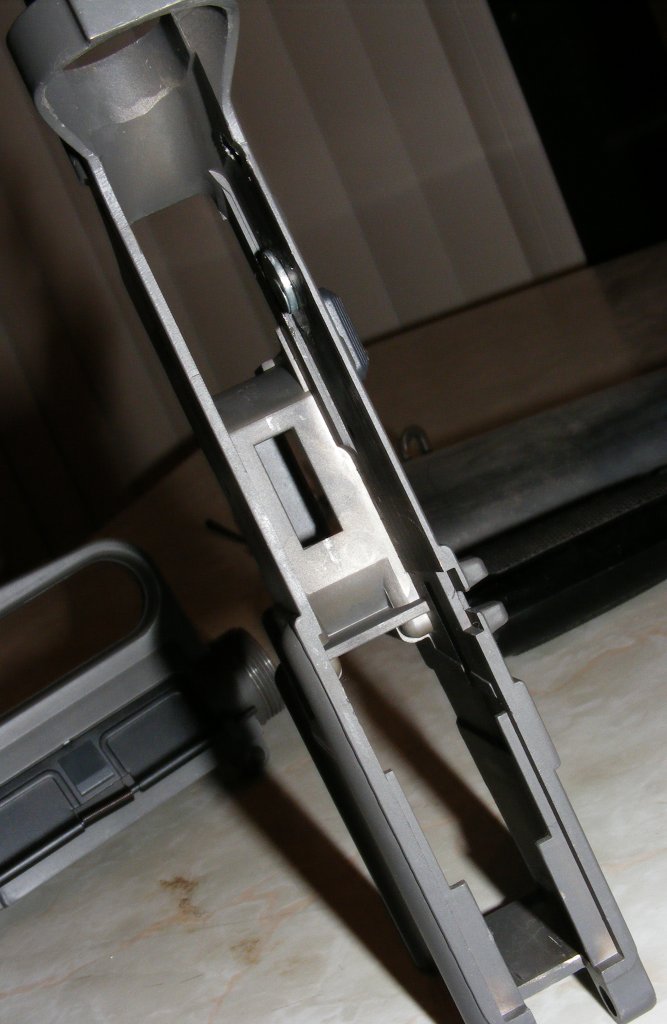
Looking into the lower receiver.
layout with front sight fitted. 1/26/08
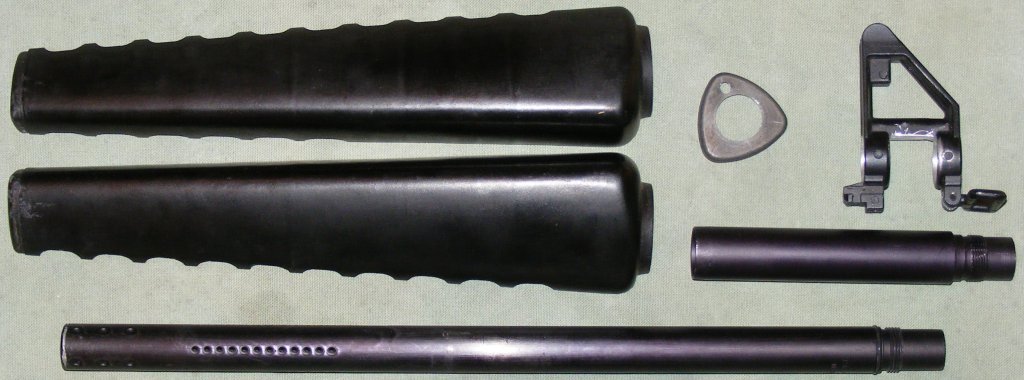
Two piece 21" barrel, RAP4 front sight, triangular end-cap, triangular handguards.
2/3/08
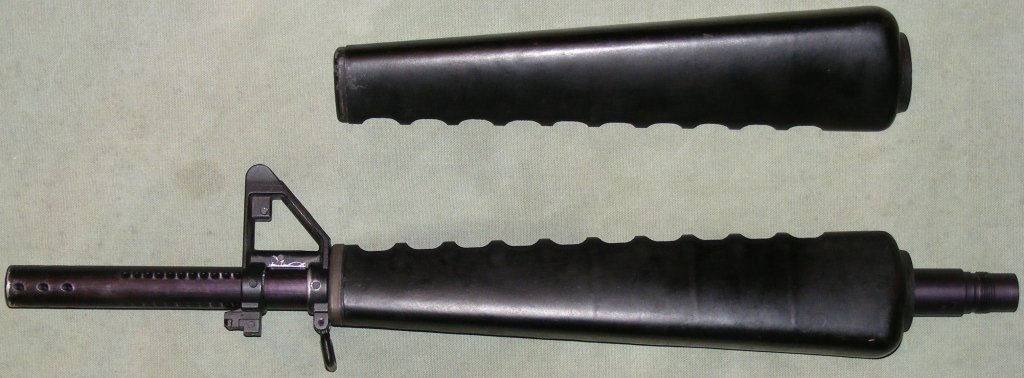
The sight and end cap had to be reamed somewhat to fit over the 7/8" barrel.
The barrel end will be tapped for a 3-prong flash-suppressor that will have to be manufactured.
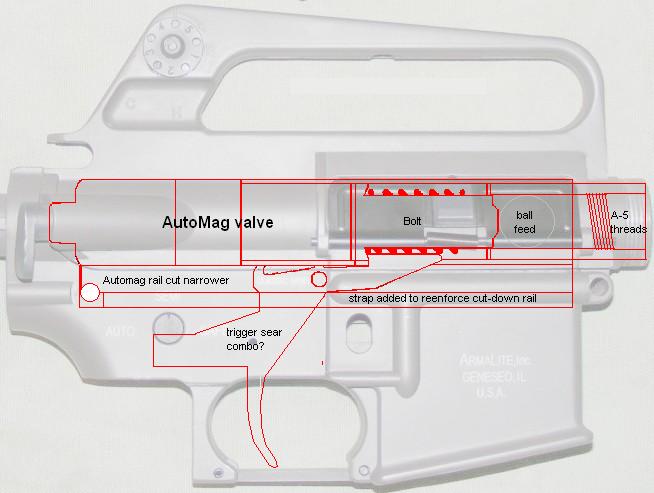
Concept Drawing
The Automag.
Images of the Mag with comparisons to the receiver.

Closing up openings to pour JB Weld.


J.B.Weld

J.B.Weld epoxy filler fills the rear of the lowers so they can be drilled and tapped to receive the buffer tube.

The Classic Army upper has tabs to lock the rear into the lower. These are trimmed off. The DBoys upper is the same way and get's the same treatment.

Opening the endcap hole to fit a paintball barrel.

Done!

The RAP4 front sight needs to be fitted to the CMI 21 inch barrel.

Done!

Straight A1 Delta ring(left)
Tapered A2 & later Delta Ring(right)

The A2 buttstock and it's buffer tube.

When the J.B.Weld is set the post is cut off. A hole is bored to 1-1/8" and tapped to 1-3/16"-16.

1-1/8 Step drill bit.

1-3/16" 18 tap for buffer tube hole

Tapping a buffer tube hole

Buffer hole drilled and tapped ~ 02/17/08

Trial fit of the car stock.

3 drilled lowers

The A1 stock mounted

3-axis adjustable drill press vice.

Parts for all three guns laid out ~ 2/21/08

The Apartment Shop ~ 2/24/08

Big hole covered up.

Filling the big holes.

One hole filled and set up.

M4 detachable carry handle.

M4 detachable carry handle.
good color match

13/16 bit and 7/8-20 tap from Victor Machinery for A-5 threaded barrel.
Note: Genius that I am, I didn't get a bit with a reduced shank to fit the 1/2" chuck of my drill press and had to get another bit - don't do that.

FINALLY got a 20rd magazine.
Here it's already cut to length

The Airsoft receiver is made small and won't fit a real mag, so it got some file work to make it fit.

1 A1 grip and 2 A2 grips

The M16A1 laid out
2/29/08

The 13/16 hole threaded to 7/8-20 for the Tippman A-5 barrel thread.

The barrel screwed in.

The barrel seen from inside.

The M4A1 laid out
3/1/08.

Sanding and grinding the upper to fit the AutMag body. Do a little, check, a little more, check, etc. There's not a lot of metal there, so care and patience are needed.

The plastic upper requires a different approach. High speed tools tend to make it melt, so sandpaper is wrapped around the Mag body and the upper is worked by hand.

Another 21" CMI barrel had this tip which will be reworked to better resemble the actual 3-prong suppressor shown on the right.

Should have left it alone, oh well it'll do till I get a better idea.

Making molds for the grip billets from card stock - 3/14/08.

placing the molds with white glue.

molds in place.

filled with J.B.Weld.

Next day, set-up and stripped of the mold - 3/15/08.

Drilling the hole.
(hard to drill and photo at the same time)

Tapping the hole to 1/4"-28 NC with Craftsman #52486 tap & drill set.

tapped and ready.

Grip screwed on.

M16A1.

M16A2.

M4A1.

All 3 laid out
3/18/08.

Mag body cut to length and ball feed removed
3/23/08.

.

Uppers fitted for the Mag body.

M4 upper with Mag inside.

.

New shop taking shape.
October 14, 2008
