|
Previous Page | Next Page | Table of Contents May 2016
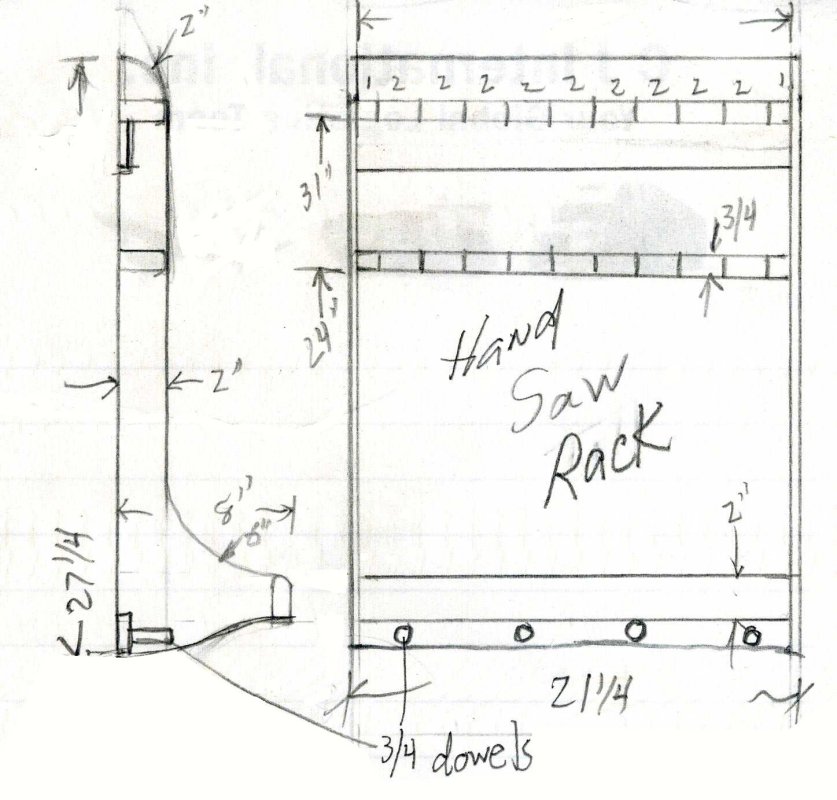
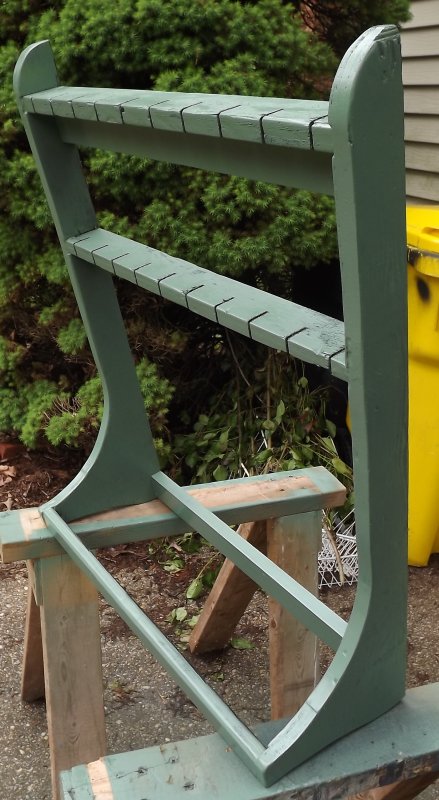
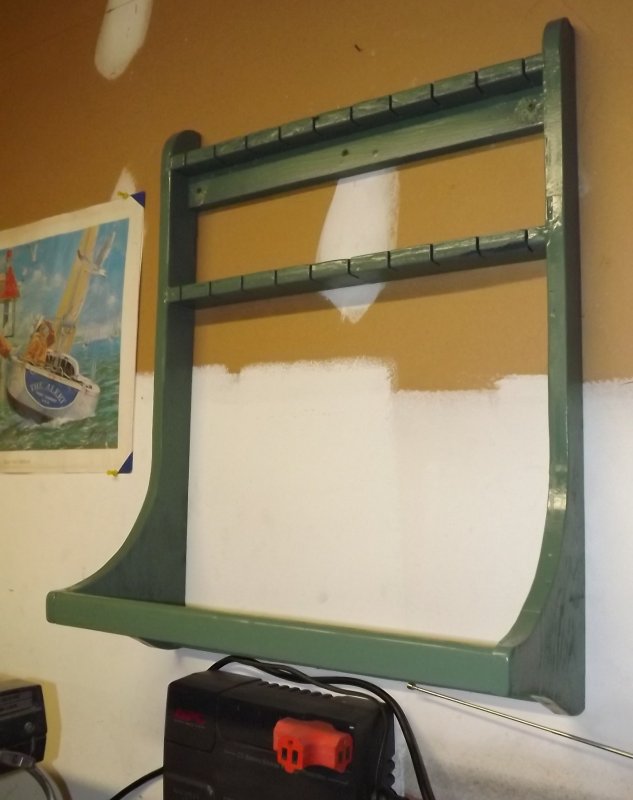
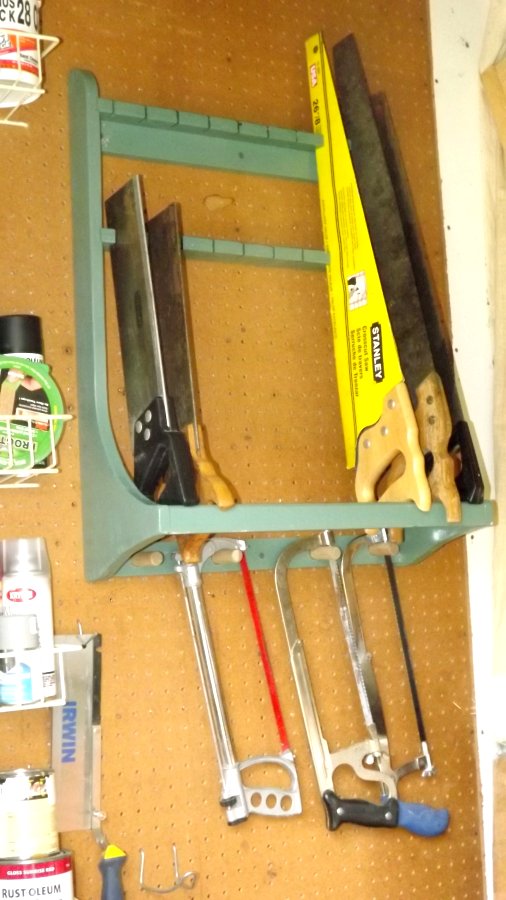
Saw Rack I was looking at dust-collection stuff on YouTube and happened on several videos for racks to hold hand-saws. Talk about a simple thing completely over-thought! One guy spent 12 videos showing you how to build one - 2 hours total of how to build something resembling a paper towel rack. Everywhere I look this thing is called a "Saw Till" and if you google "saw till" you'll get an even bigger pile of over-though projects, with dove-tails, exotic woods, laminates, carvings, yawn. I don't know where this name comes from, there's nothing in any dictionary or even Wikipedia, but the definition of "rack" is: "A framework or stand in or on which to hold, hang, or display various articles" This thing is very similar to a "gun-rack" which isn't called a "gun-till," anyway... I liked the idea of the thing because at the moment all my saws are stacked up on a couple of peg-hooks. This would make it so I could get at a saw without having to pull serveral others off the stack and the point of things built for the shop is to facilitae making things in the shop. So here's my quick and nasty saw RACK. I laid out my saws on the worktable and figured out where the two slotted strips needed to be for the saws I had, or might have.
Using some of the scrap 3/4" ply from the bench I recently pulled down, I cut two 2" strips and made 1" deep saw kerfs 1" from either end and 2" apart. This left 1" between the bottom of the kerf and the wall, so the blades won't touch the wall. To get 10 slots made the piece 20" long. The sides were also 3/4" ply and I dadoed them slightly to hold the three strips. They were cut to hold the third strip, the saw rest, 8" from the wall. I made this from some pine 1x which I shaved half-round on top. I figured solid wood would be better here than ply. This was all glued up and air-nailed with the 1" brads. I added two more ply strips top and bottom to rigidify the rack somewhat and for attaching it to the wall. After it was puttied and sanded a bit, I attempted to spray-paint it yellow, but the yellow wouldn't hide very well, so I used the left-over moss green from the Pride of Baltimore
model's bottom. I hung the rack on the wall near the door into the house, but something was missing. It dawned on me to install some dowels so I could hang my hack-saws on the bottom stretcher.
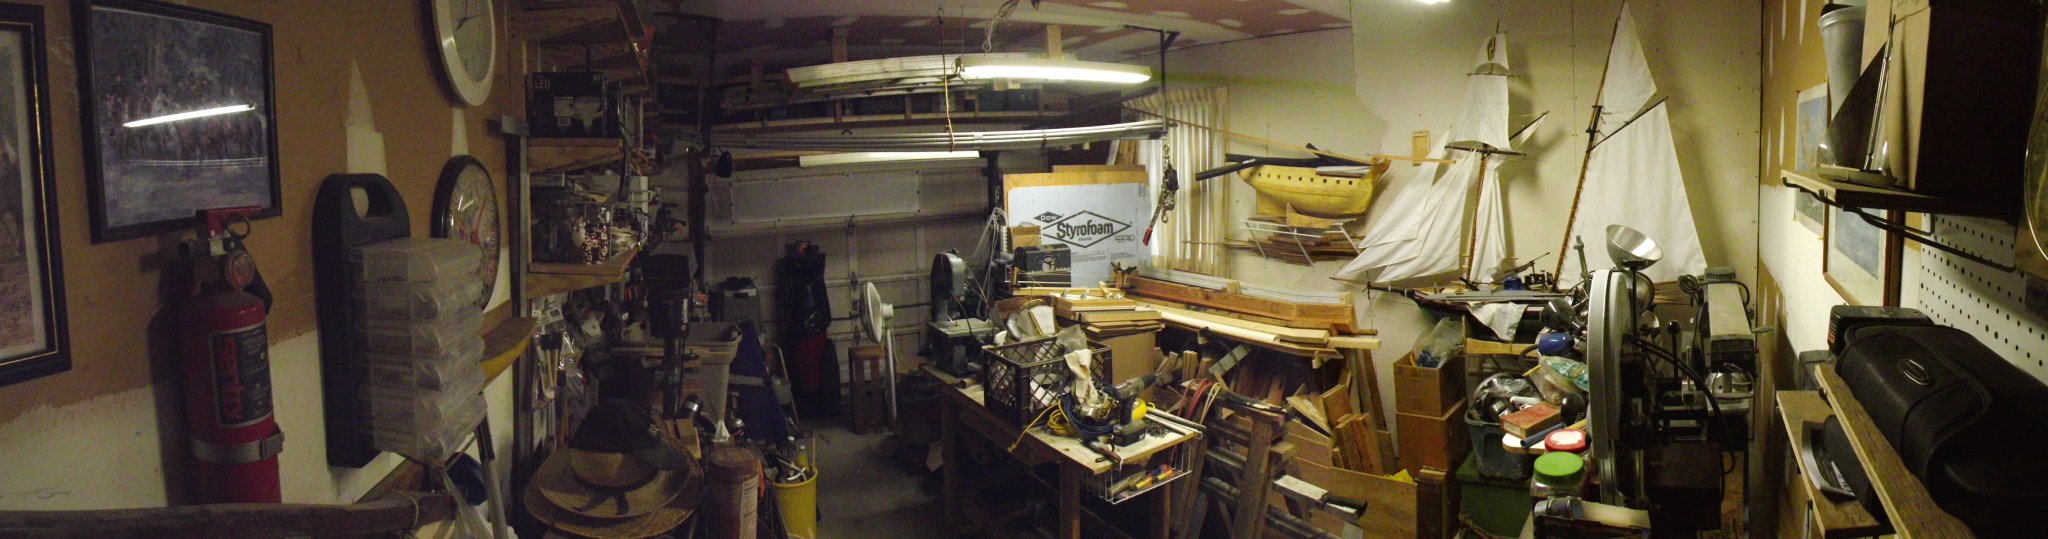
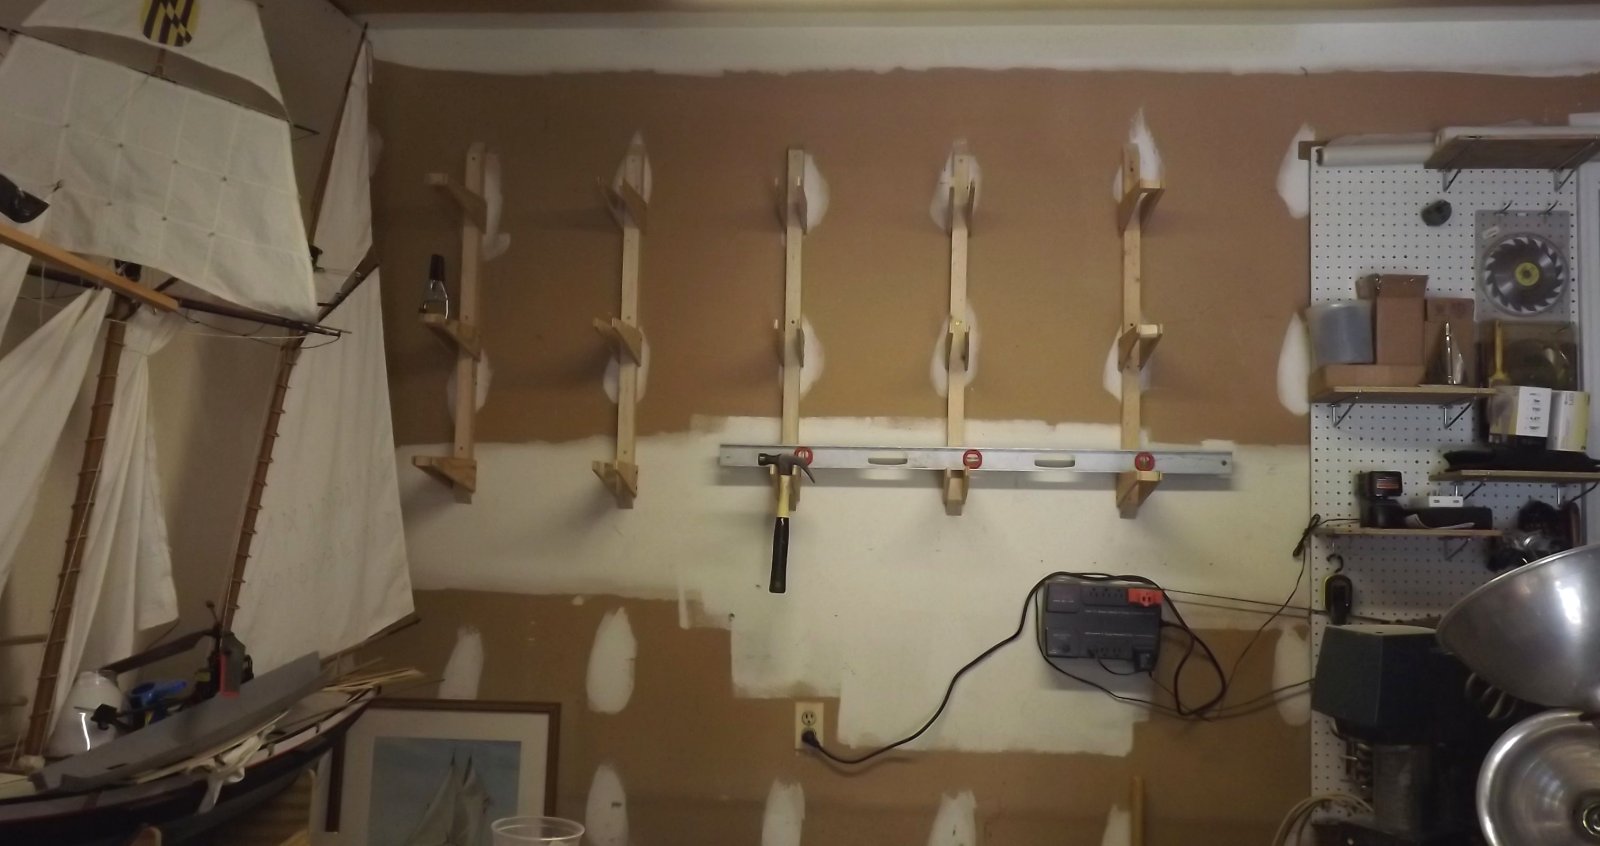
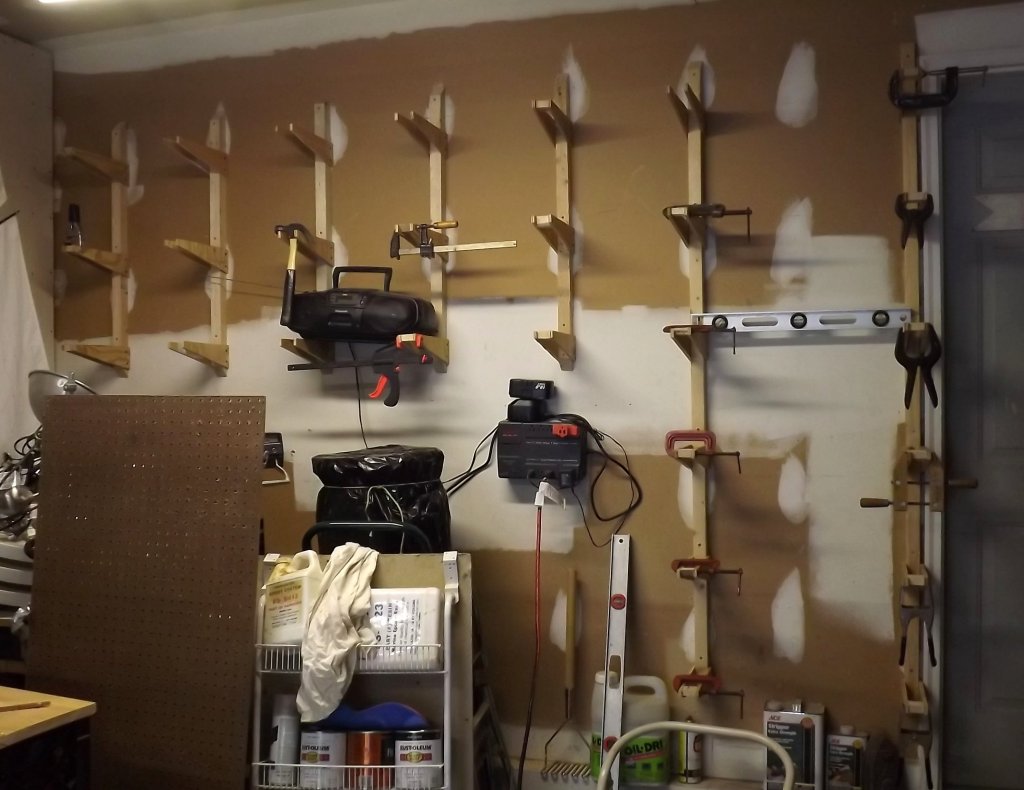
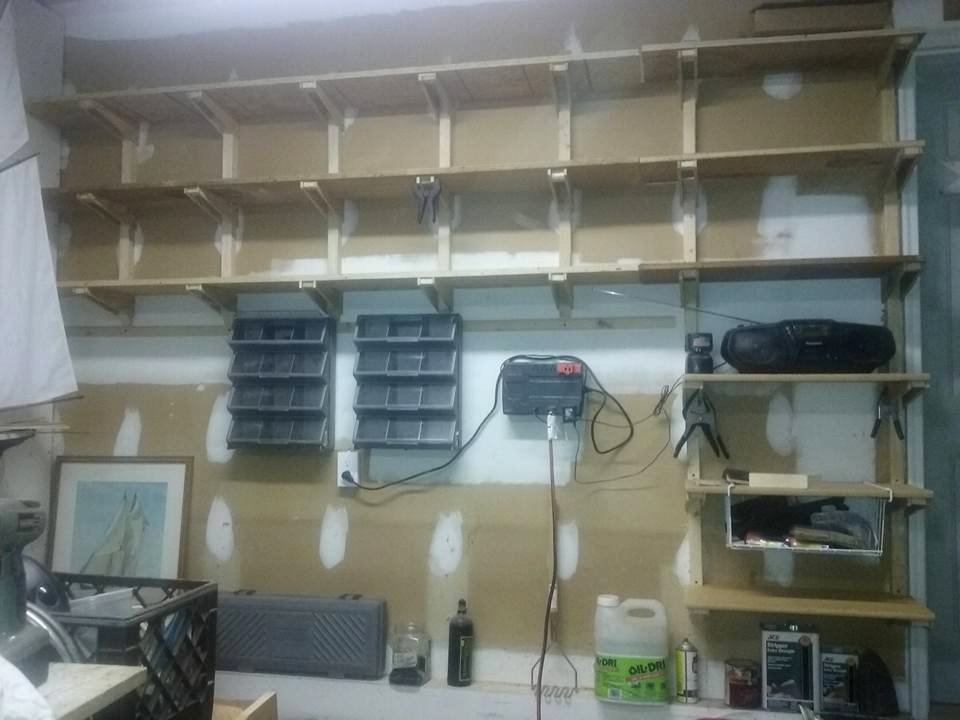
I need more shelves, so I built more shelves; these on the NW wall at the head of the garage where the built in bench used to be. The shelves themselves are mostly from the plywood from that bench.
They were built exactly like those on the NE wall with about the same amount of shelf space.
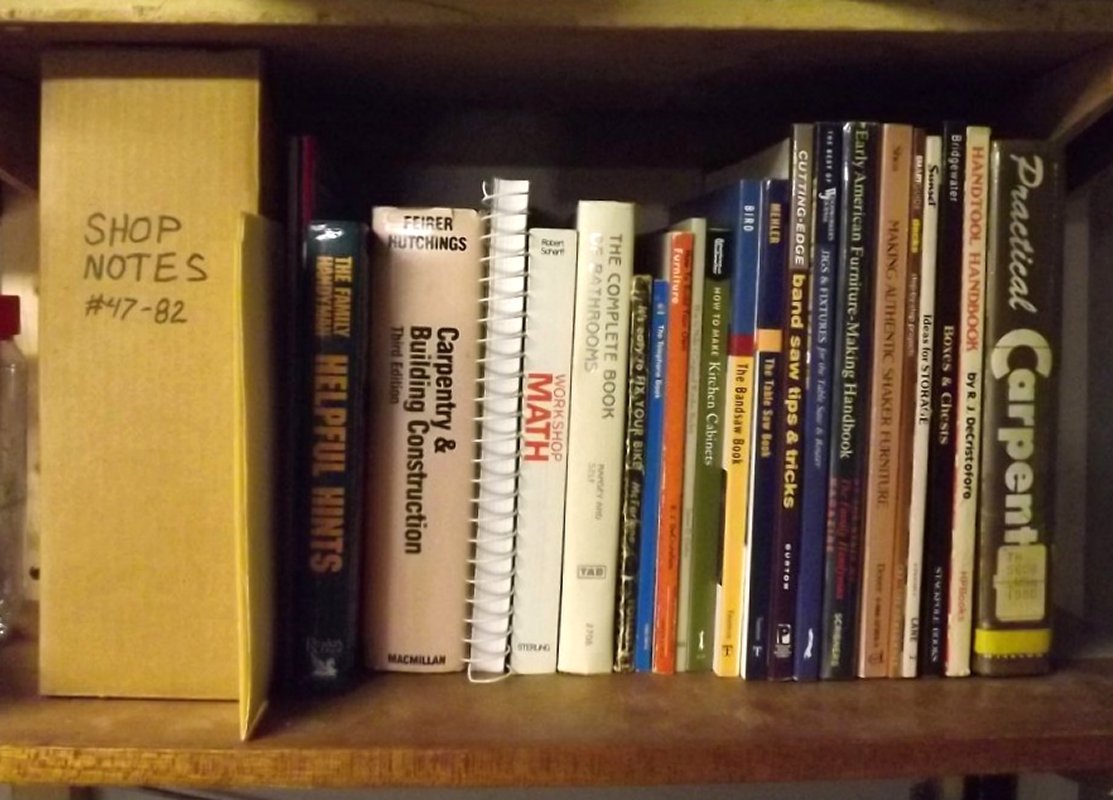
Getting things up on the new shelves includes my workshop books.
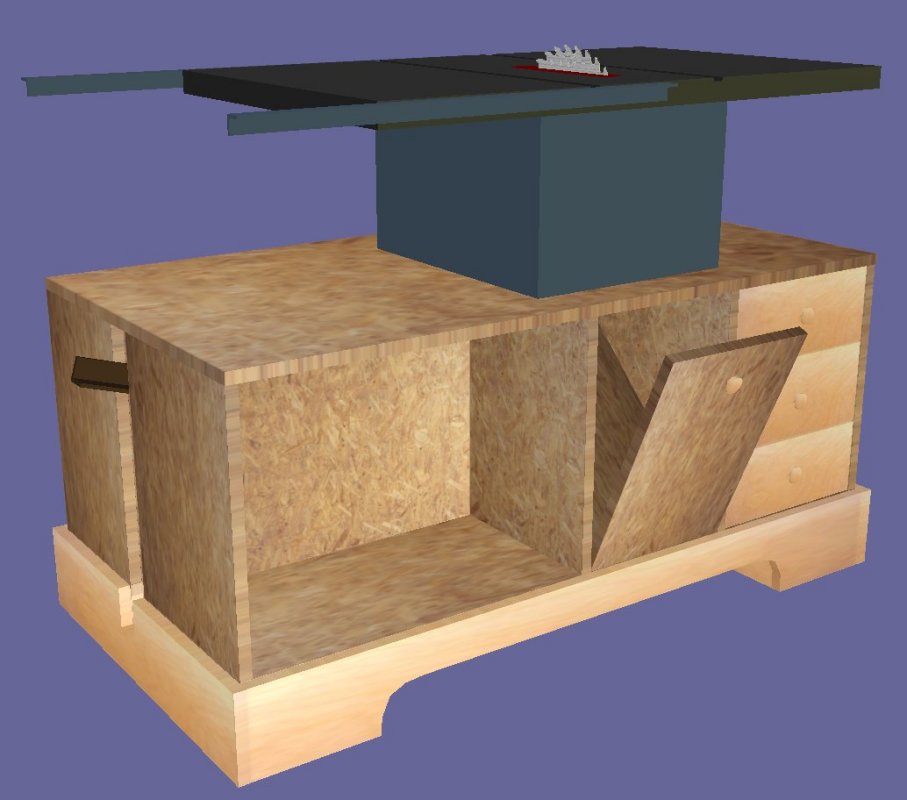
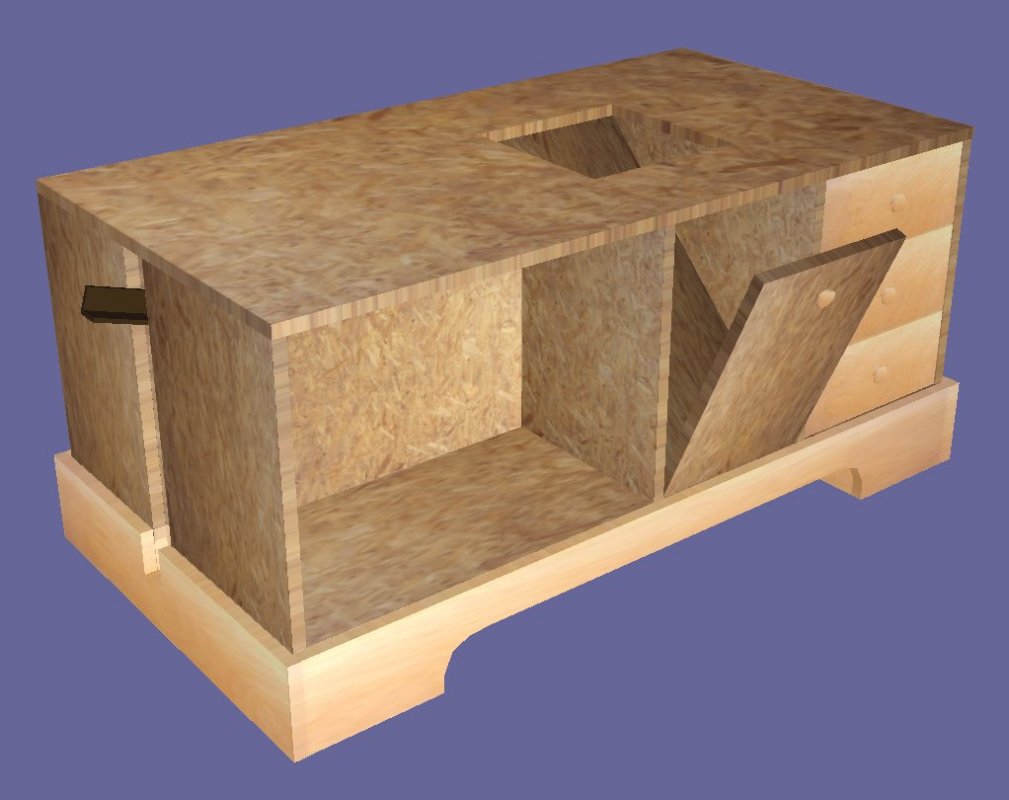
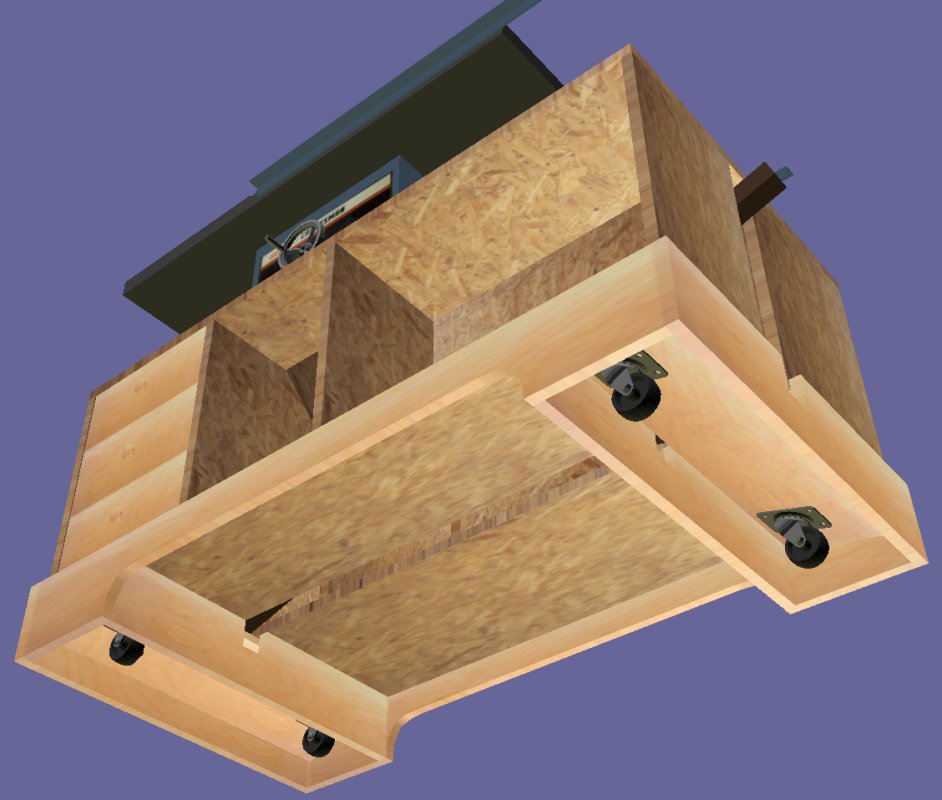
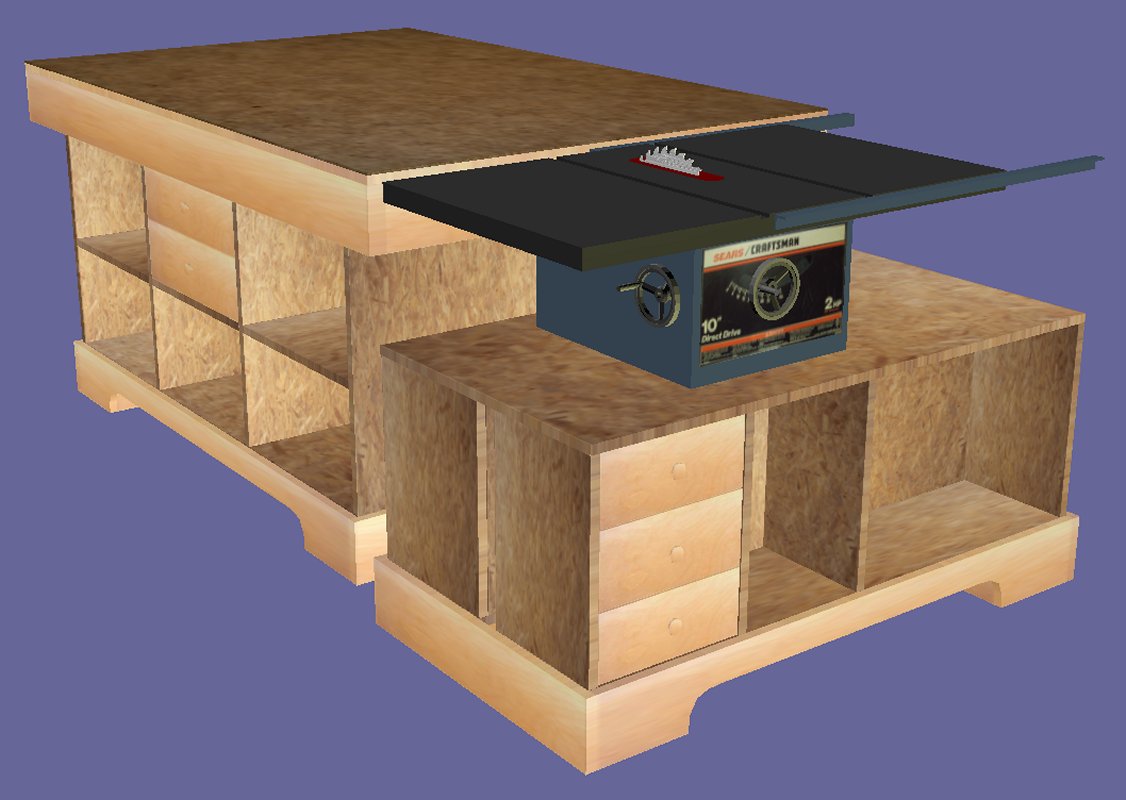
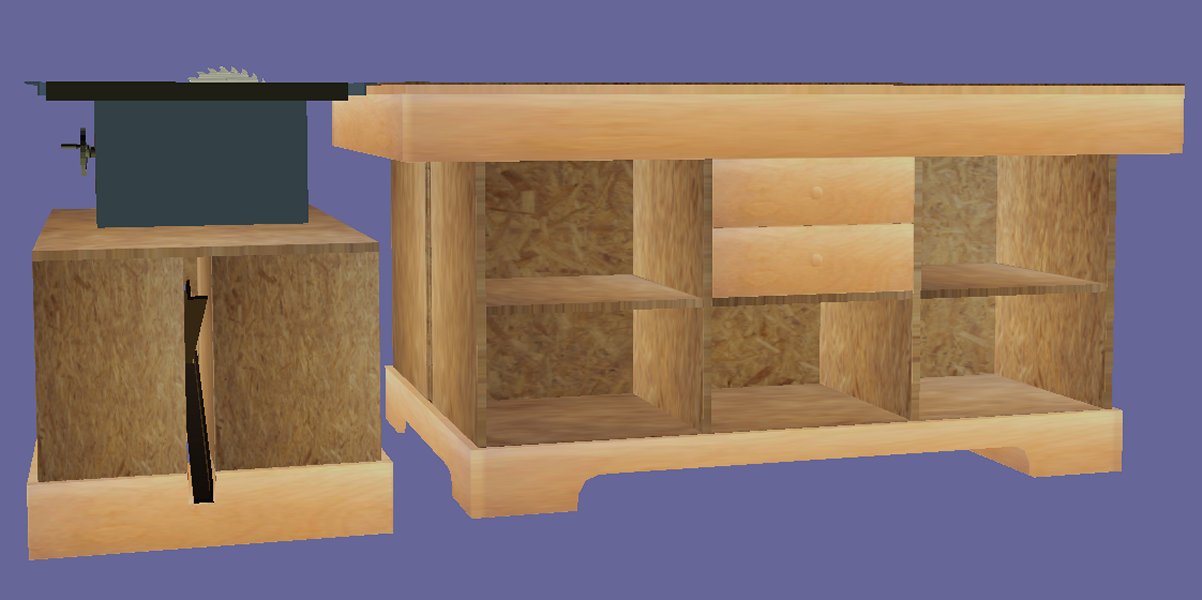
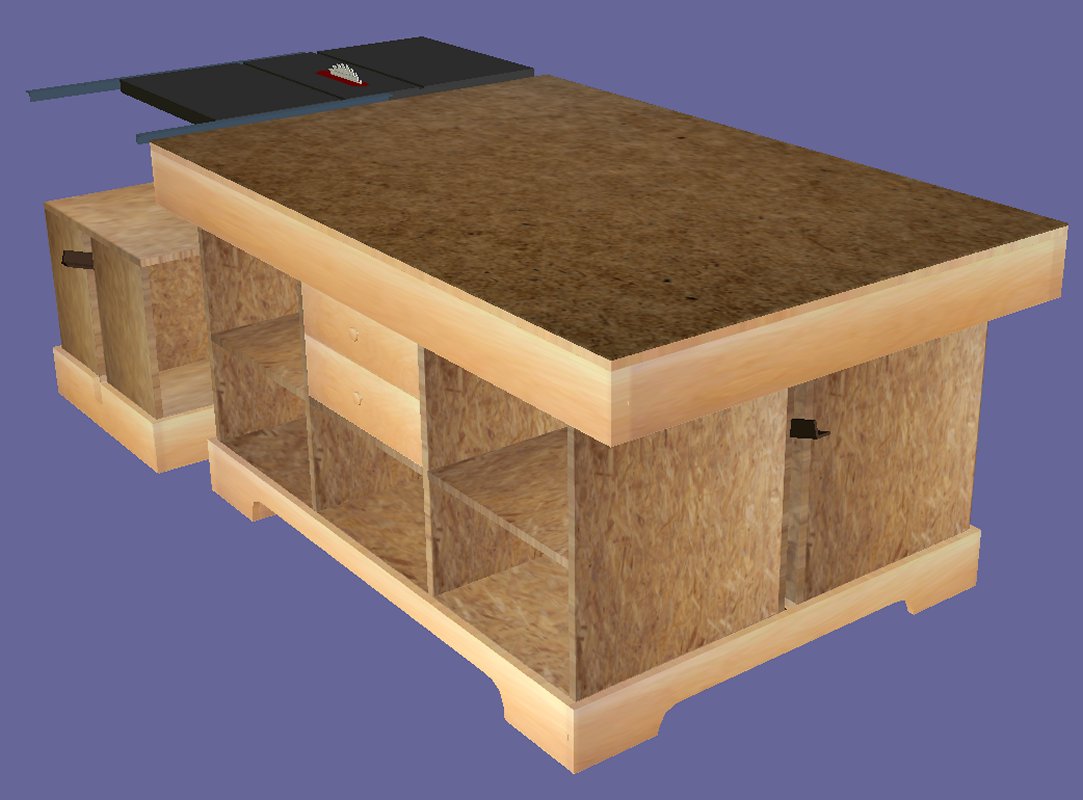
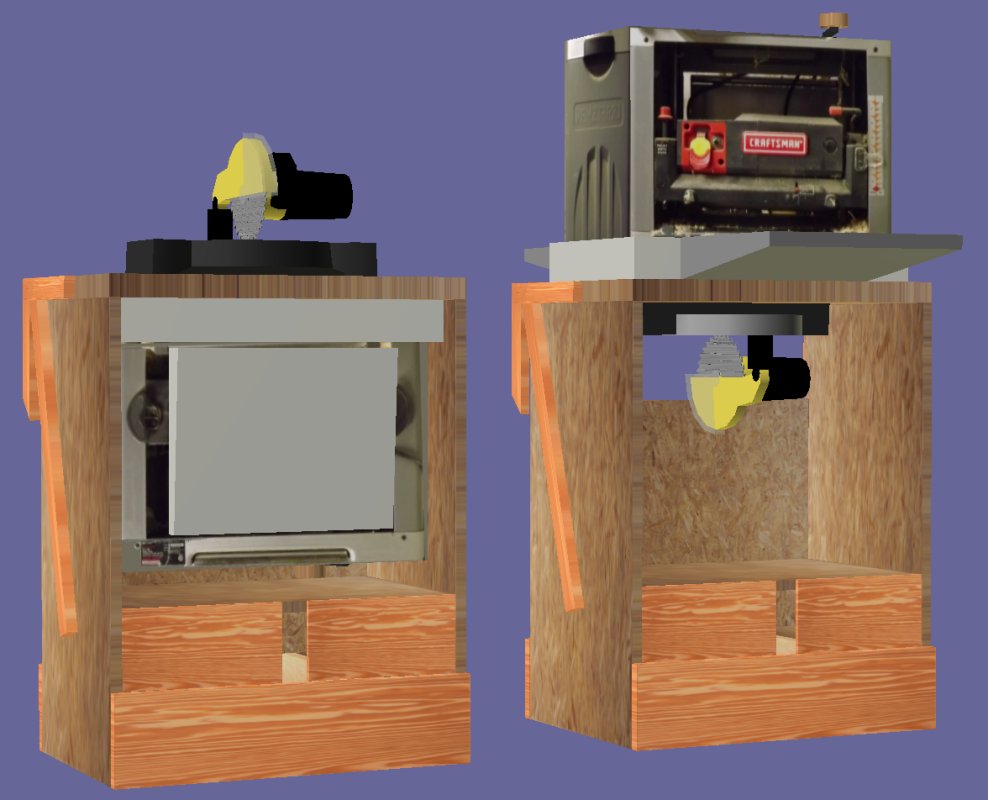
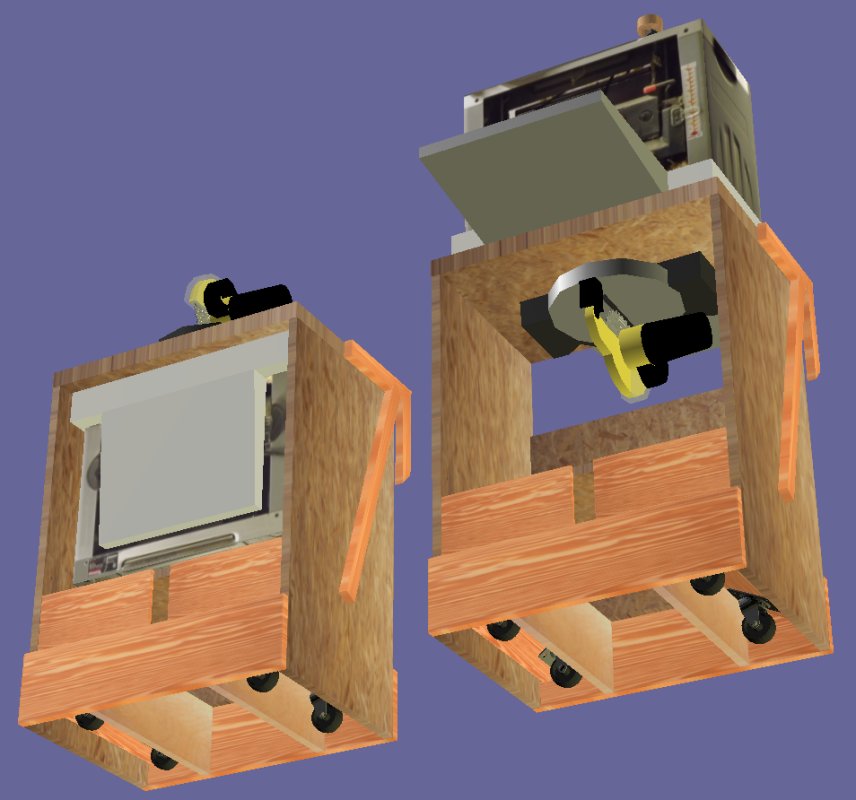
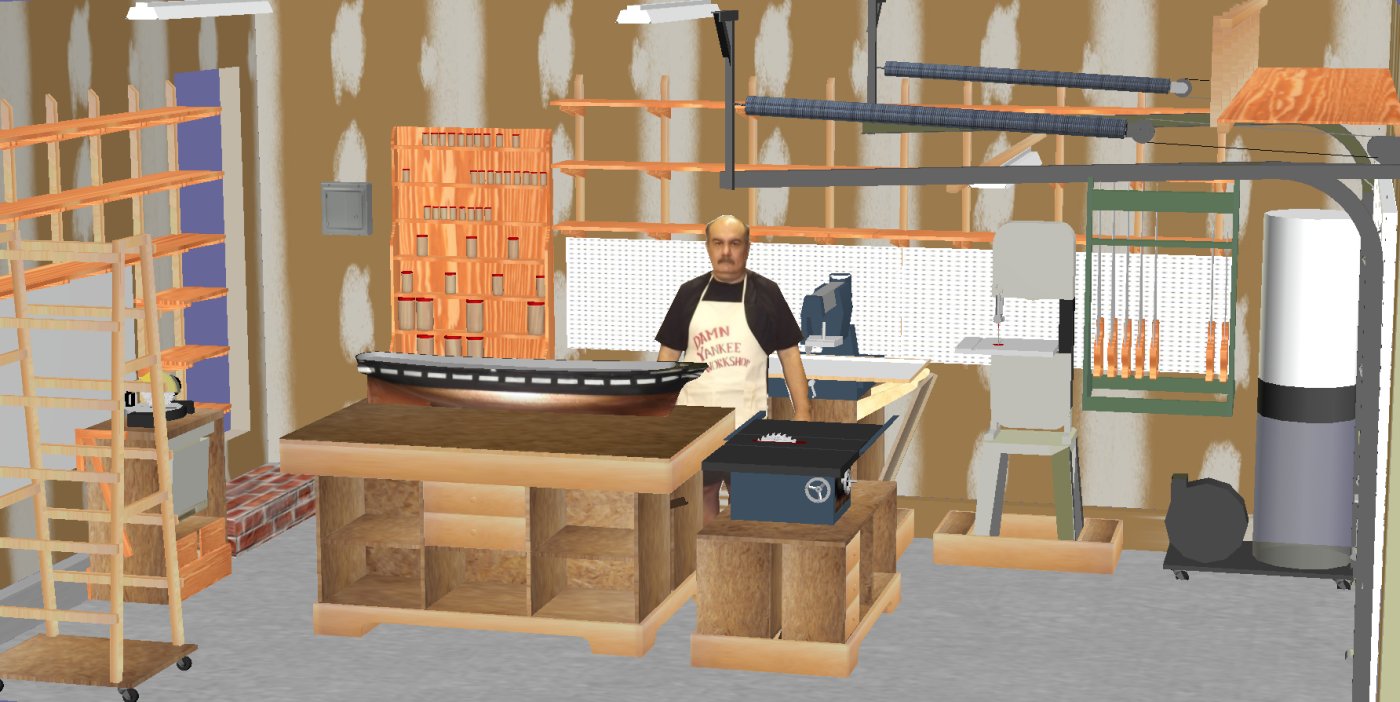
I want the new work-table to be the same height as the table saw so it can serve as an "out-feed" table for long stuff coming off the saw. That means determining the height of the table saw and that got me thinking of putting it on a cabinet. The idea here is that it takes up no more floor space than it currently does, but the cabinet provides storage and better dust collection.
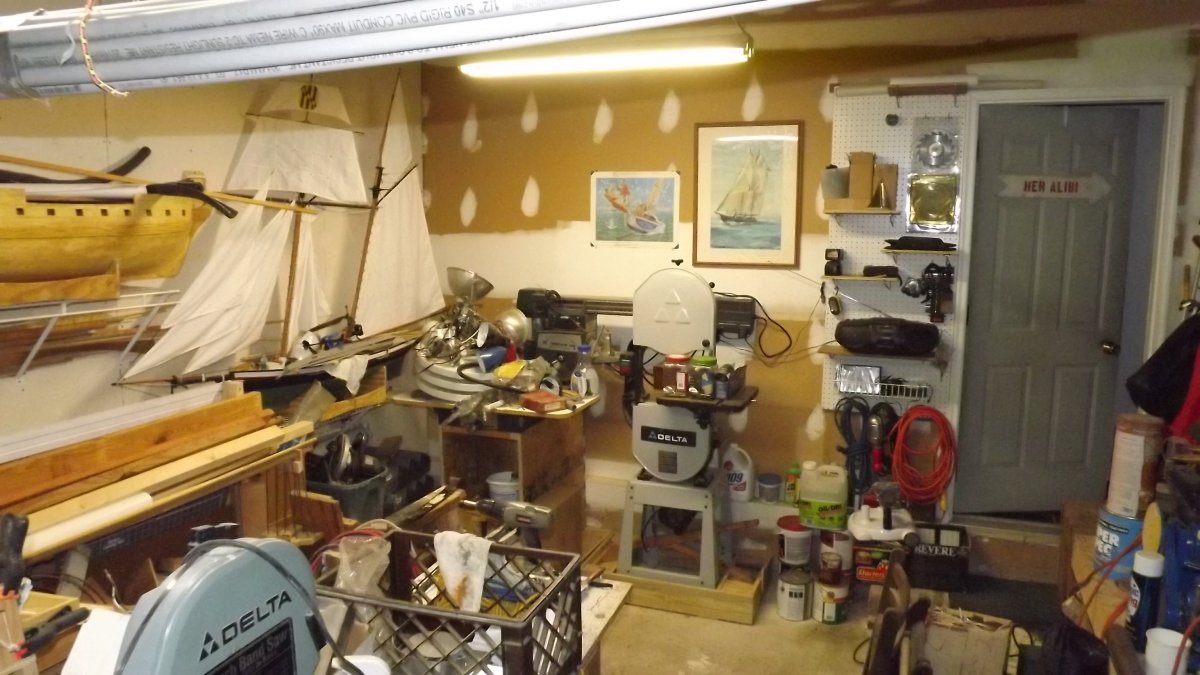
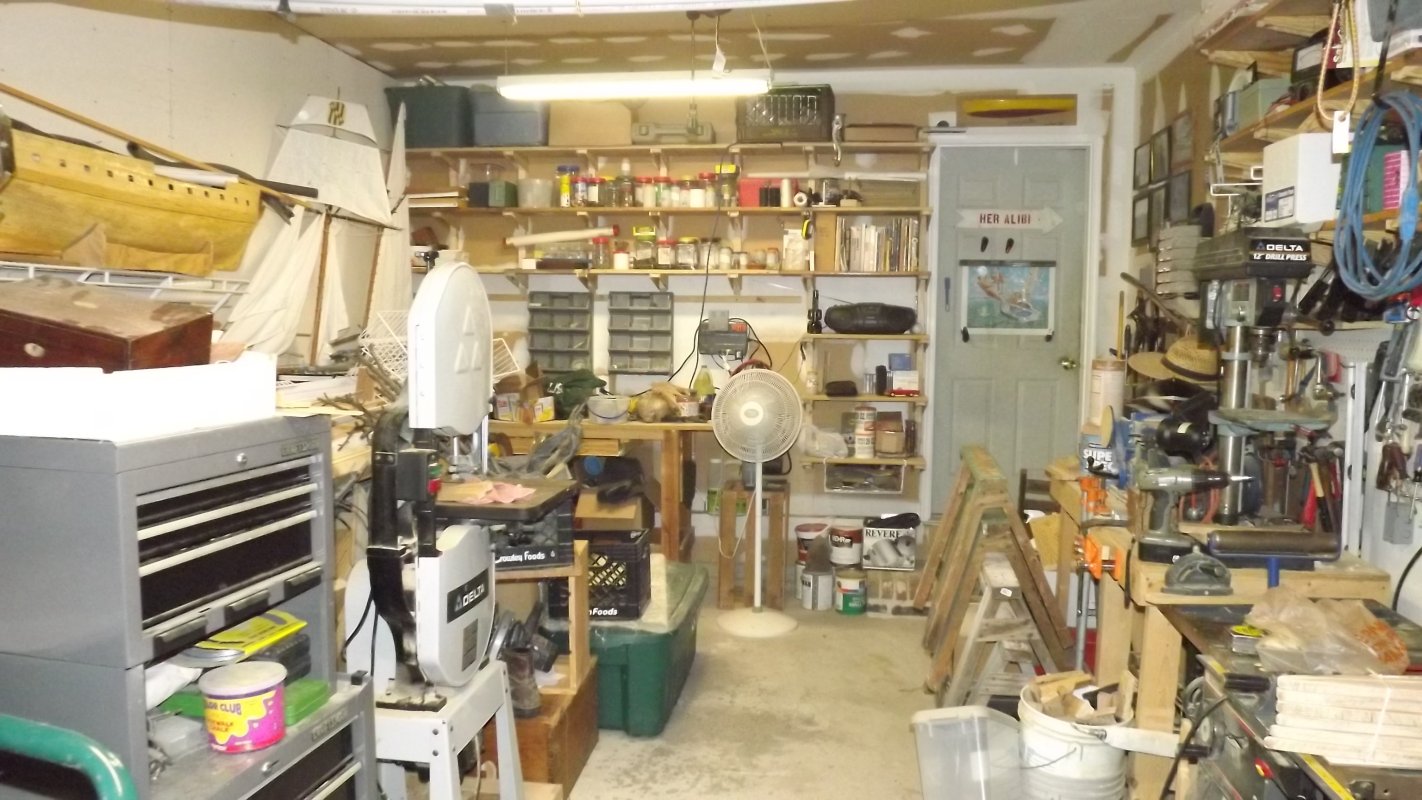
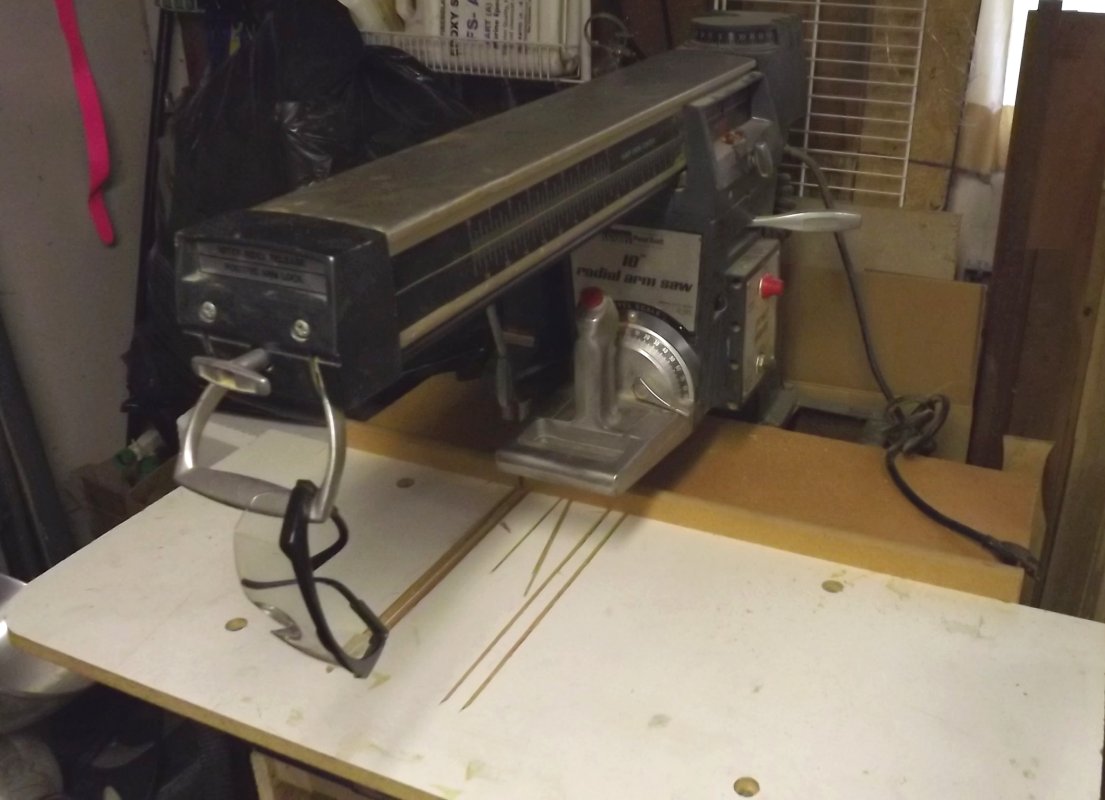
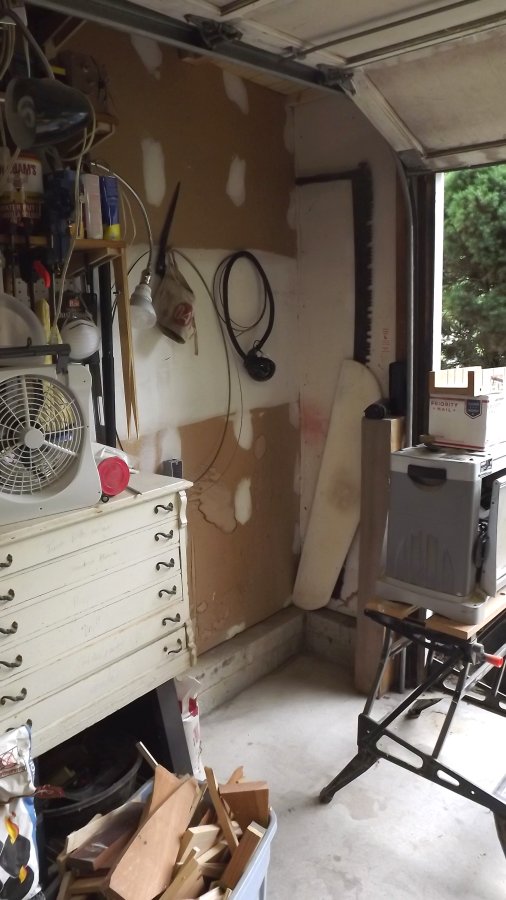
Besides cutting some tent stakes for the 1st Minnesota living history group, and getting the arm-saw's table and fence set-up and aligned; mostly I've been going through boxes and bins, putting things on the shelves, the basement, or in the yard shed; and still I seem to have more to do. The lumber cart is fairly full, yet I still have wood leaning against walls and in the way. I moved the bulk of that between the cart and the wall which got the wood out of the way while is pushed the cart out into the floor about two feet. Still, I've gained a lot of floor space, it just doesn't feel like I have. With it raining literally for the past month, I was able to work without the need to shove half the shop's contents onto the driveway, so there has been progress. The bottom line when it comes to shoving 10 pounds into a 5 pound bag is; get rid of 5 pounds.
A lot of the wood mentioned above will get used in making the new work table and table-saw base, and another tool base I've been studying based on this little gem...
I intend to put the planer and small band-saw on this cabinet, and I also want the planer's shelf surfaces at 36" so it'll also work with the work table as an out-feed. I intended to mount the planer on one side of the flip-top, and the small band-saw on the other, but there's no way put the planer input at 36" and have room for the band-saw stowed inside the cabinet. So I'll have to figure a different tool to share this cabinet, like the small chop-saw or my router table? The 3D drawings below show the planer and chop-saw in alternate positions.
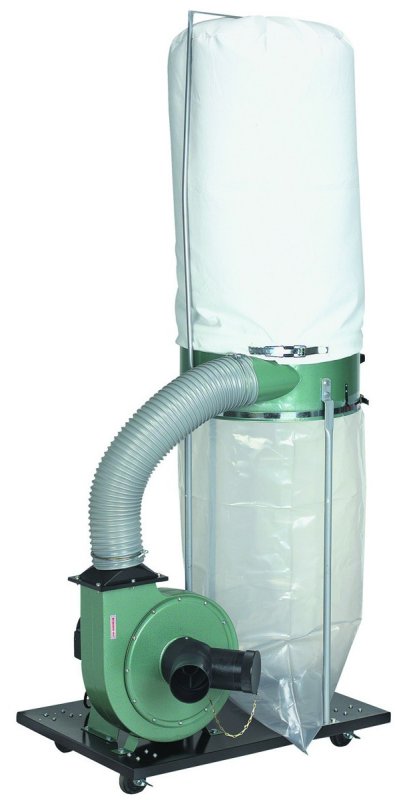
Spent a very hot and humid few hours this Memorial Day going through more boxes and bins; sent more items to the basement and shed, and cleared the space where the duct collector will live. Though working in there, and just looking at it it's obviously a great deal better than it was, there's still more to do and it's still looks cluttered as hell in photos.
|
||||
June 3 2016 | ||||