BOTTOM

11/13/10
Plans by Tom Gilmer. |

Printing the plan on the 3 foot plotter. |

1:20th scale plan. |

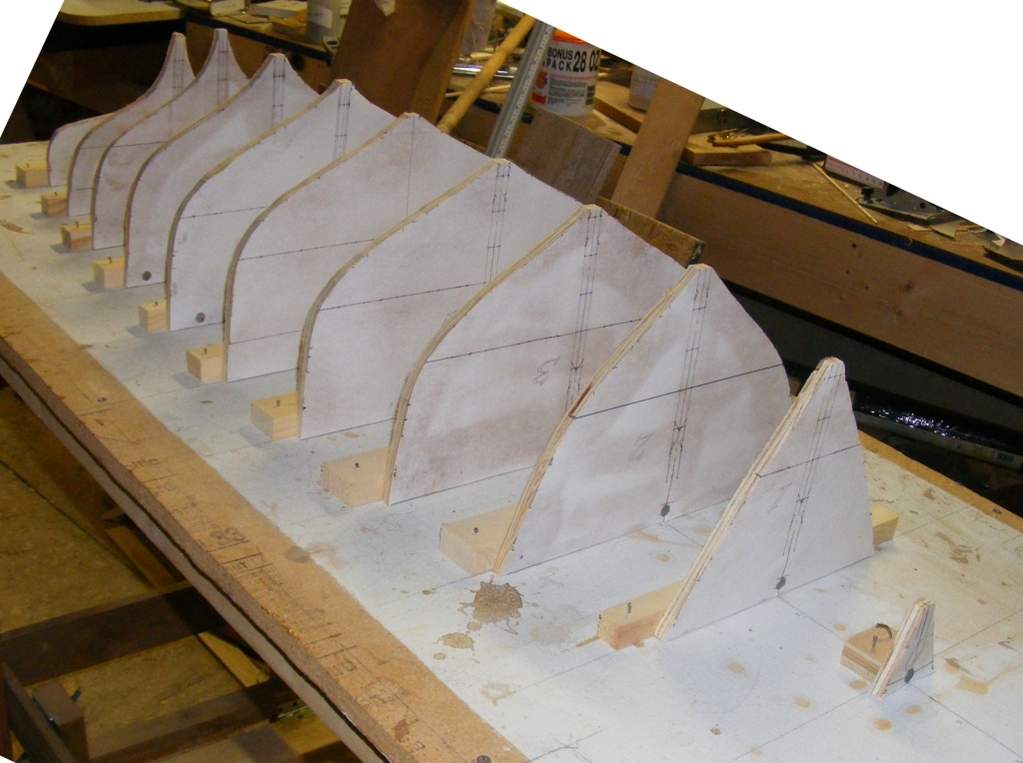
Station patterns in 1:20 scale. |

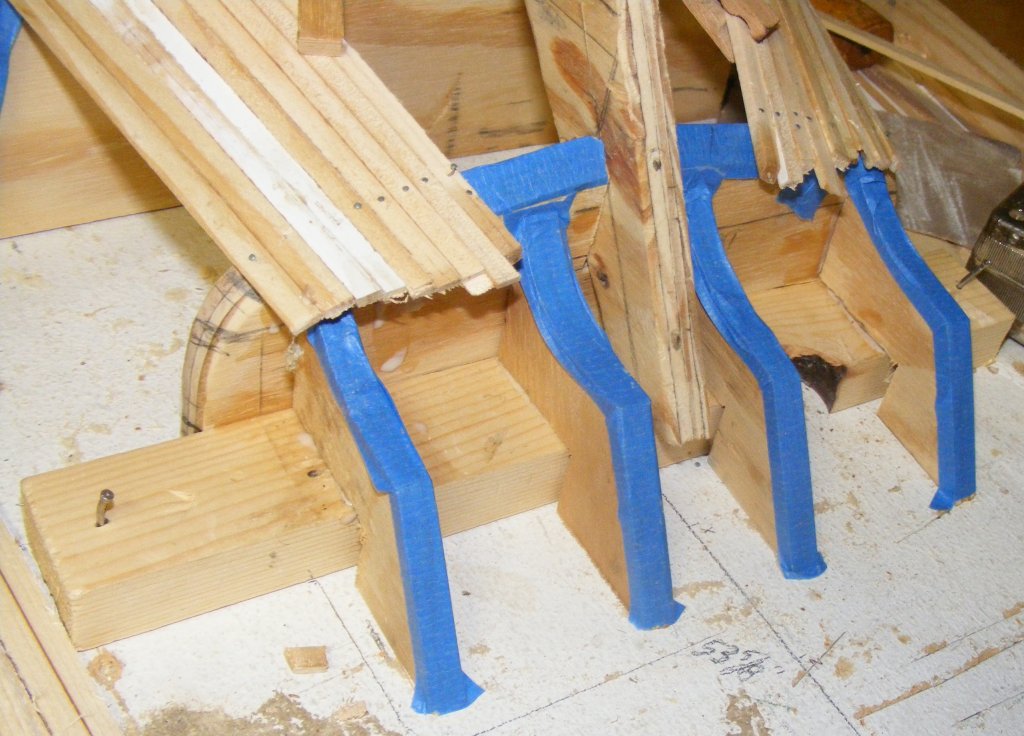
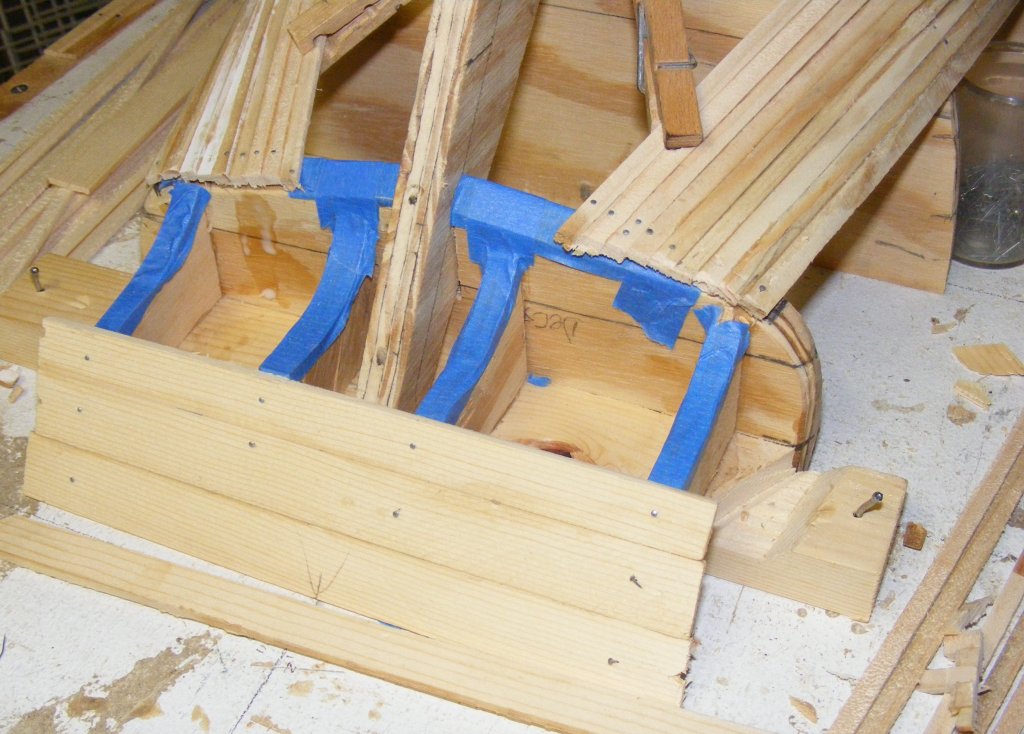
11/19
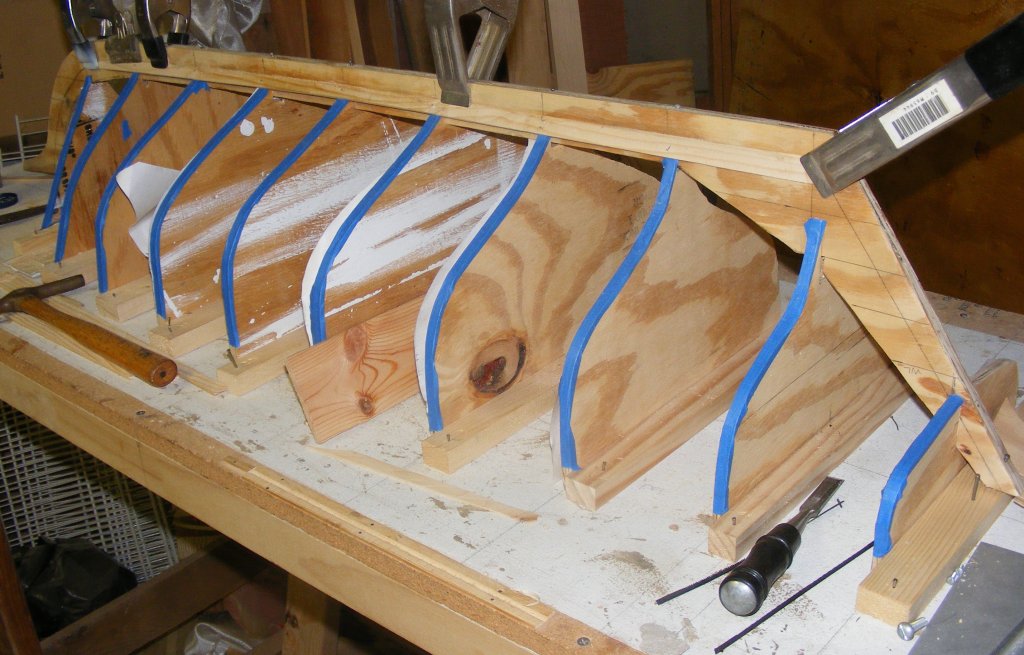
Forms on building board. |

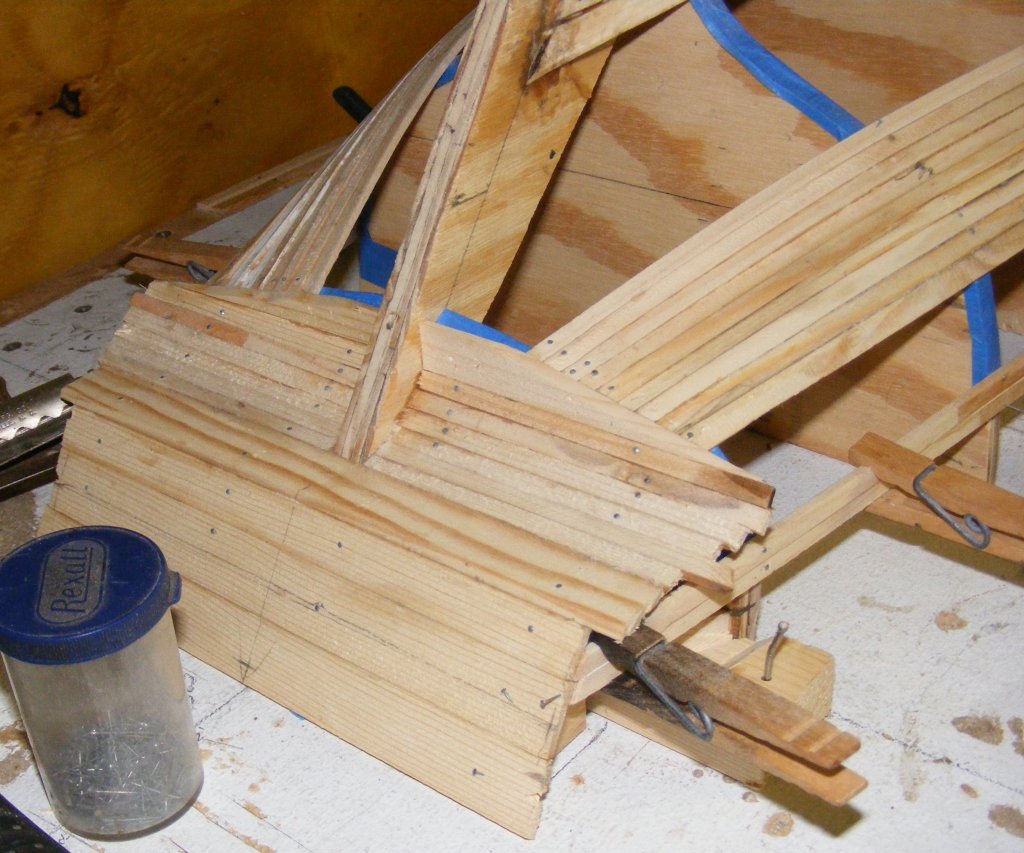
9/17/11
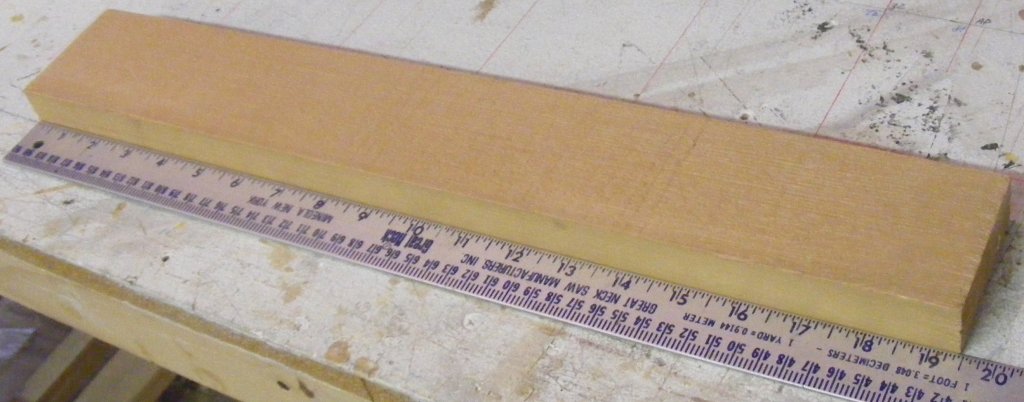
Keel cut and fitted. |

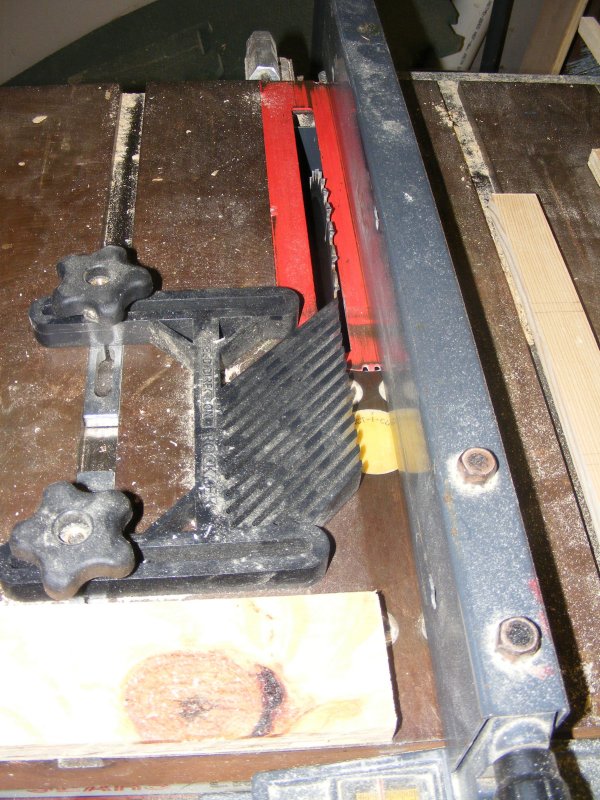
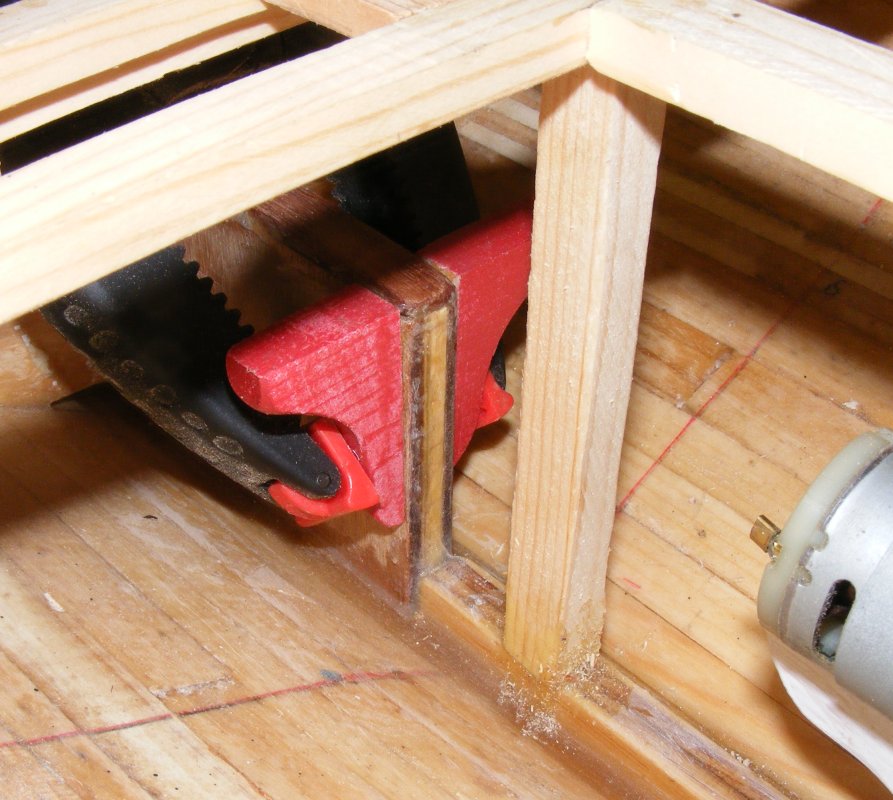
10/8
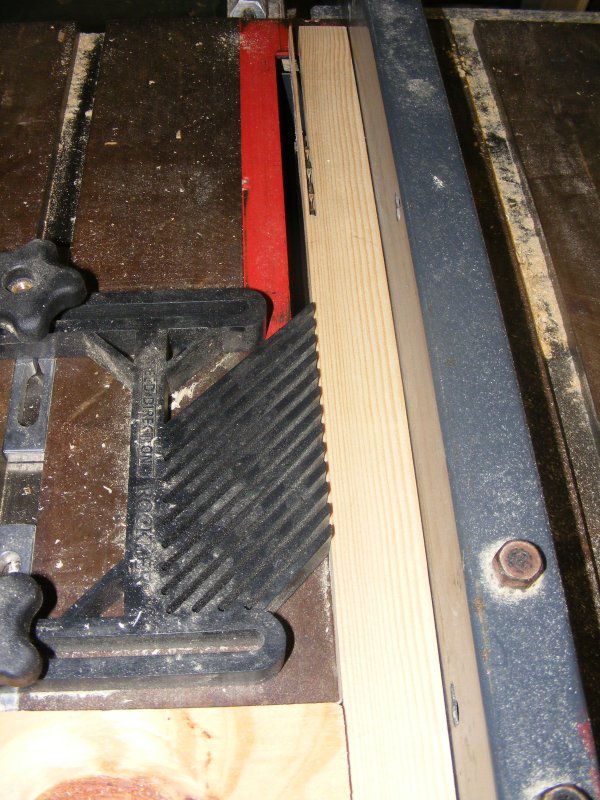
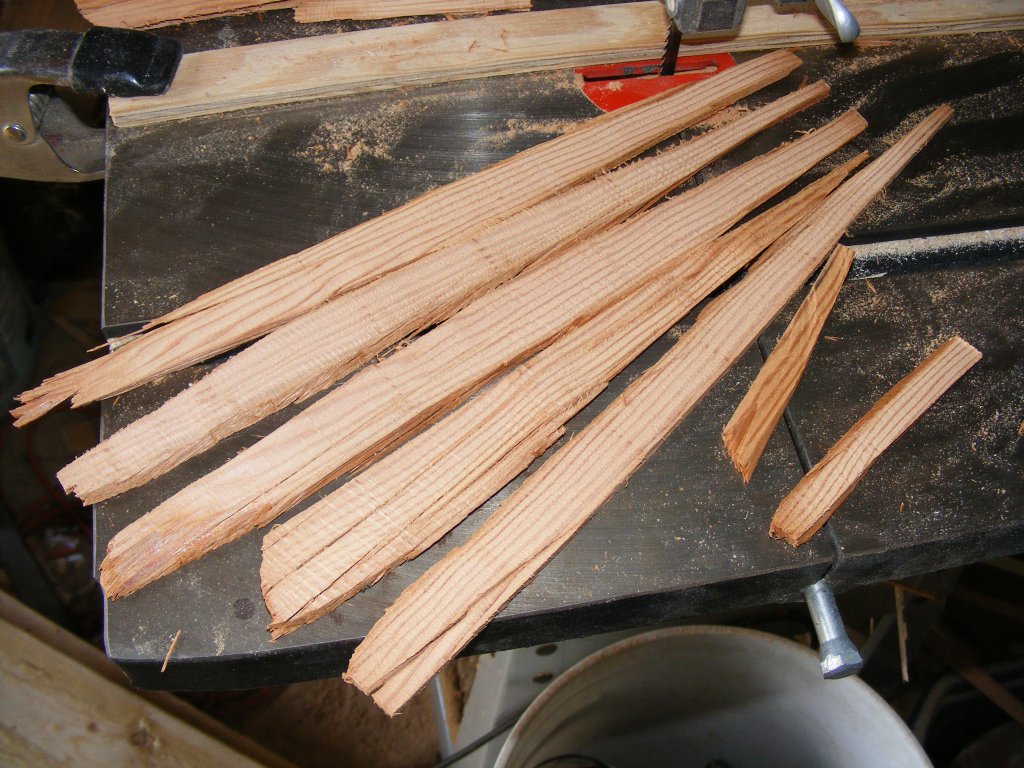
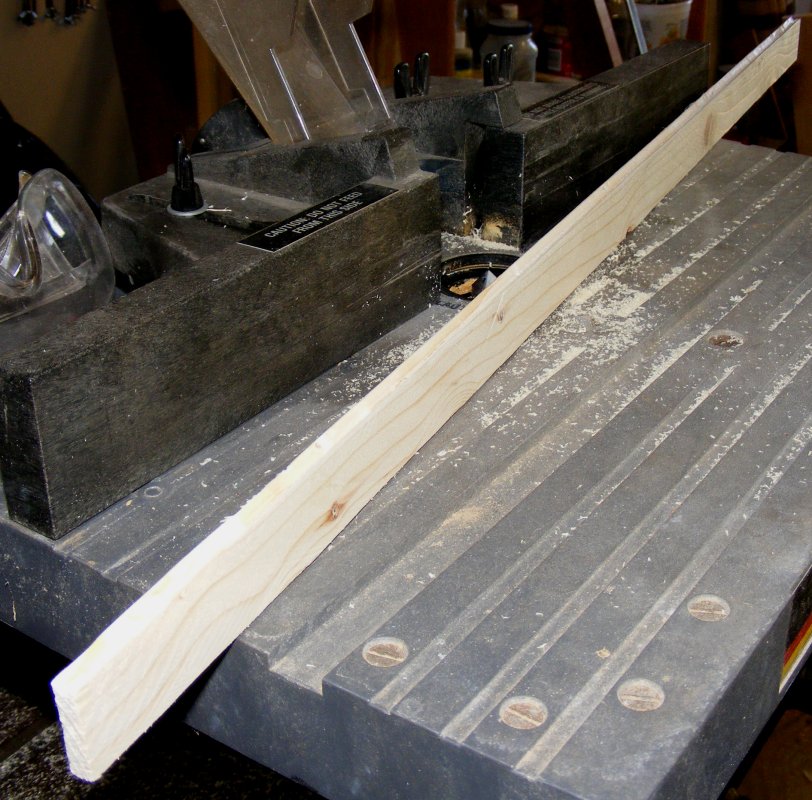
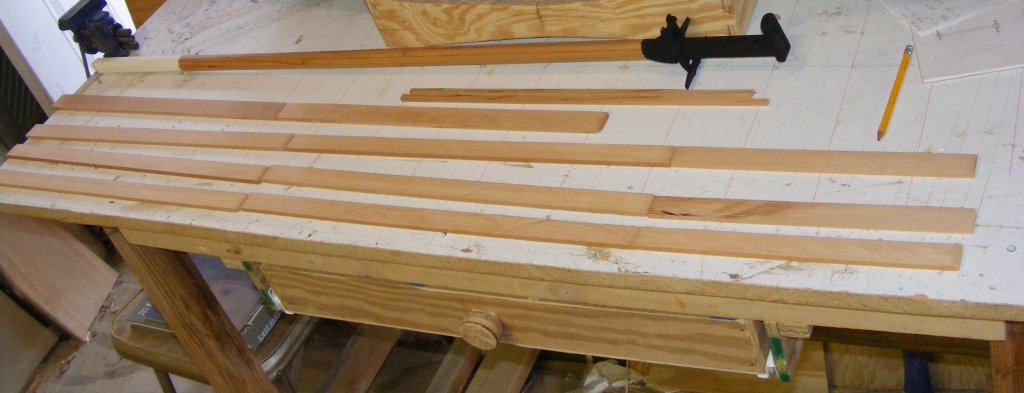
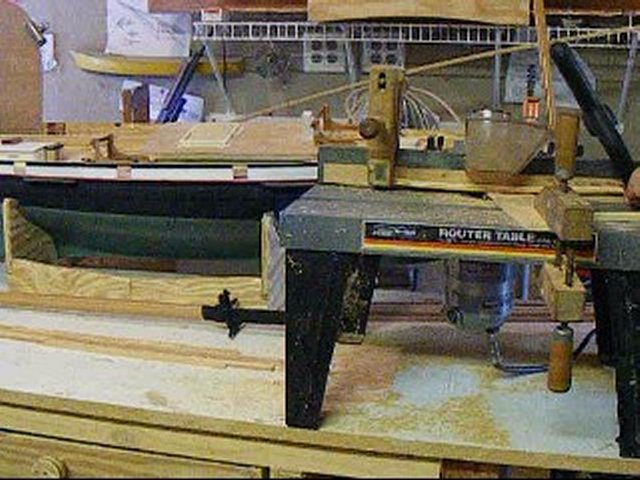
Table saw rigged for ripping planks. |

ripping a plank. |
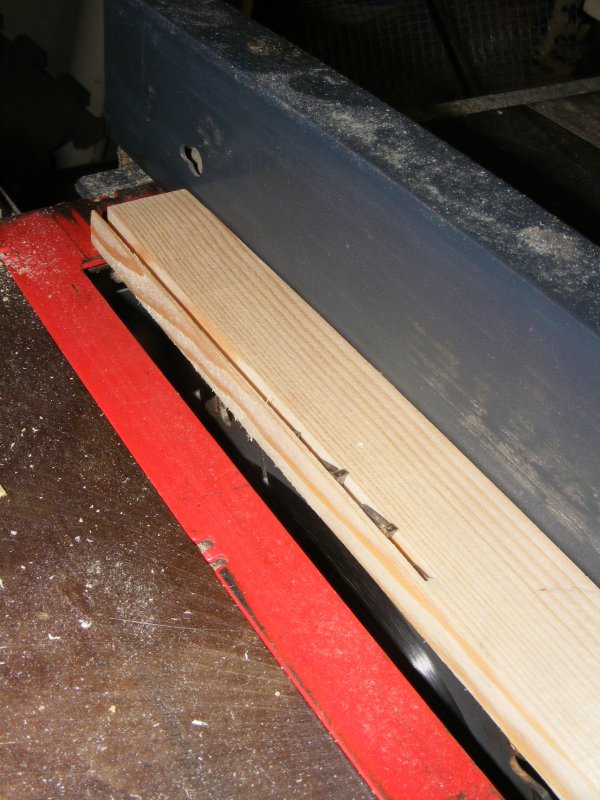
 |

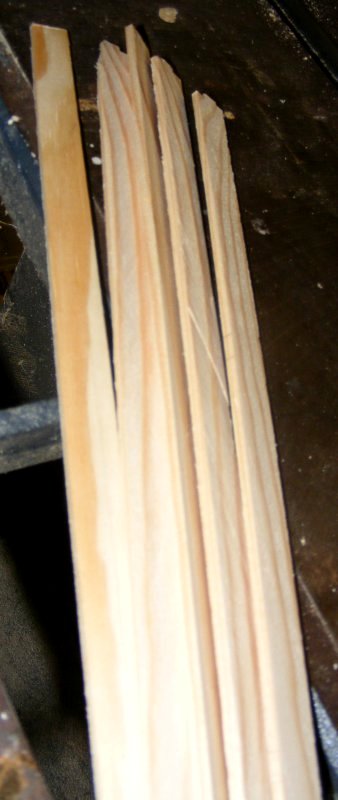
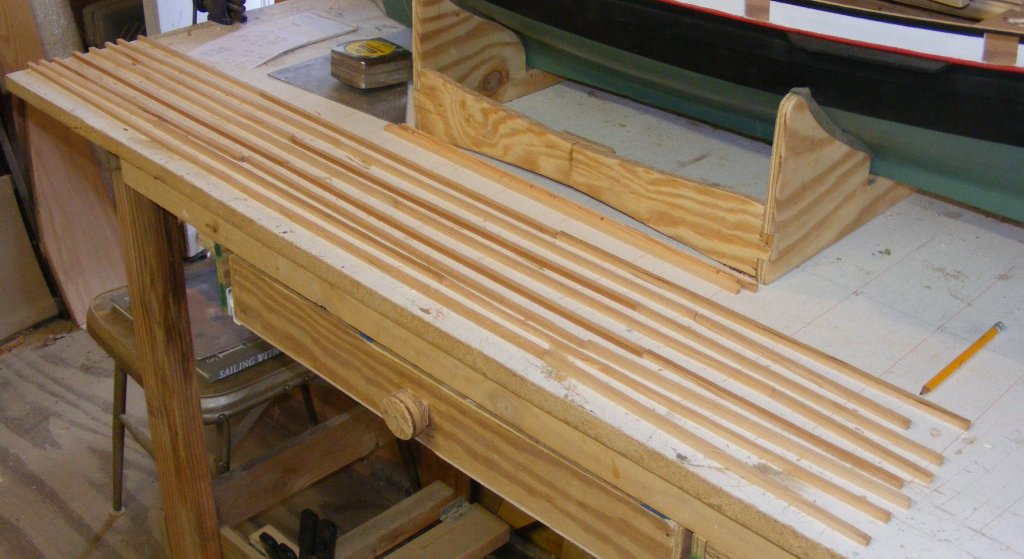
planks! |

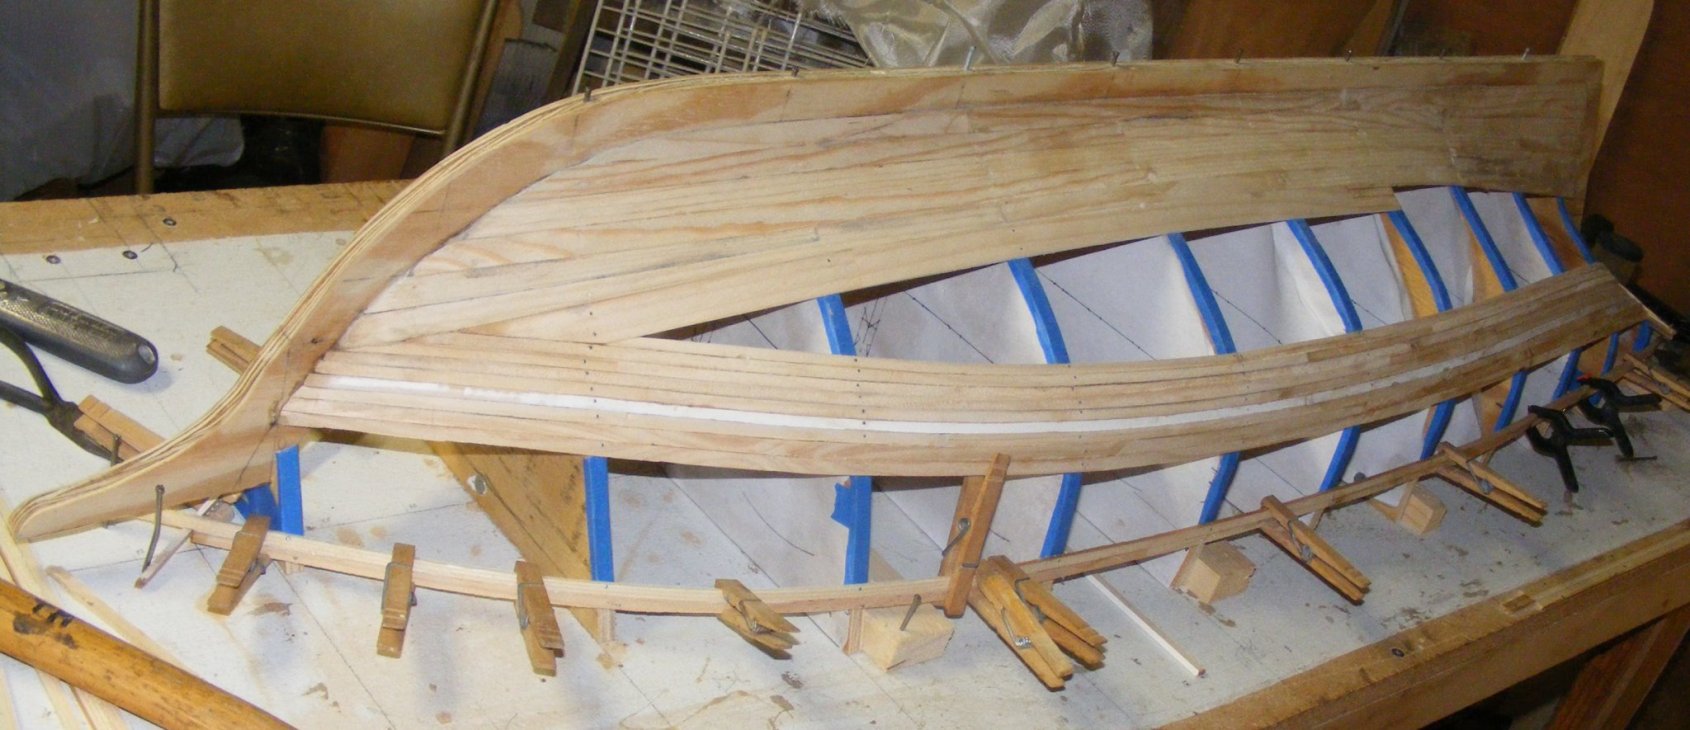
10/8
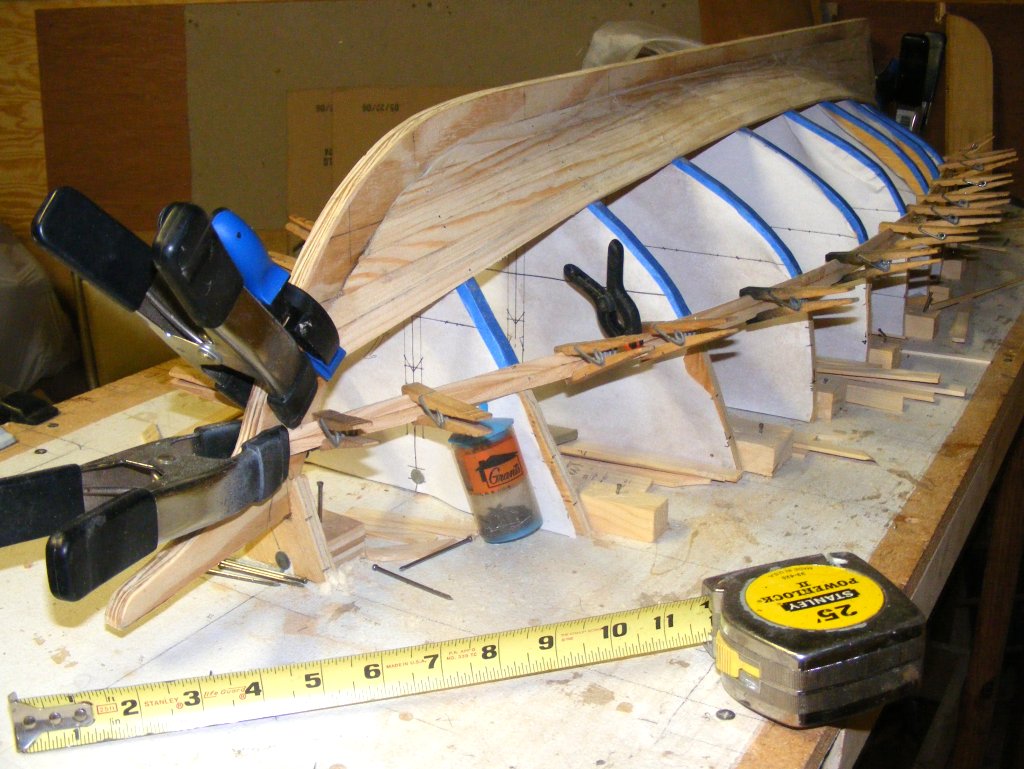
Starboard garboard going on. |

10/10
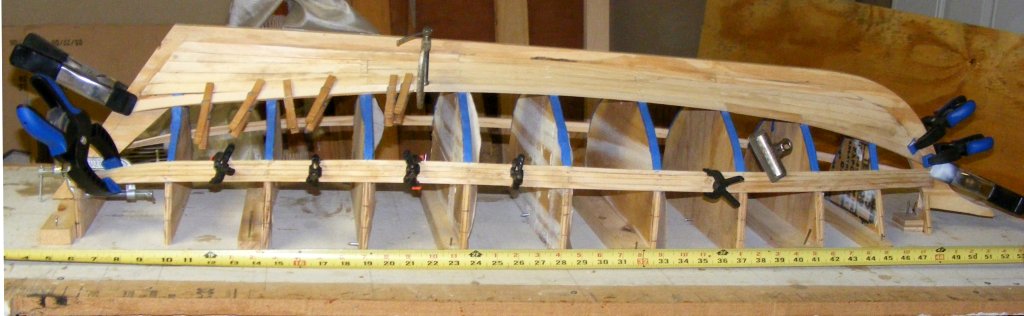
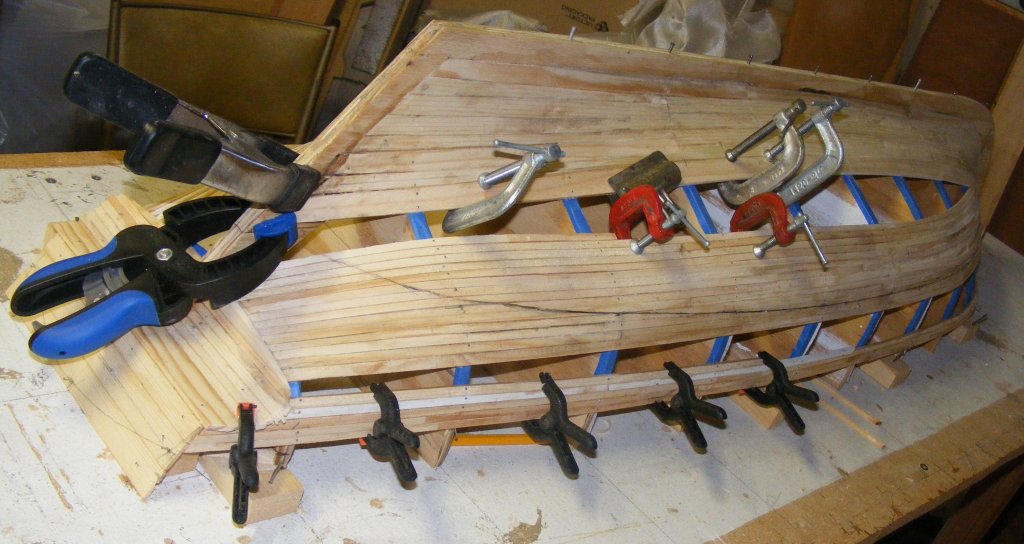
A few more strakes. |

10/15 |

10/21 |
 |

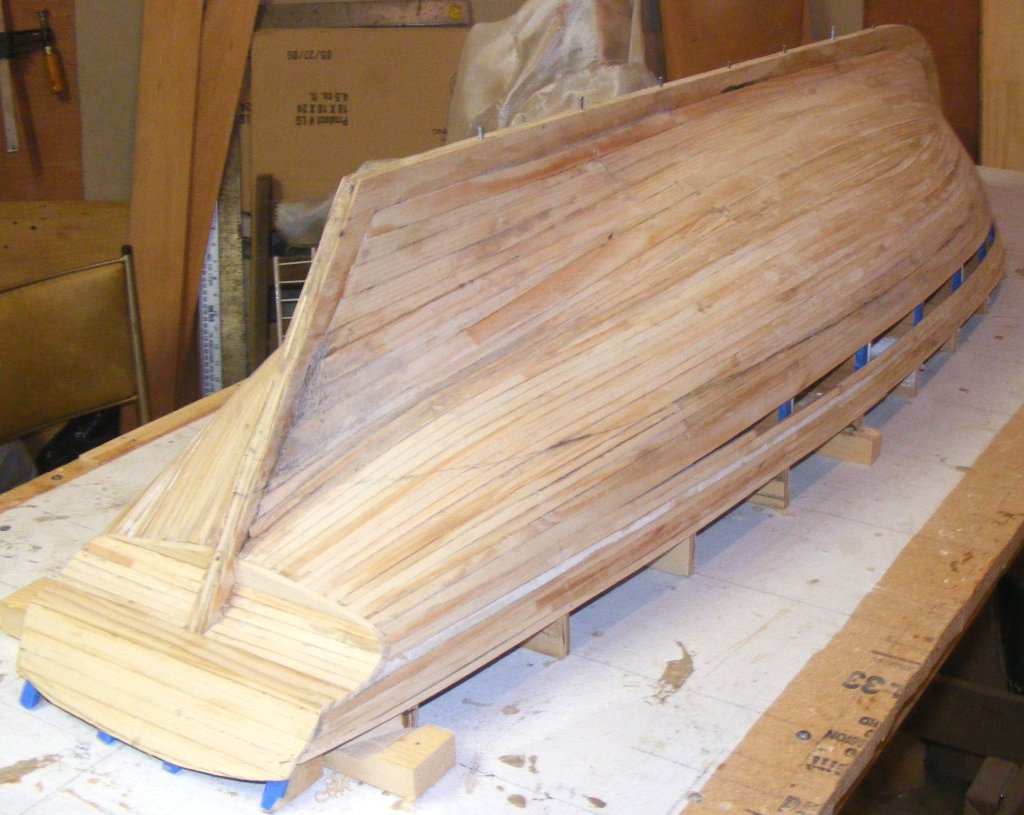
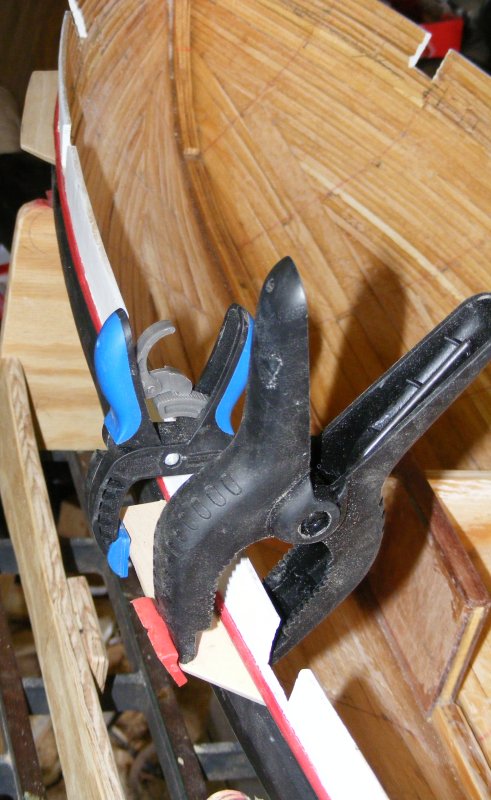
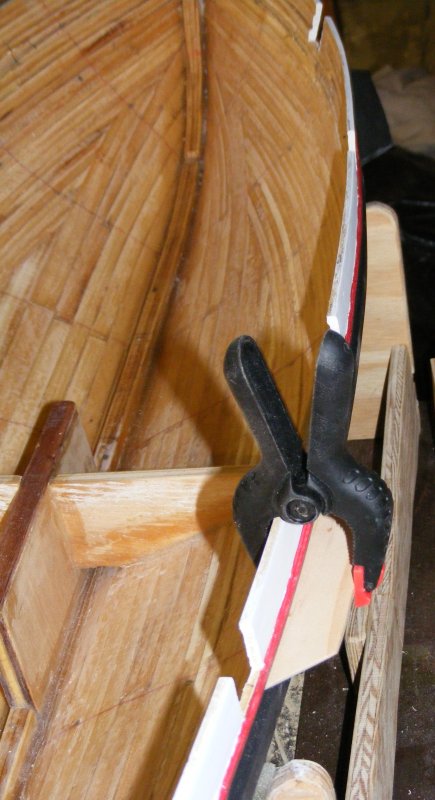
10/22
Sheer strake. |

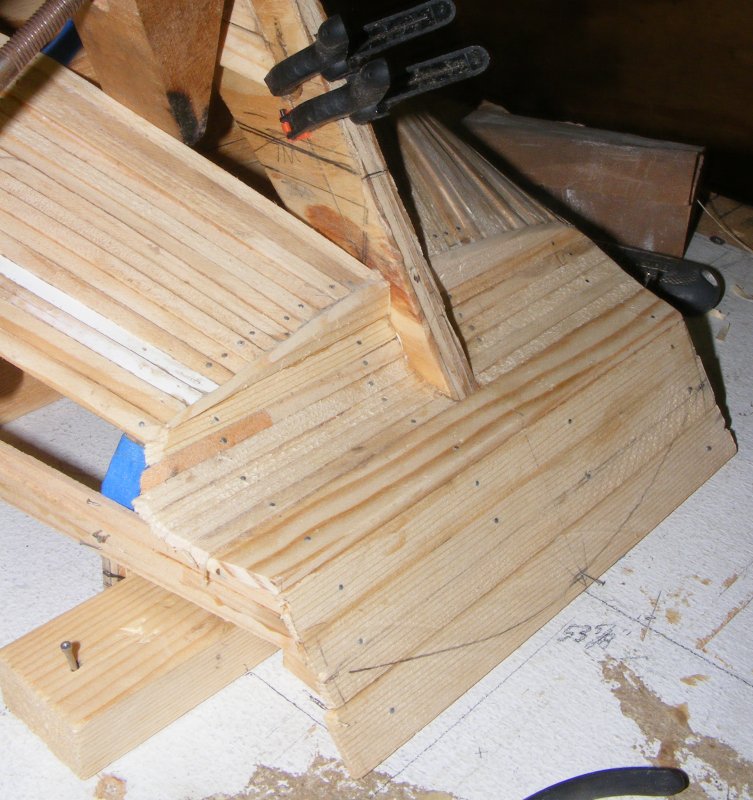
Planking from the sheer
down connects with the transom. |
 |

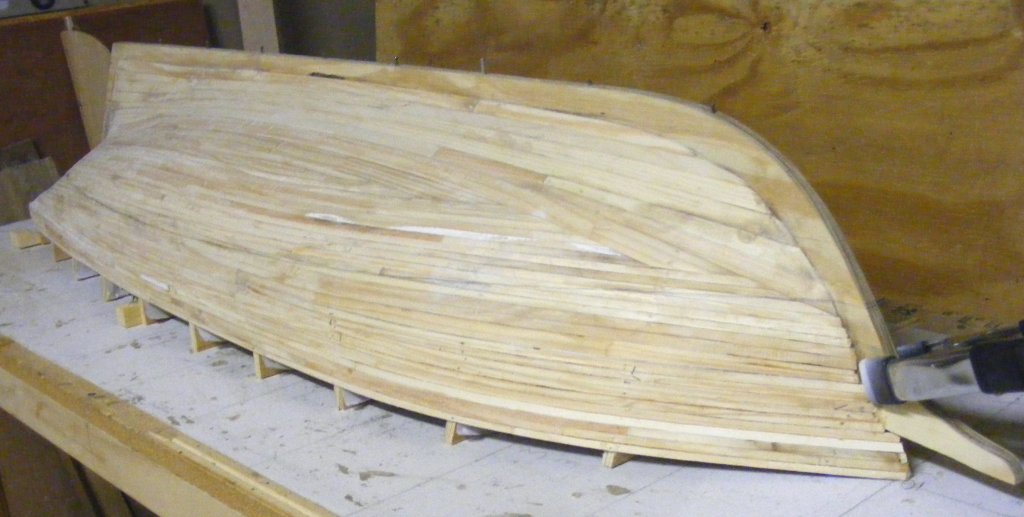
10/23
Scribed the waterline and
planking continues. |
 |

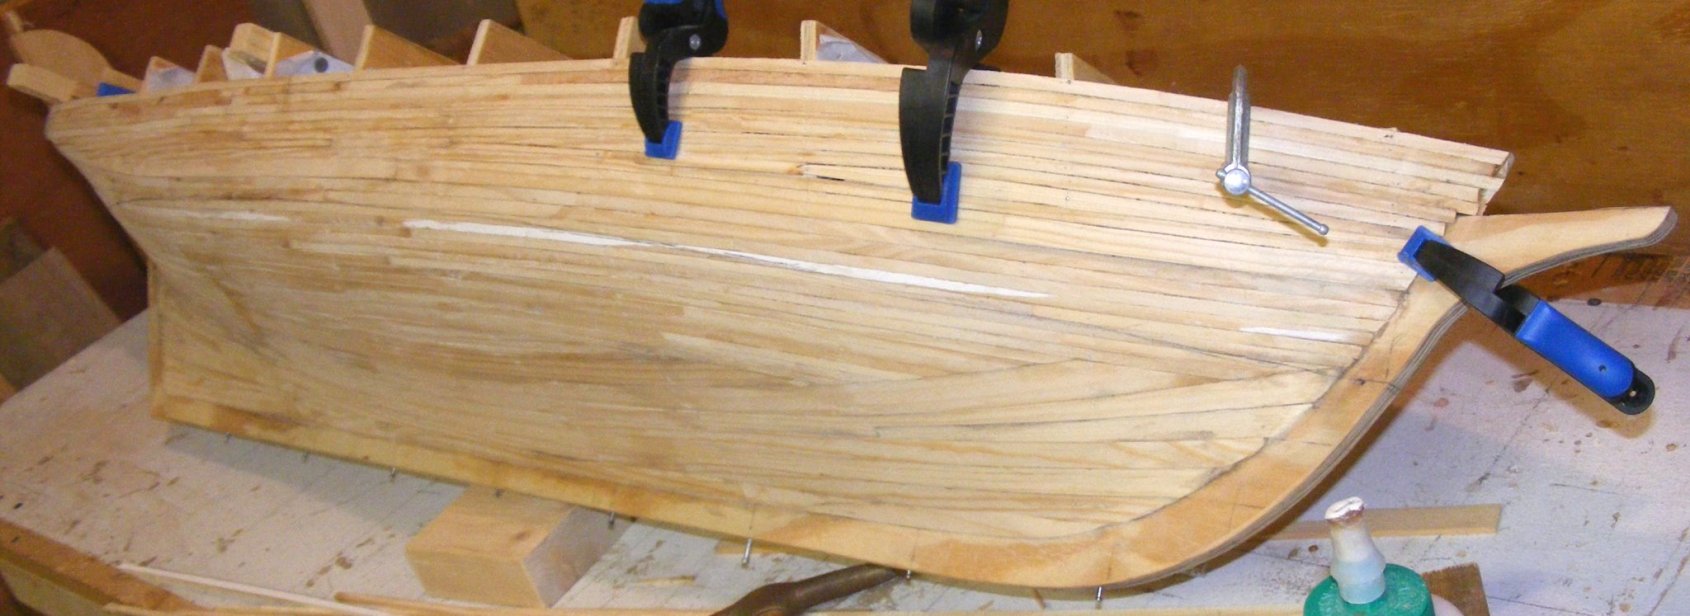
10/27
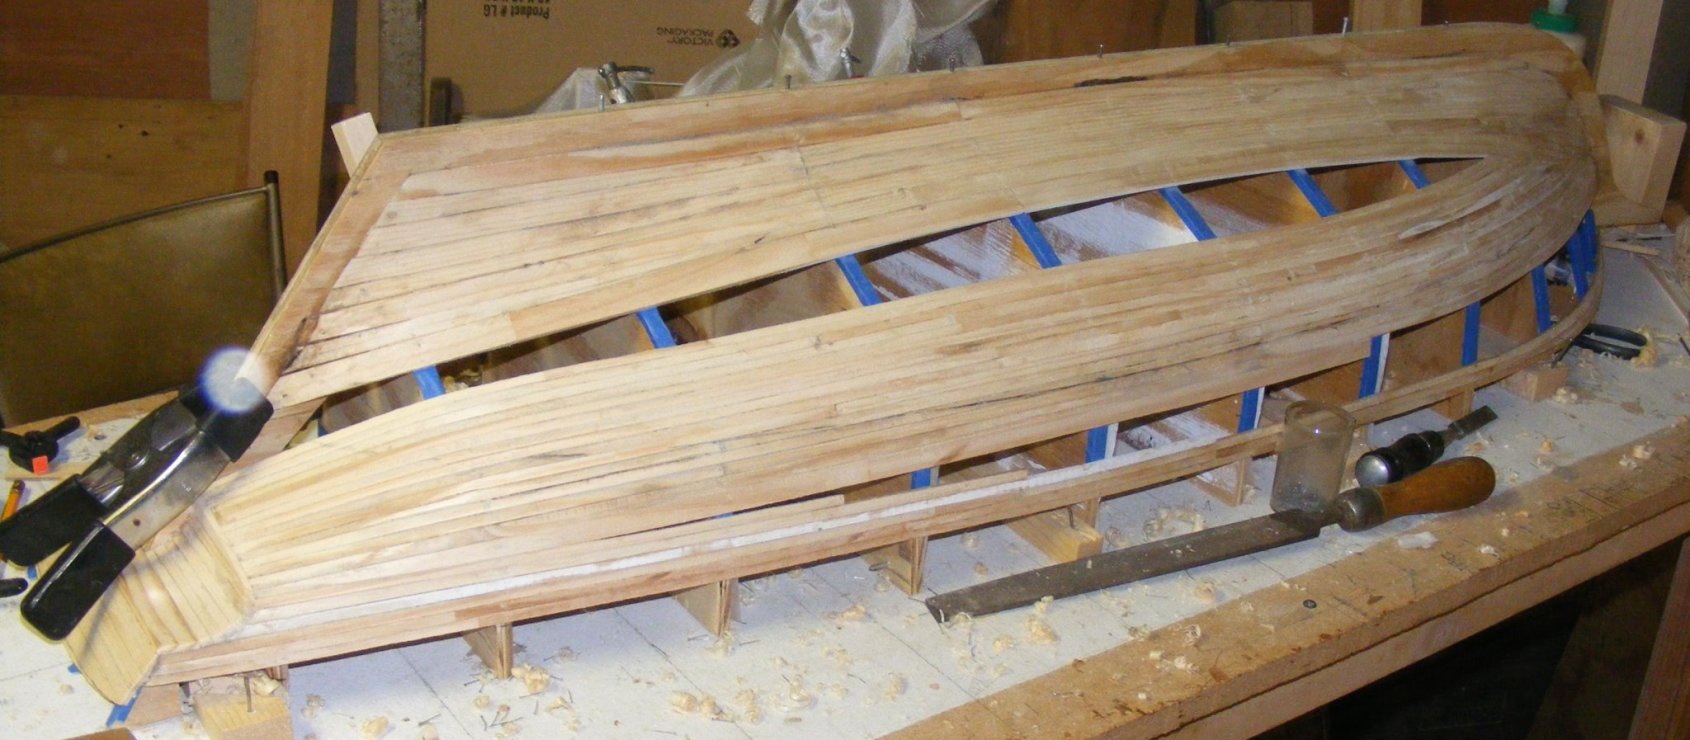
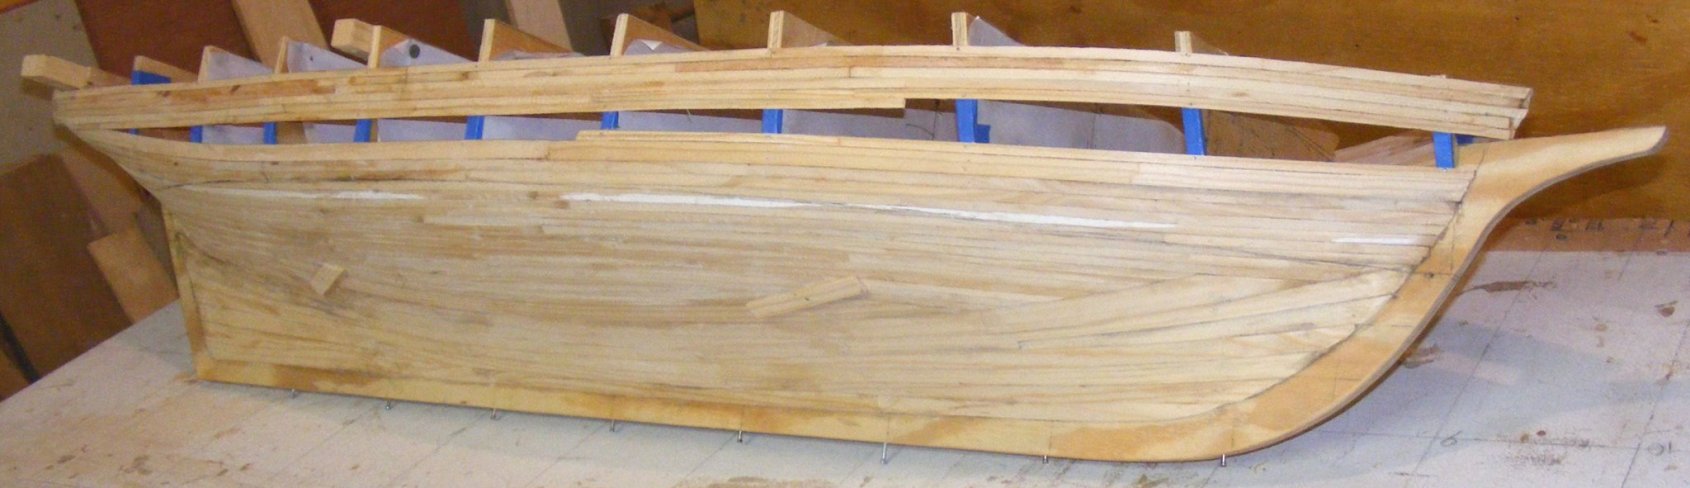
Pulled almost all the pins, knocked off some bumps and ridges with the plane, and sanded a bit. |

10/29 |

10/30 |
 |

10/31 |
 |

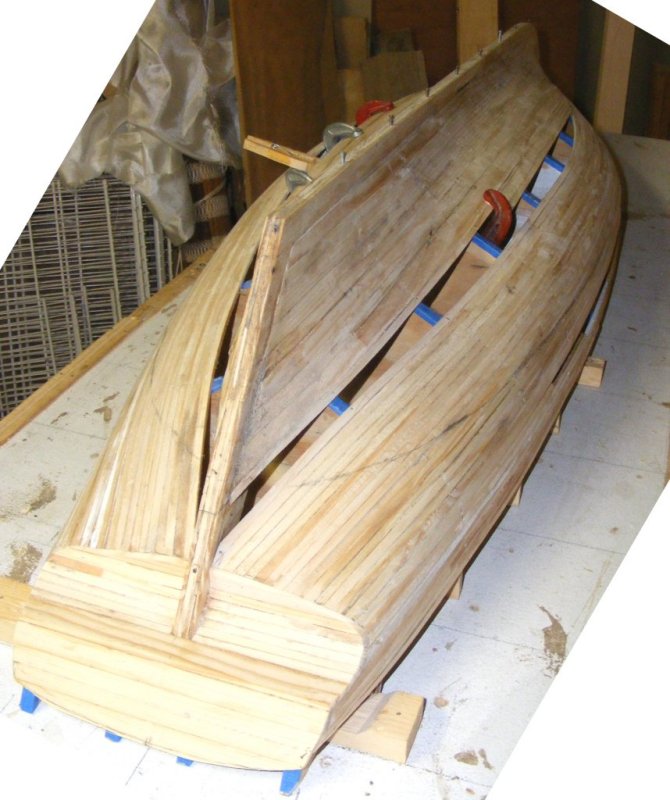
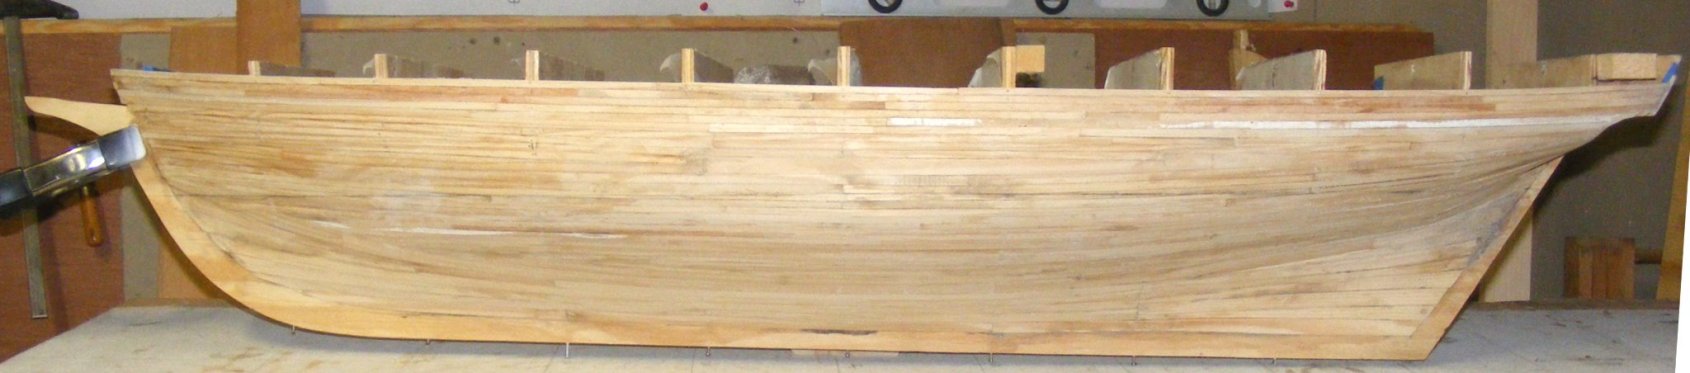
11/1
Final plank. |

11/3
Pulling out form #10. |

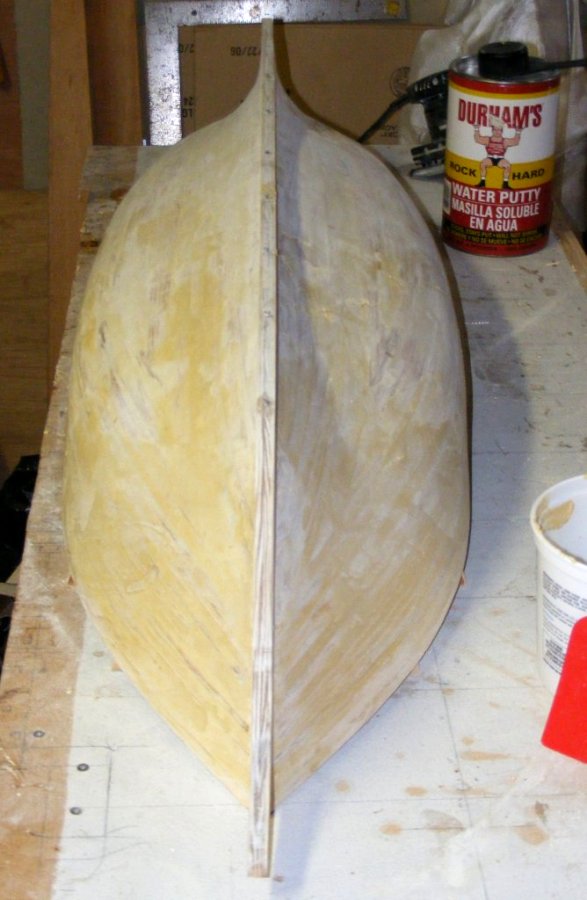
11/4
Some more putty (note can in background). |

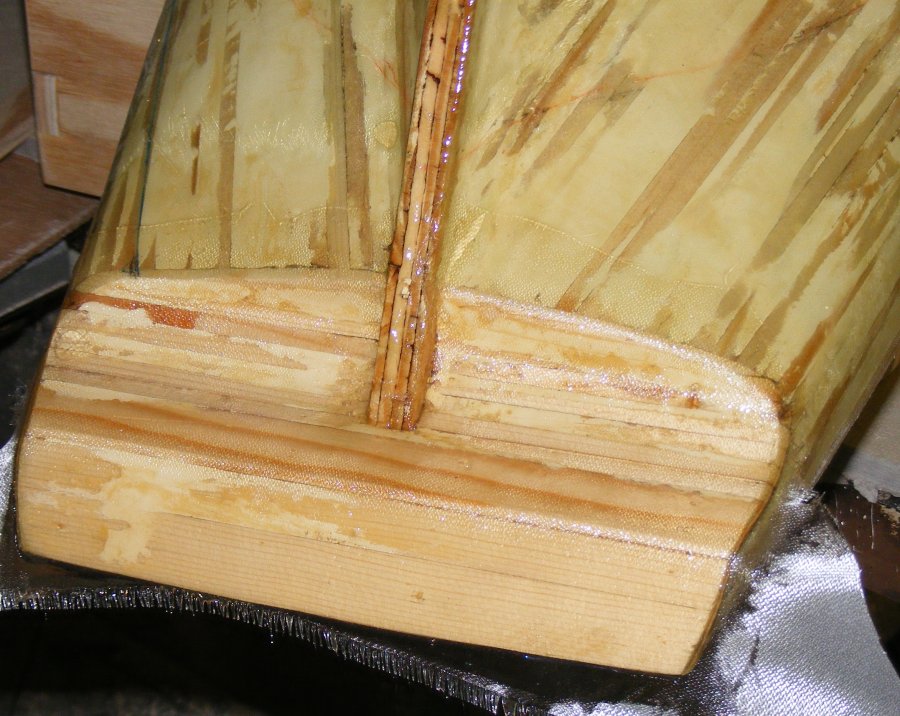
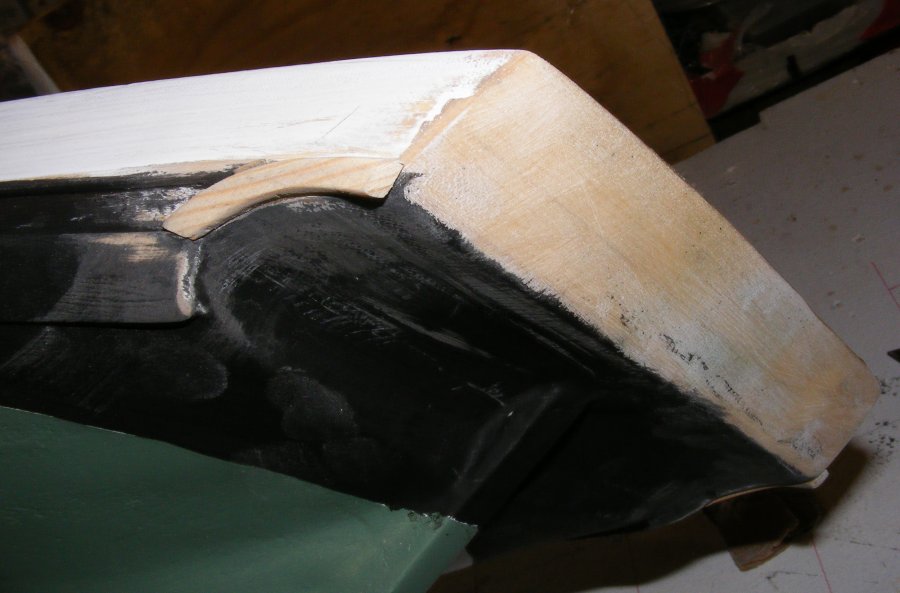
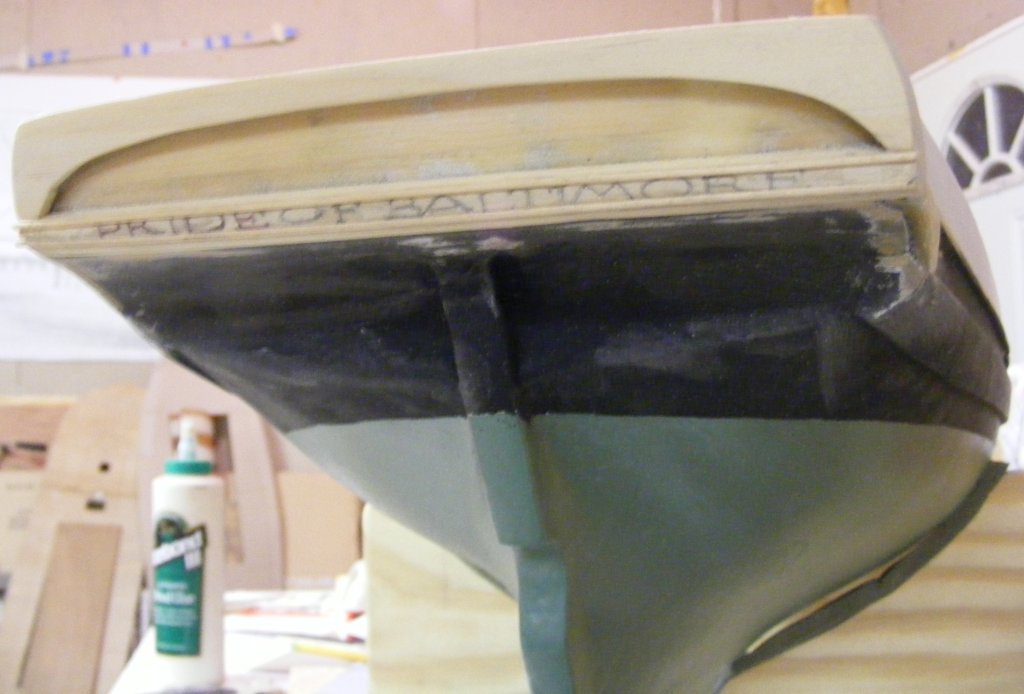
All sanded. |

Transome trimmed down to where it should be. |

11/5
Fully taped |

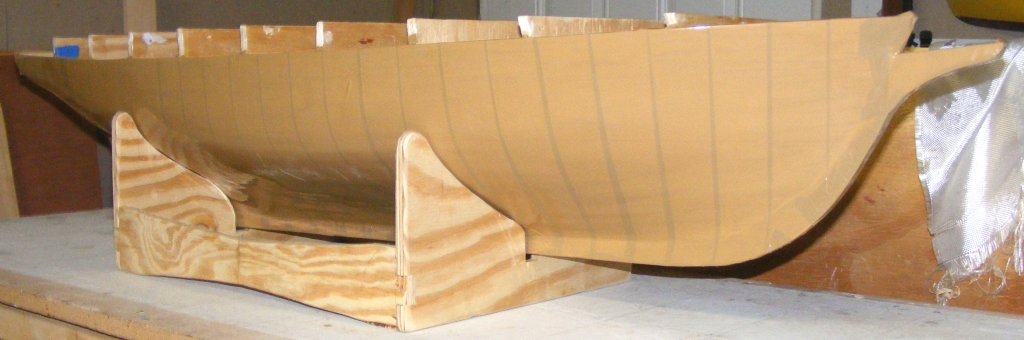
11/6
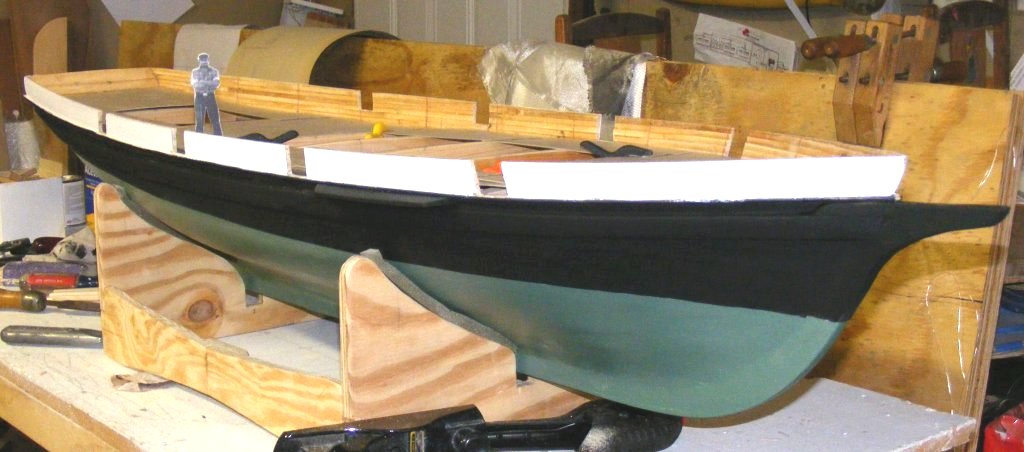
Made a stand |

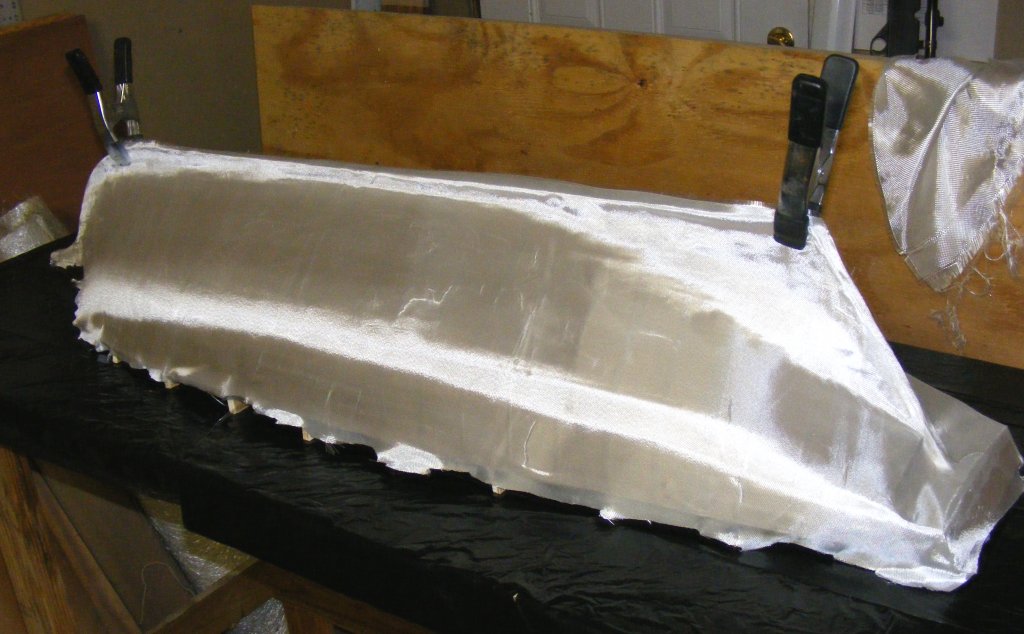
11/11
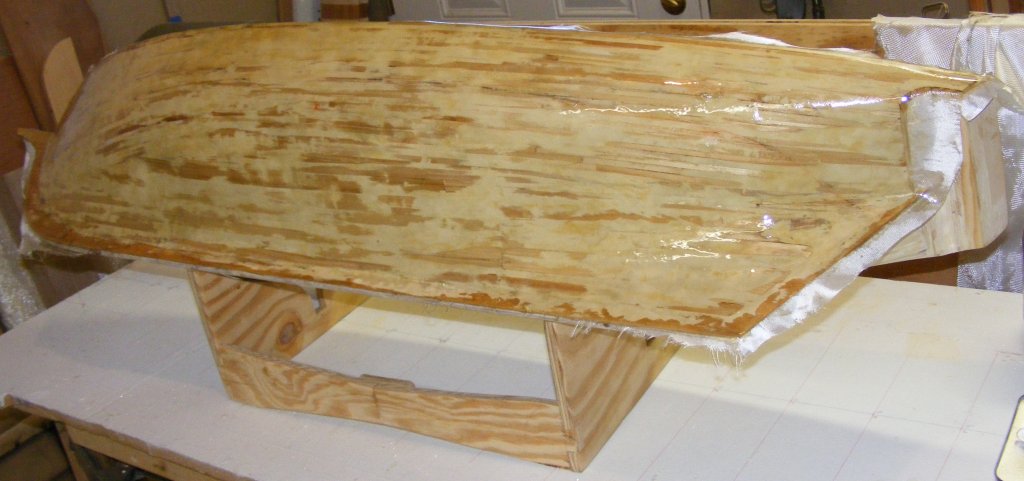
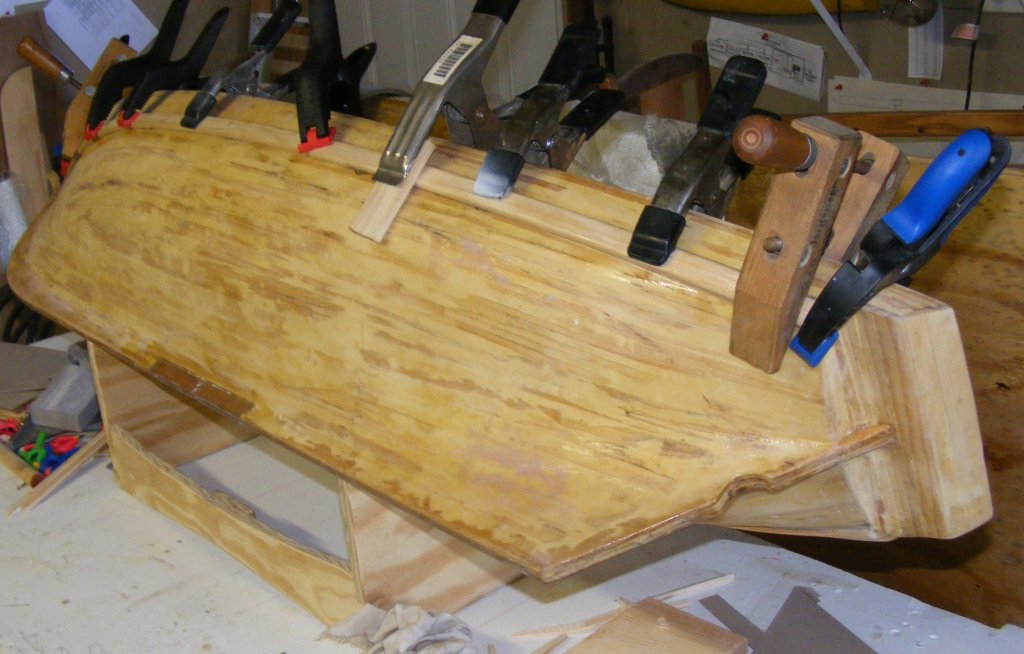
3oz cloth laid on. |

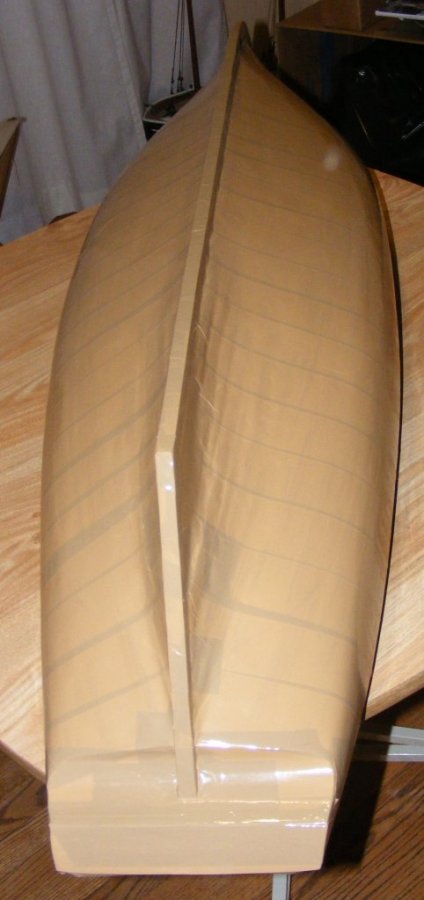
11/12
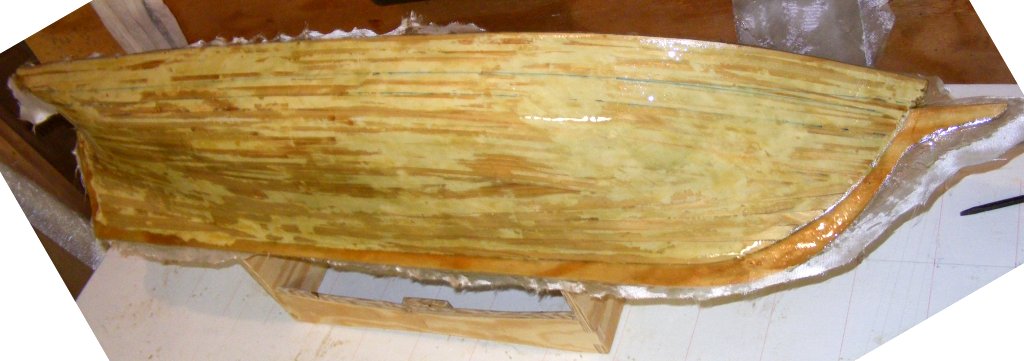
Glassed. |

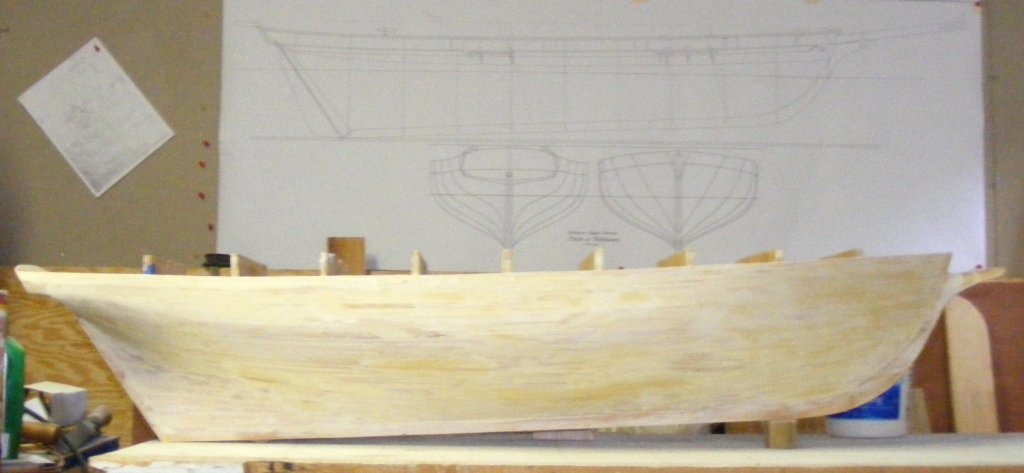
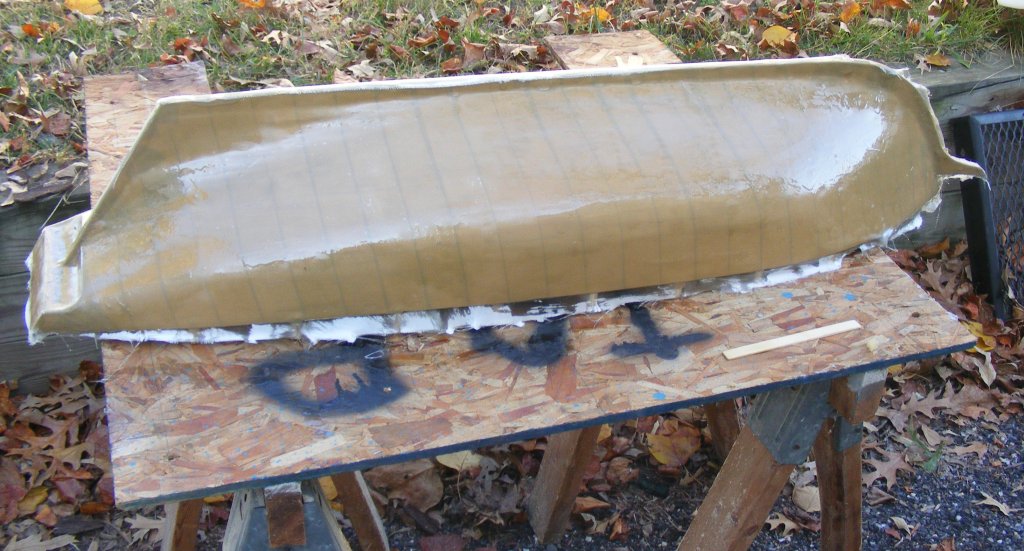
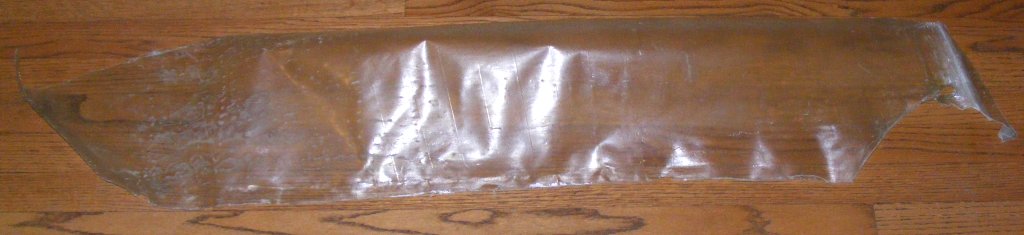
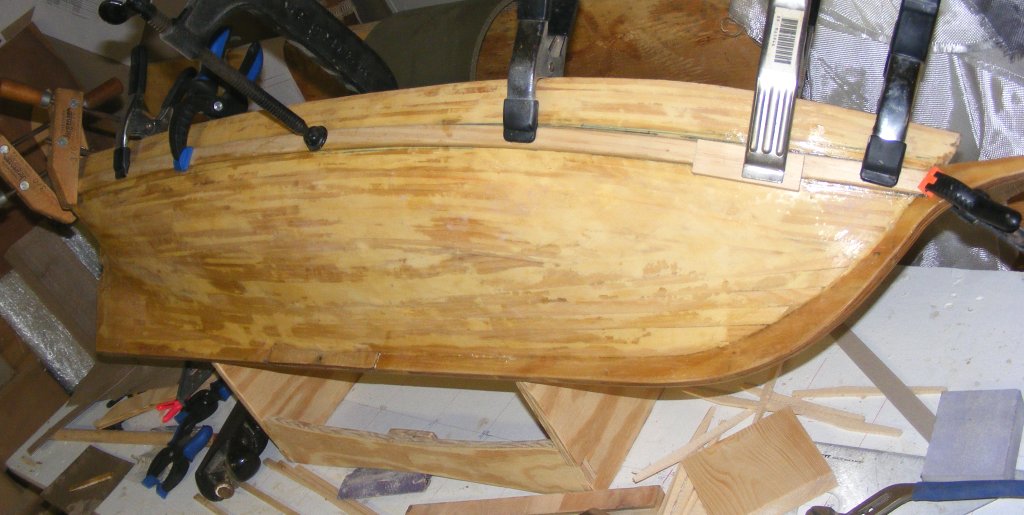
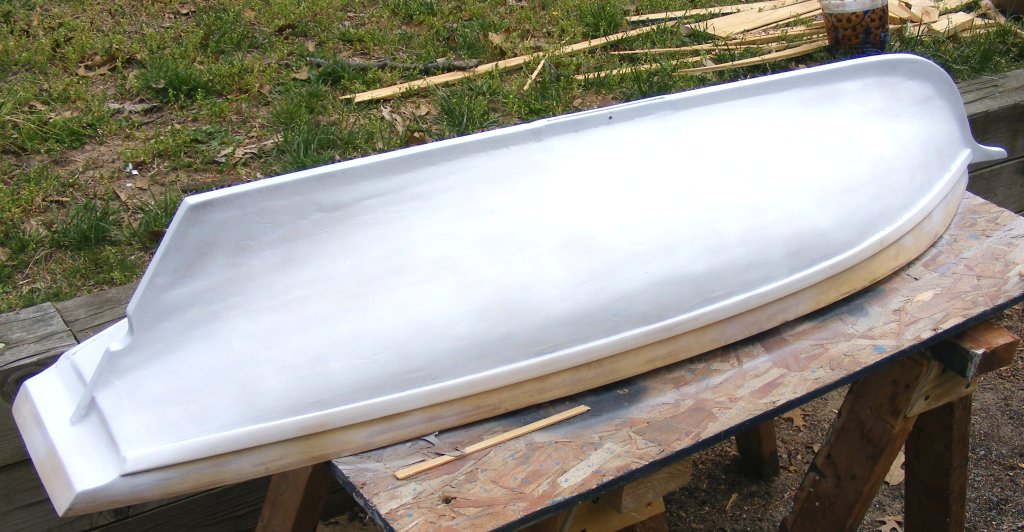
11/13
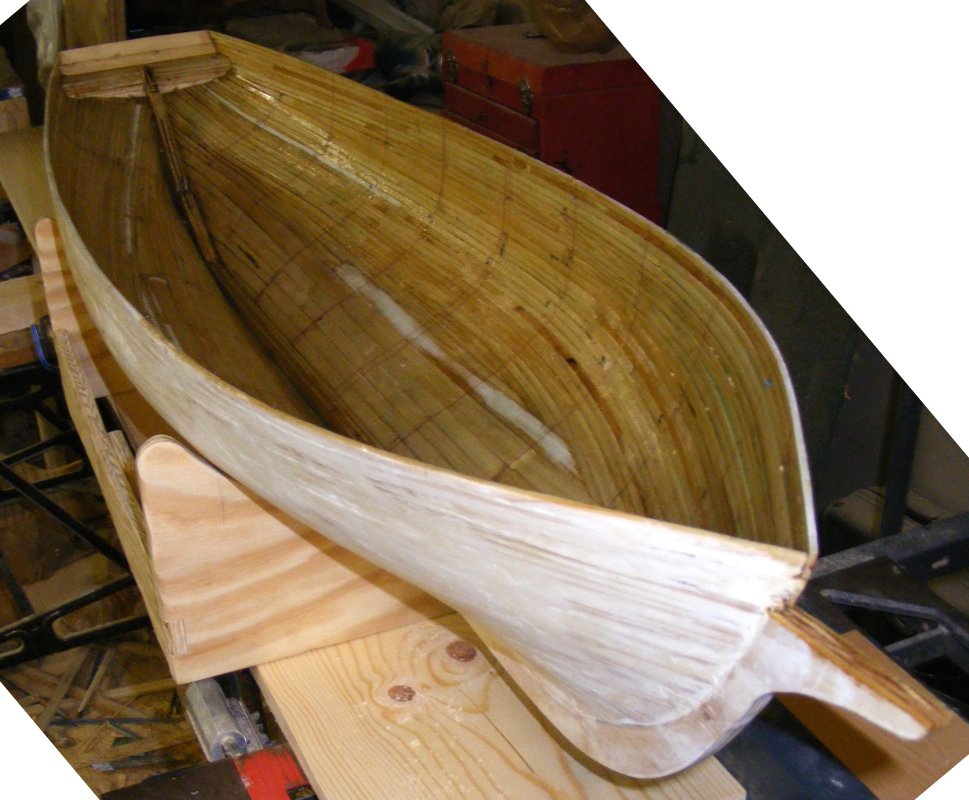
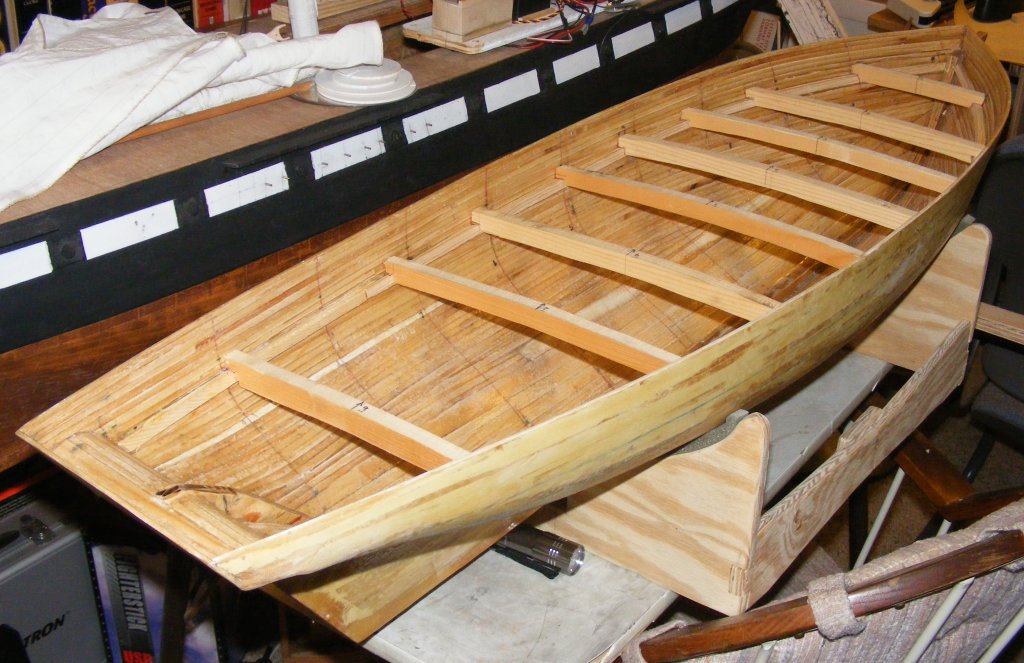
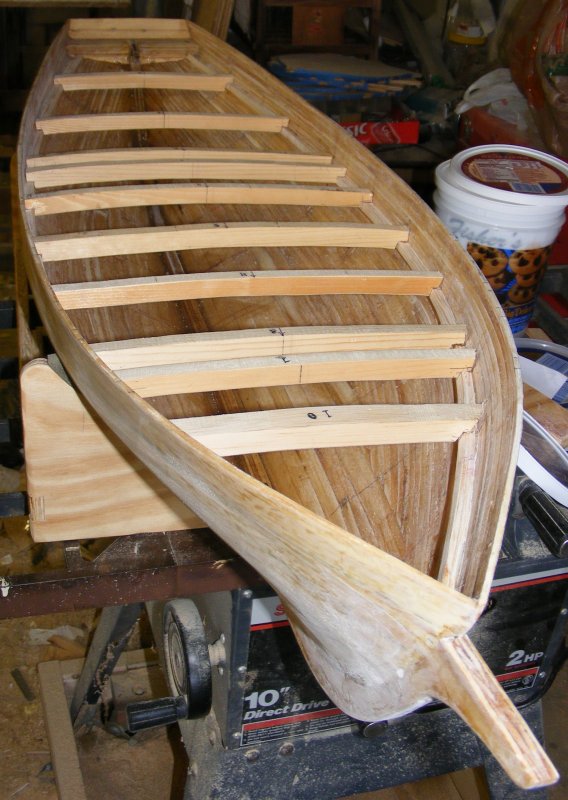
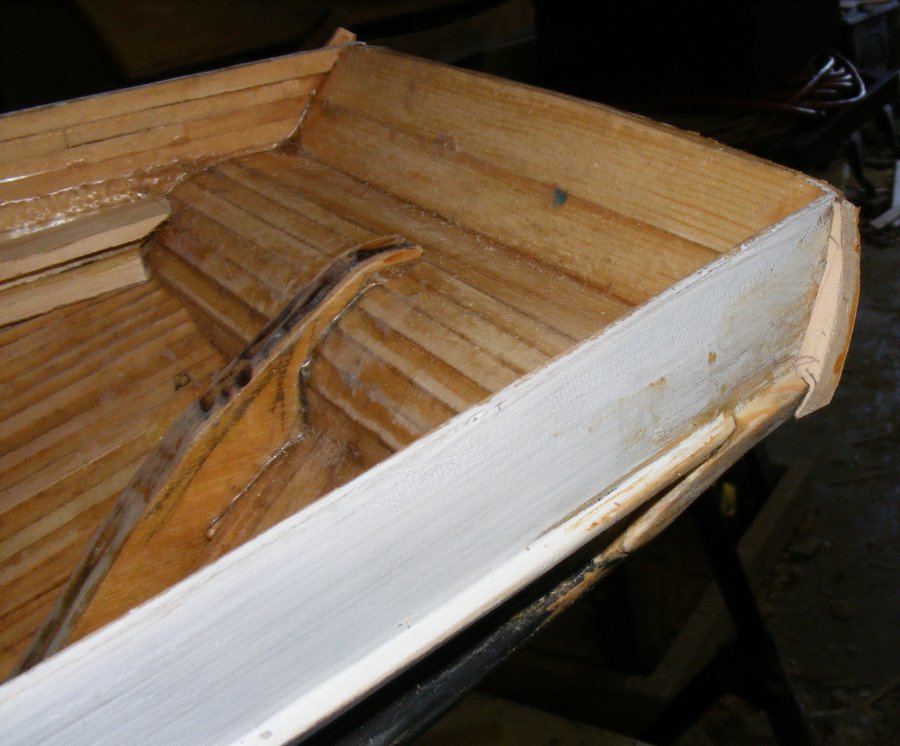
Unglassed. |

Forms pulled out. |

11/20
Resin inside. |

12/25
Port side glassed. |

12/27
Starboard side glassed. |

12/30
Transom glassed. |

1/18
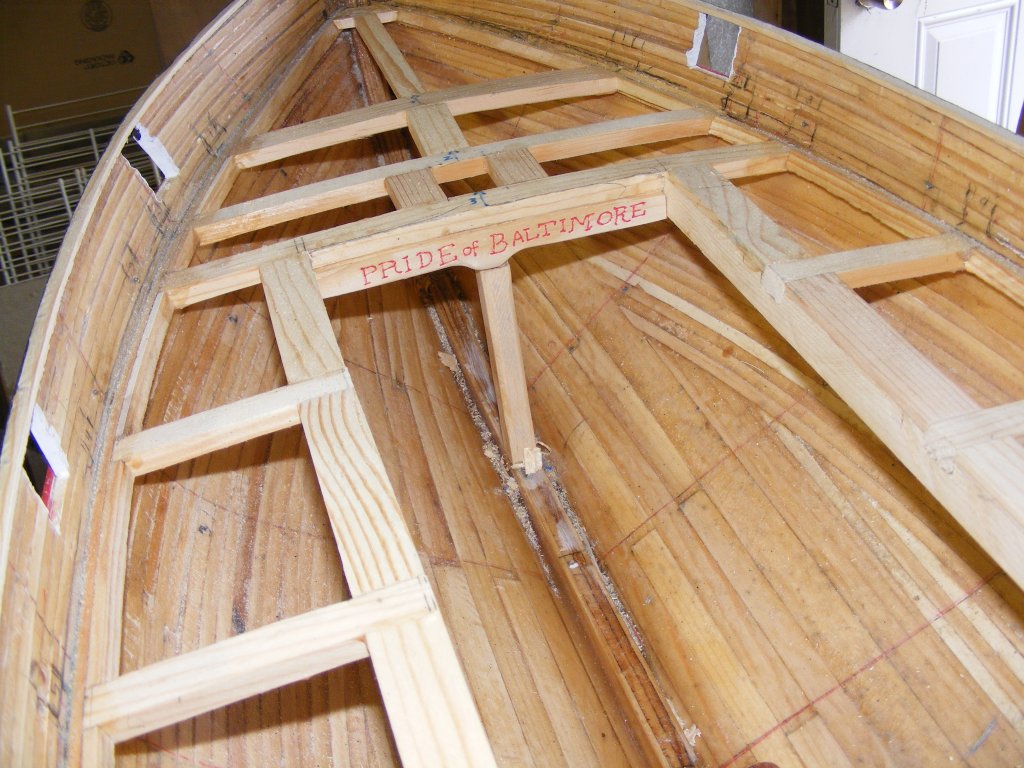
Deck clamps installed and main beams fitted. |

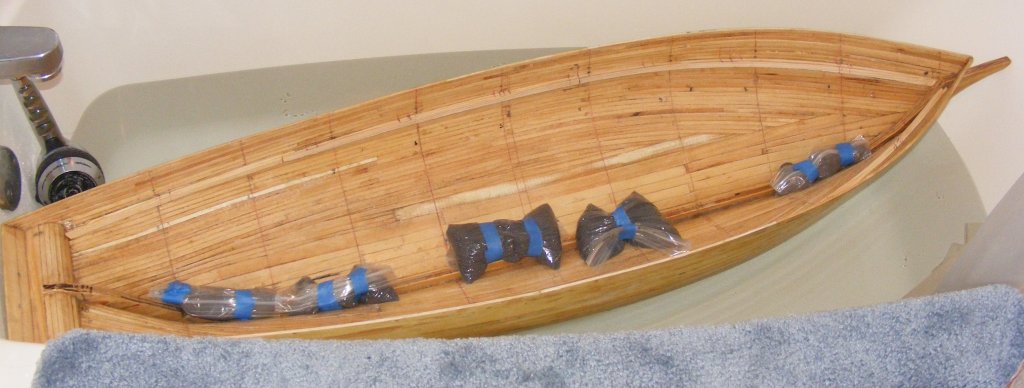
1/19
First float in the tub. |

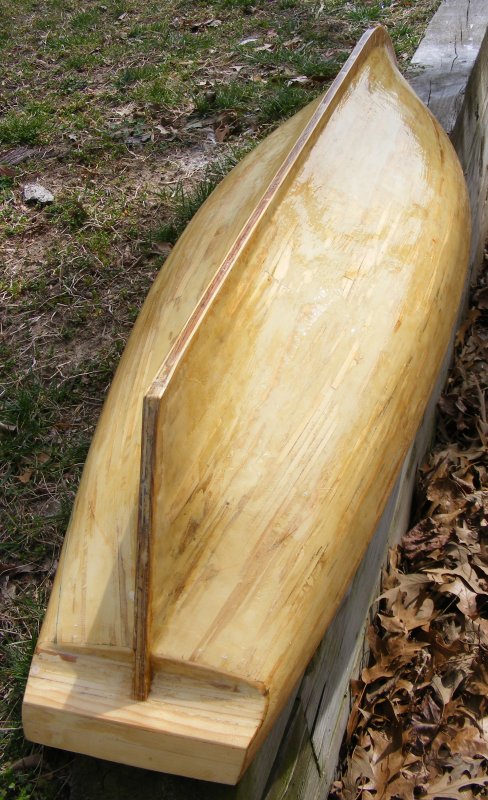
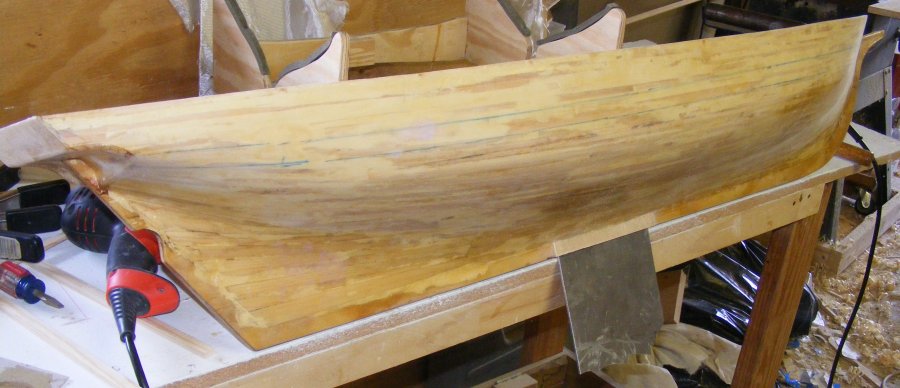
3/15
Another coat of resin after sanding. |

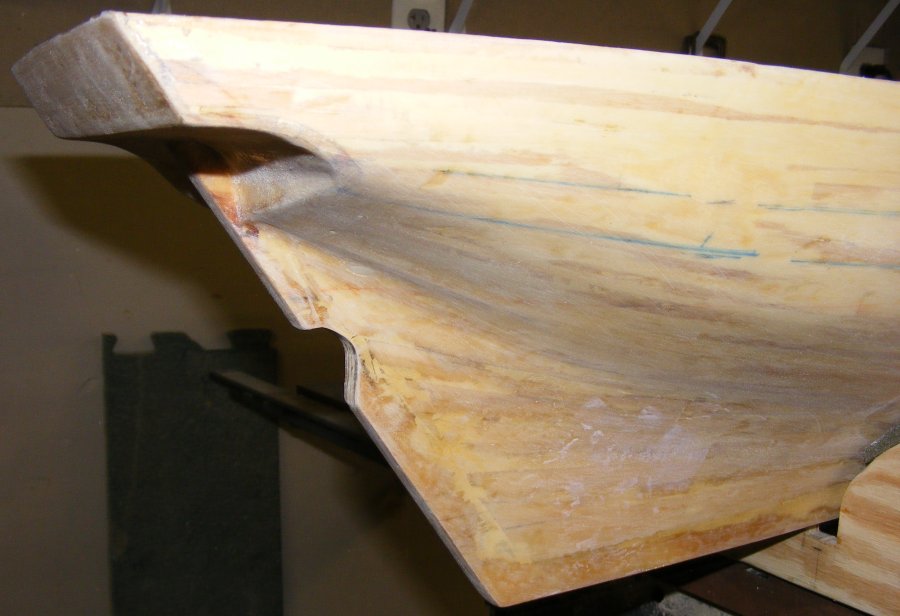
3/17
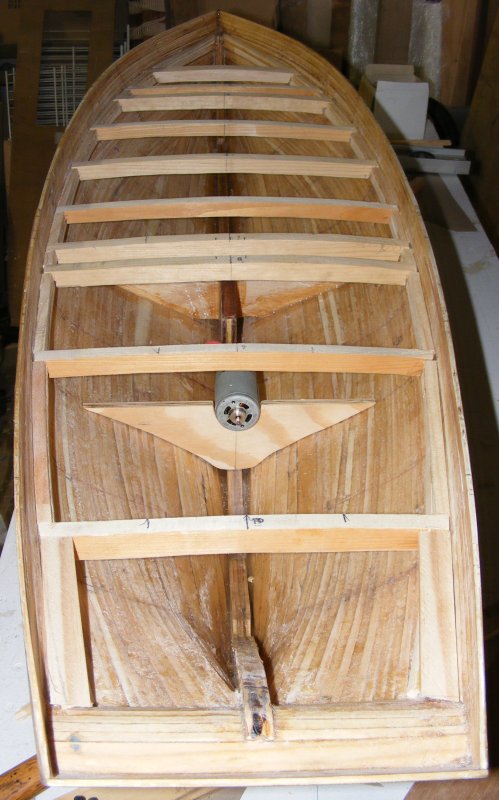
Stern post cut-out for prop. |

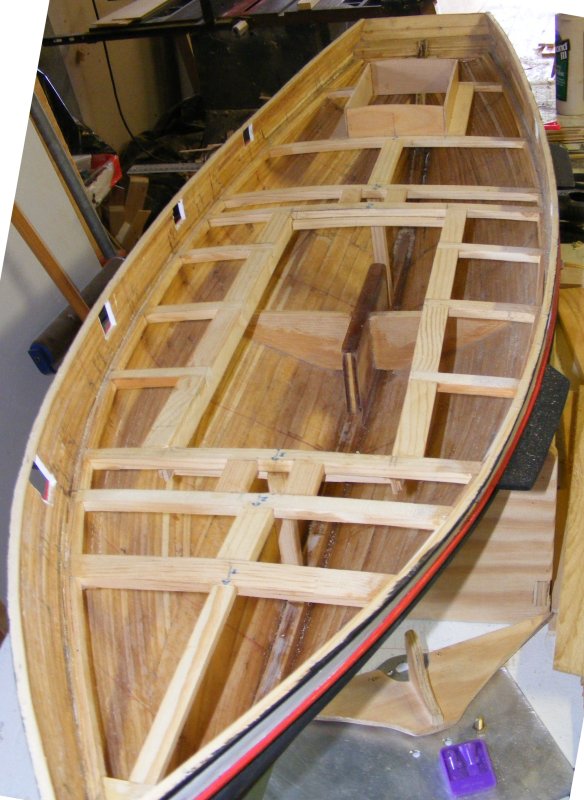
Deck beams fitted and tacked in place.
The pilot hole for the shaft stuffing box has been drilled as well. |

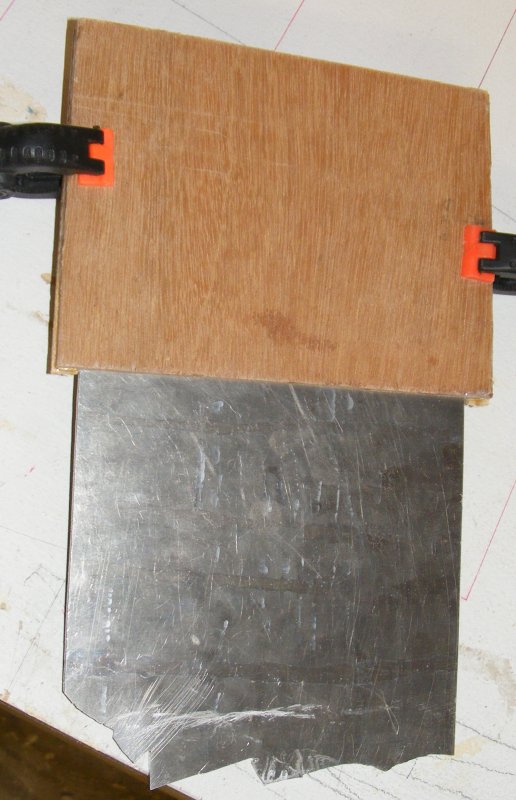
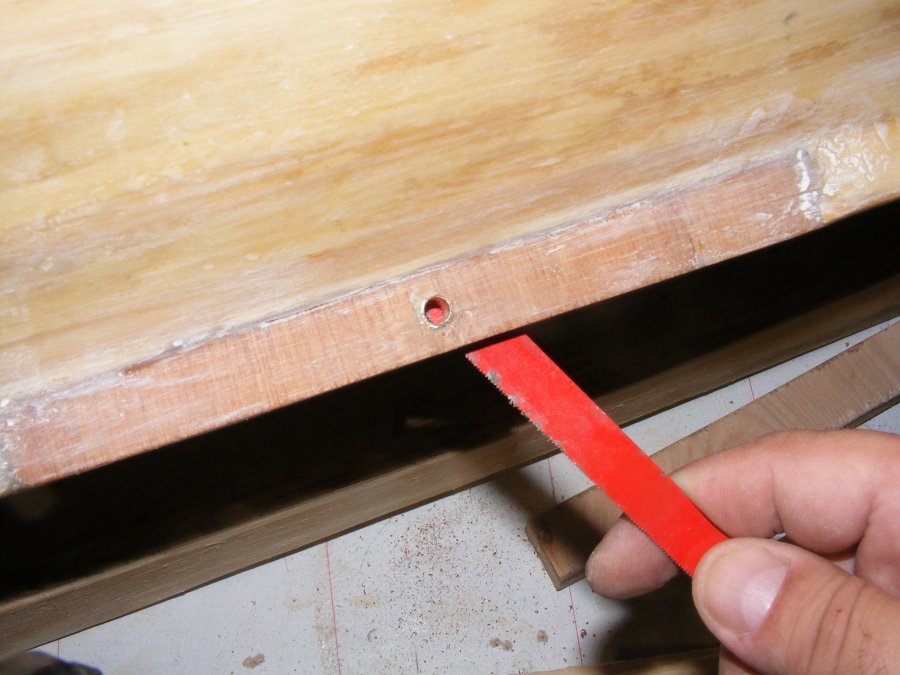
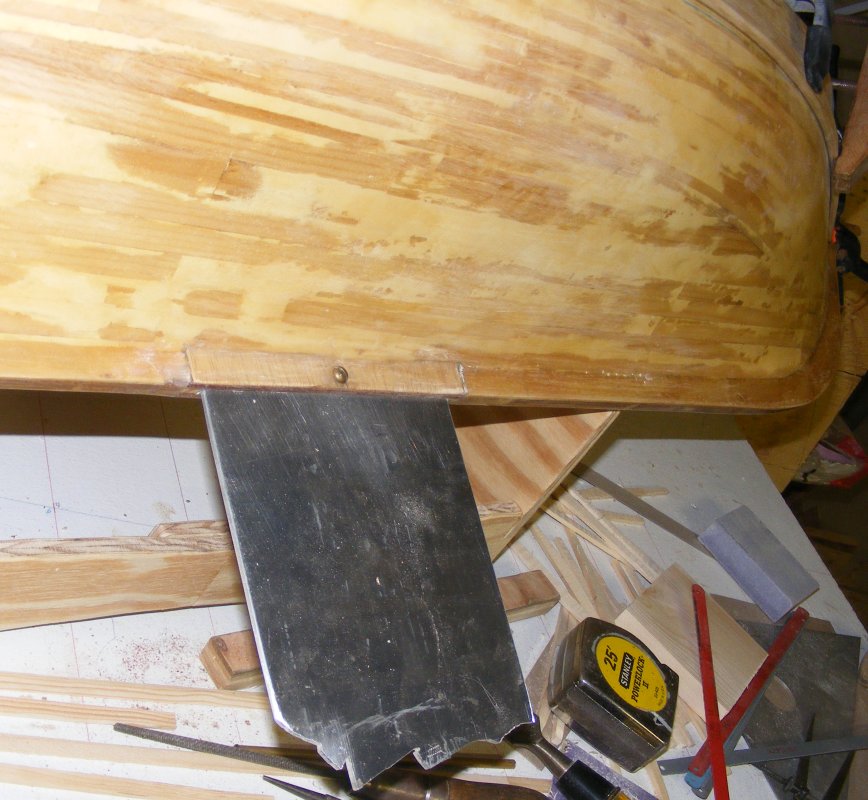
3/23
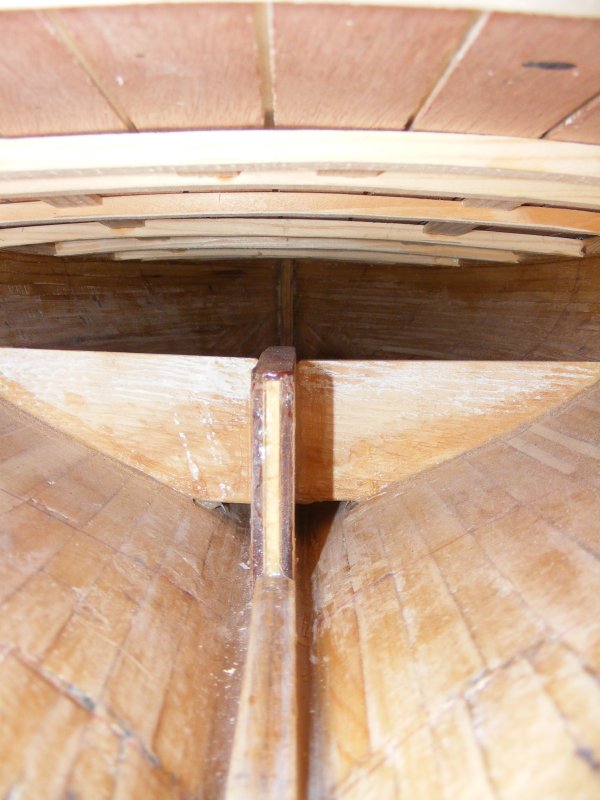
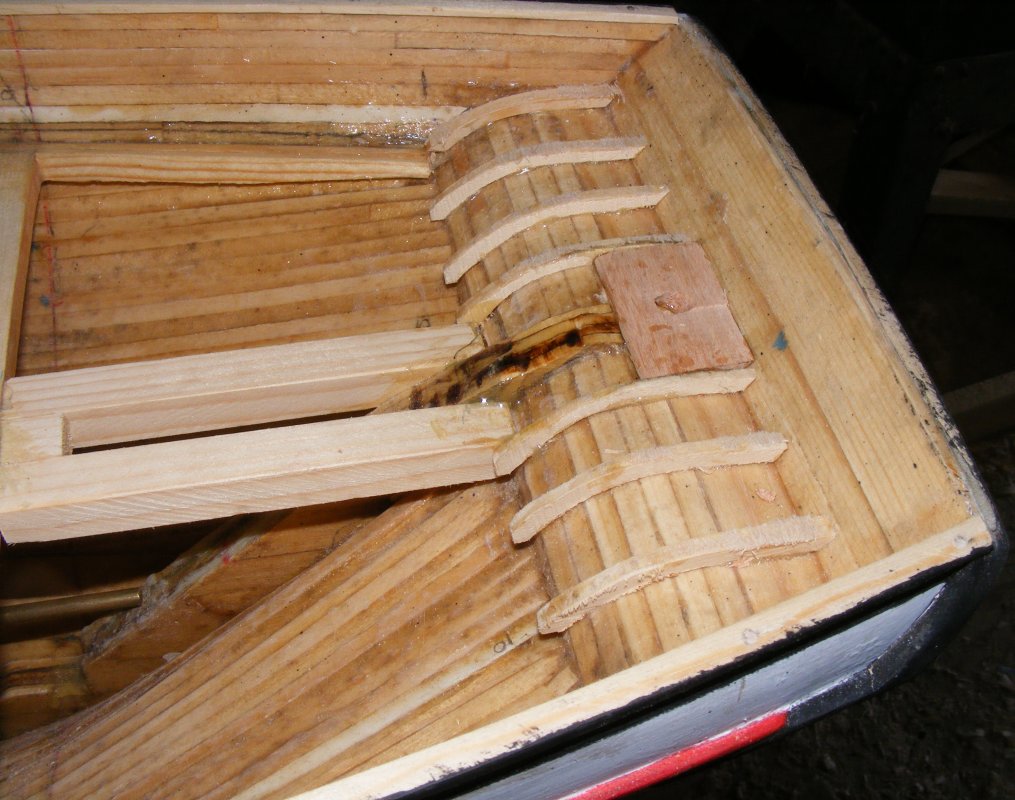
Dagger board trunk with 6" wide 1/8" aluminum plate. |

Installed in the hull. |

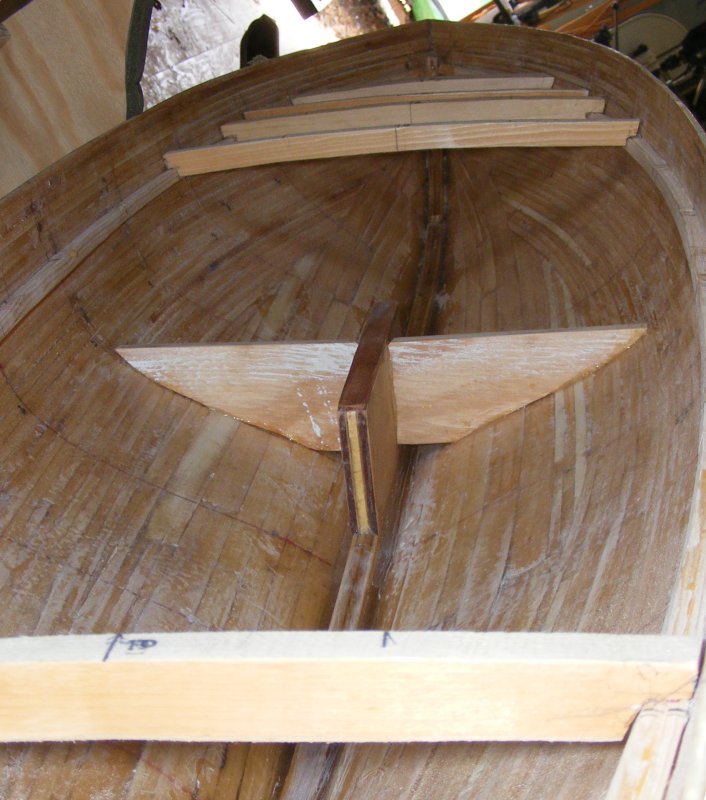
3/29
Dagger board trunk trimed down, capped, and braced. |

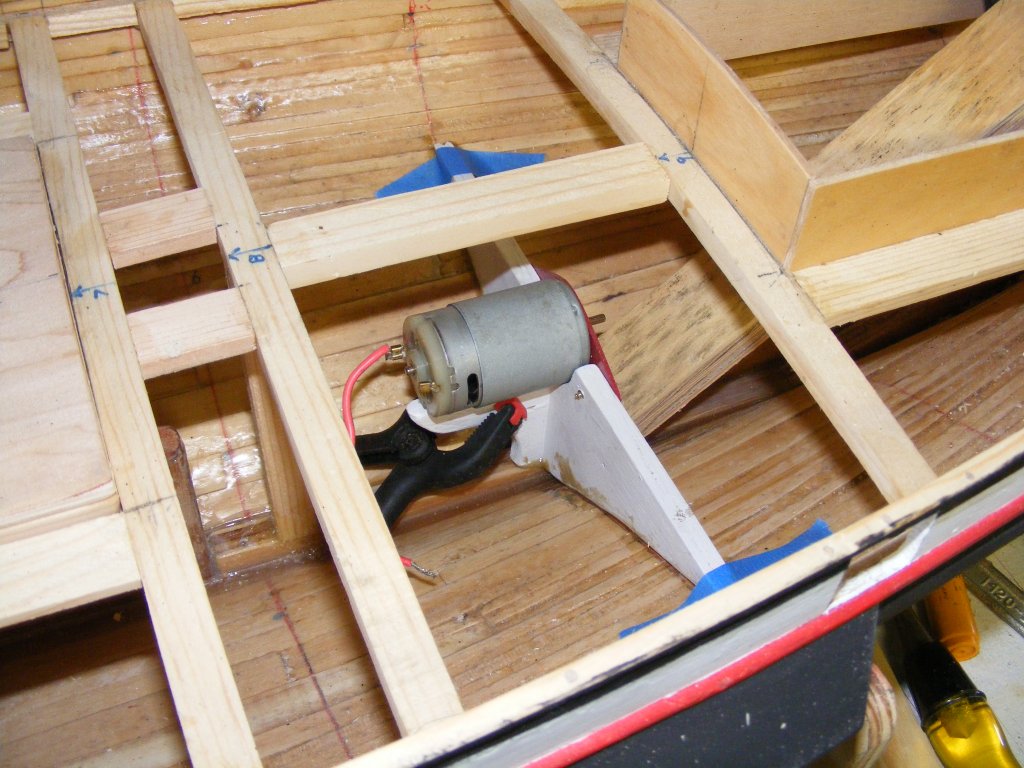
Motor mount bulkhead fitted and spaces between deck beams filled around perimeter. |

3/30
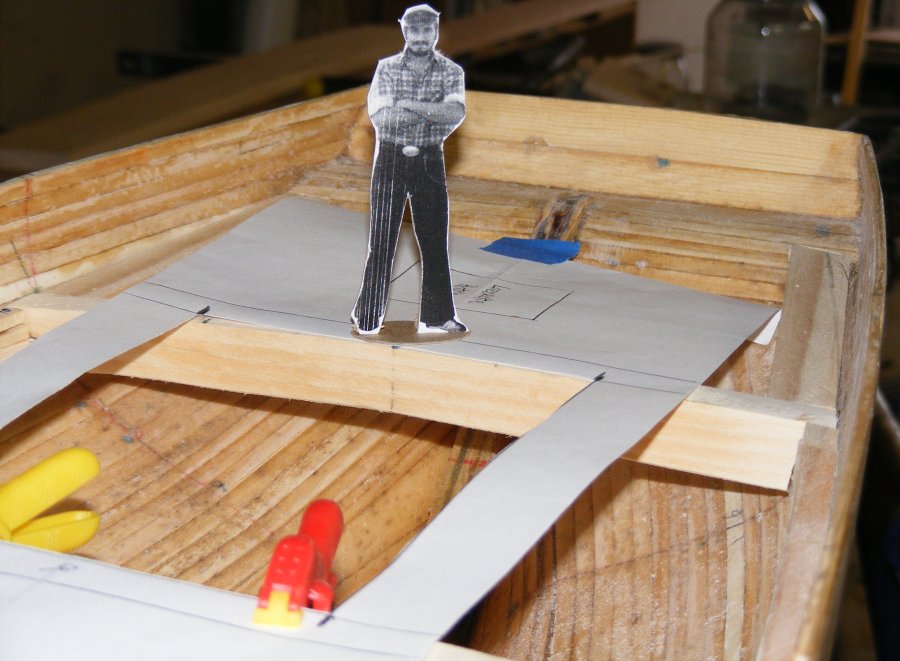
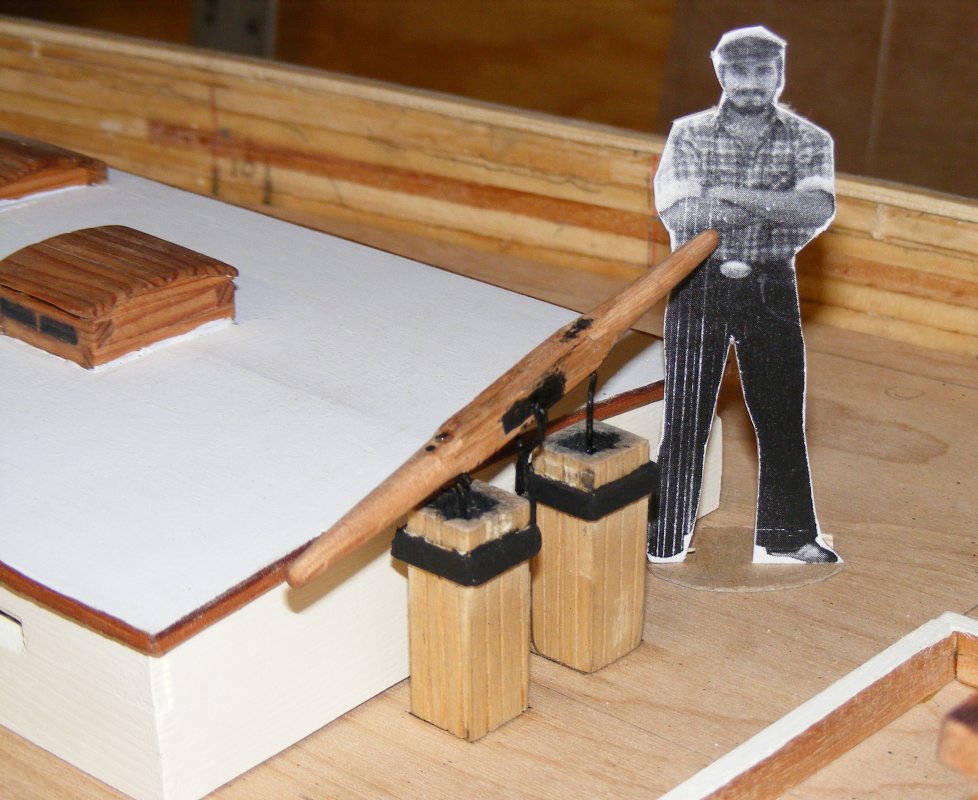
A much younger me in 1:20 scale. |

3/31
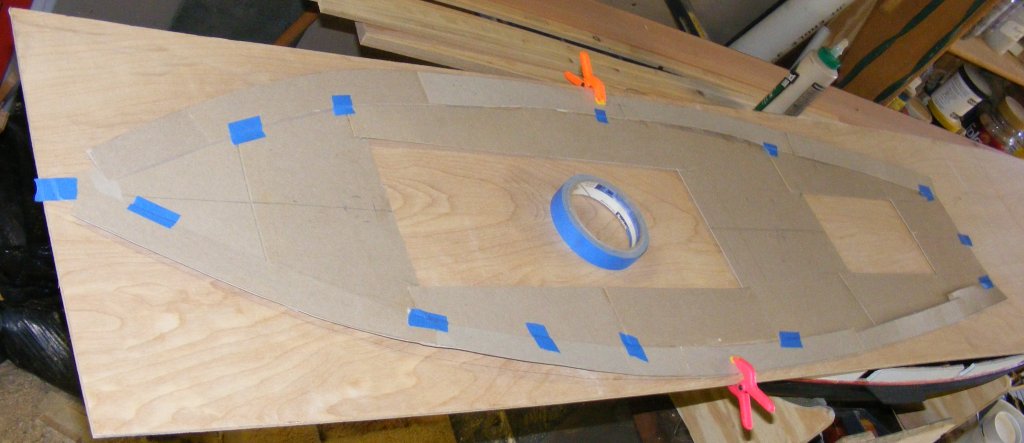
Making a cardstock deck template. |

Made a cardstock deck template. |

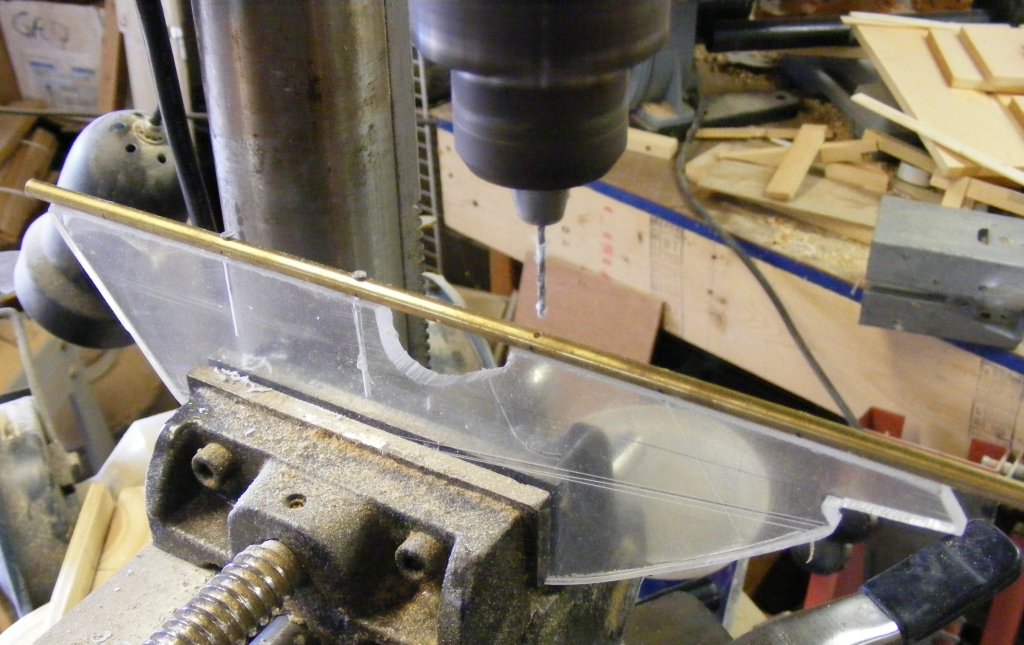
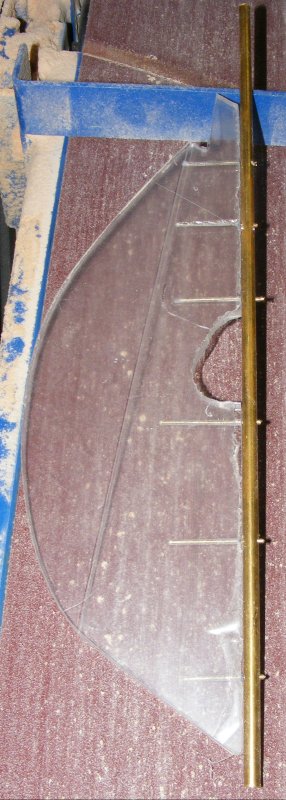
Cutting the tube that reenforces the keel-bolt hole. |

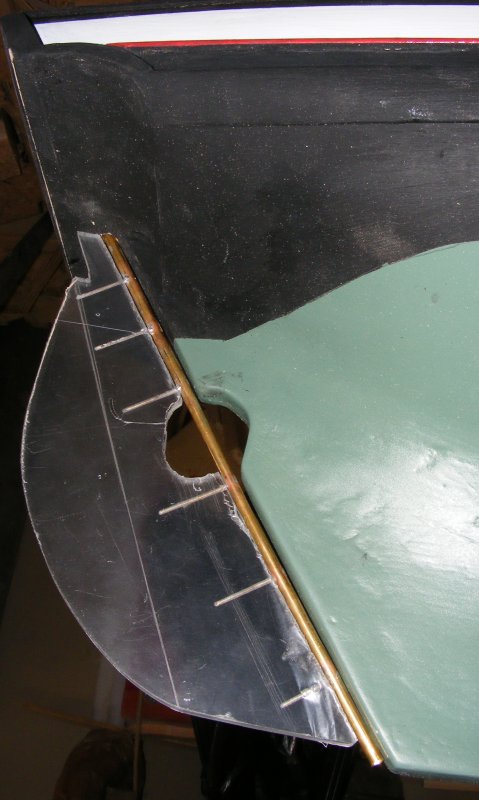
Board in place with keel-bolt installed. |

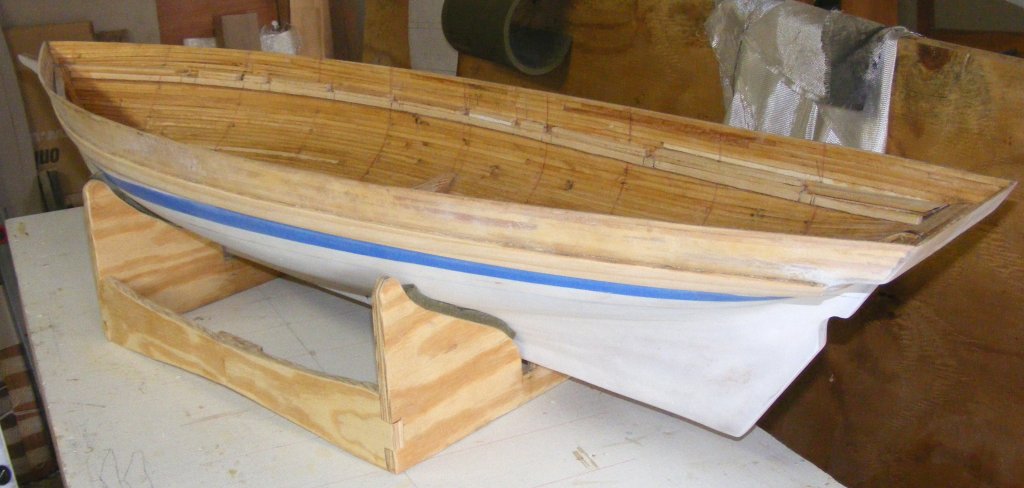
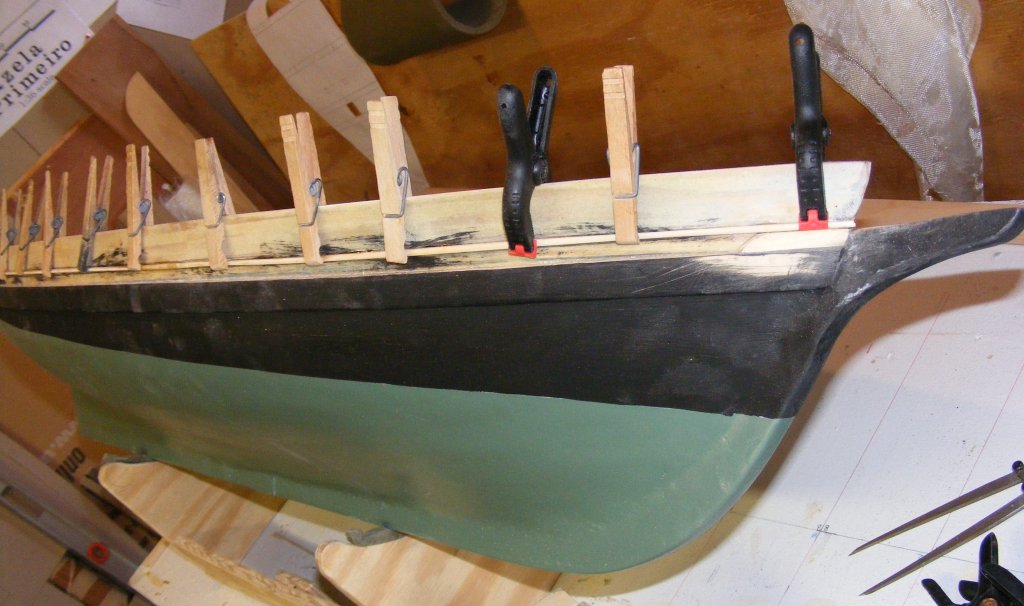
Starboard wale epoxied on. |

4/2
Starboard wale while wet port wale is clamped on. |

Port wale epoxied on. |

4/4
Port wale. |

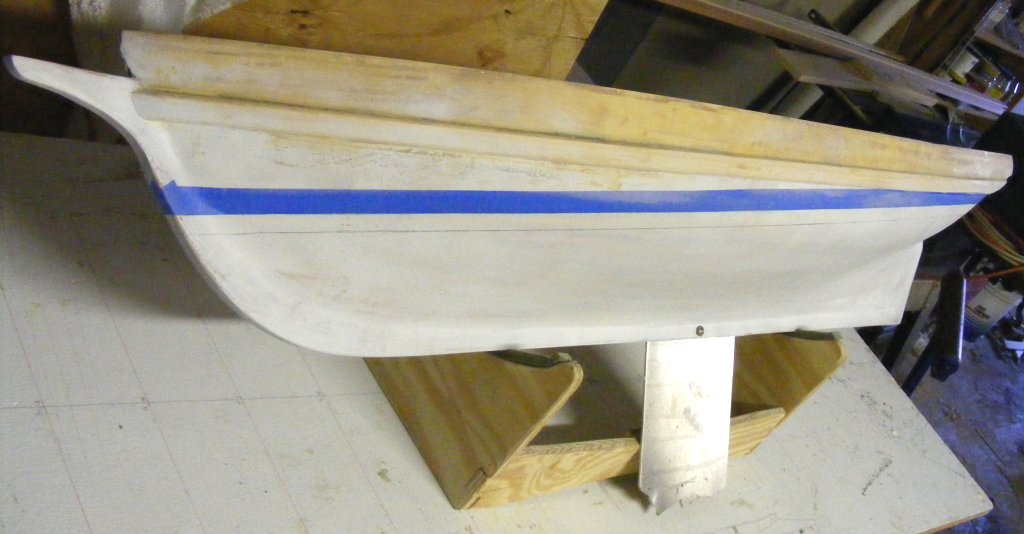
A coat of primer. |

Waterline taped. |

4/5
Wales thinned out. |

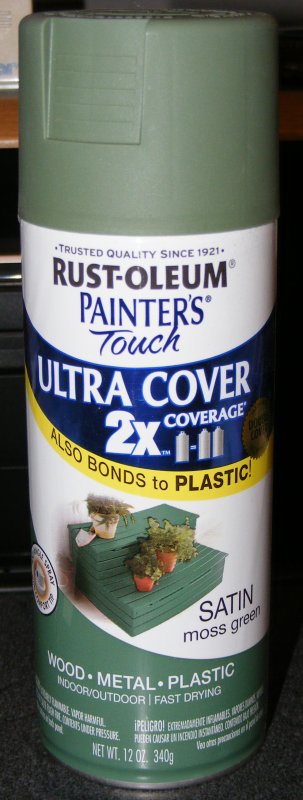
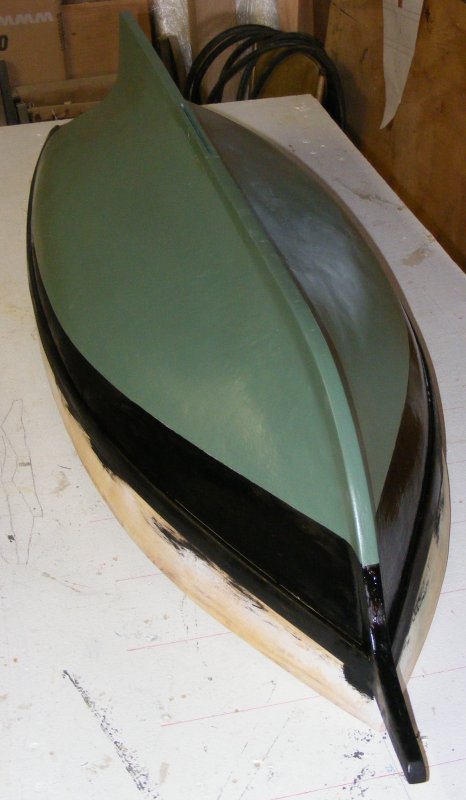
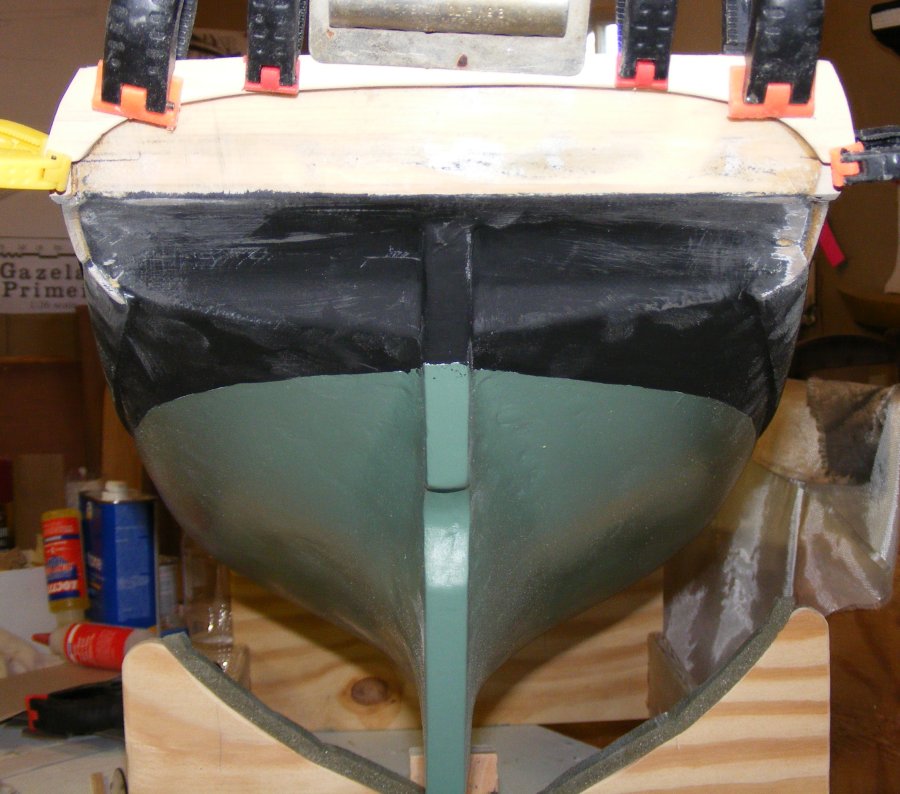
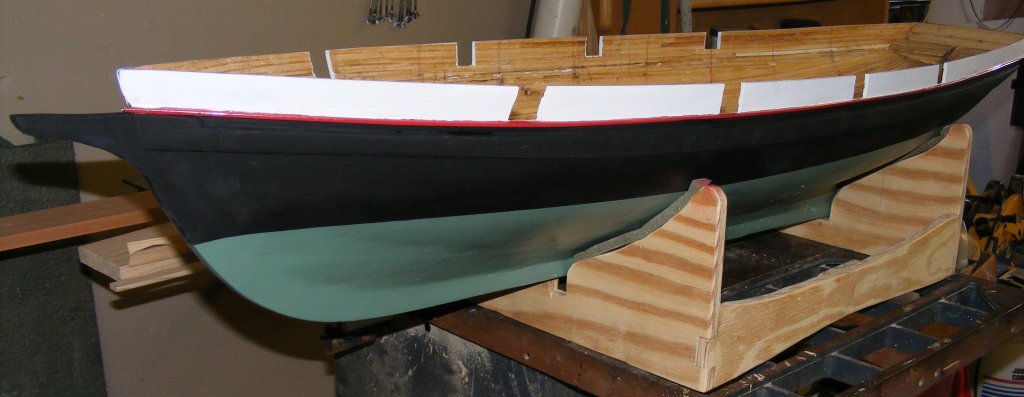
Moss Green paint. |

Bottom painted. |

Sides painted to the tops of the wales. |
 |

Hawse bolsters and starboard molding going on. |

Forward channels cut; starboard one installed. |

4/6
Port side molding installed, more paint,
and gunports cut out. |

4/7
Fashion pieces fitted. |

Transom wings fitted. |

Transom arch epoxied on. |

Lower transom attached. |

4/9
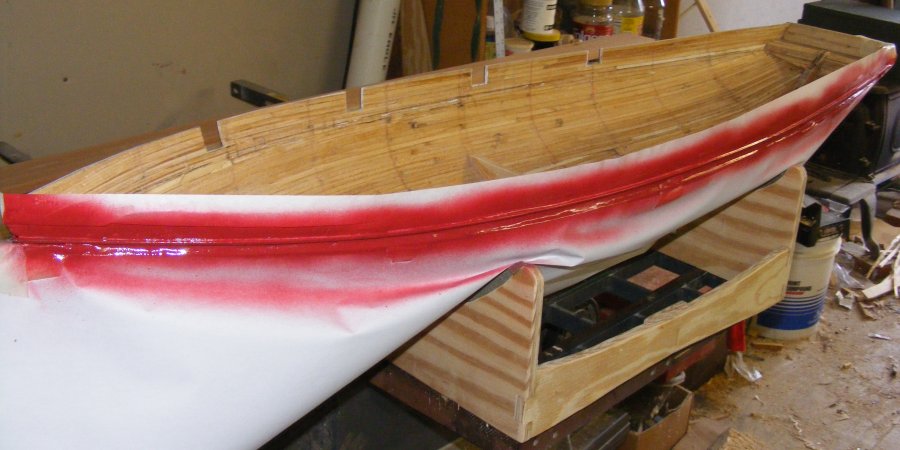
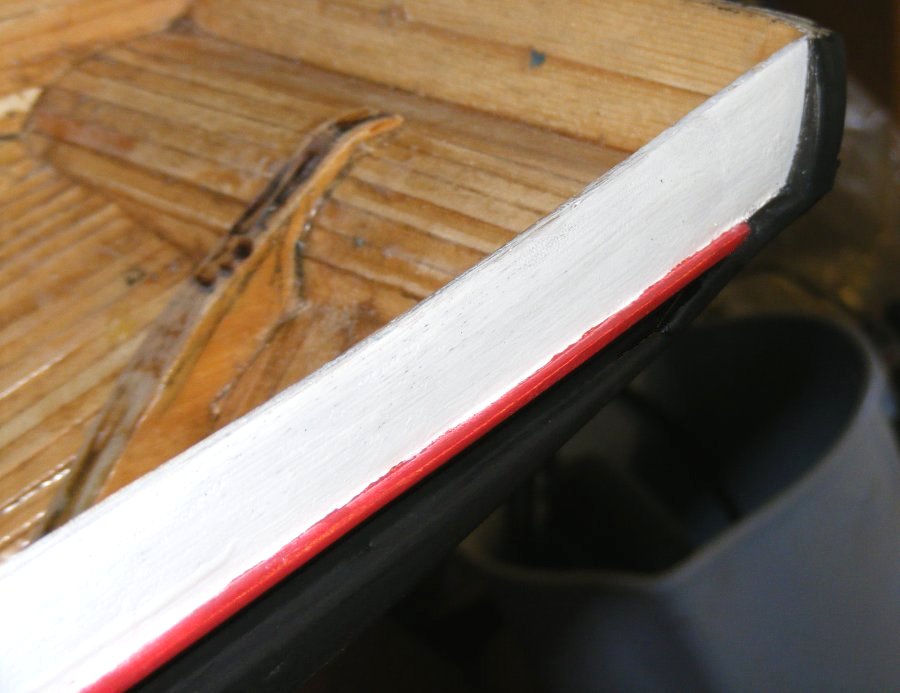
Masked off to spray the red molding. |

Molding sprayed and some touch-up. |

Port quarter. |

4/10
Installing the port channels. |

Installing the starboard channel. |

A coat of paint drying outside. |

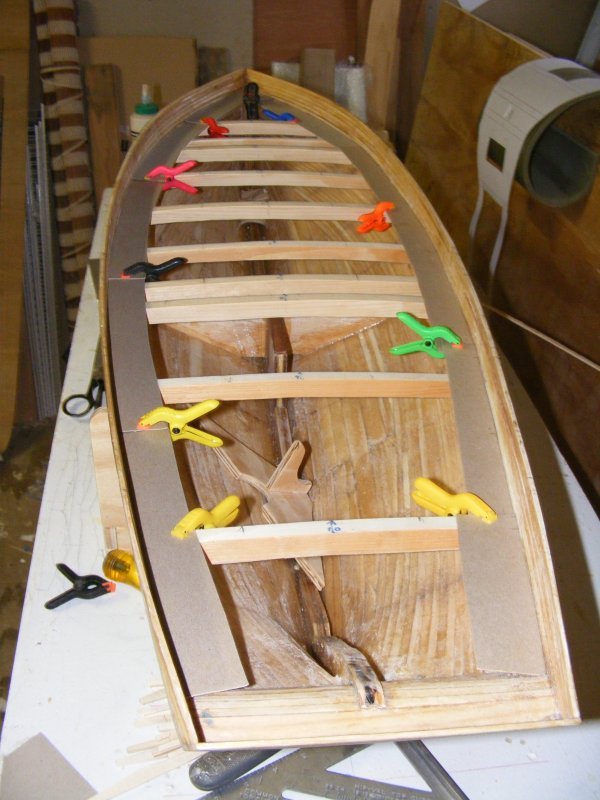
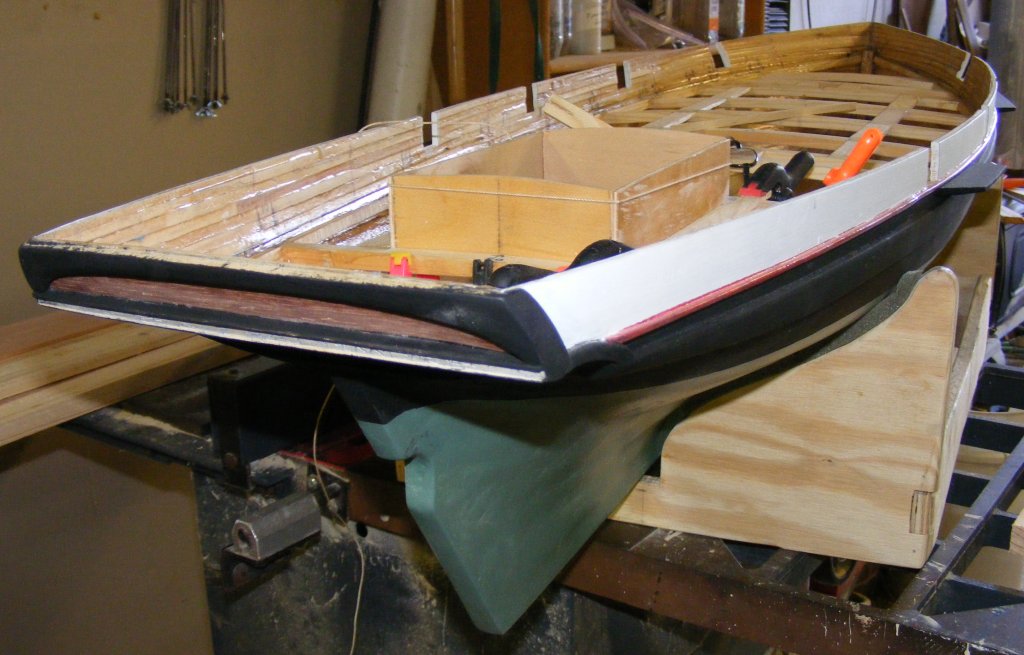
New deck clamps, resized deck beams,
mast partners, and cabin stringers. |

4/13
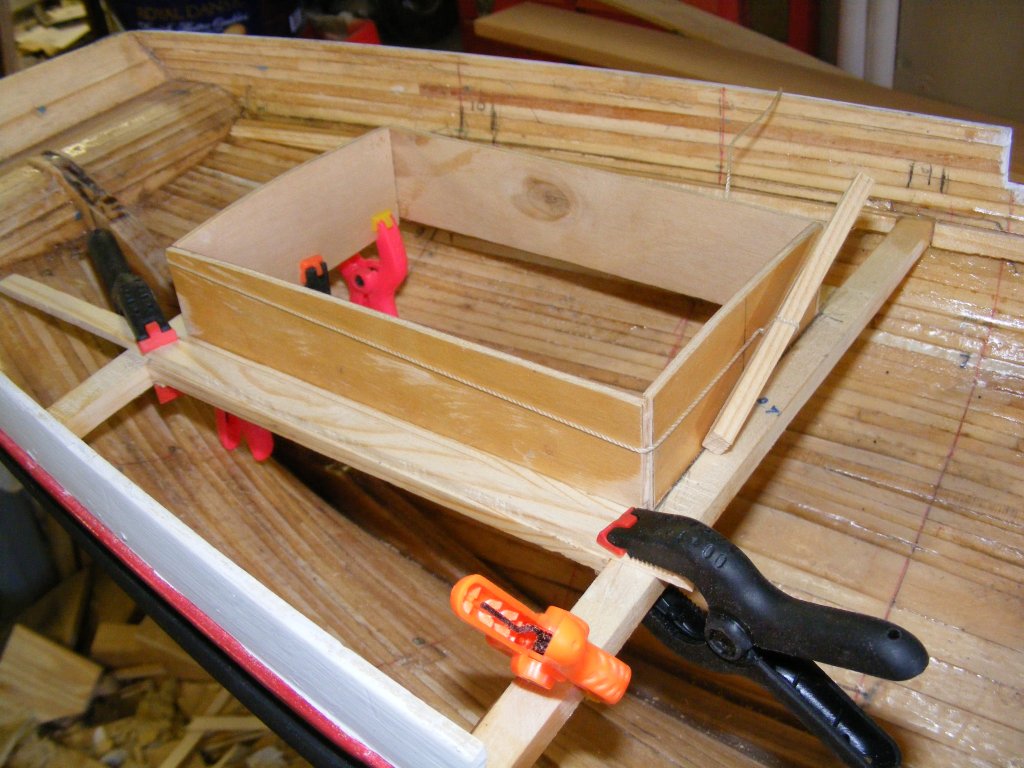
Transom filler installed and cabin trunk made. |

Cabin trunk. |

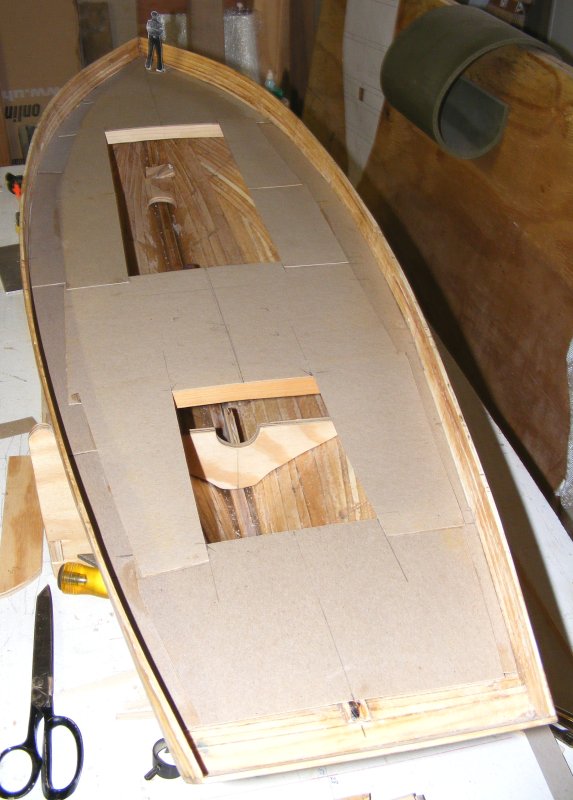
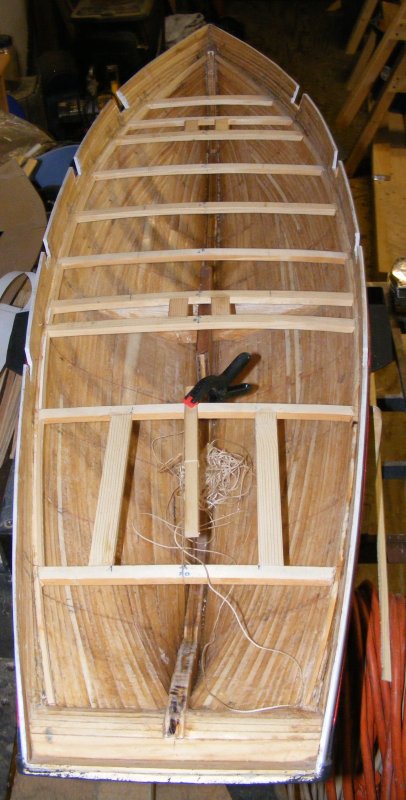
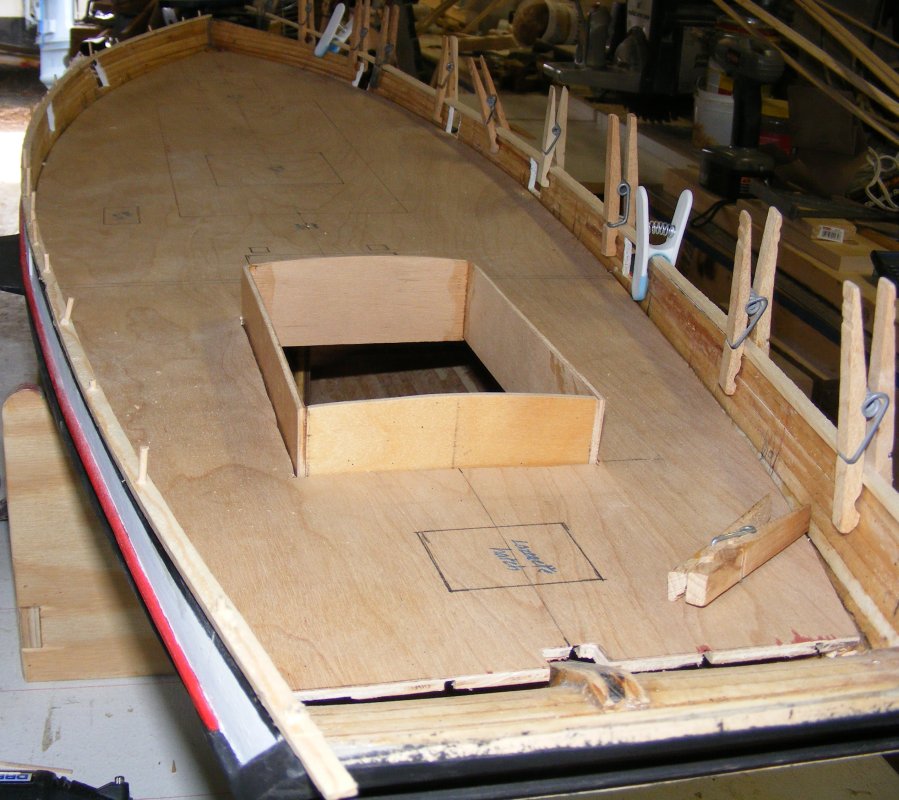
Tracing deck pattern onto plywood. |

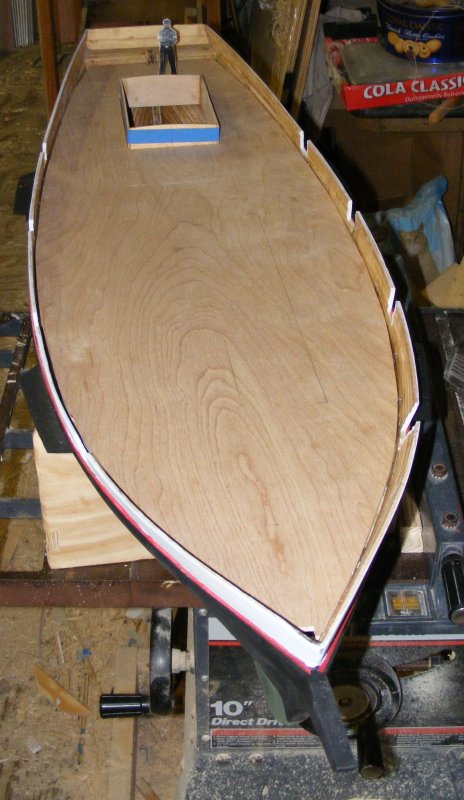
Subdeck fitted. |

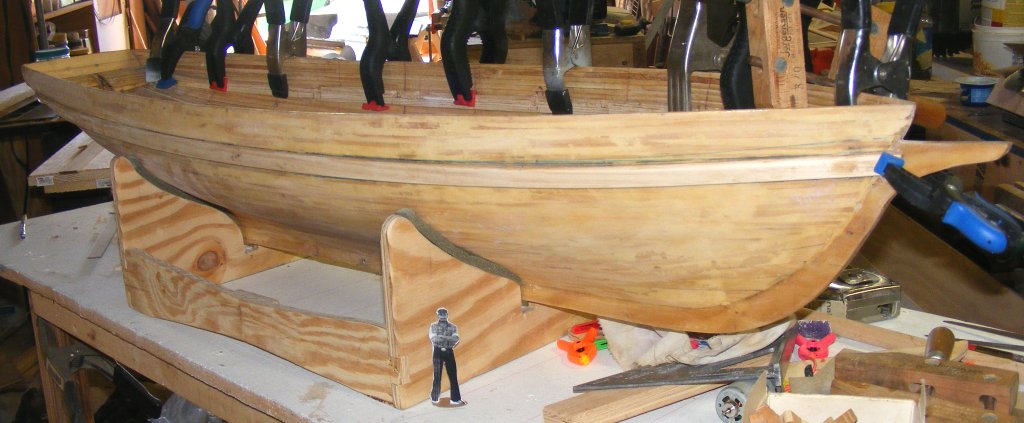
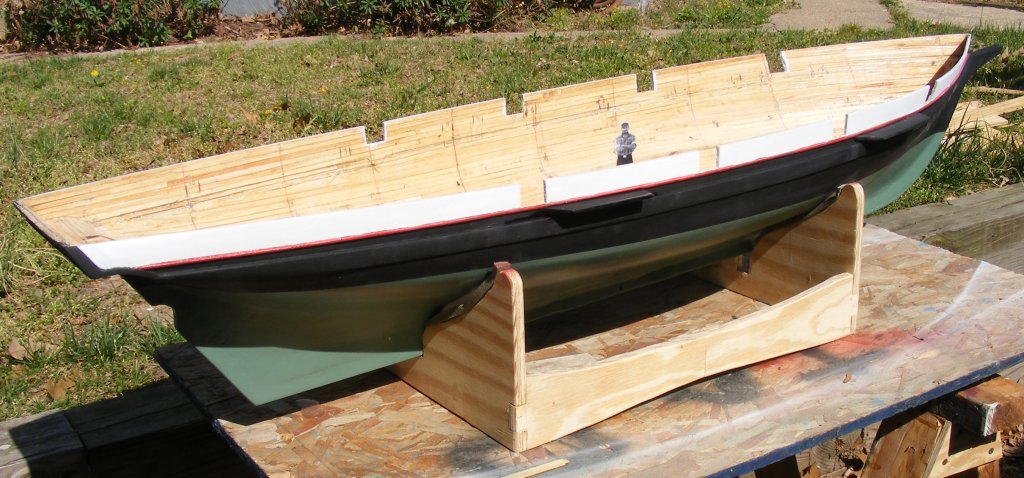
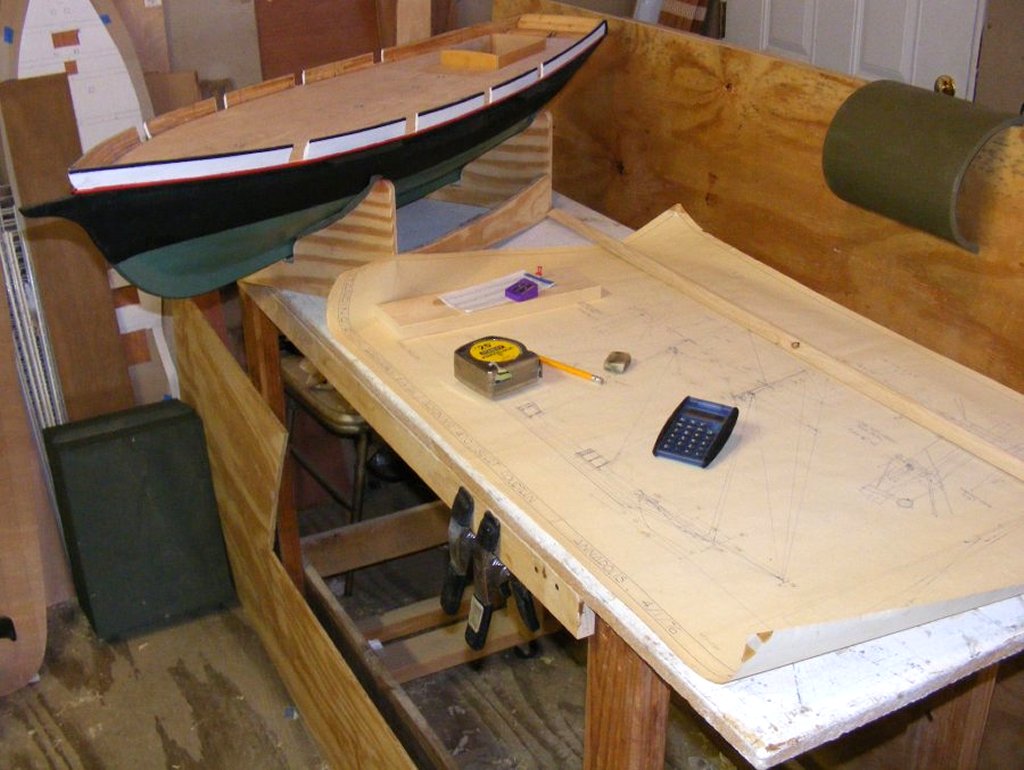
4/14
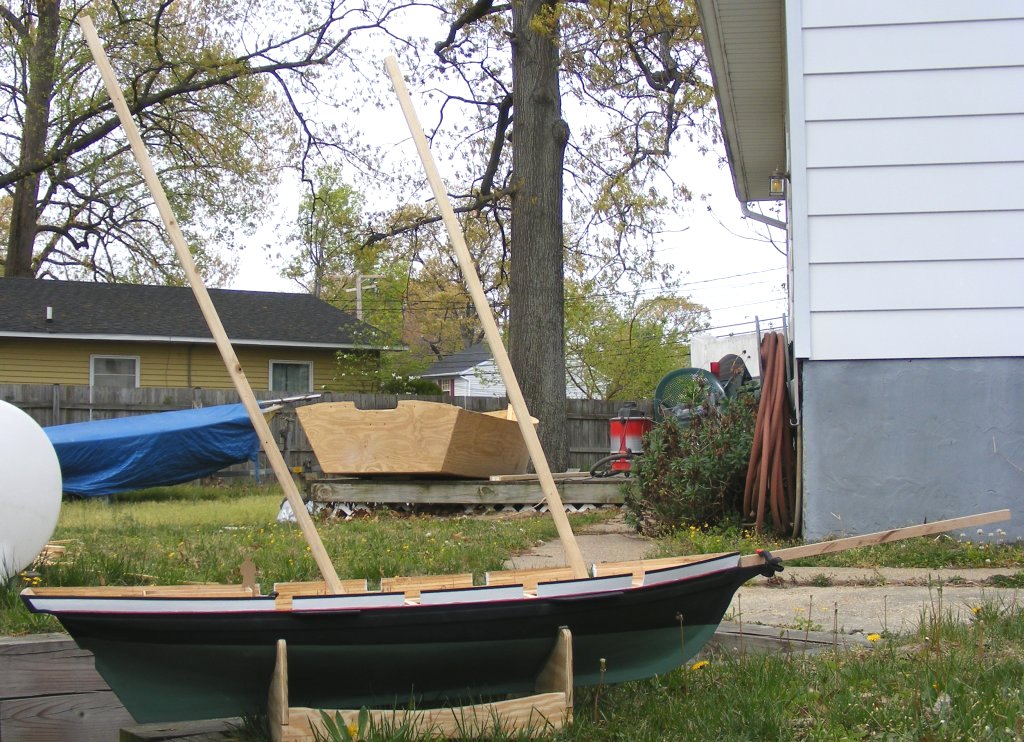
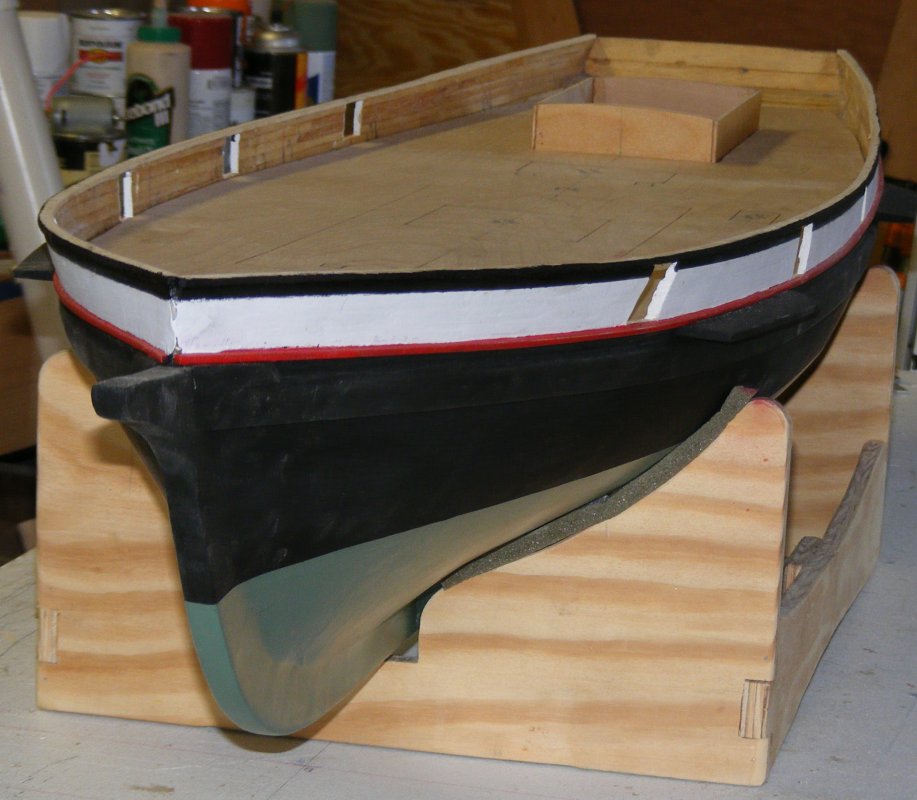
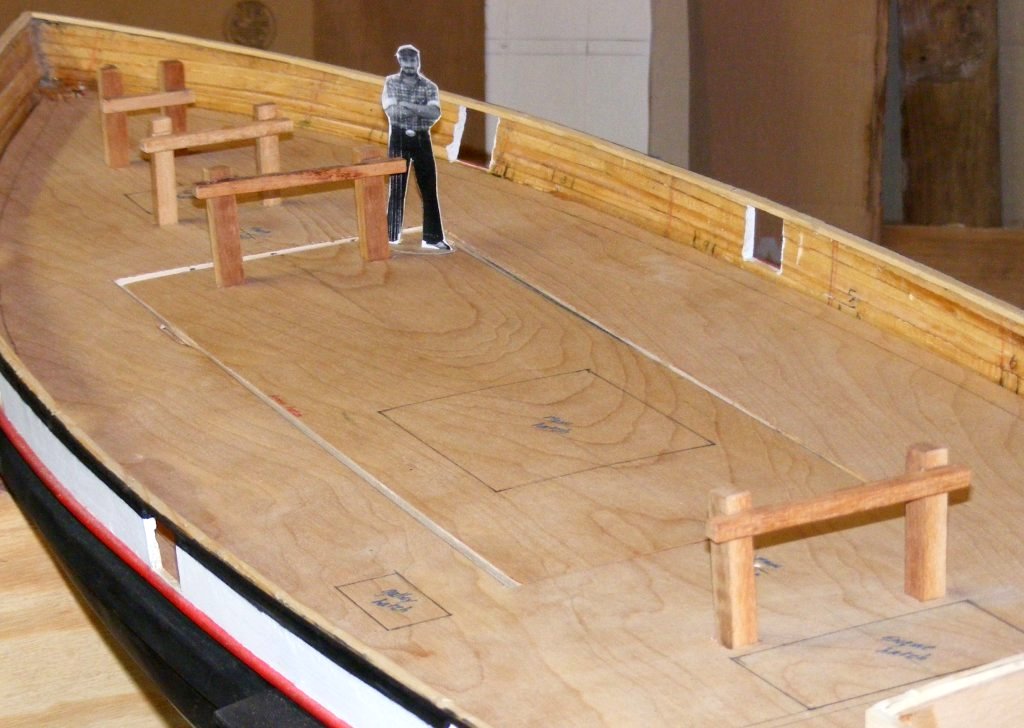
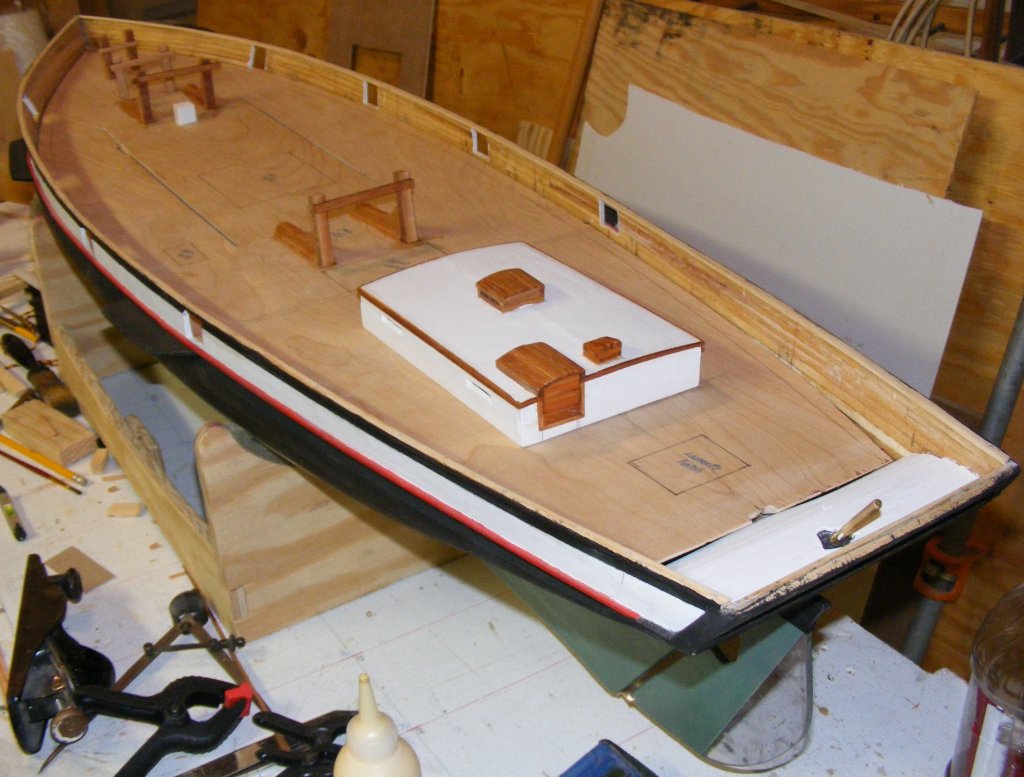
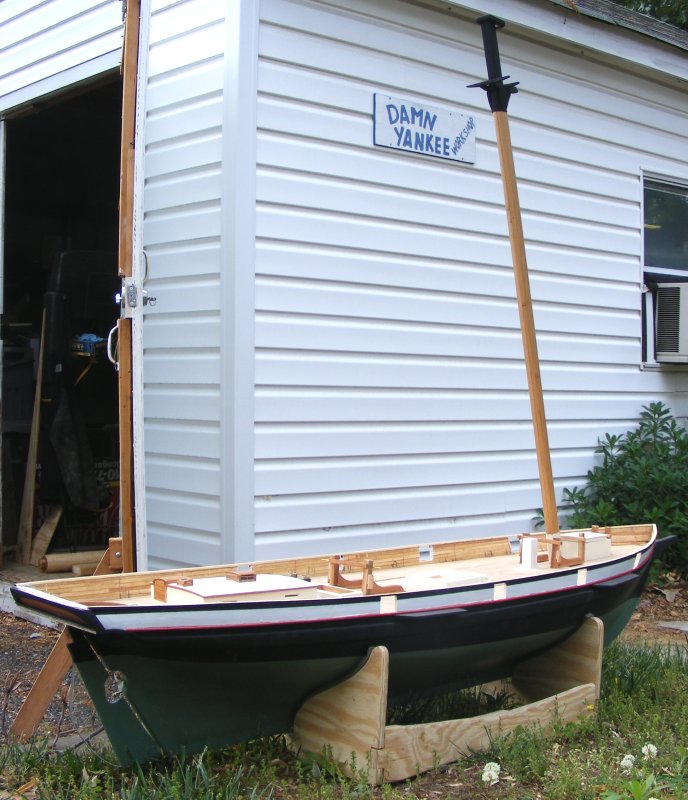
A little more paint and
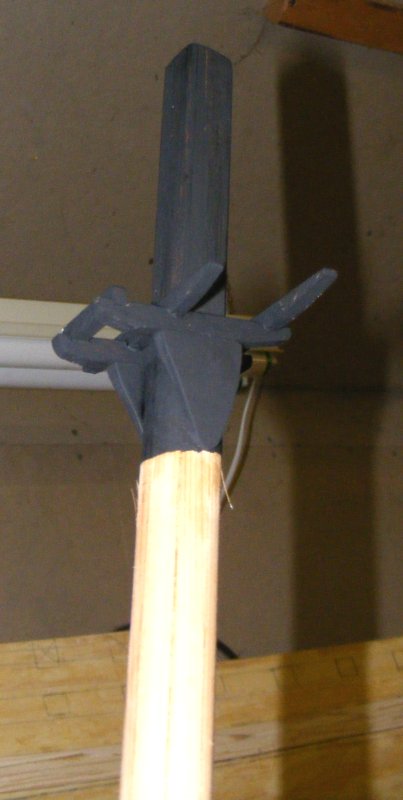
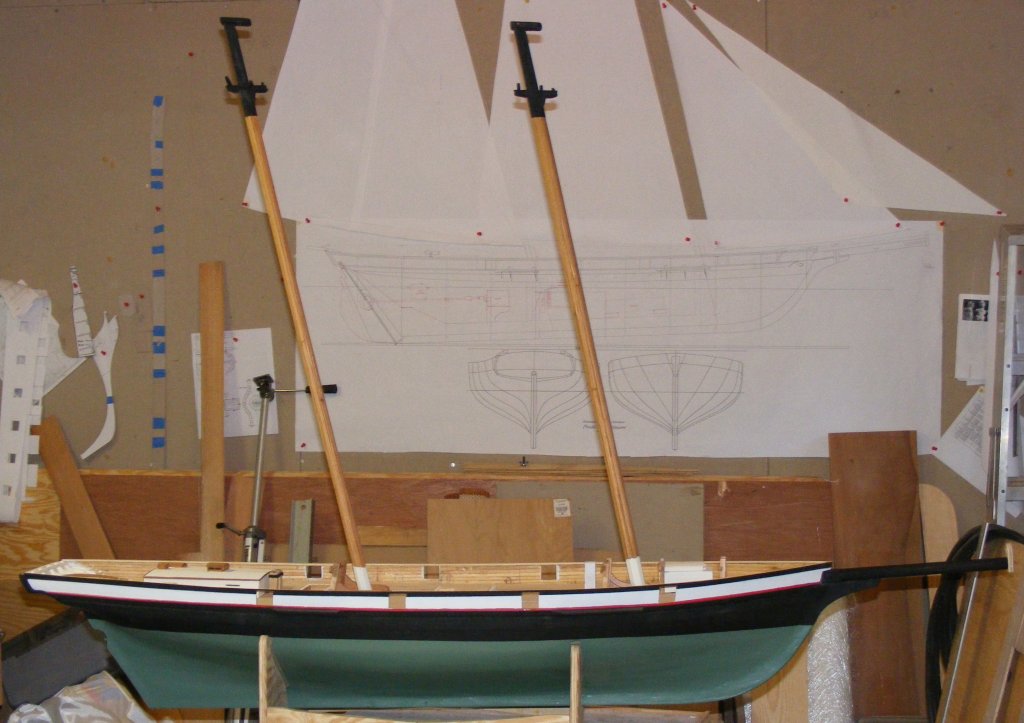
some sticks to get an idea of what she'll look like. |

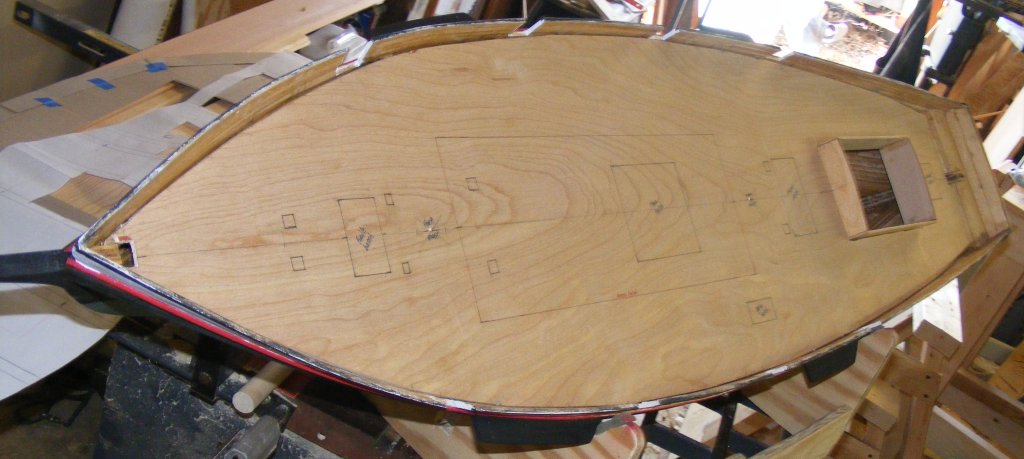
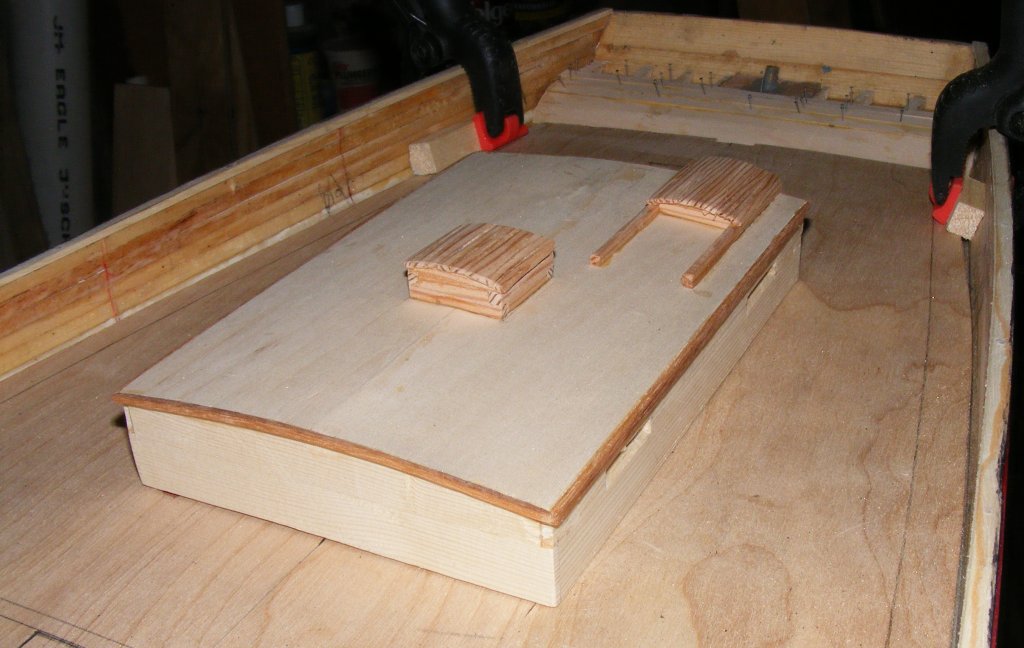
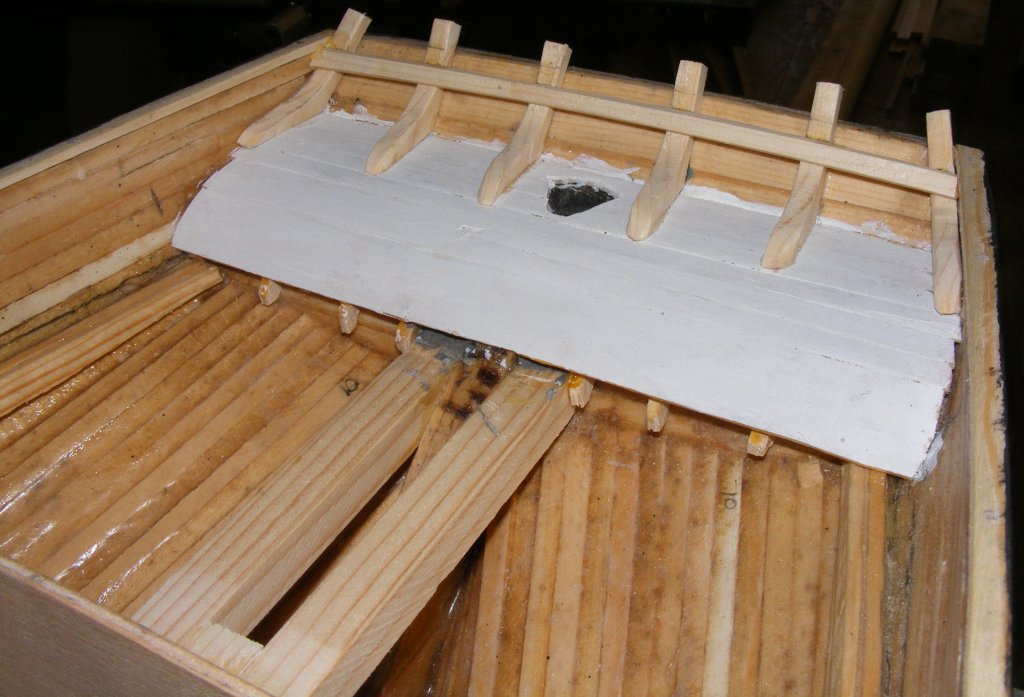
Deck furniture marked on subdeck. |

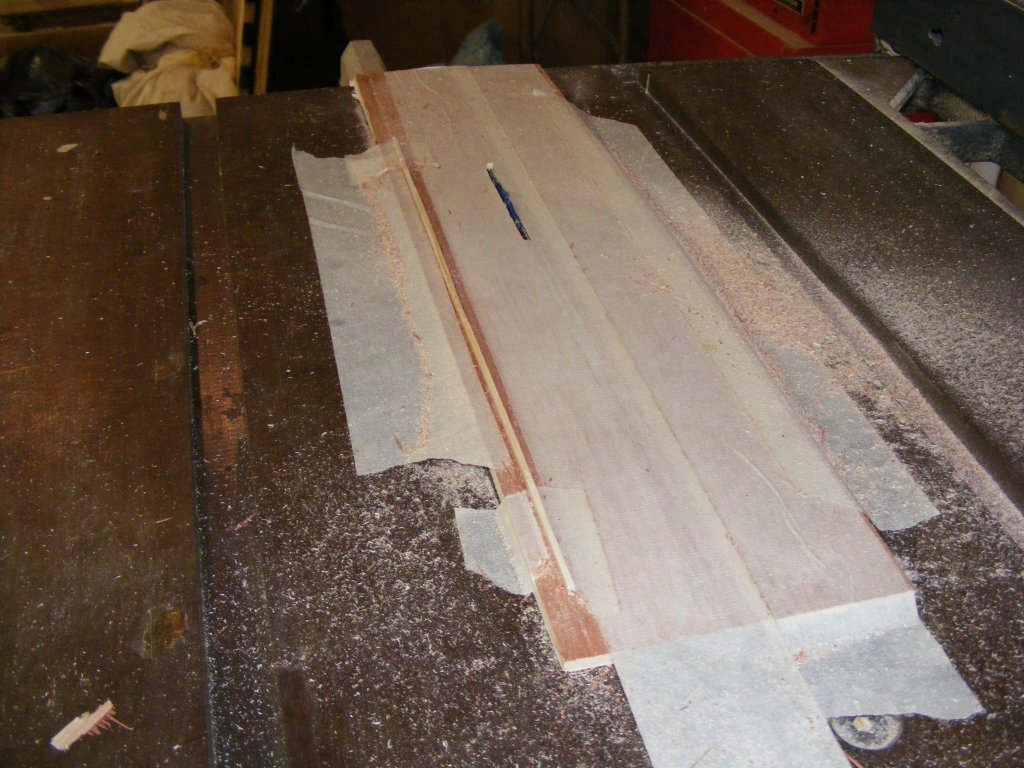
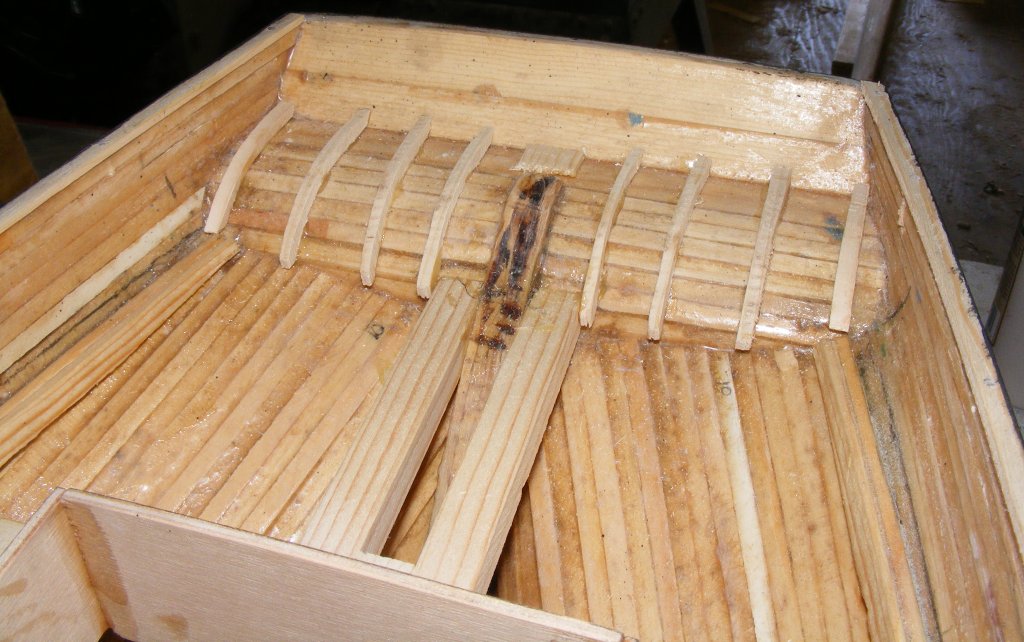
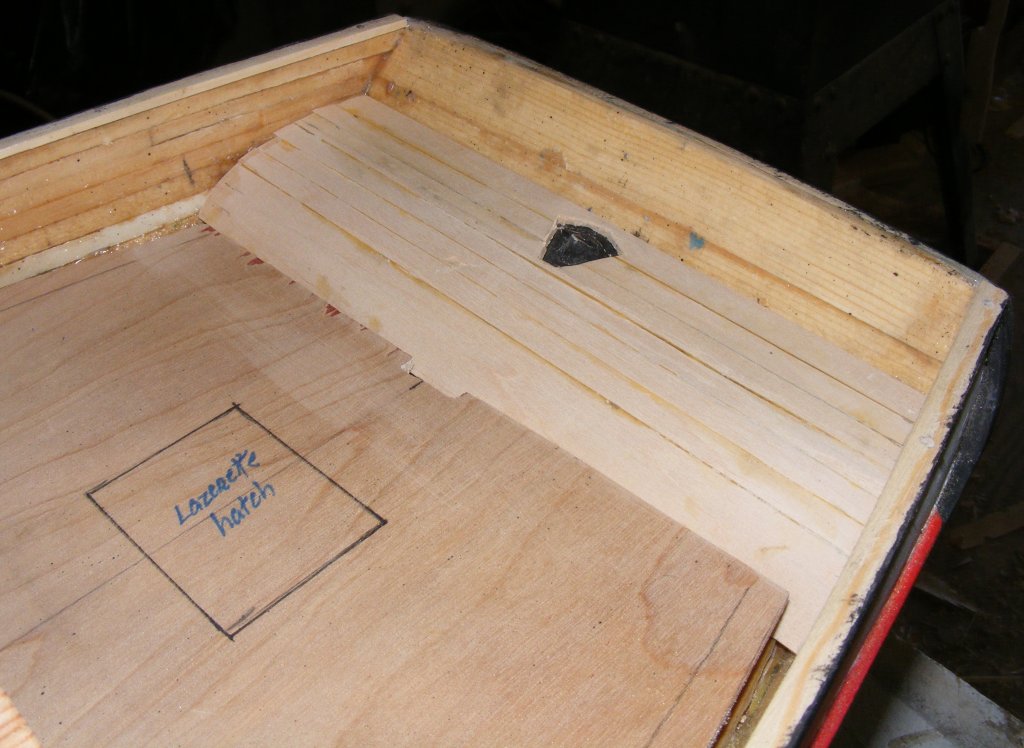
4/15:Table saw jig to cut parallel kerfs in underside of subdeck 1-1.2" apart. |

Kerfs cut. |

Subdeck will now bend to deck camber. |

4/17
Marking 1:20 scale measurements on the spar plan.. |

4/18
Motor mount plate from an electrical box cover. |

4/19
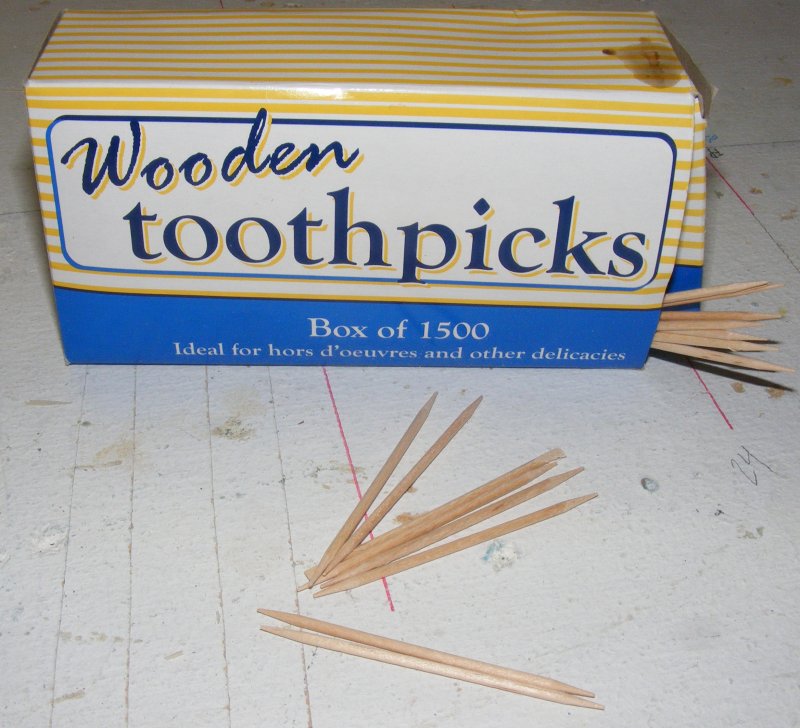
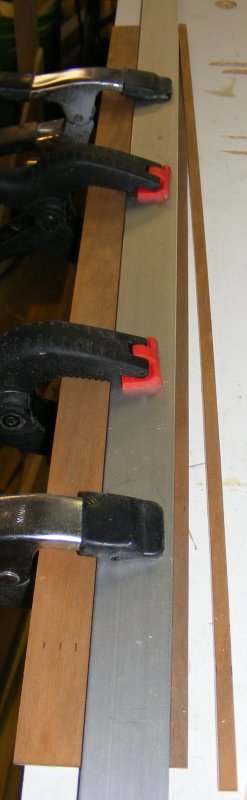
Trenails, also known as toothpicks. |

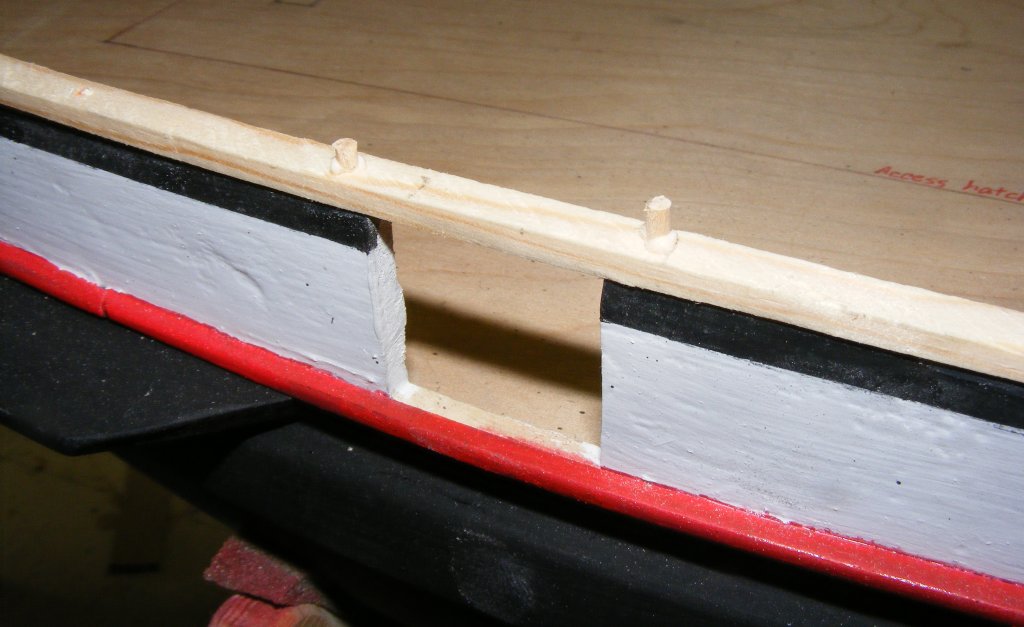
Pegging on the timber cap rail. |

One rail pegged while the other takes shape. |

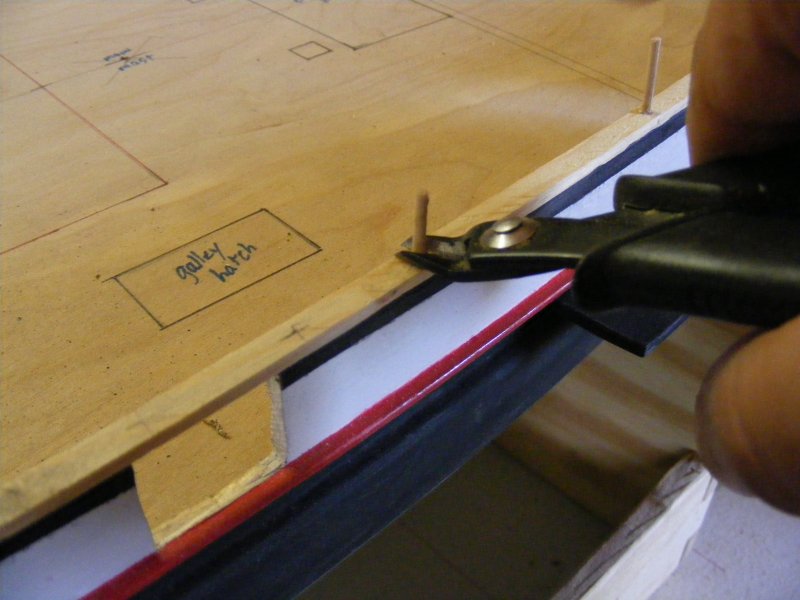
Nipping off the pegs. |

Pegs cut, everything sanded, and some paint. |

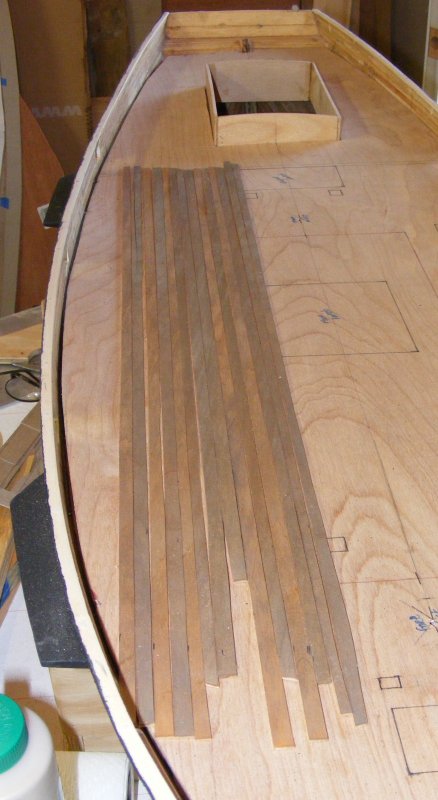
4/20
Staining basswood sheets:
L: gray then oak
M: oak then gray
R: plain bass. |

Cutting planks. |

Looks like that will work. |

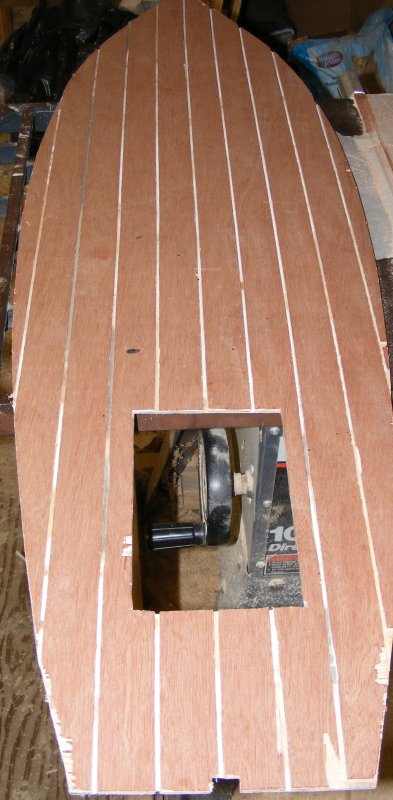
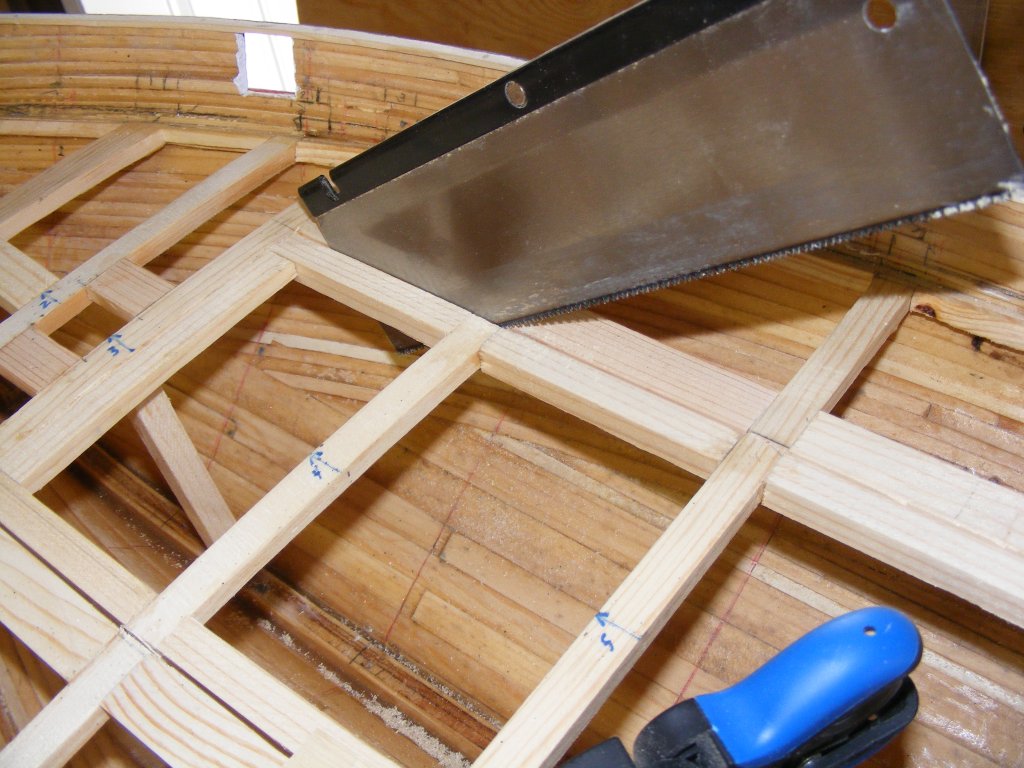
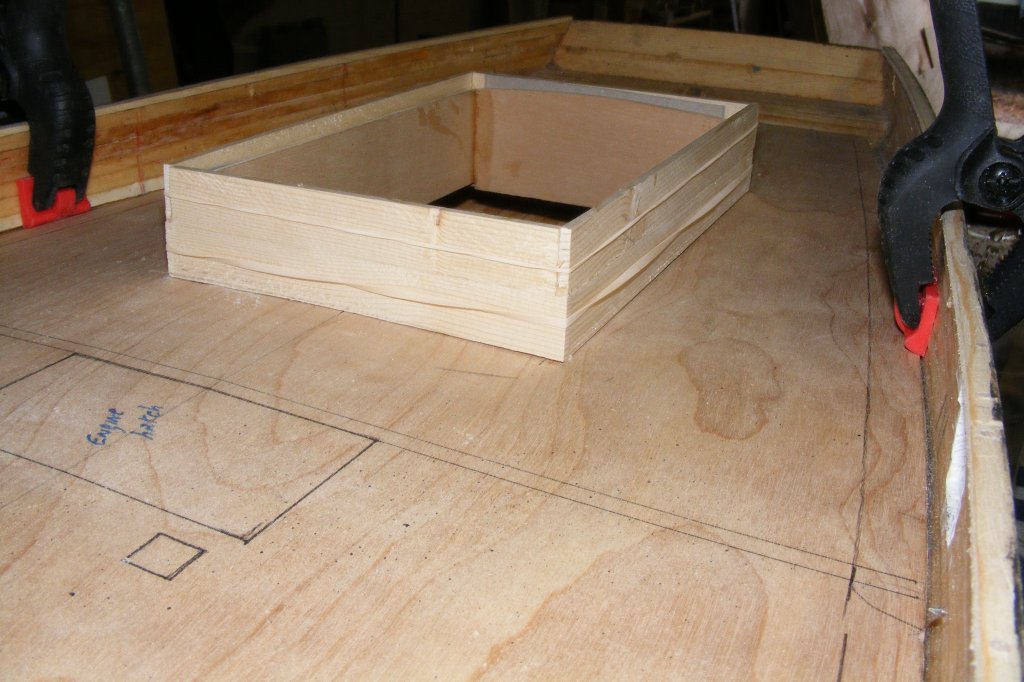
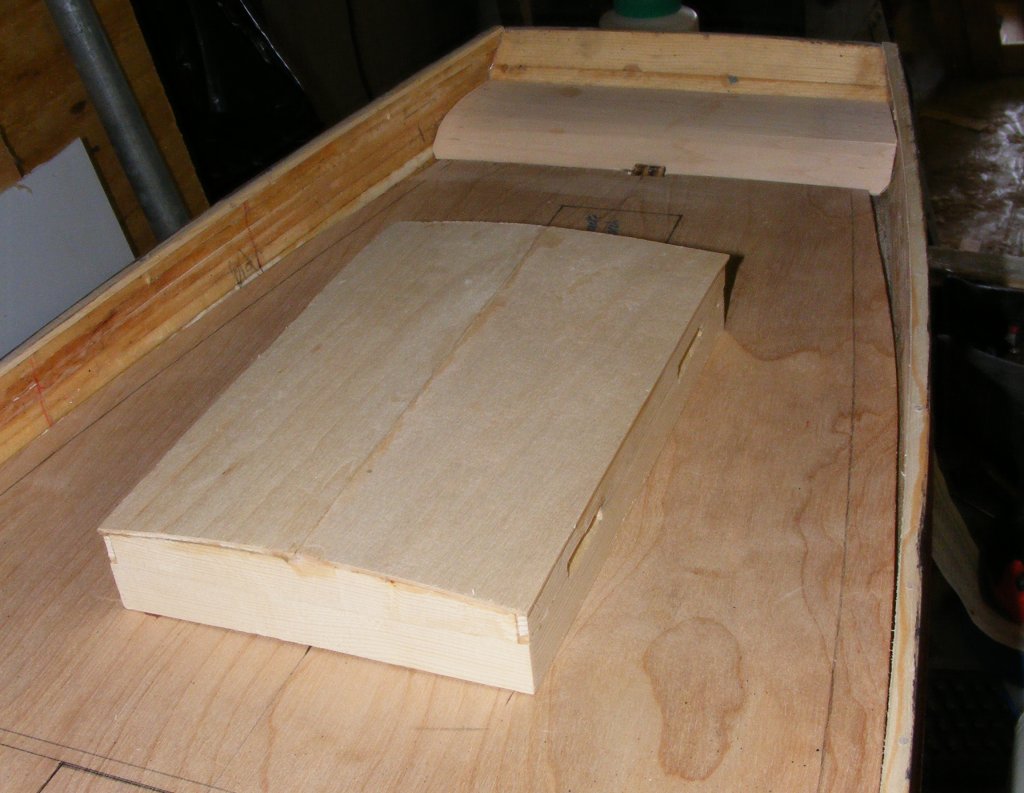
Access hatch cut in subdeck. |

Framing the access hatch. |

4/21
Cutting out the access hatch. |

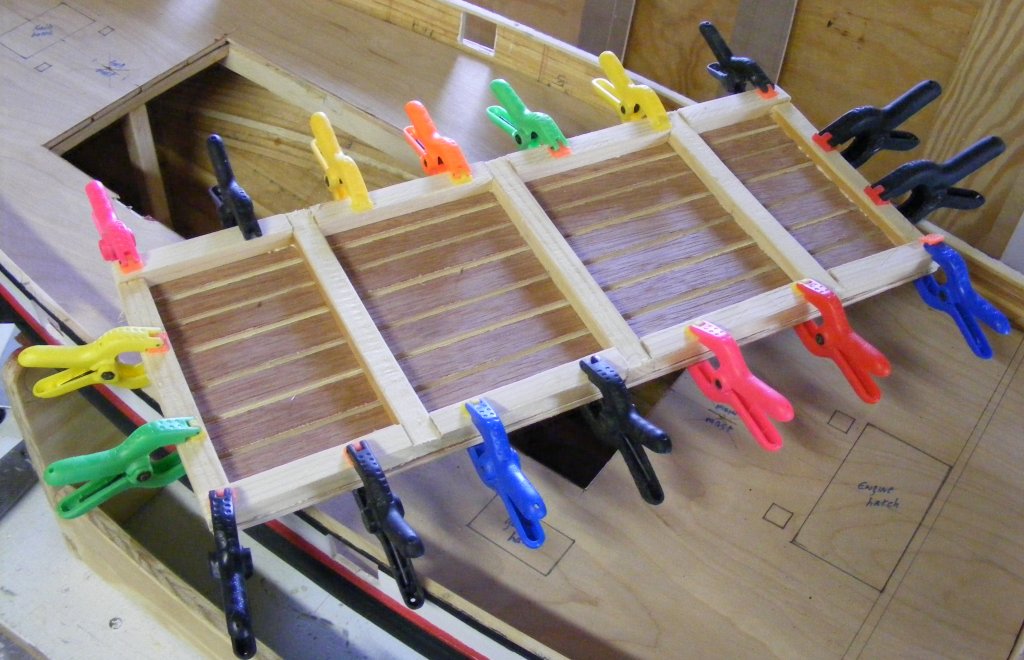
Gluing up the access hatch cover. |

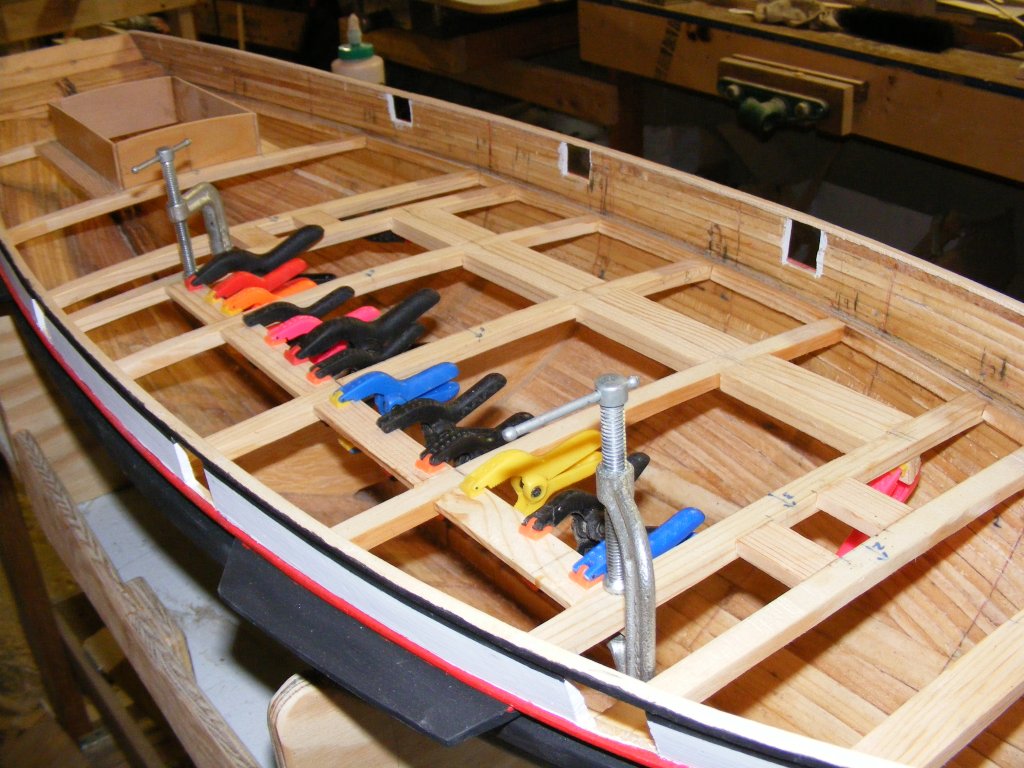
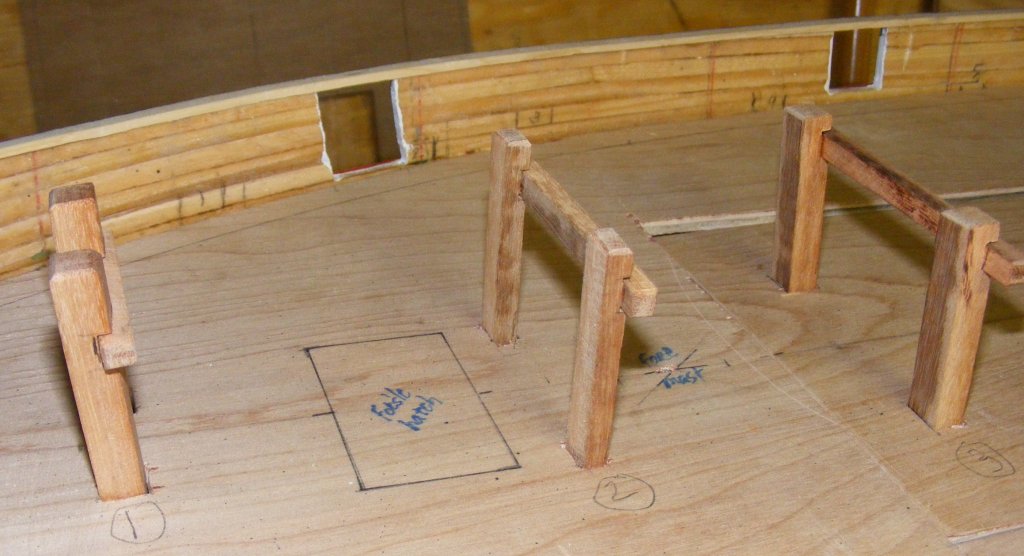
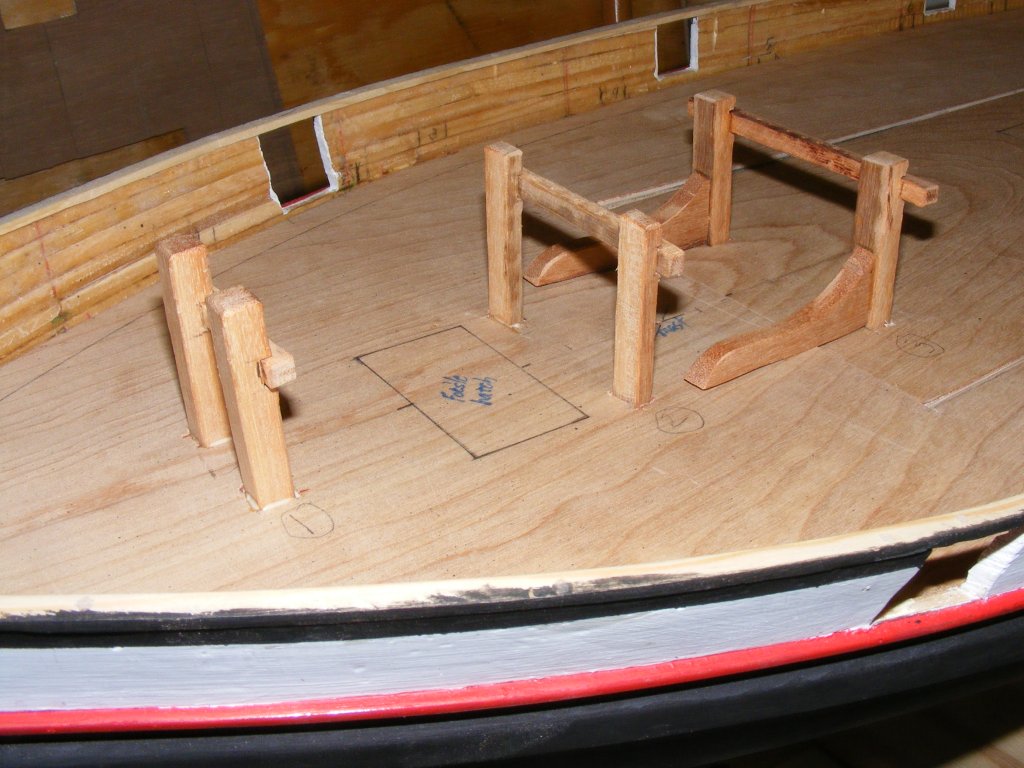
Additional deck framing and support posts at mast partners. |

Two hatches. |

Deck framing. |

Bulkhead #7 epoxied into the hull. The motor mount plate has been painted red. |

Wood from Pride's mast cut into 3/16" slabs. |

Constructing the cabin trunk. |

4/22
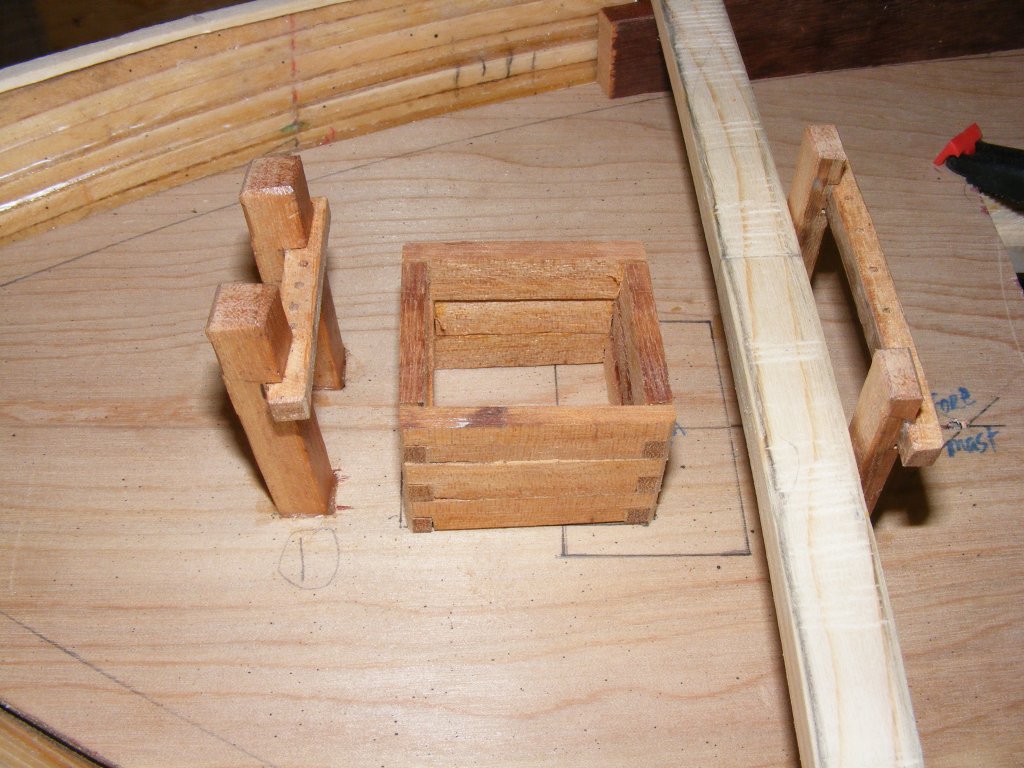
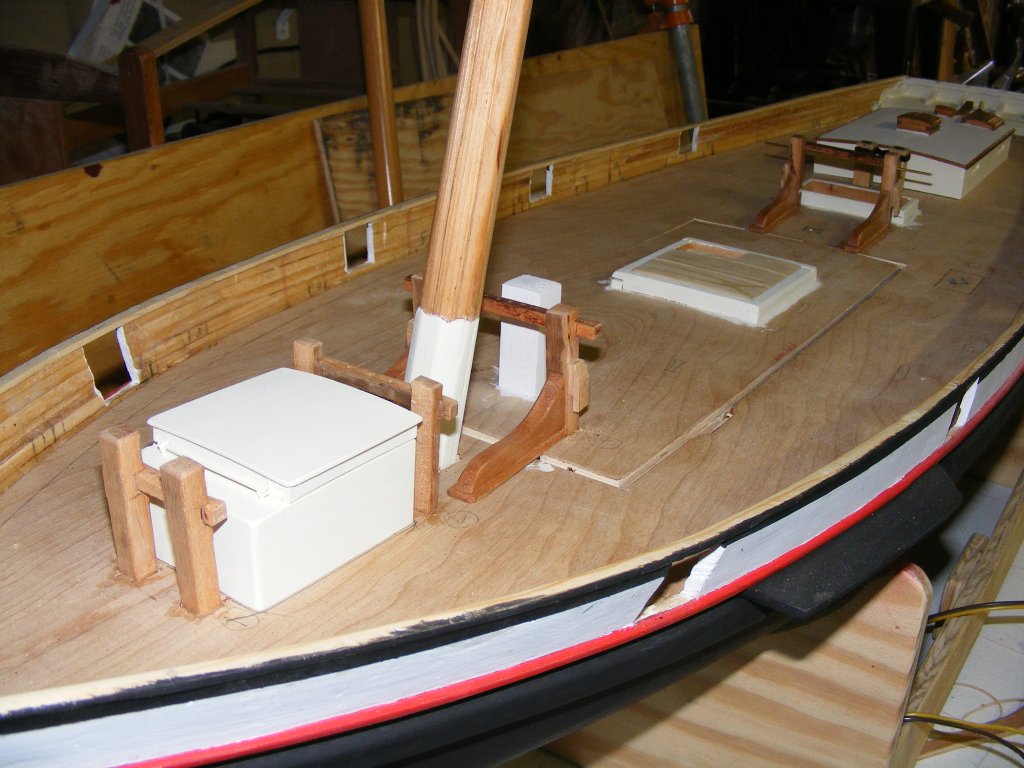
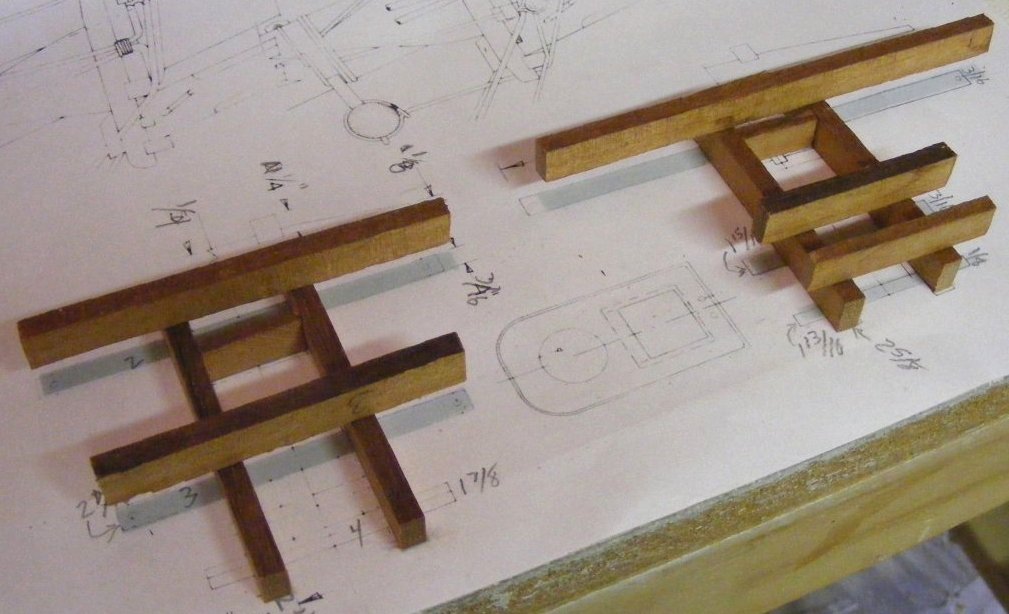
Bitts. |
 |

4/23
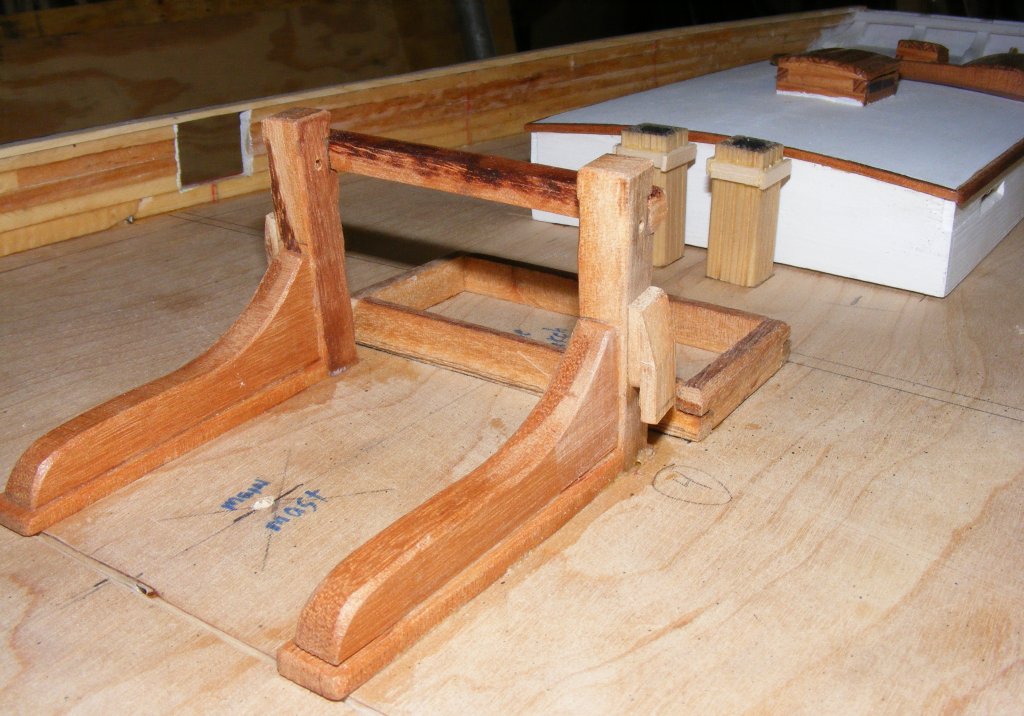
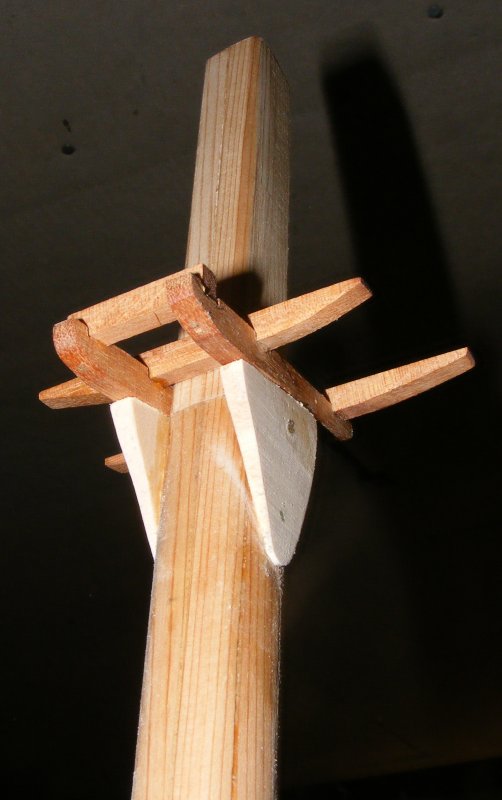
Aft riding bitt with windlass axle and knees. |

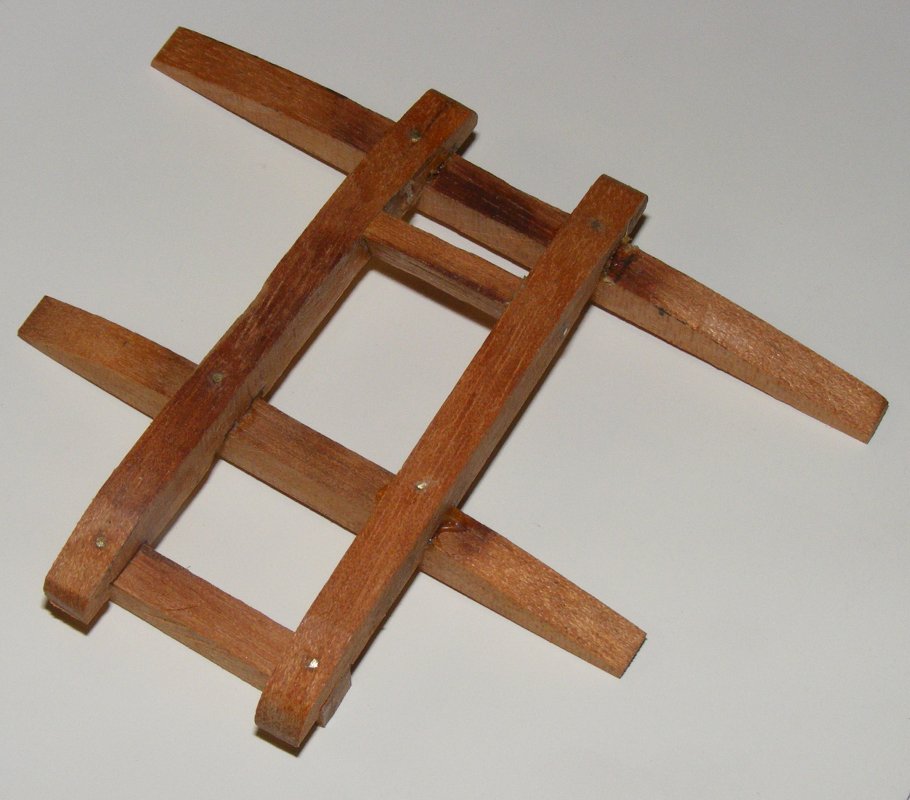
Forward bitts. |

4/24
Counter framing. |

Cabin top installed. |

Inside the cabin top. |

Skylight made of wood from the original boat. |

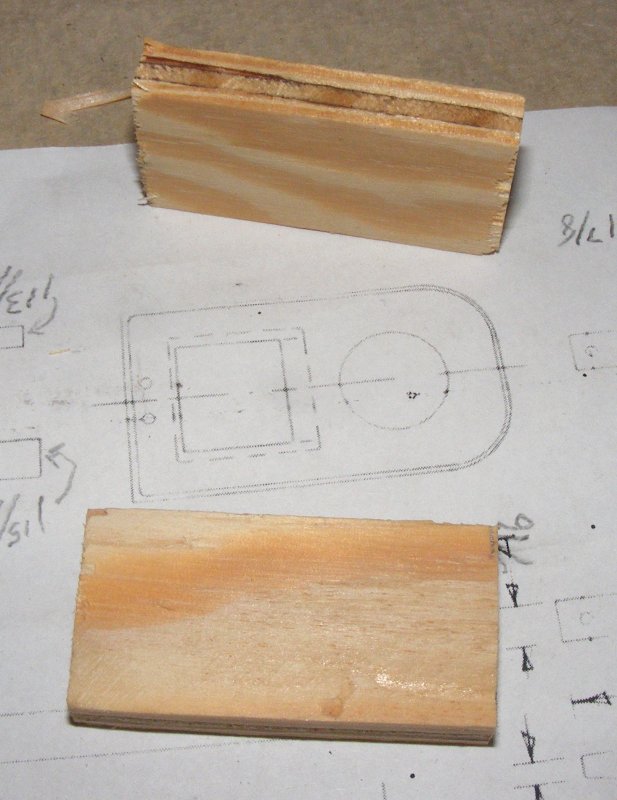
4/25
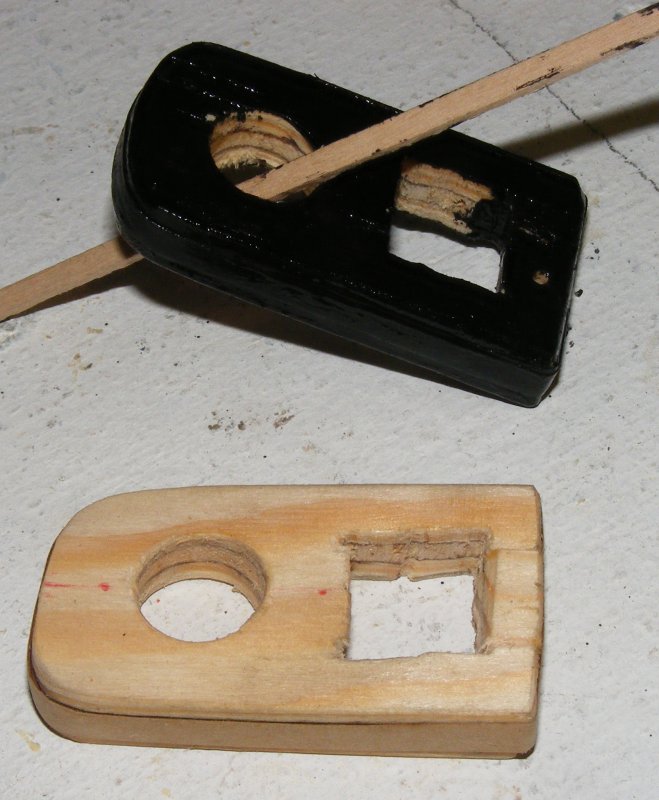
Oak block for rudder tube. |

Drilling the drift pin holes in the rudder. |

Test fit. |

Against the hull. |

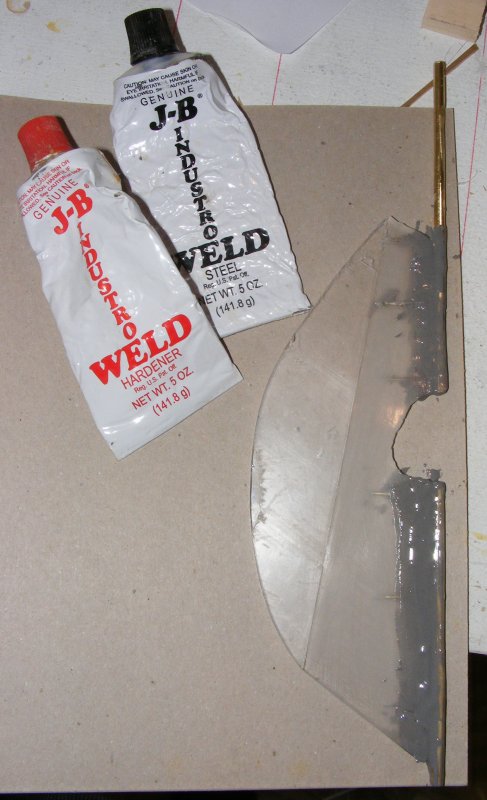
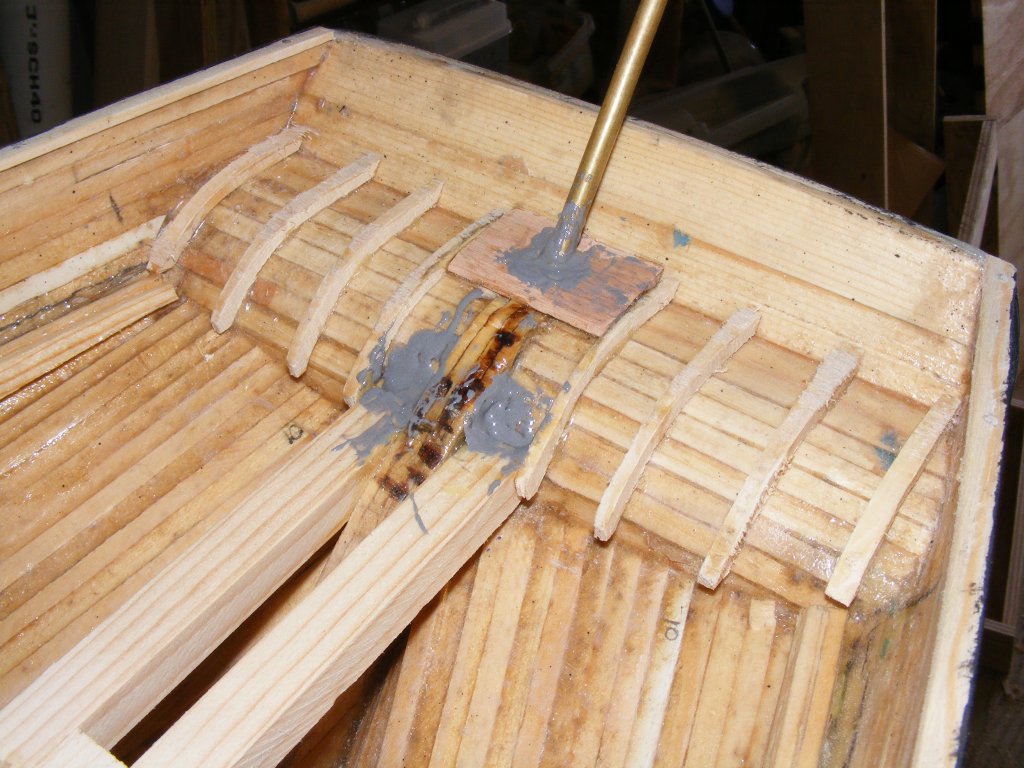
Filling with J.B.Weld. |

Rudder tube in place-inside. |

Rudder tube in place-outside. |

Cabin top with trim, hatch, and skylight in place. |

4/26
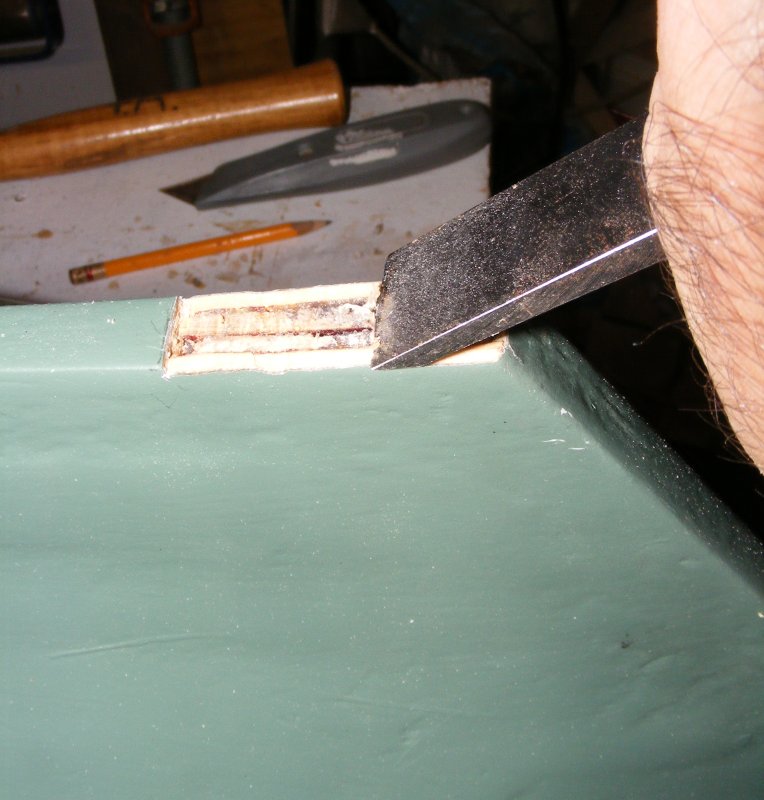
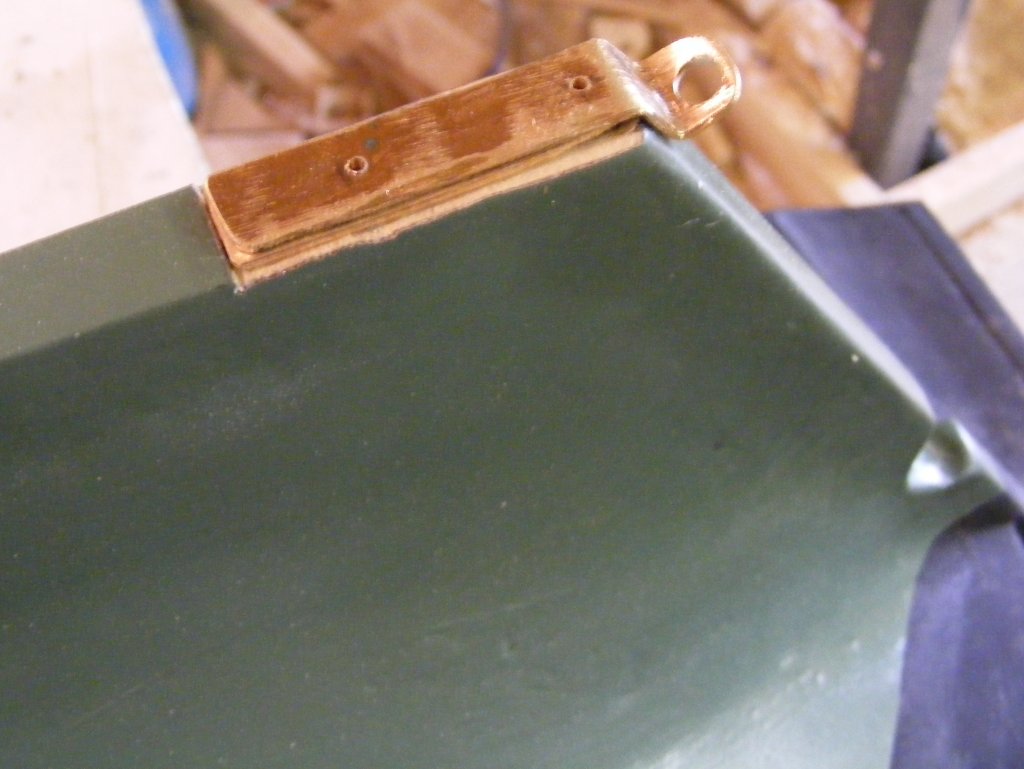
Cutting the motice for the gudgeon plate mounting plate. |

Test fit, now I need some screws. |

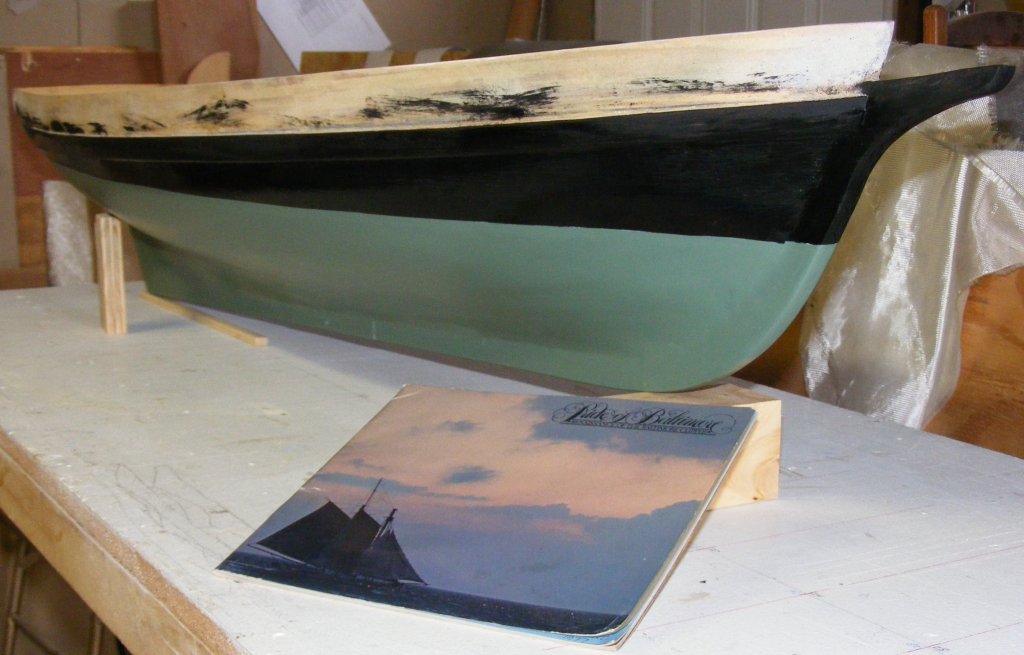
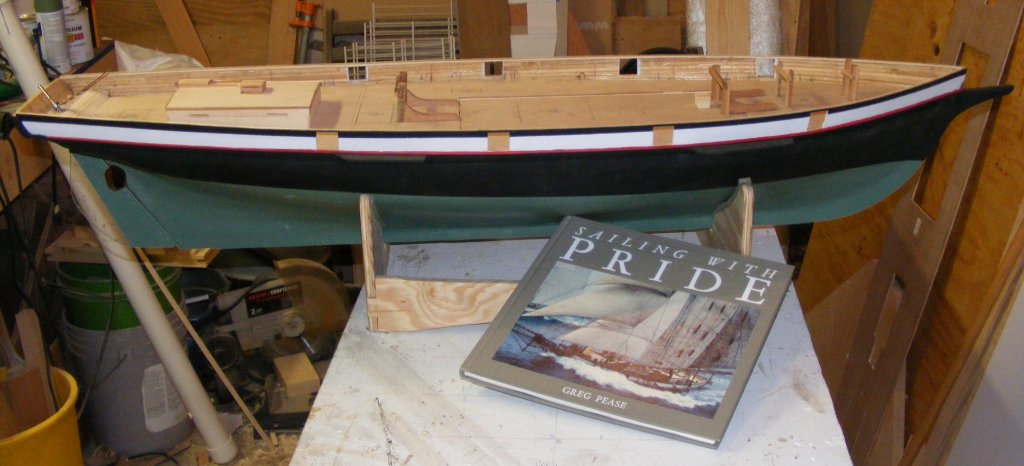
The model so far with Greg Pease's book Sailing With Pride.
All of it's pictures have been very helpful. |

4/27
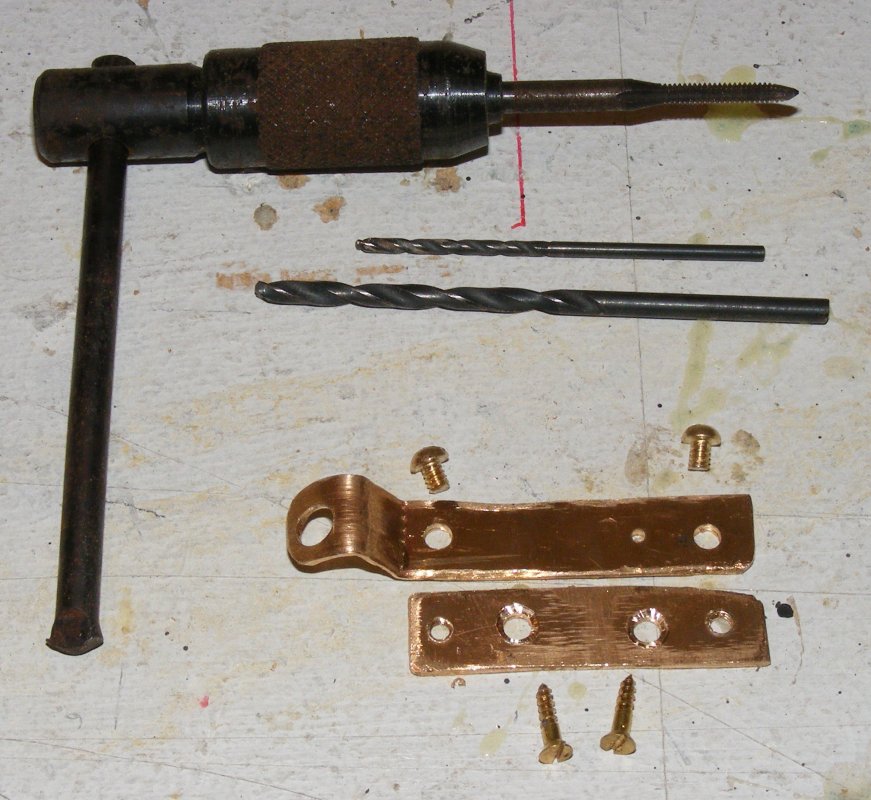
The gudgeon plate and the tools to tap the holes. |

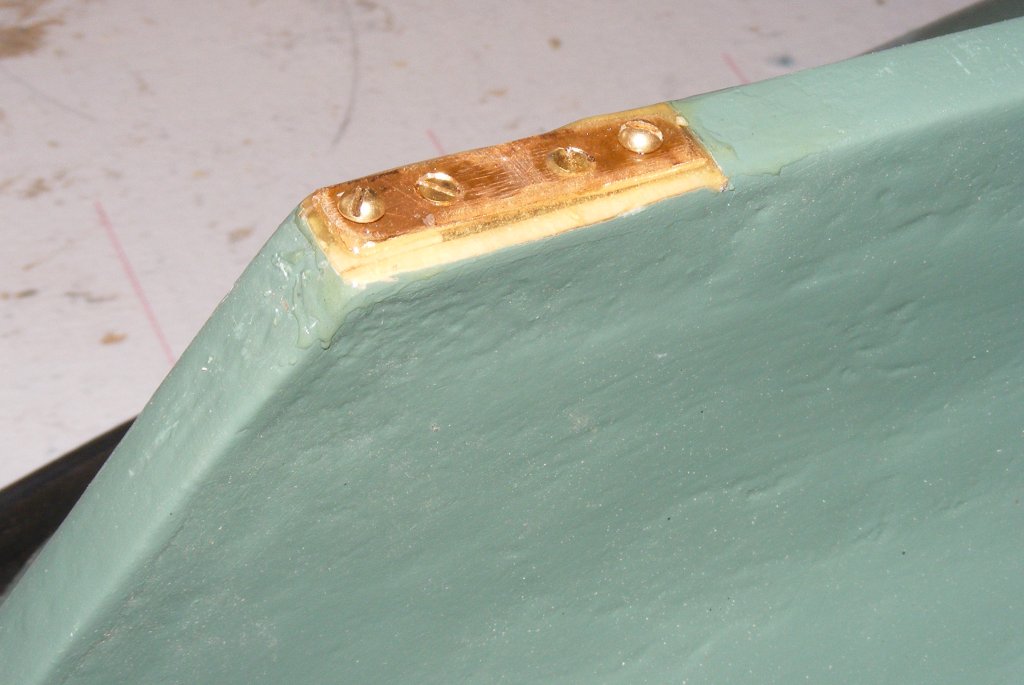
Mounting plate epoxied and screwed in place. |

Job done. |

Counter replanked. |

Riding bitts glued to subdeck. |

Riding bitts glued to subdeck. |

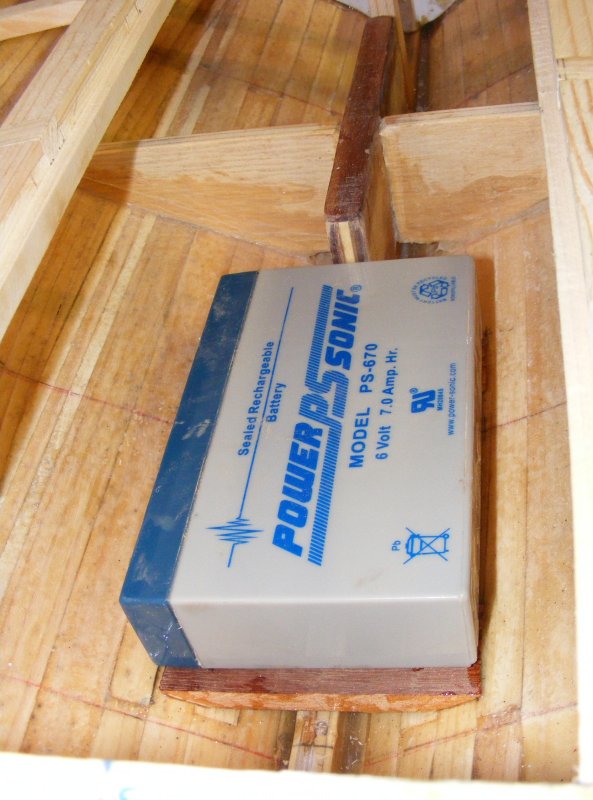
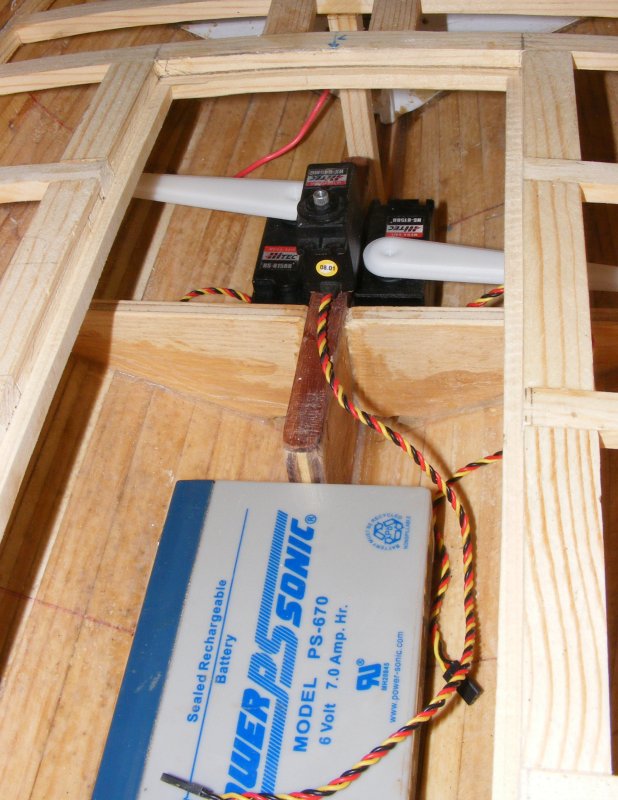
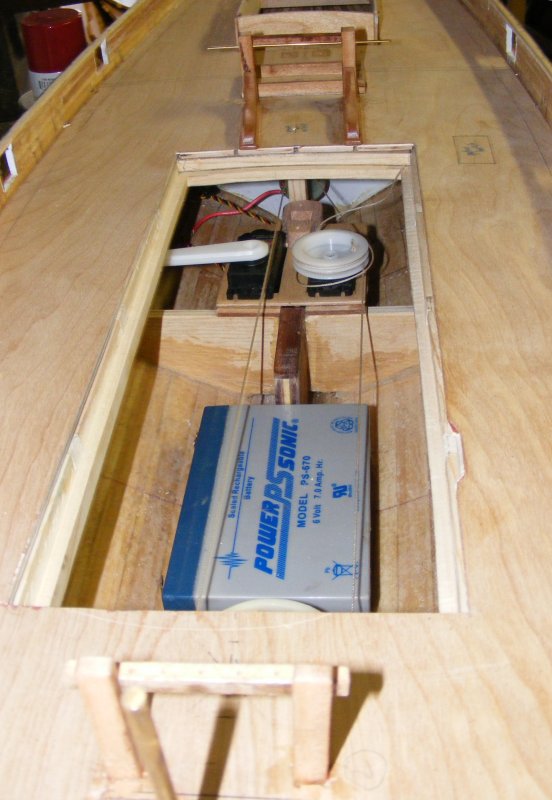
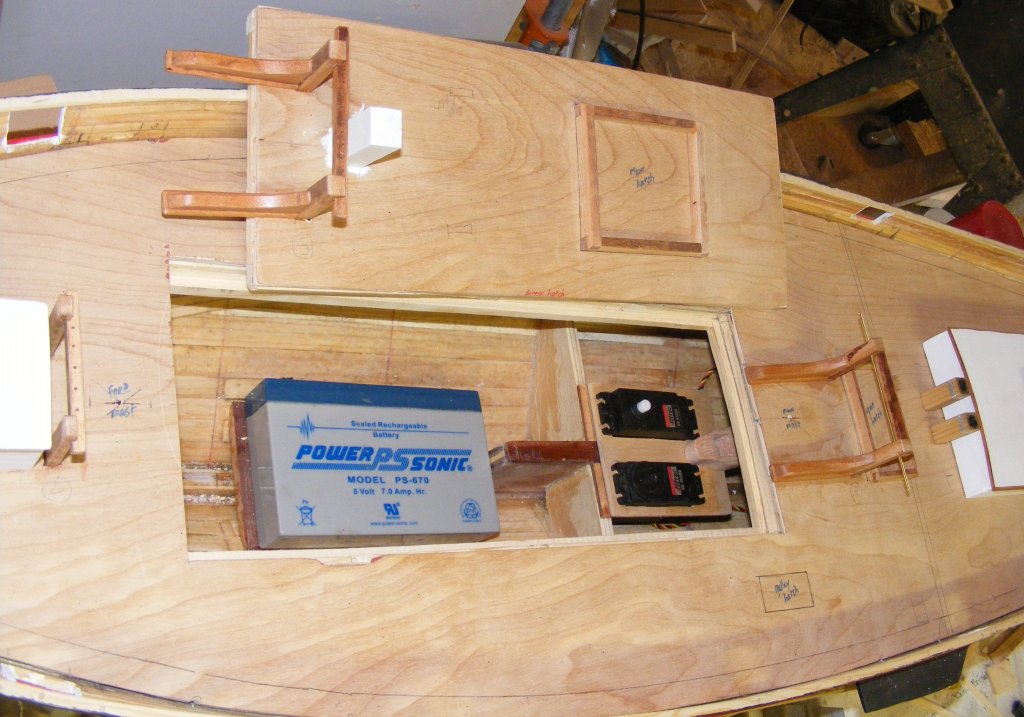
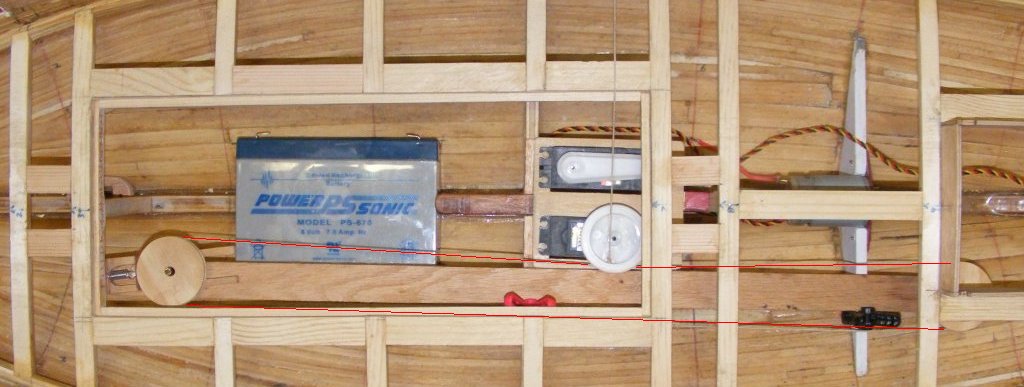
Battery suppored installed. |

4/29
Binnacle box and hatch panels added;
cabin top and counter decking primed. |

4/30
Transom knees and clamp installed. |

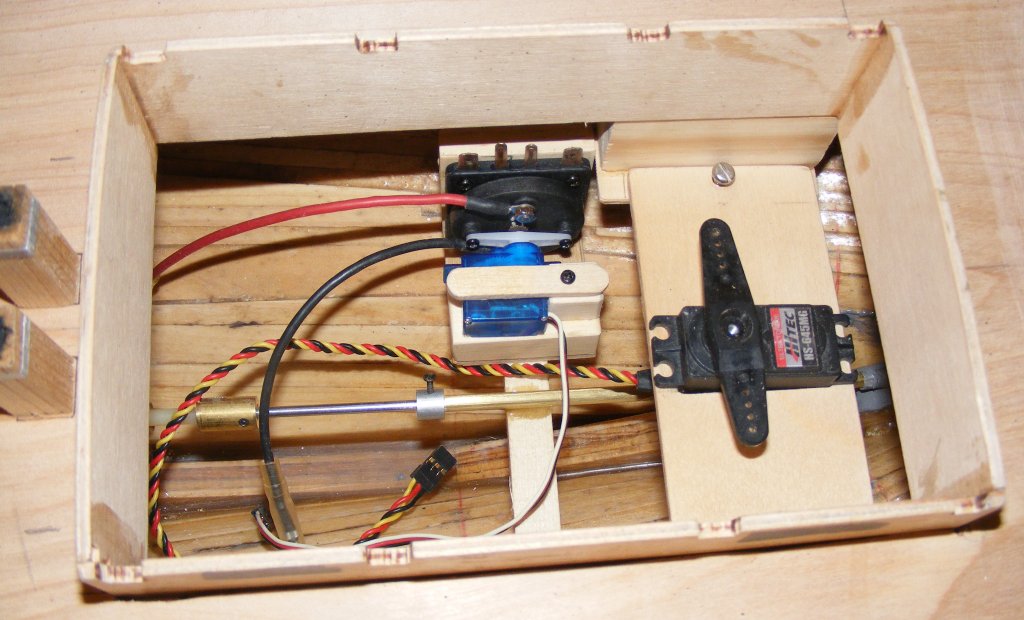
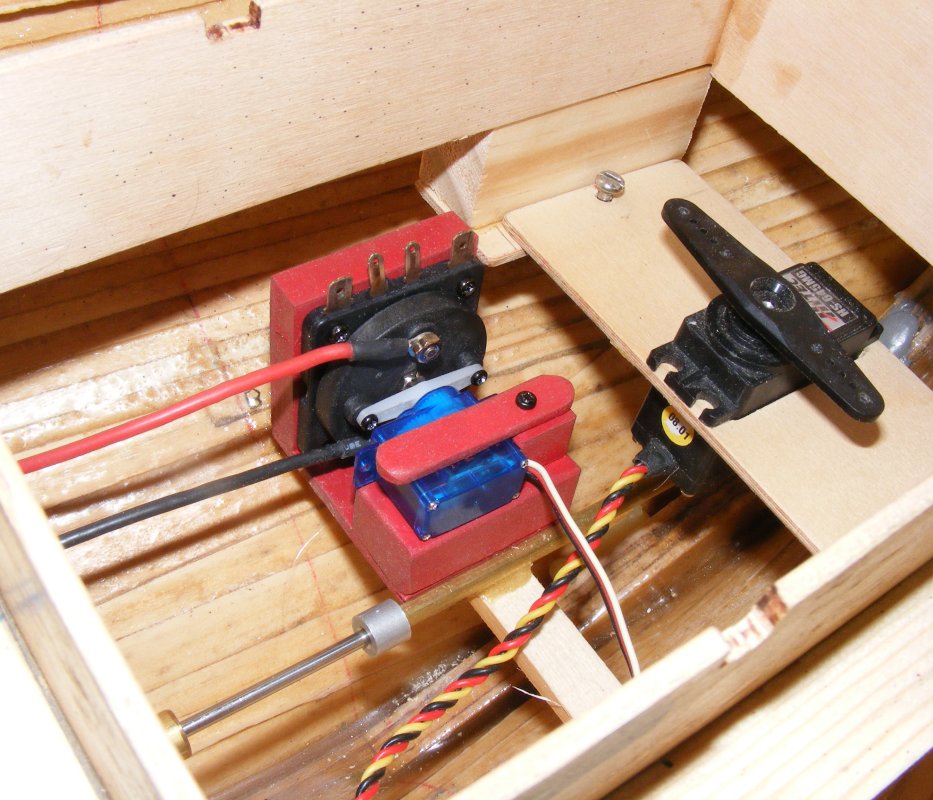
Servo placement. |

Pump boxes started, Binnacle box corrected,
and transom knees trimmed. |

5/1
Focs'l hatch coaming. Drawn line is from deck plan, coaming is based on stuctural plan and photos. |

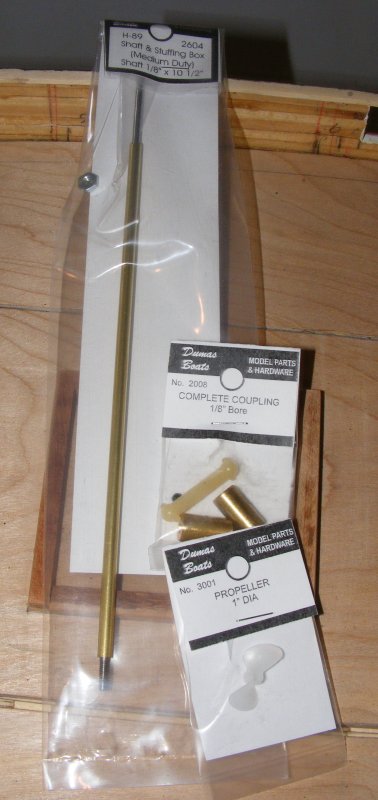
Prop, shaft, stuffing box, and motor link from Dumas. |

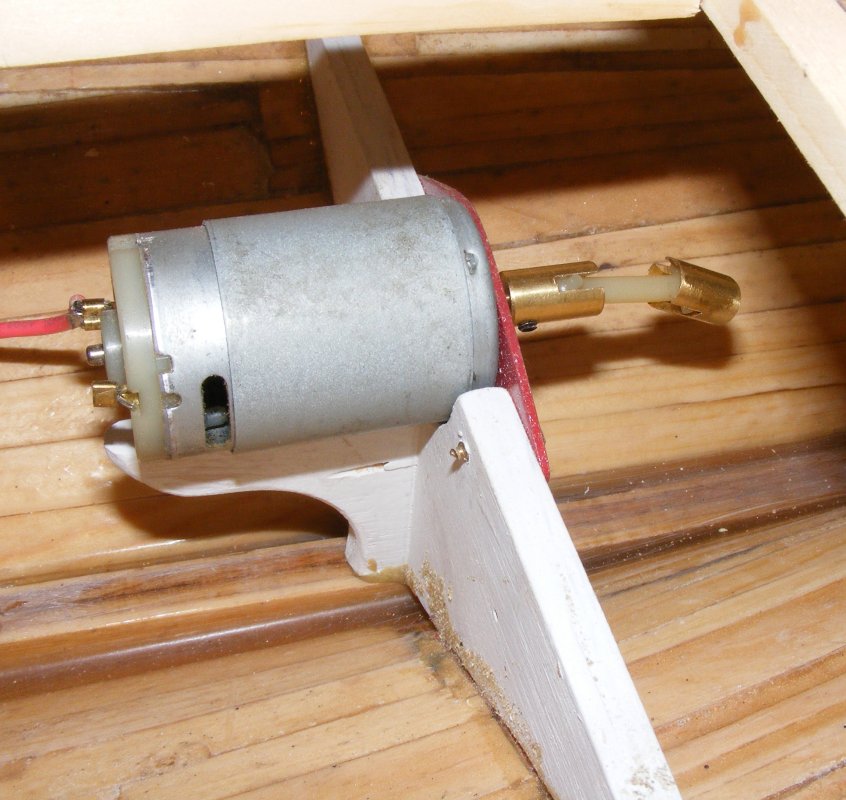
Sockets and nylon link for the motor. |

Hatch coamings added. |

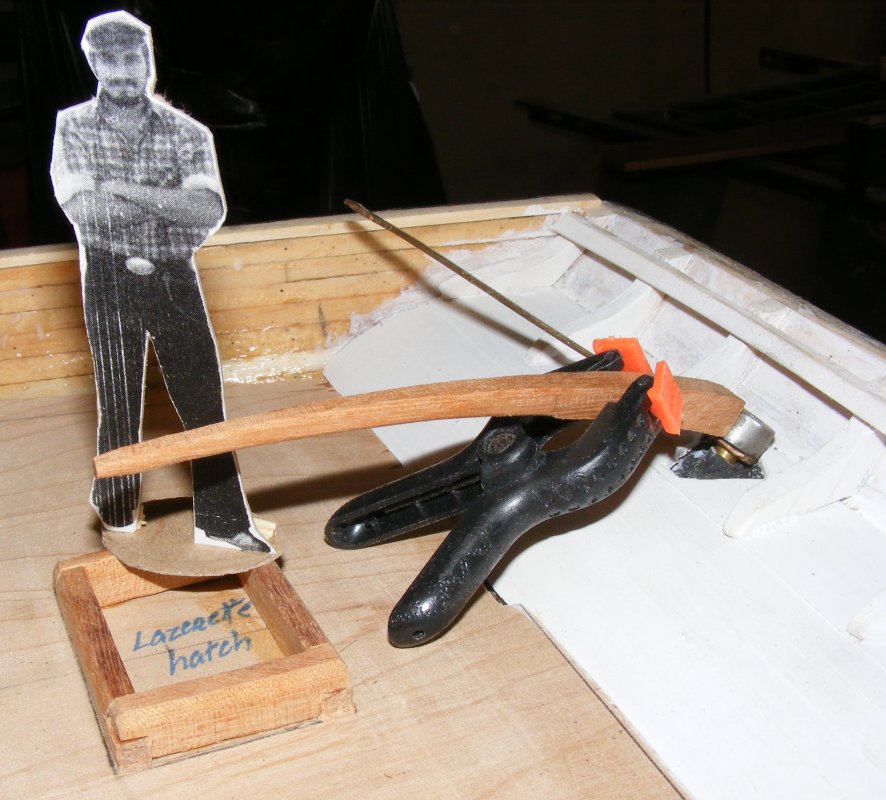
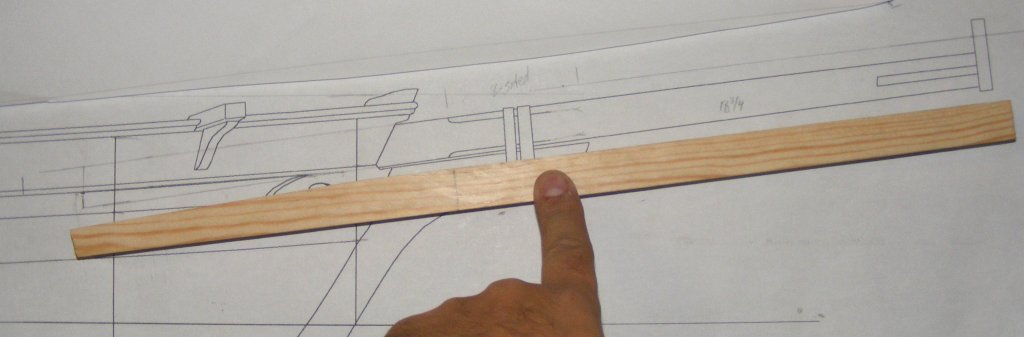
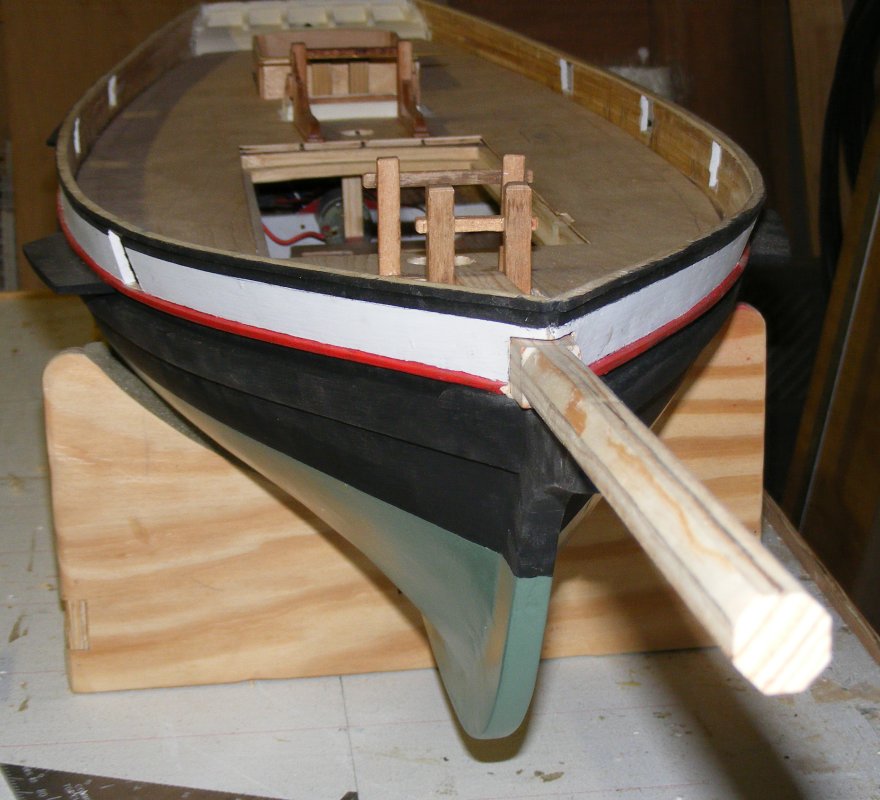
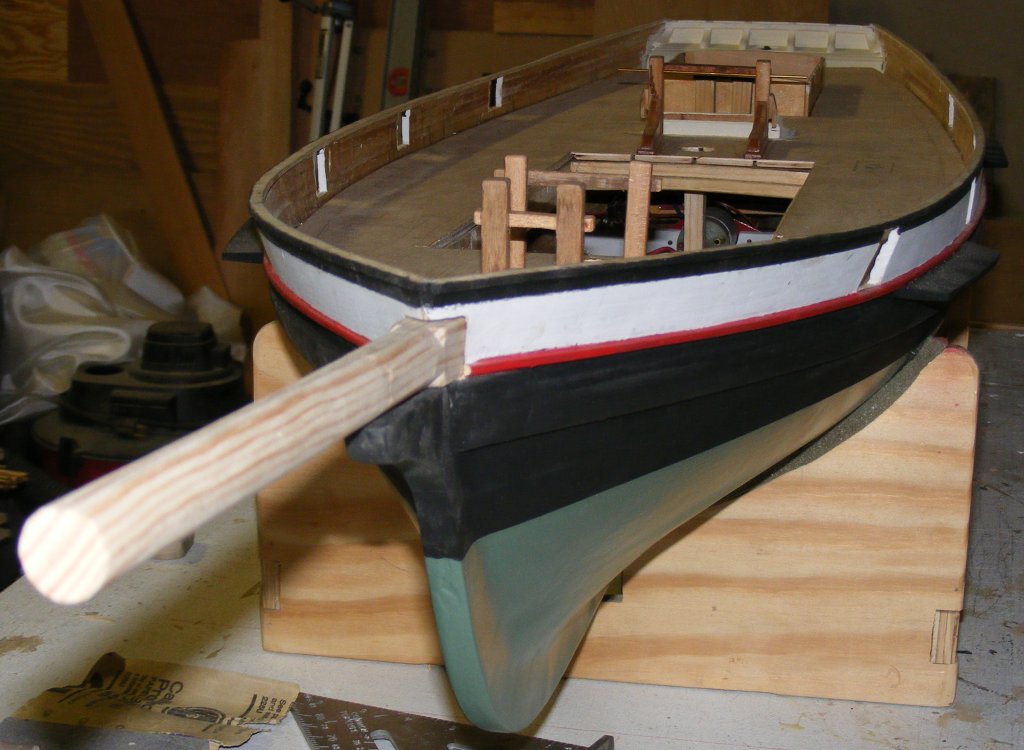
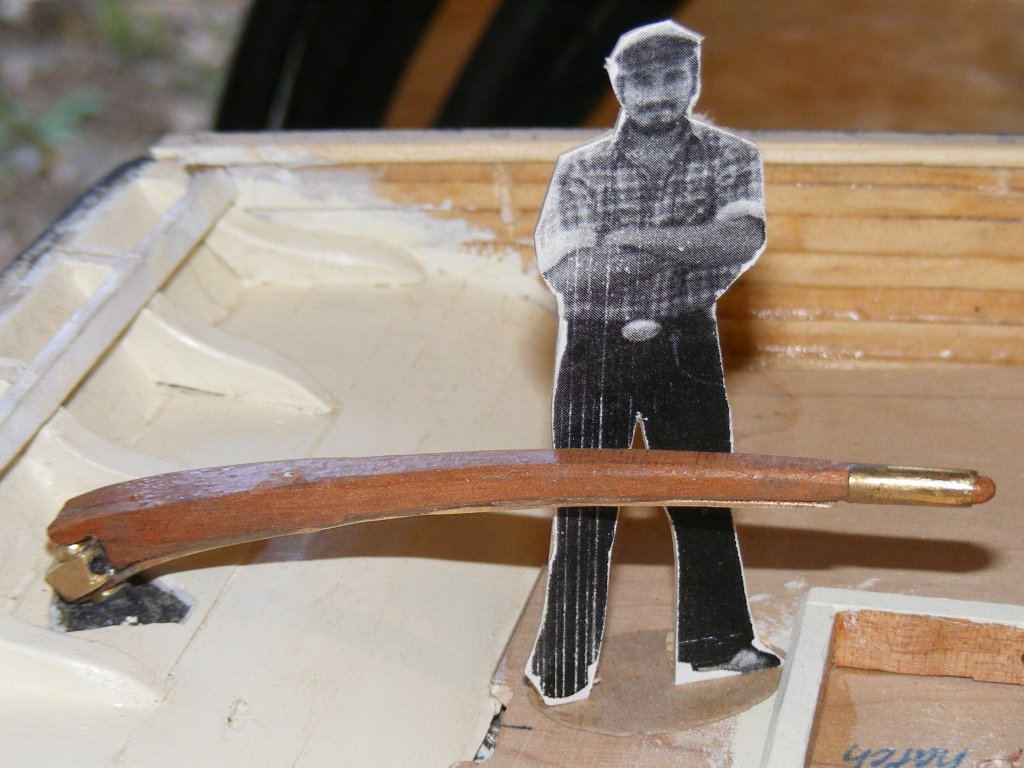
Beginning the tiller. |

5/2
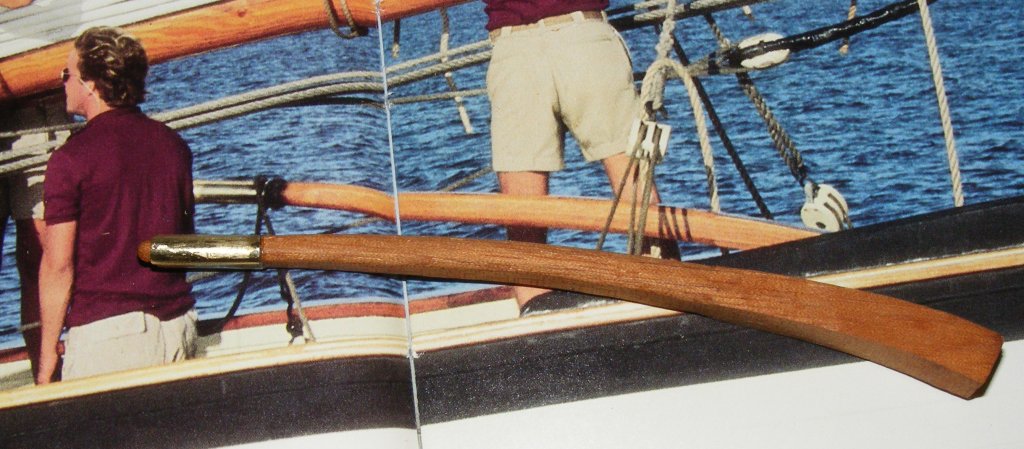
The tiller with a photo of the real one. |

5/3
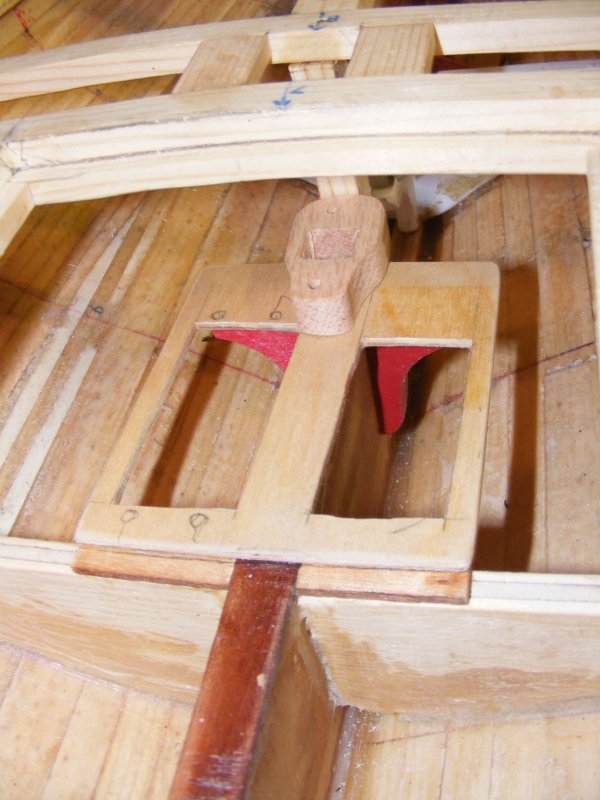
Knees to support the servo tray. |

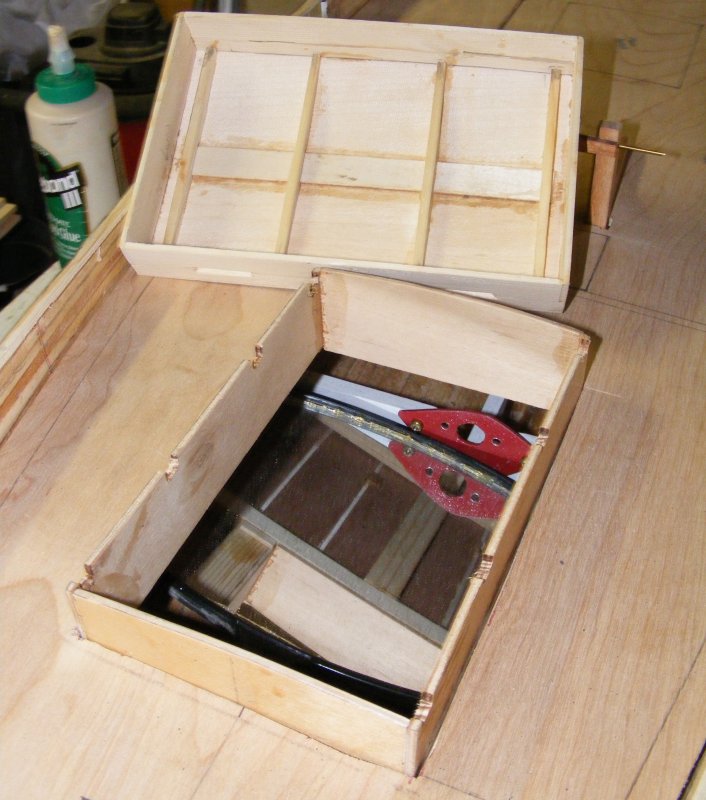
A look in the access hatch. |

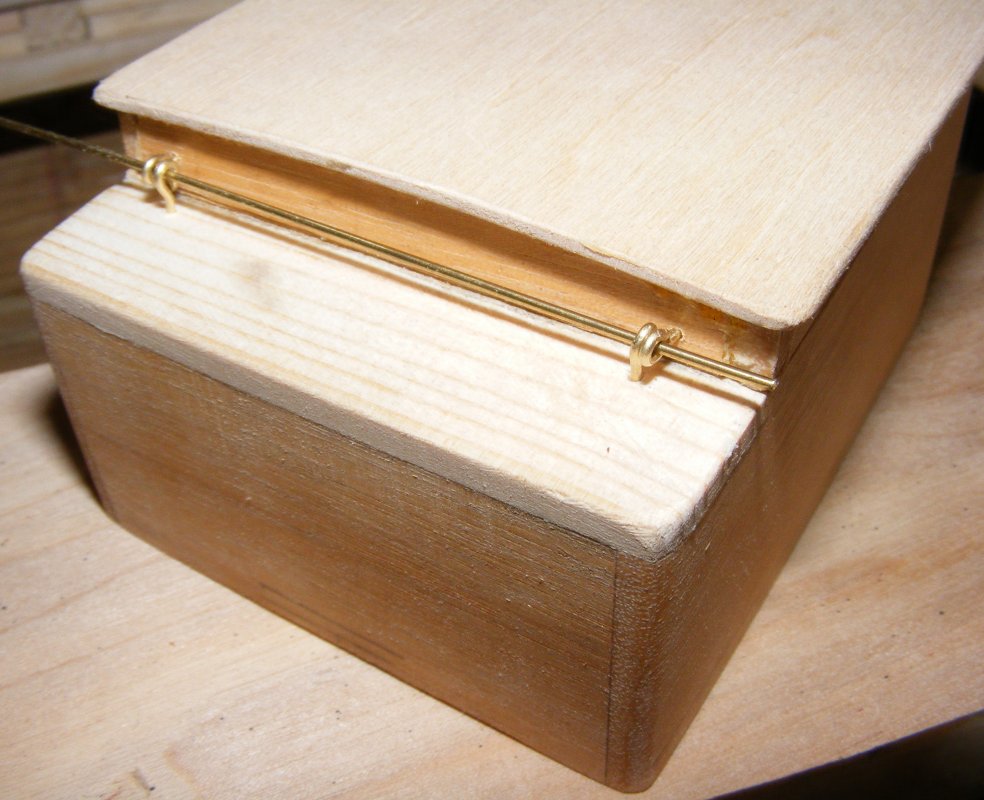
5/4
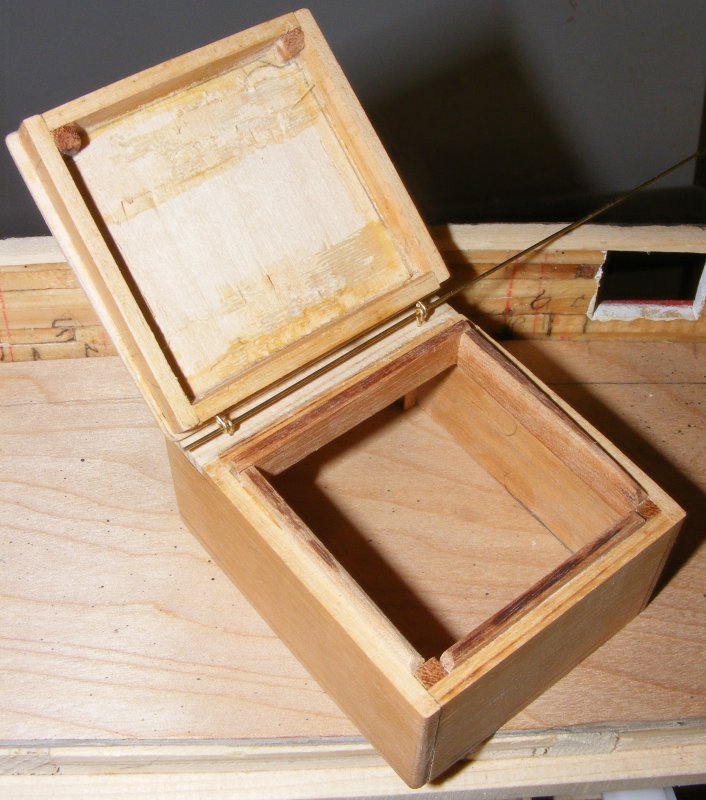
Focs'l hatch gets a hinge. |

Hatch cover opens. |

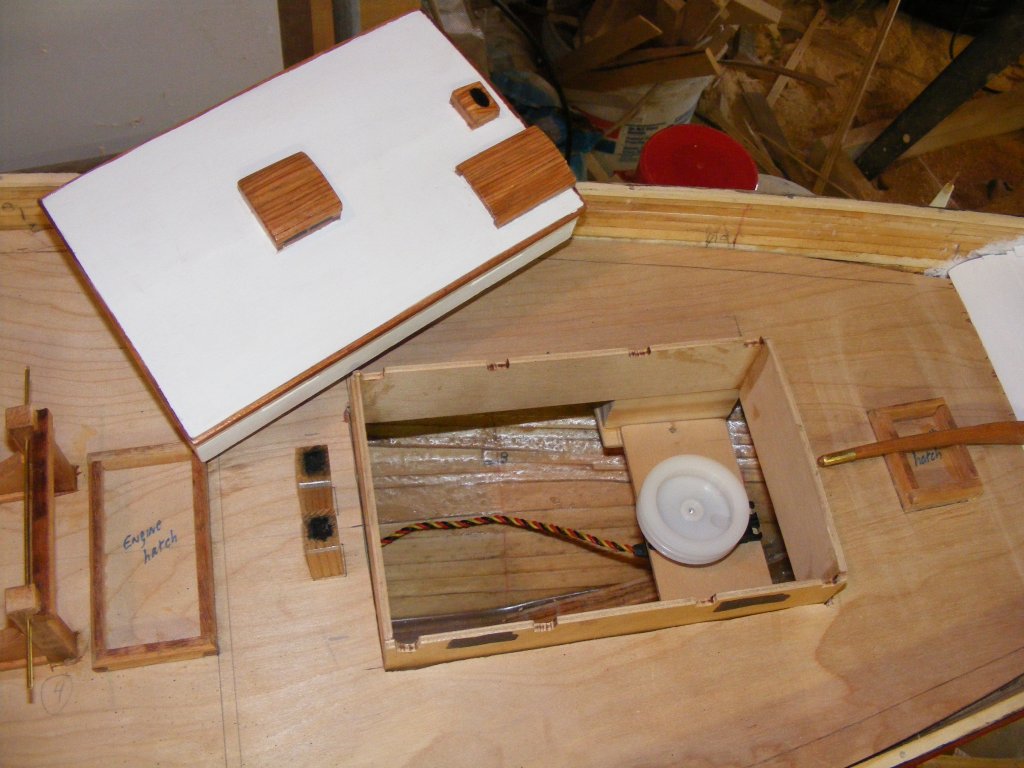
Rudder servo in the cabin hatch. |

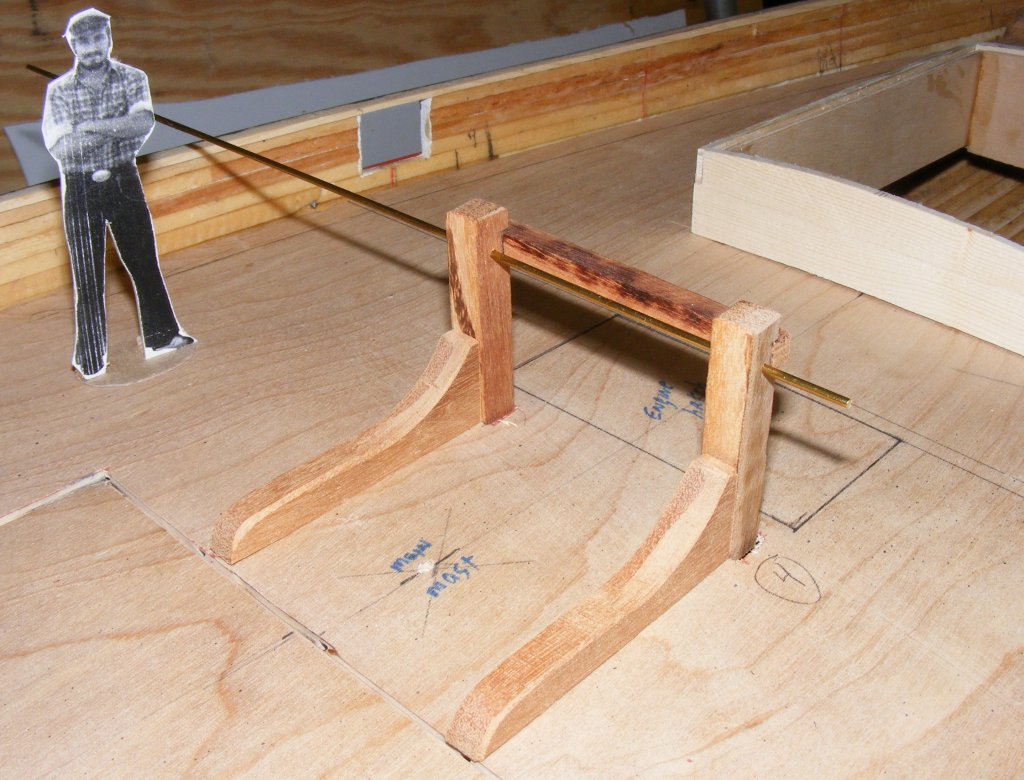
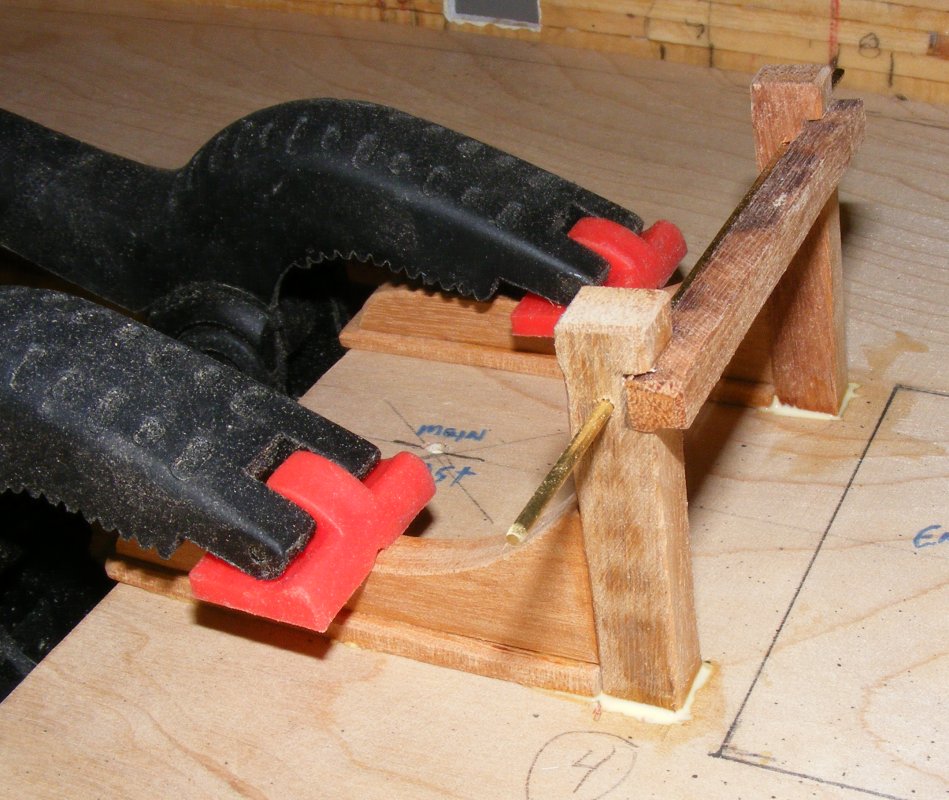
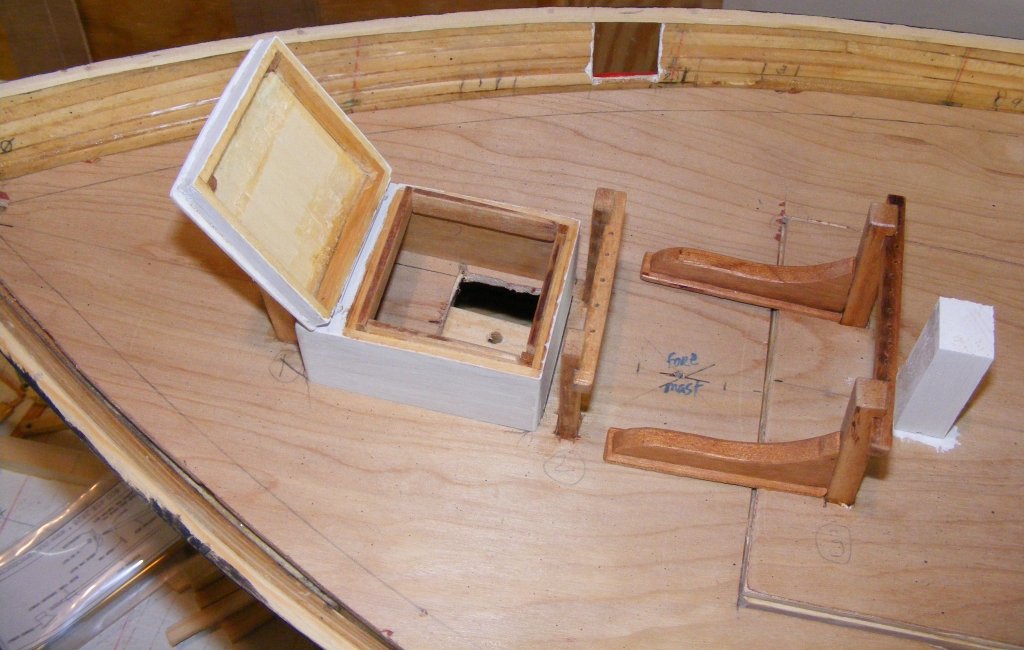
Sail control servo tray with main mast step. |

Focs'l hatch sitting in place. |

Cabin hatch with cover removed. |

Access hatch with cover removed. |

5/6
Sail control shuttle mock-up. |

5/7
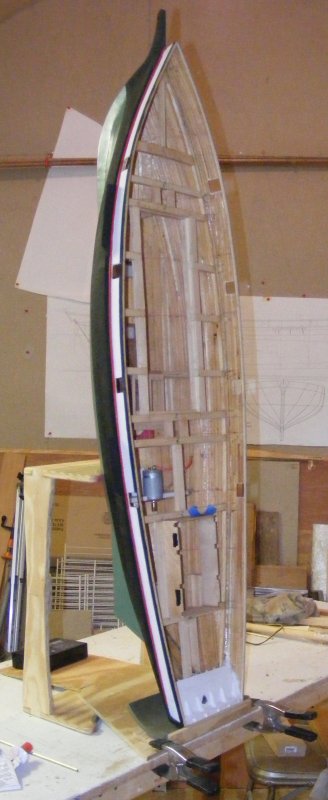
Hull stood up to install stuffing box for prop shaft. |

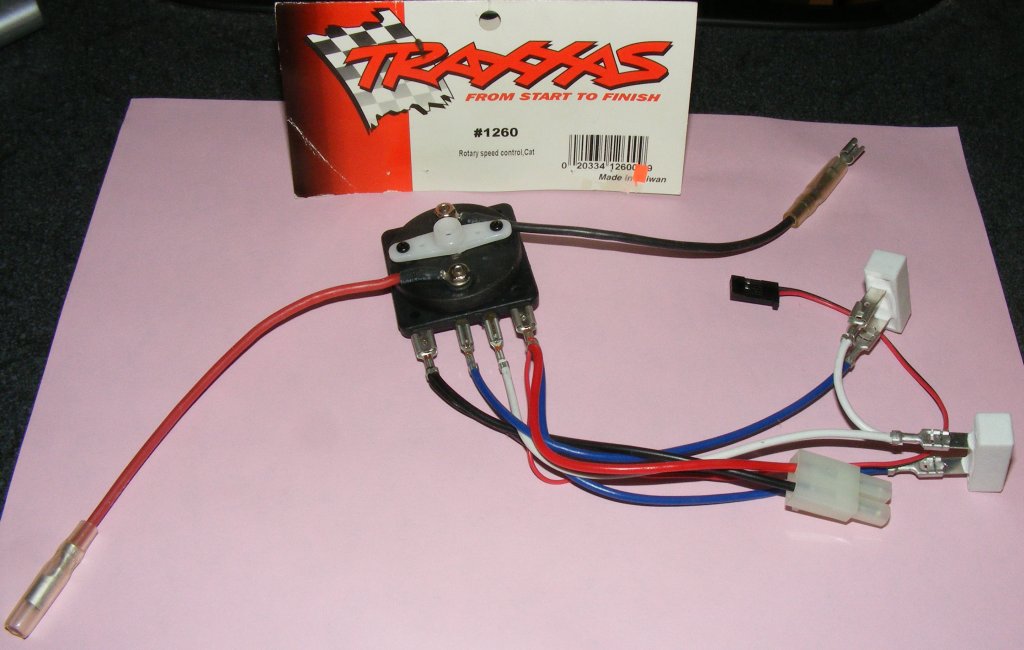
The Traxxas 1260 rotary speed control. |

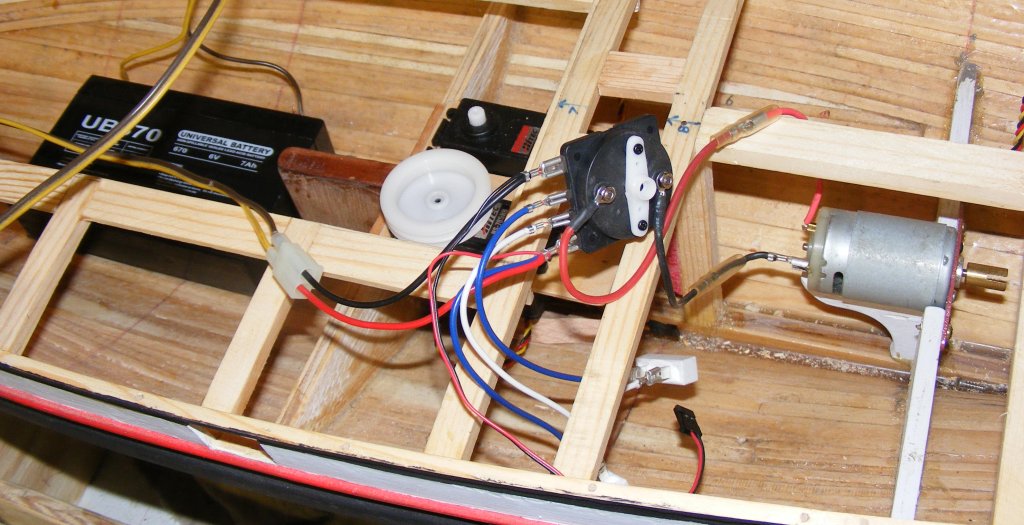
Rigged for a test run. |

5/8
Speed control mount. |

5/9
Speed control mounted in hull. |

5/10
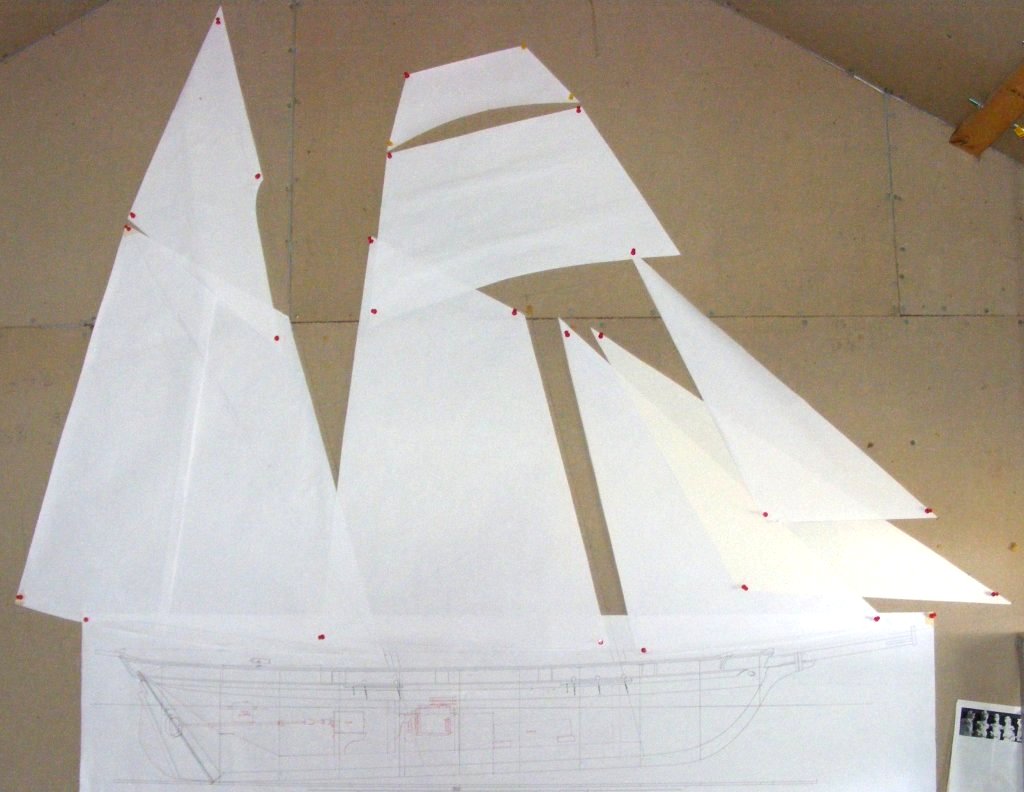
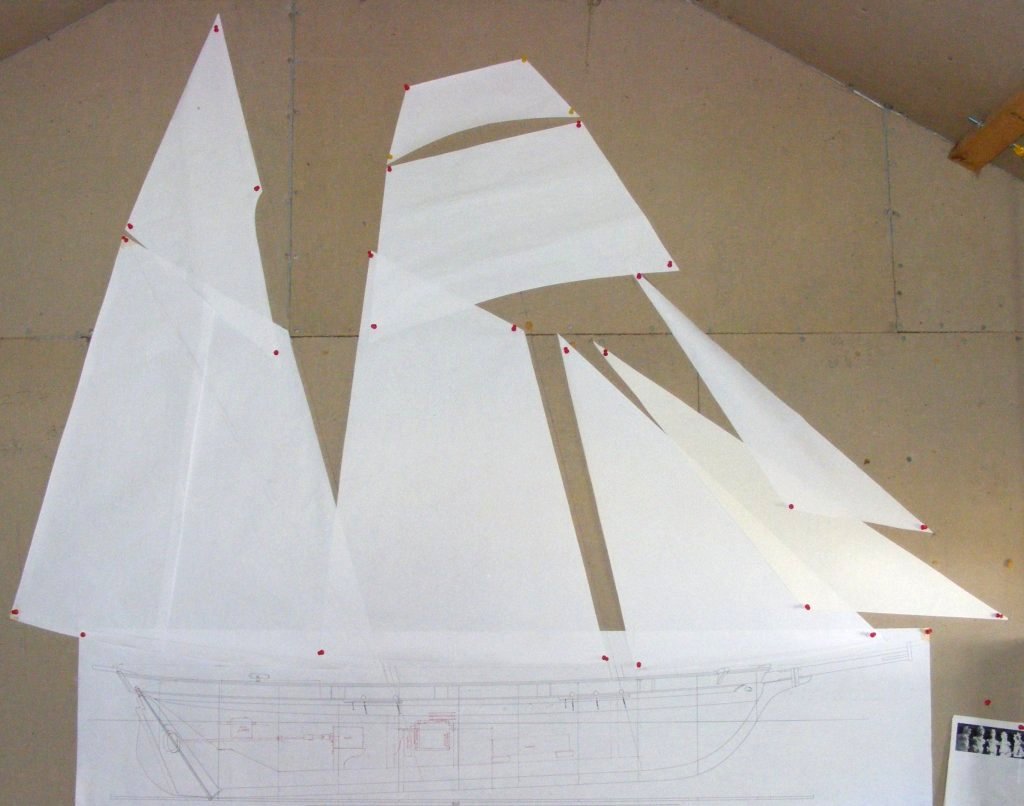
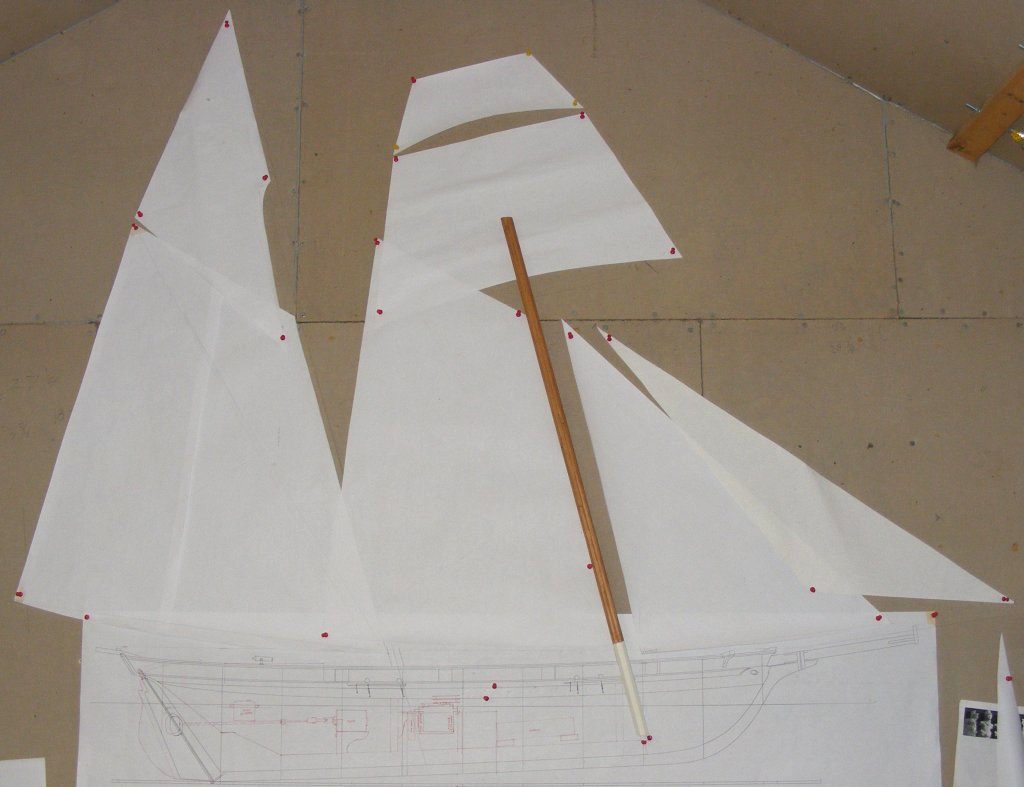
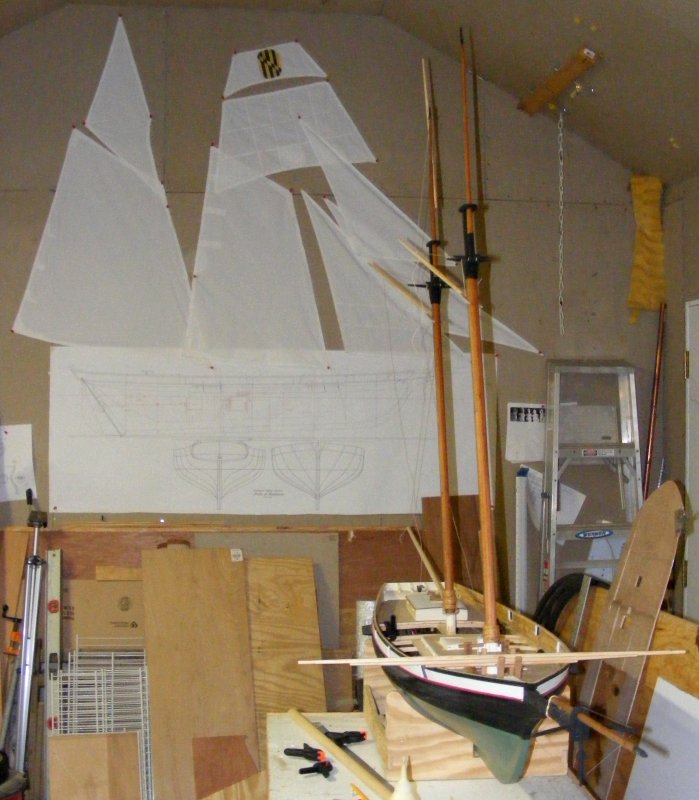
Full size sail plan on shop wall. |

Jib altered to reduce amount sails overlap. |

5/11
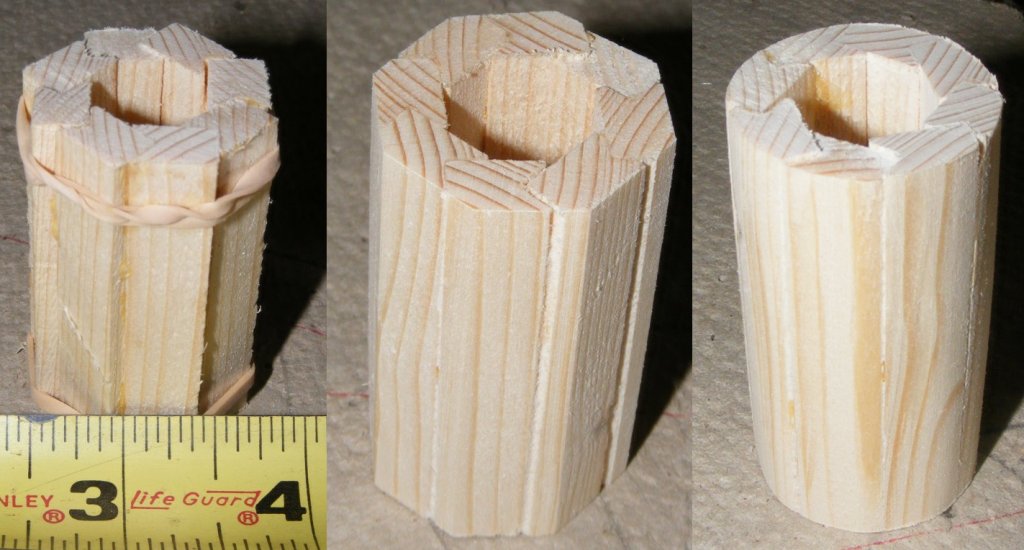
Cutting a V groove in a test piece. |

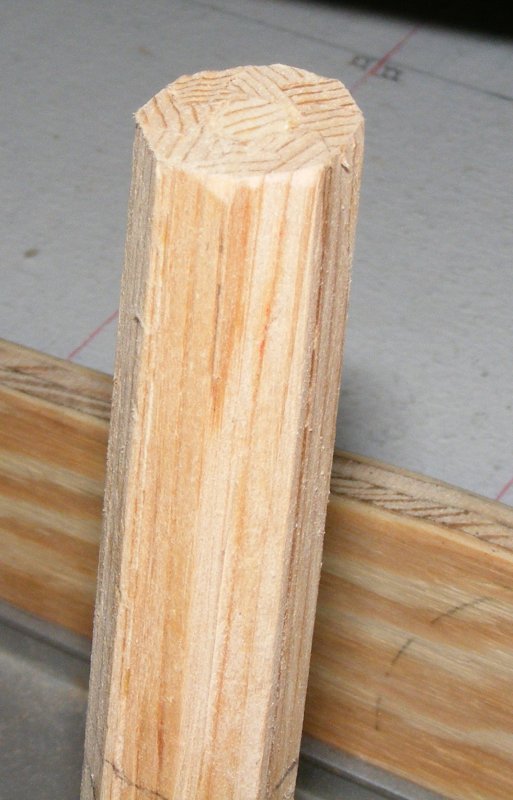
Test piece glued up; made 8 sided, made round. |

Making cheek blocks for the riding bitts. |

Cheek blocks on the aft bitts. |

5/12
"Iron" banding on pumps made from bass. |

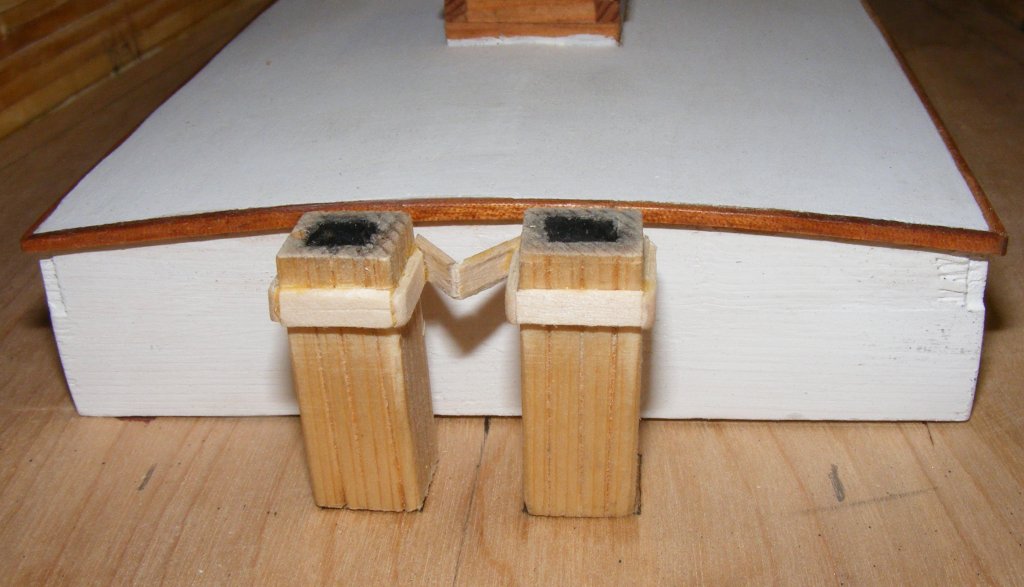
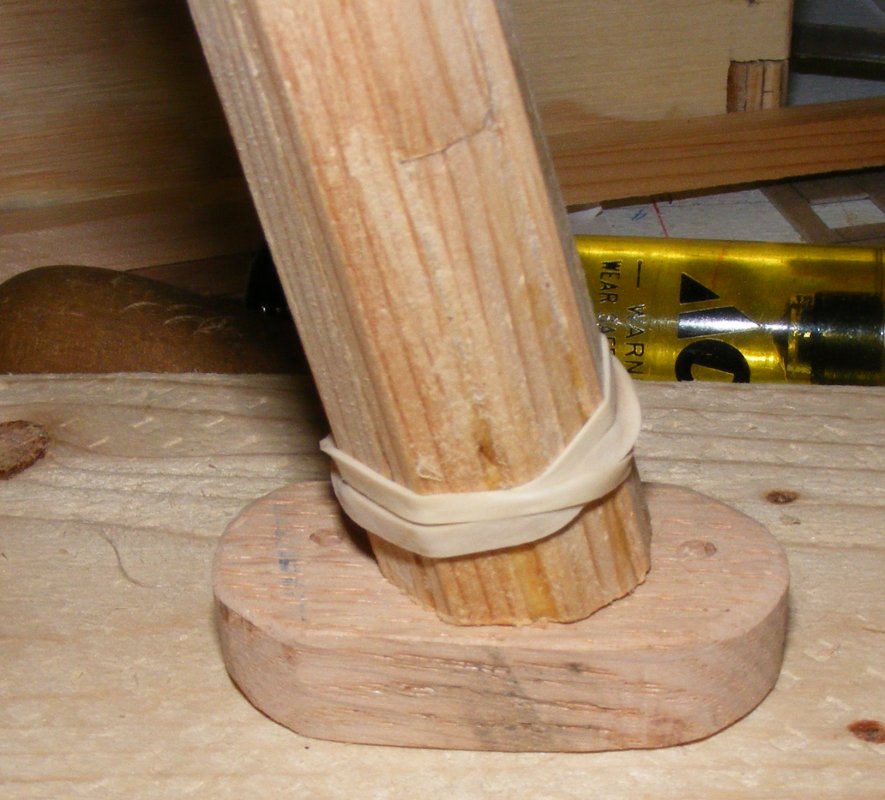
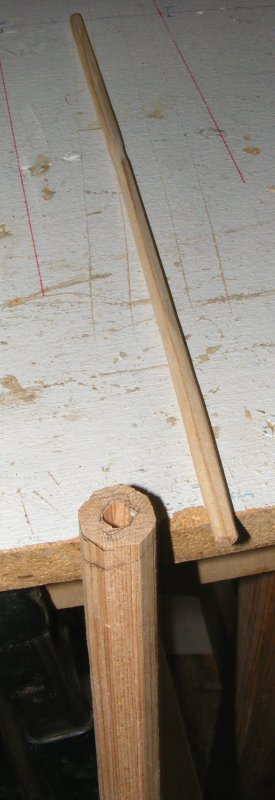
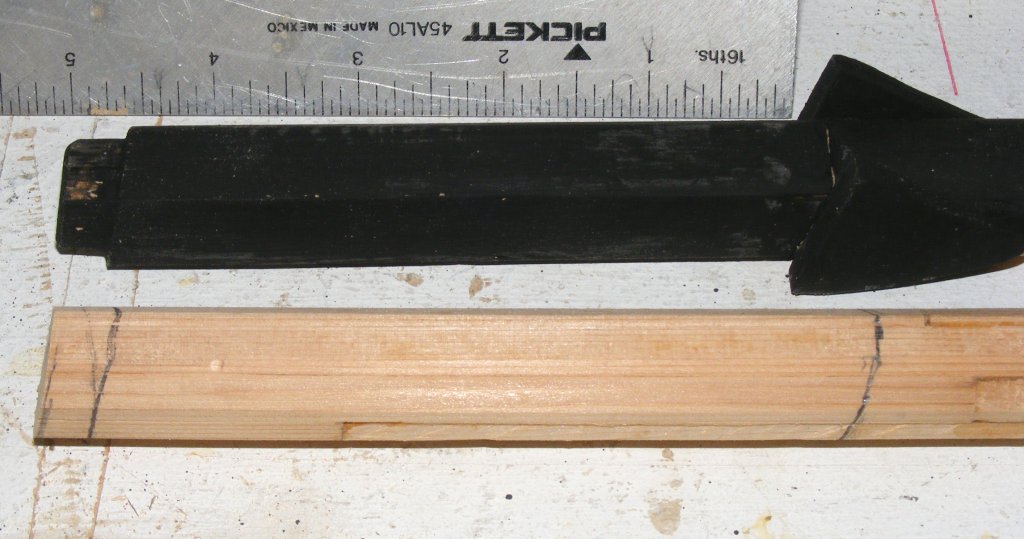
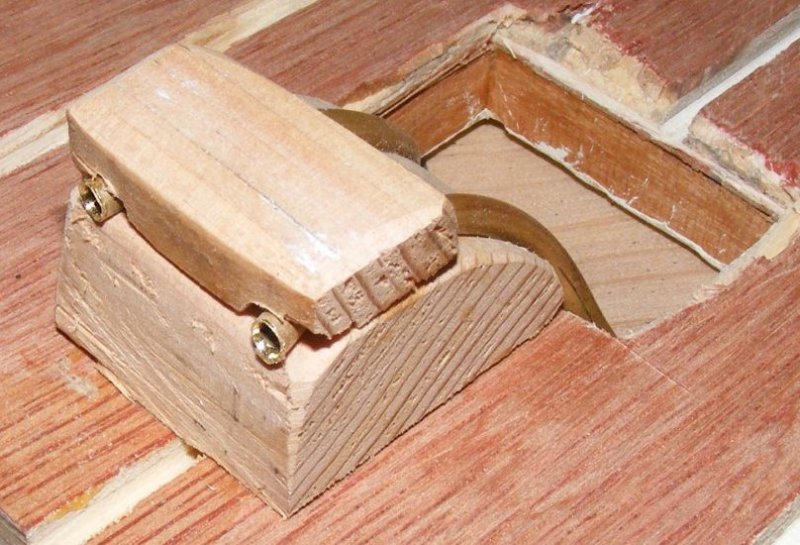
Foremast tenon. |

fits into an oak mast step. |

5/13
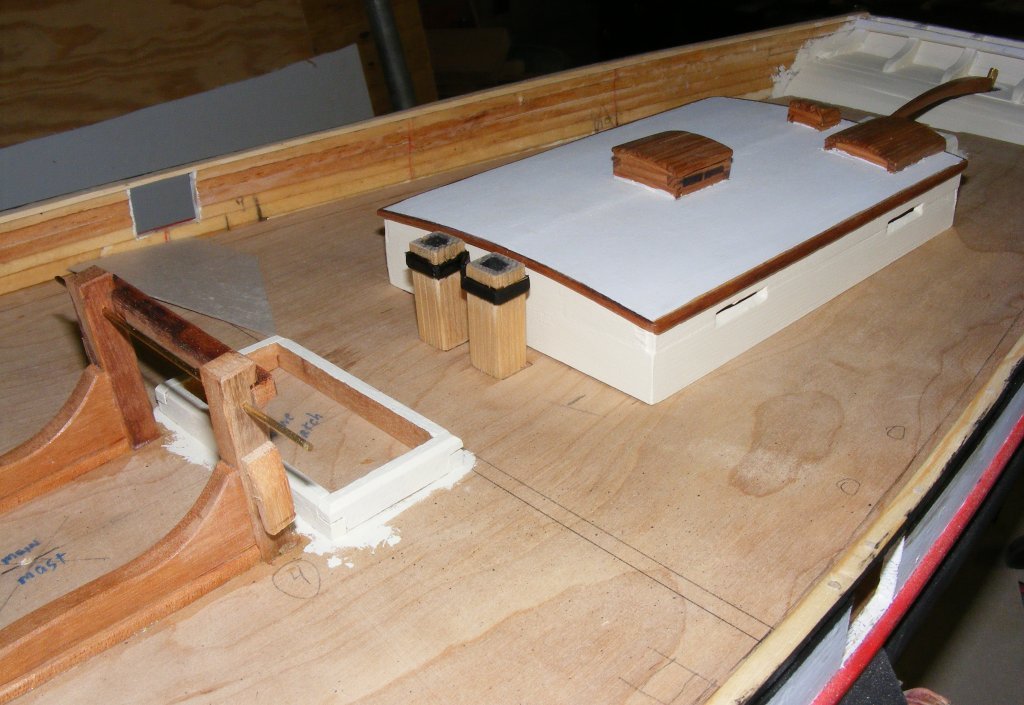
Cream colored paint on most of the furniture, and "iron" pump bands painted black. |

Foremast cut, stained, and painted. |

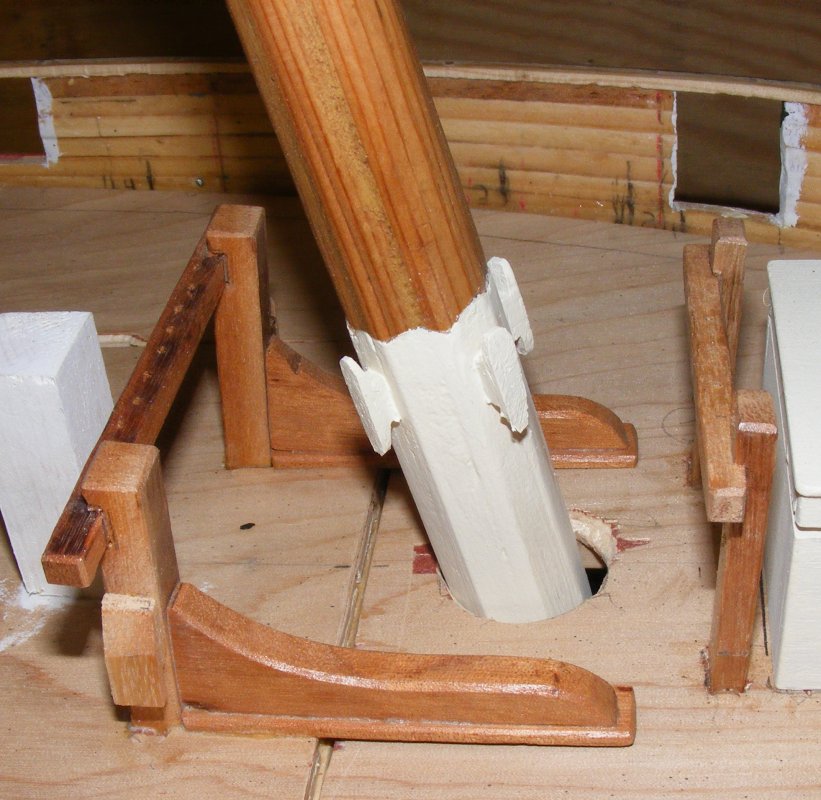
Hole made in subdeck for foremast. |

5/14
Cross-trees and trestle-trees parts cut. |

Fore mast set glued and pinned. |

Hounds installed. |

Painted black. |

5/15
Plywood cut for caps. |

Tape around perimer to represent iron banding. Fore cap painted, main cap is next. |

Outside the shop for a little sunshine. |

5/16
One of the cedar boards left over from
Constellation that will make Pride's masts. |

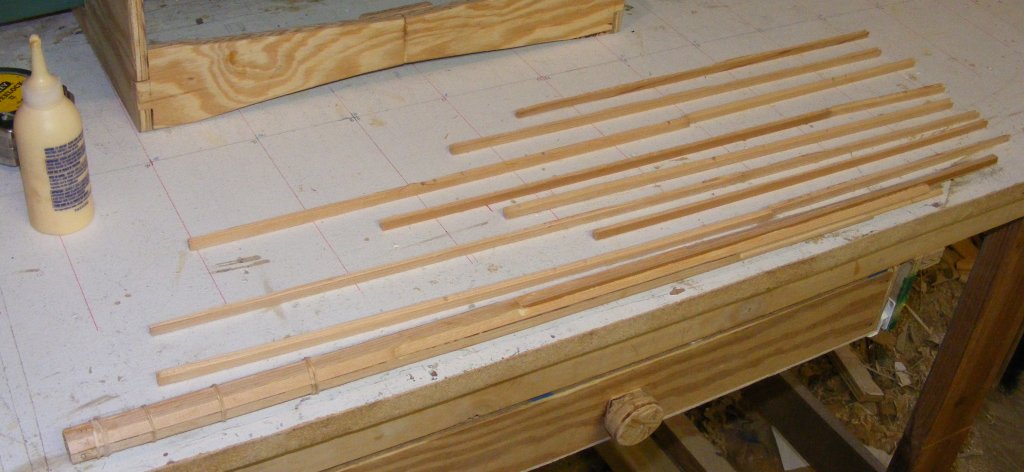
Cedar ripped into 1/4" thick boards. |

1/4" board ripped into 5/16" strips. |

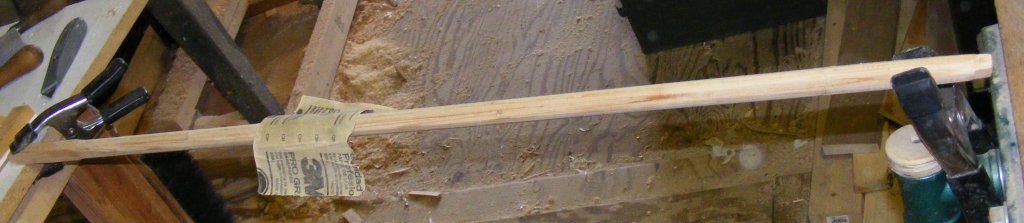
Pushing the strips through the router to cut the V-groove. |

Strips laid out by stave. |

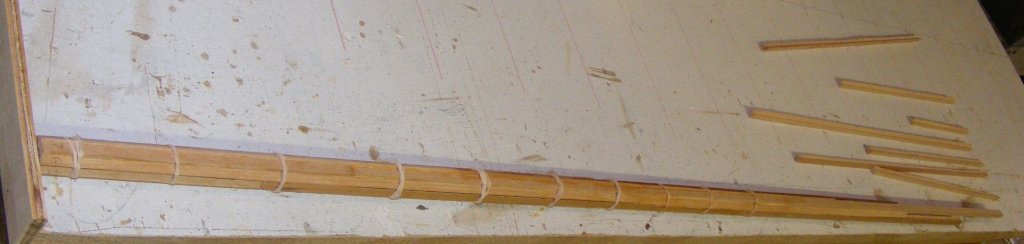
Gluing up the mast. |

Almost there. |

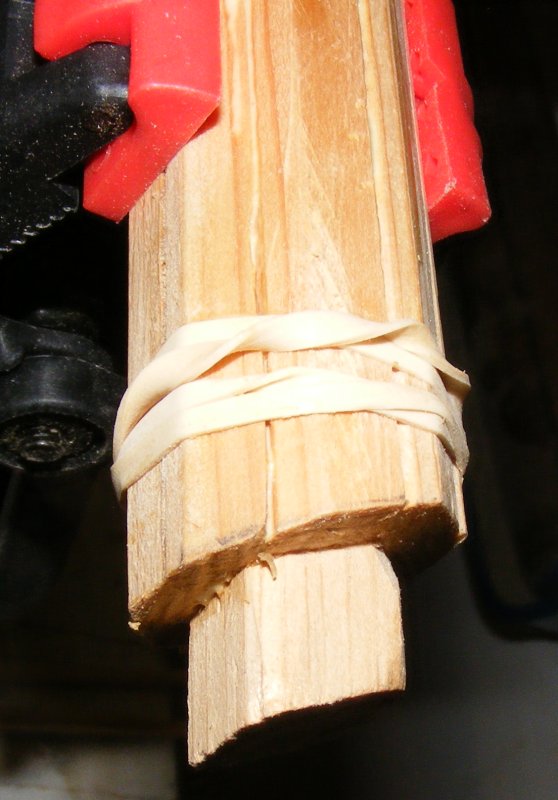
All bound up with rubber bands and a string clamp. |

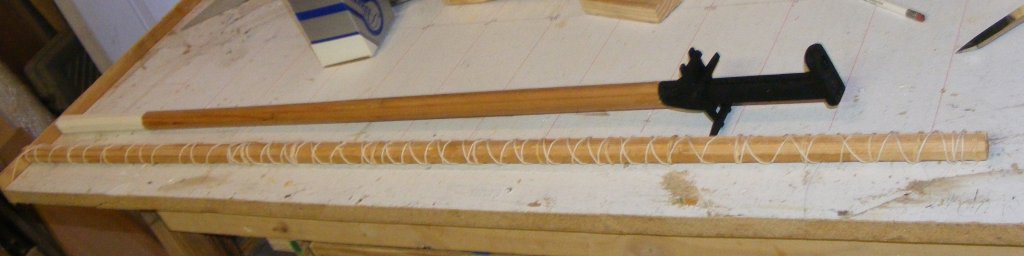
5/17
All set up and bindings removed. |

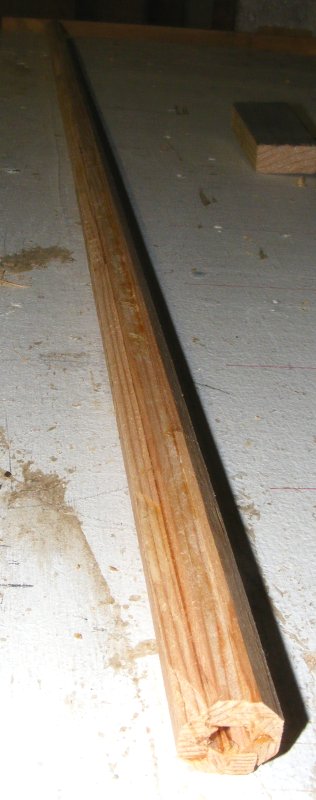
Ridges planed off to 8-sided. |

Heel plugged. |

Head getting plugged. |

Marking out the doubling. |

Rounding the mast between the head and the bury. |

Cross-trees and trestle-trees assembled. |

Head shaped with hounds, cross-trees, cap. |

5/18
Beginning the bowsprit. |

Opening the bulwark for the bowsprit. |

Mini-me checks the fit. |

5/19
8-sided from near the bulwark out. |

Round from the end of the head knee out. |

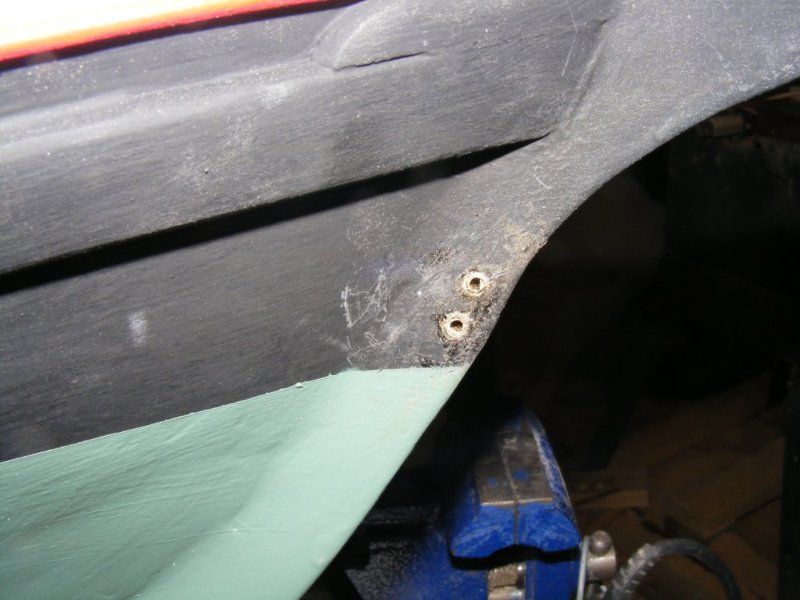
Tenon cut. |

Sleeved holes in bitts for shear pin. |

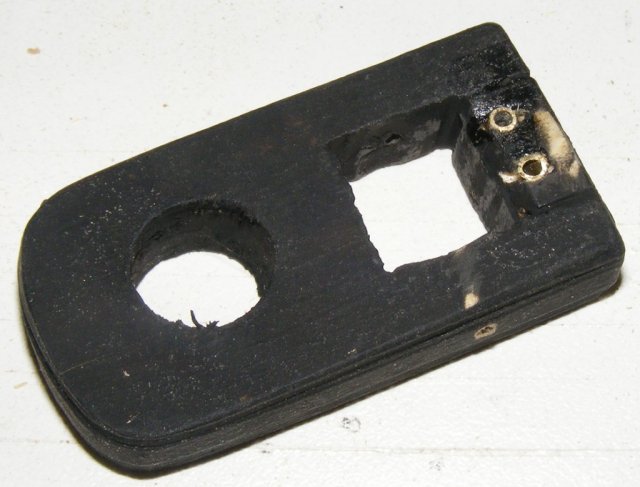
Cap cut out. |

So far. |

5/20
Made the hand-pump hardware. |

5/22
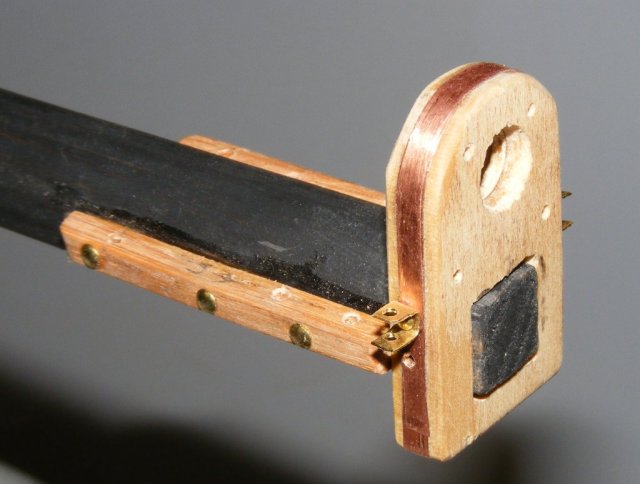
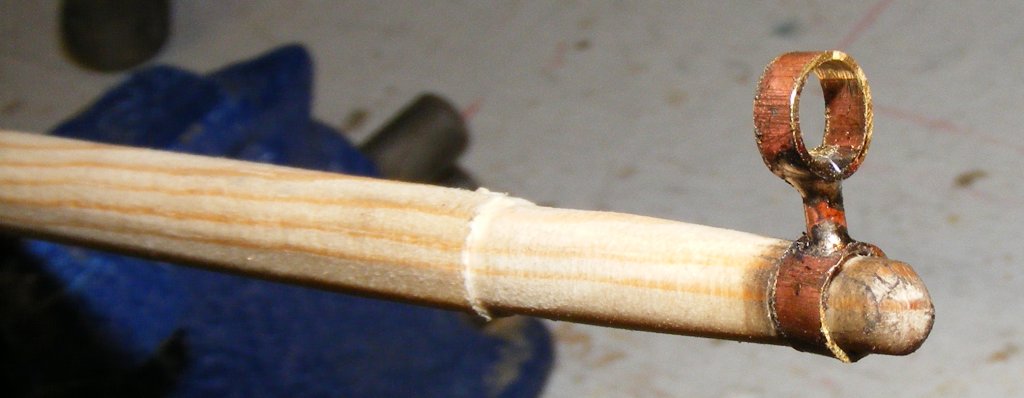
bowsprit cap and bees. |

Stay holes in fore topmast cap sleeved. |

Bobstay holes in stem sleeved. |

5/23
Dolphin striker and spreaders. |

5/24
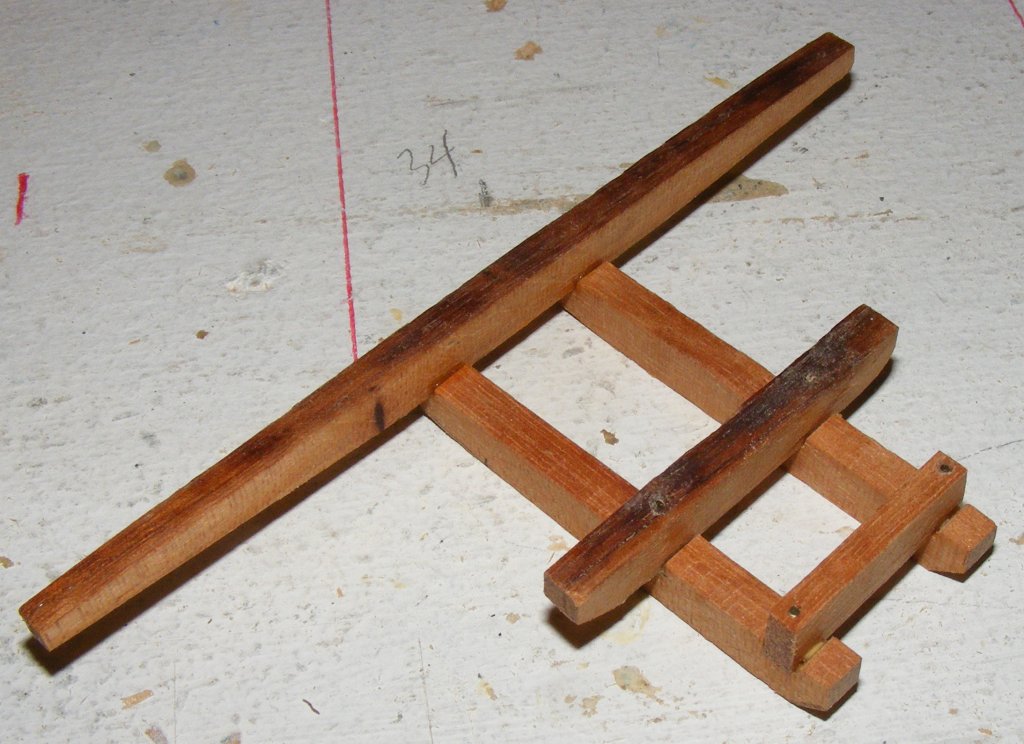
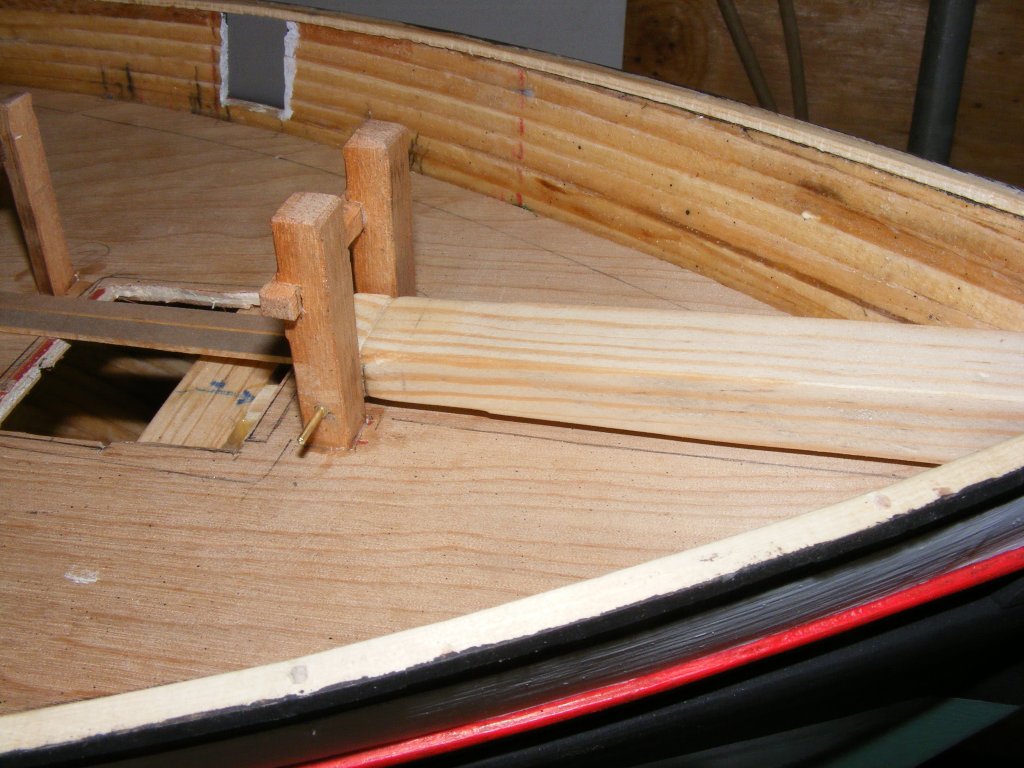
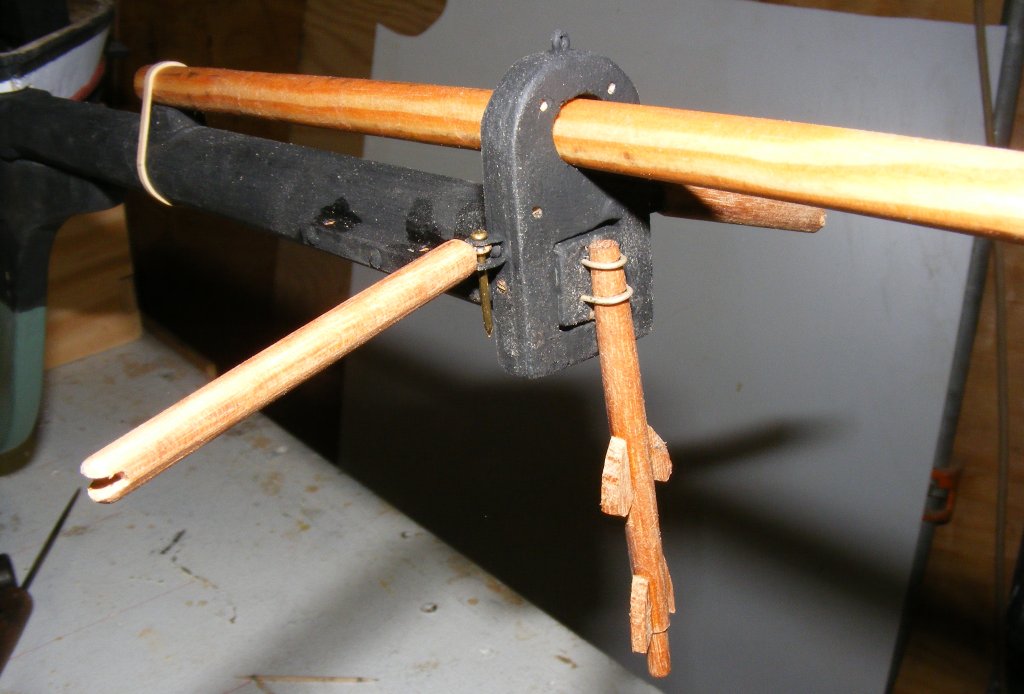
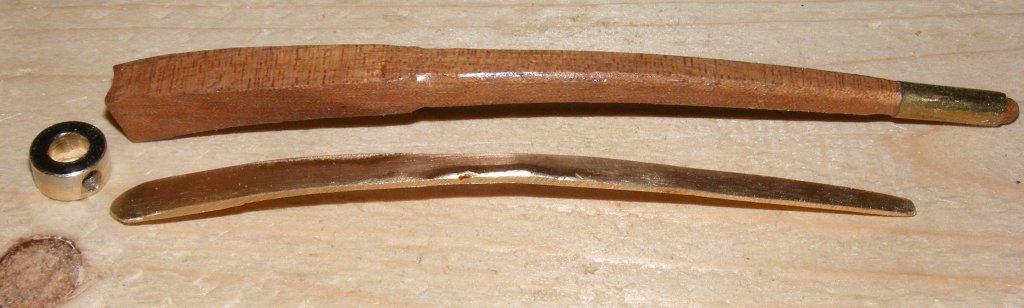
Tiller parts. |

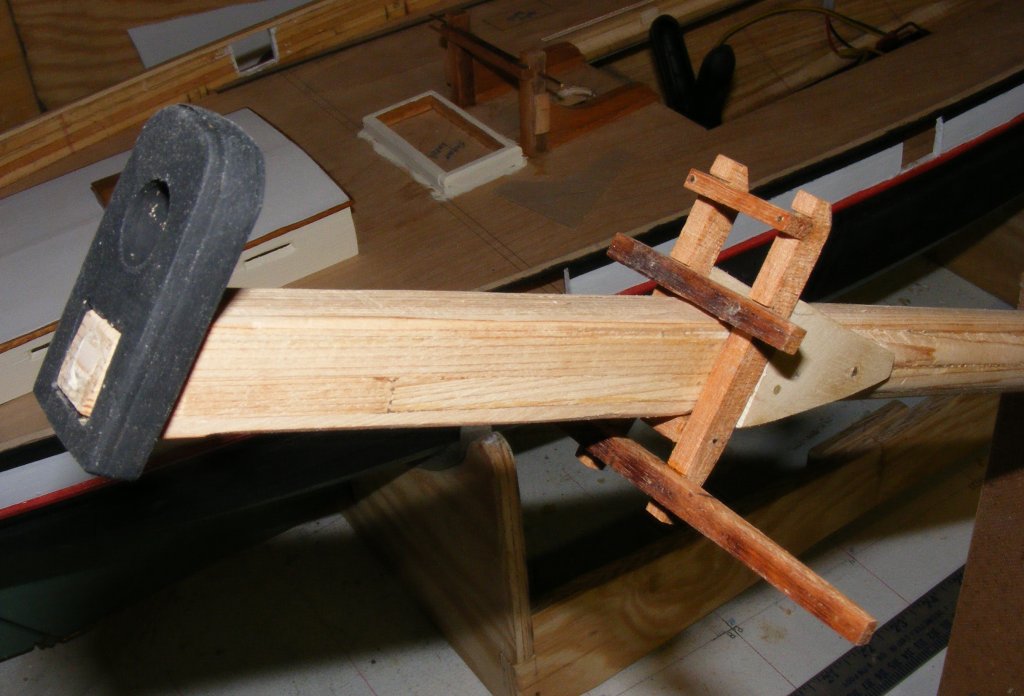
All together and in place. |

Set screw in placed when it can be accessed. |

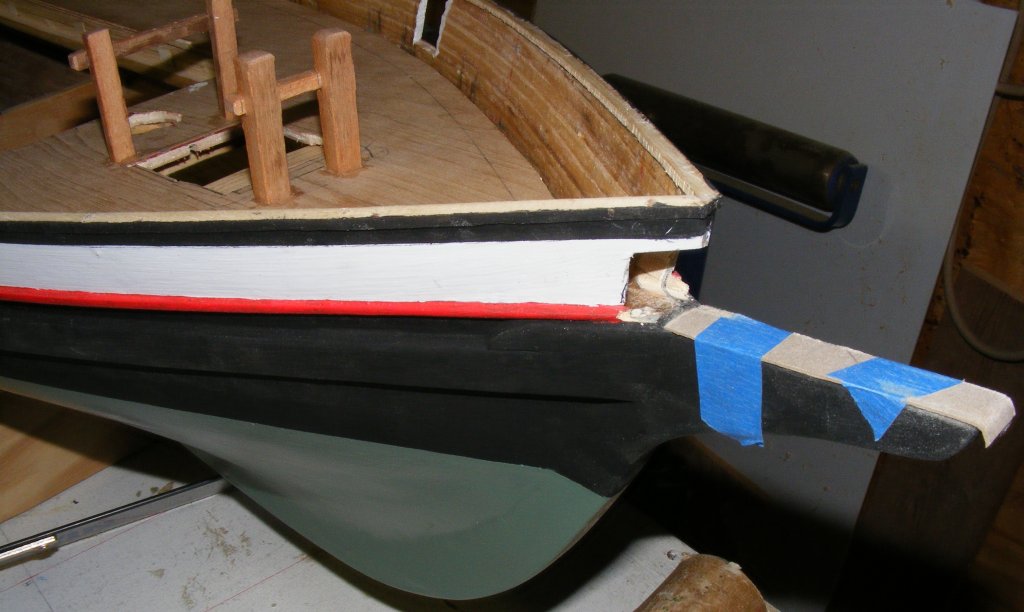
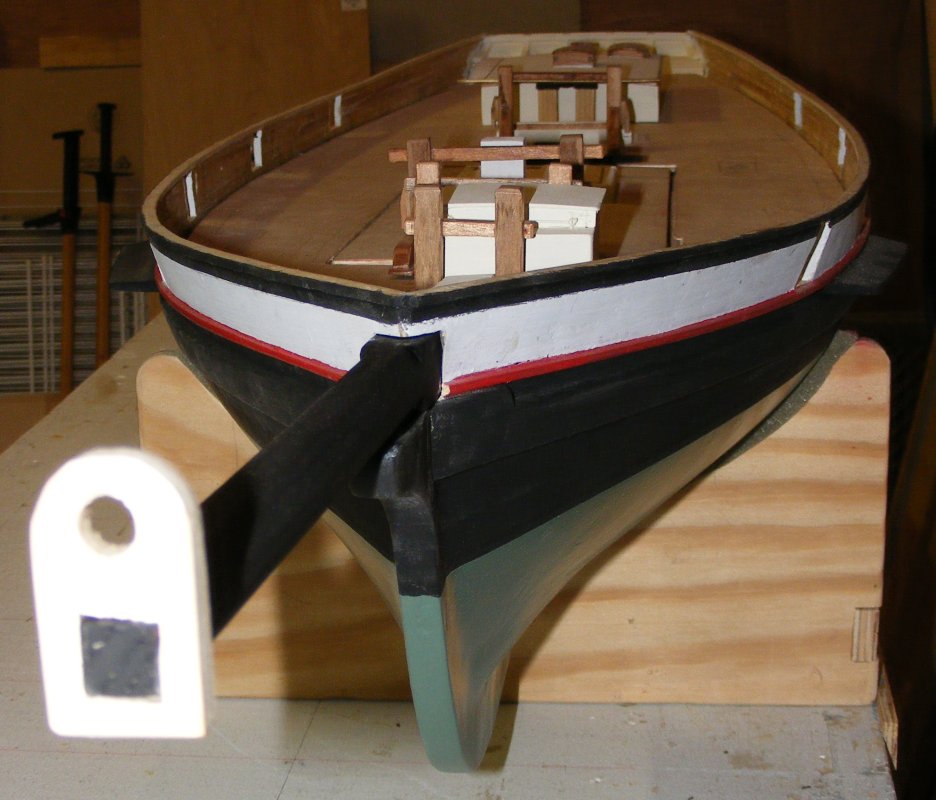
5/30
False rudder head installed. |

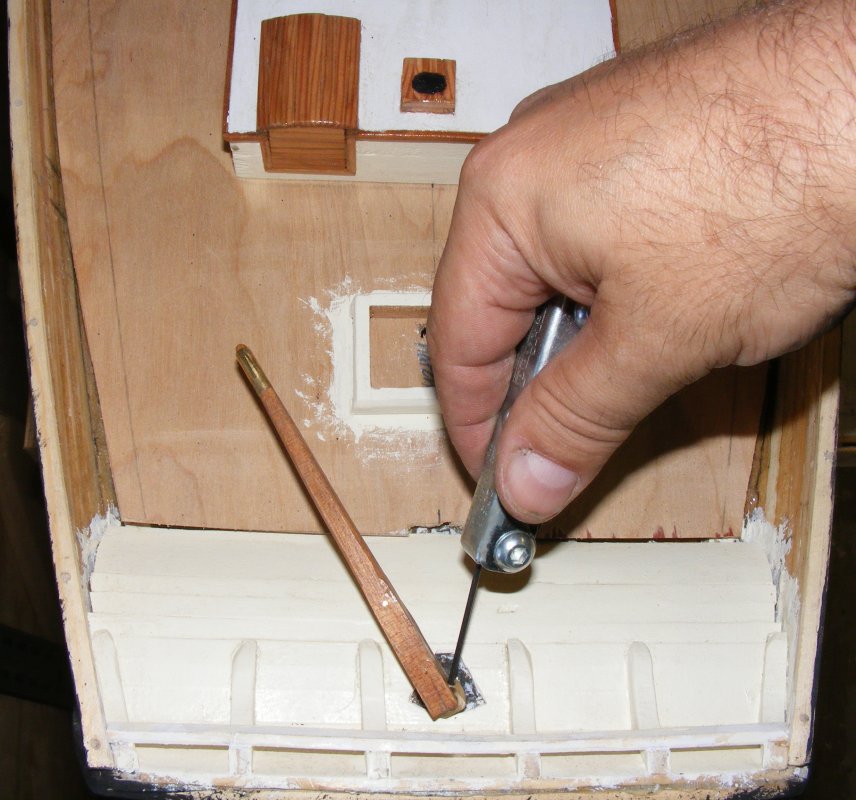
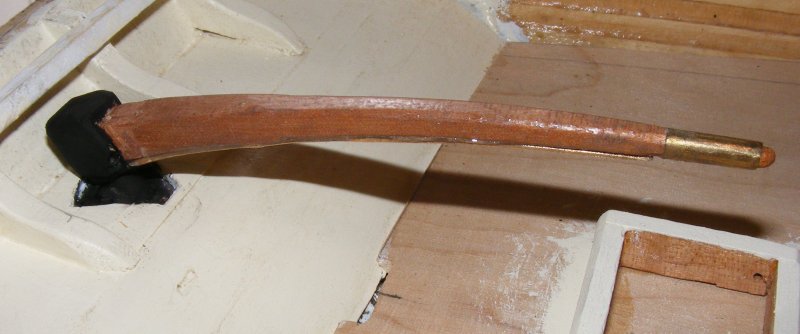
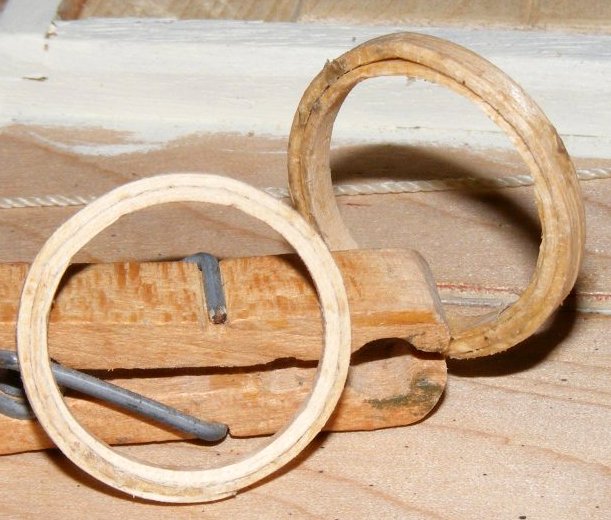
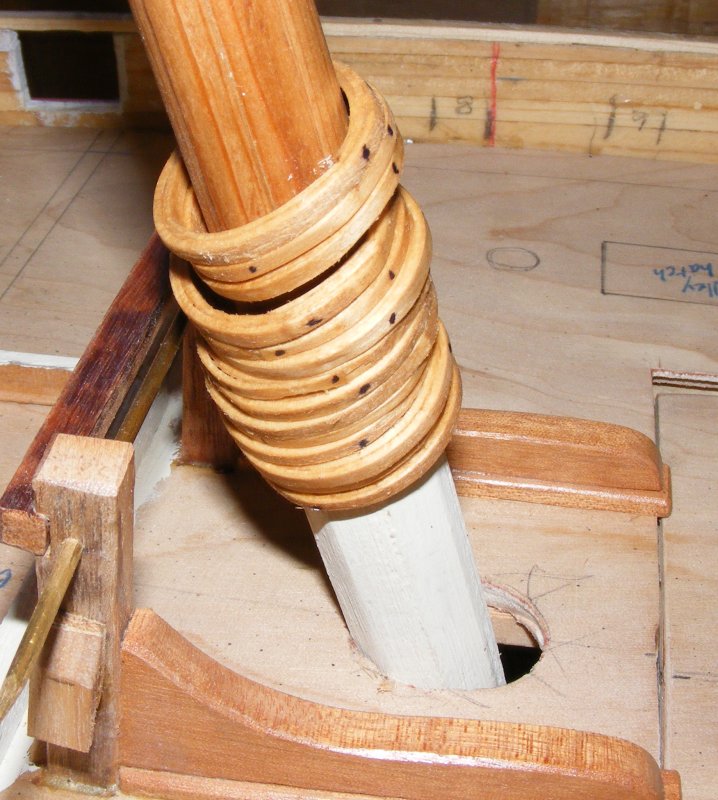
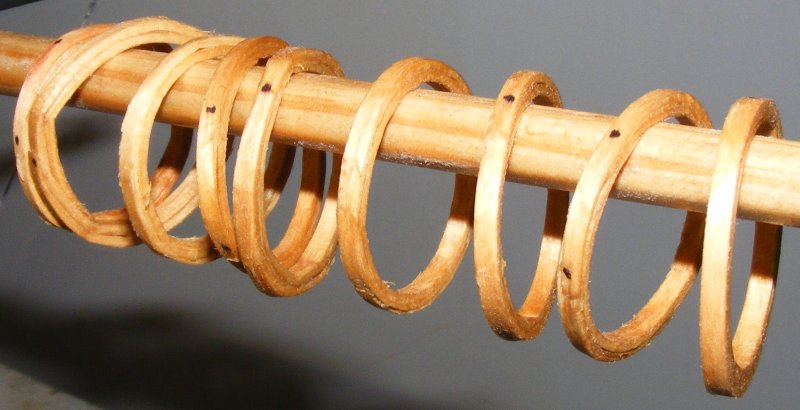
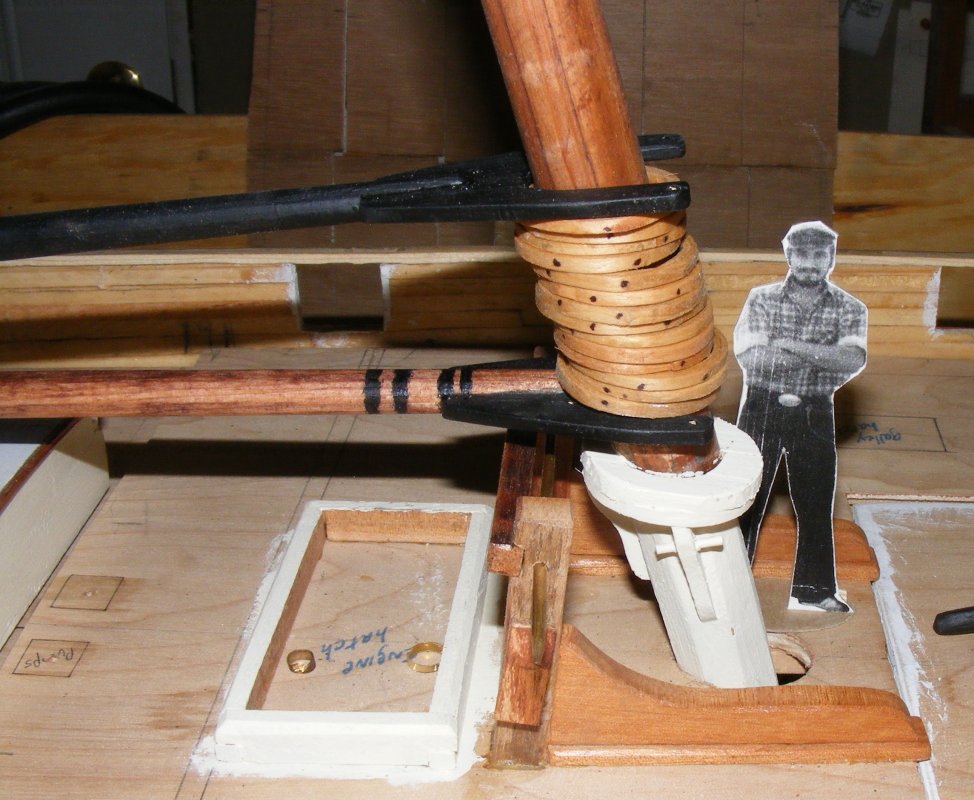
Mast hoops. |

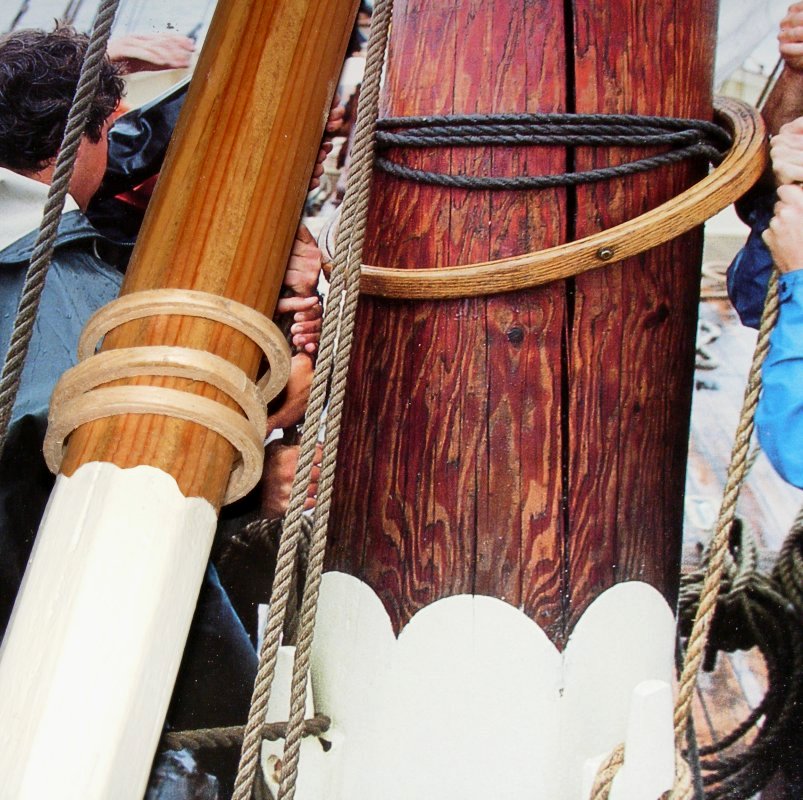
Compared to the real thing. |

5/31
Finished hoops on the mast. |

Stained hoops drying. |

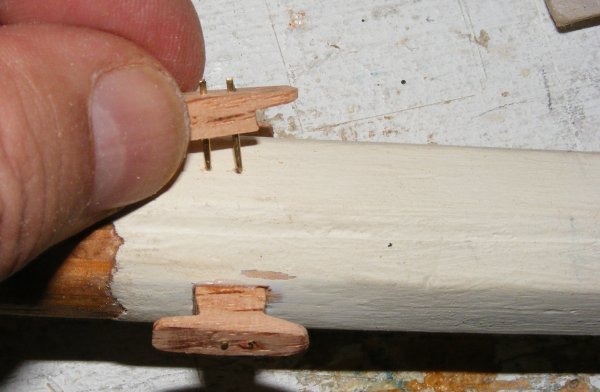
Installing foremast cleats. |

Cleats installed and painted. |

6/1
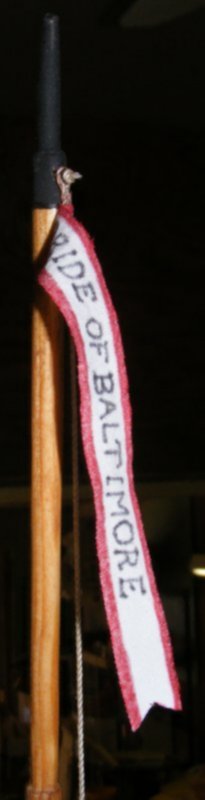
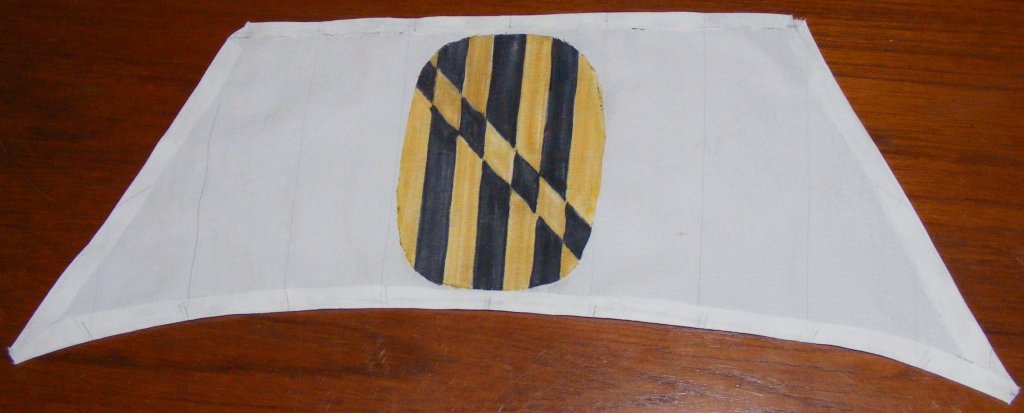
Pennant cut with new hot-knife blade. |

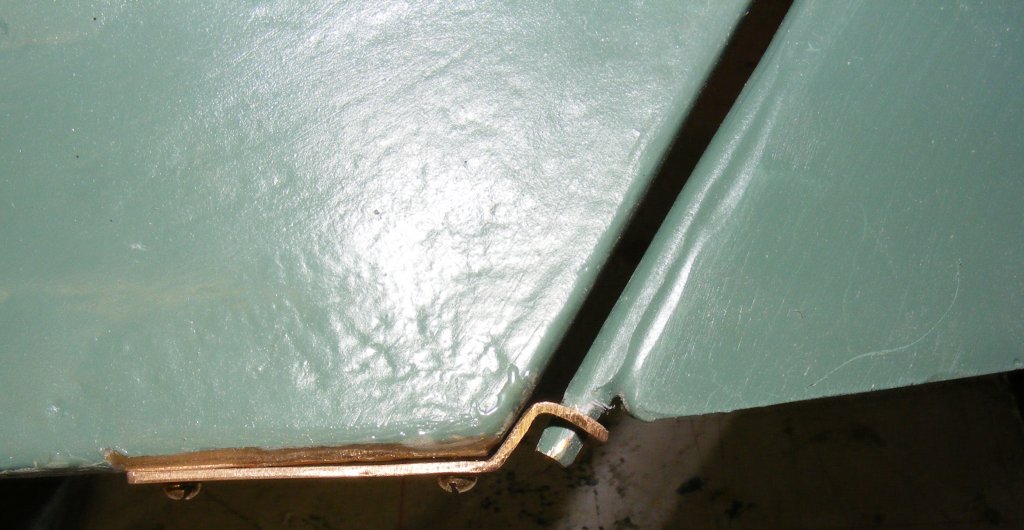
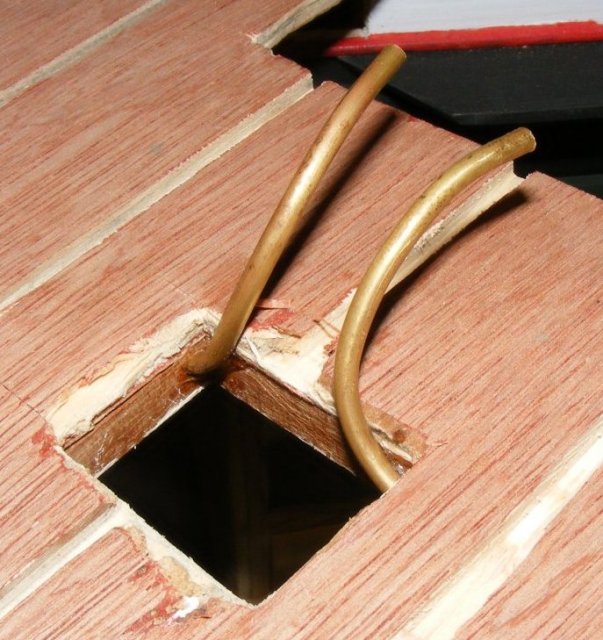
Tubing guides steering cables below deck... |

...from the lazerette hatch. |

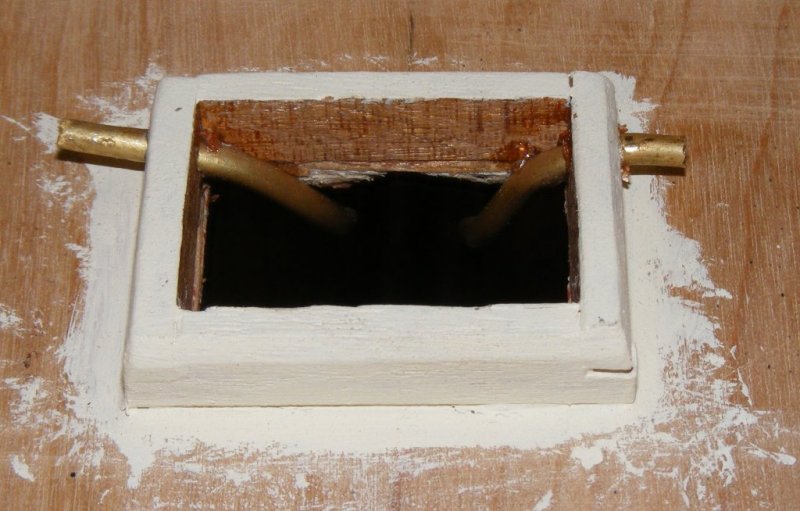
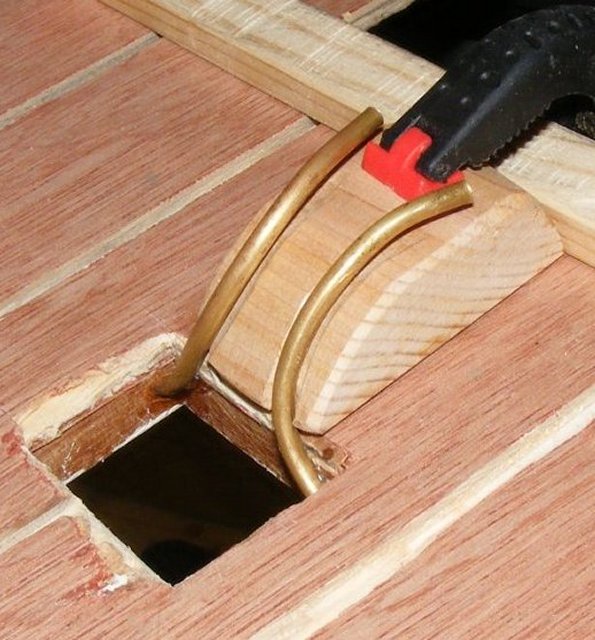
Cedar block reenforces the tubing. |

6/2
Foresail cut from Supplex with the hot-knife. |

6/3
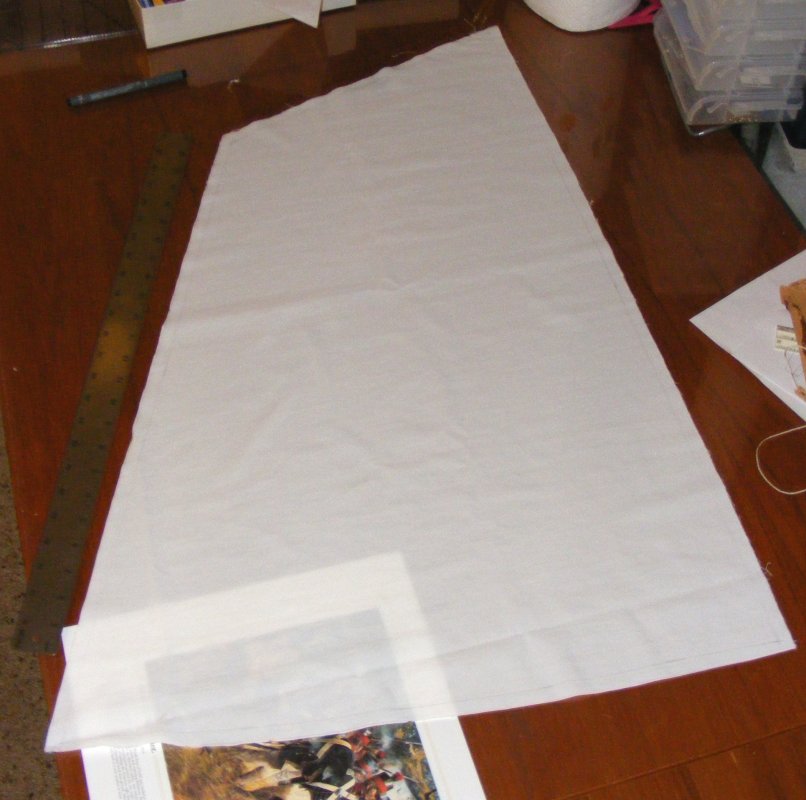
All the sails cut and ruled. |

6/4
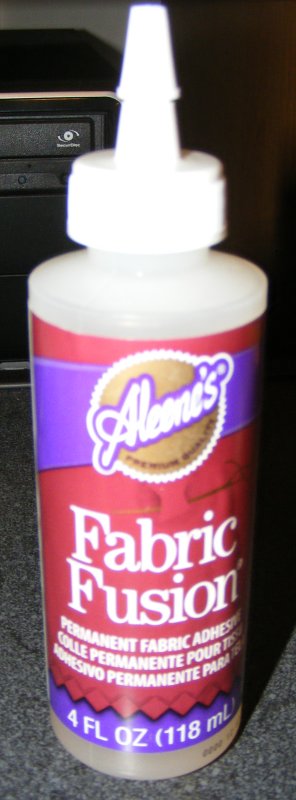
Steering fair-lead block under sub-deck. |

New fabric glue. |

6/5
Three heads'ls tried on for size. |

Fore t'gallant and "The Eye of Sauron." |

6/6
Squares added to the laundry list. |

6/8
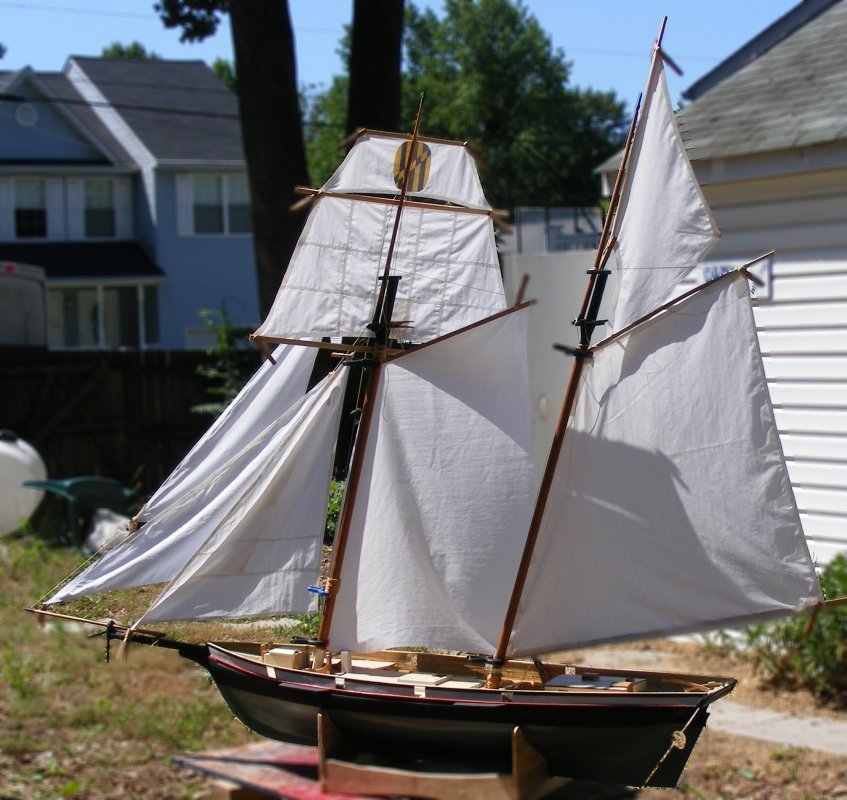
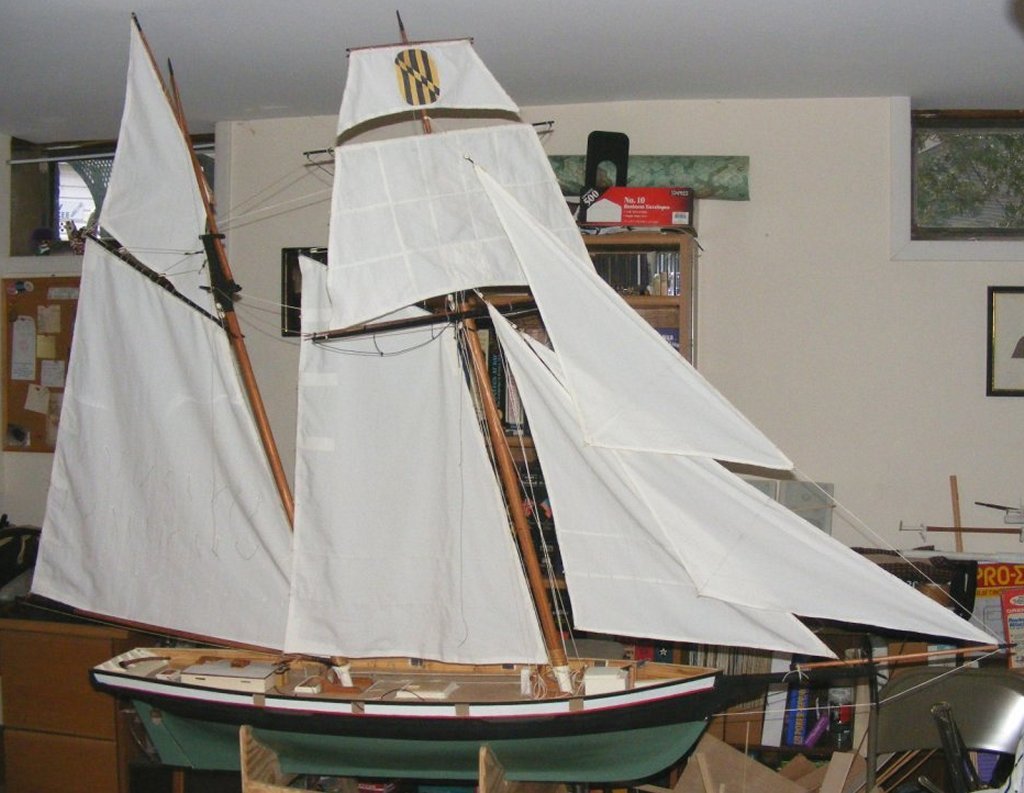
Fully clothed. |

6/9
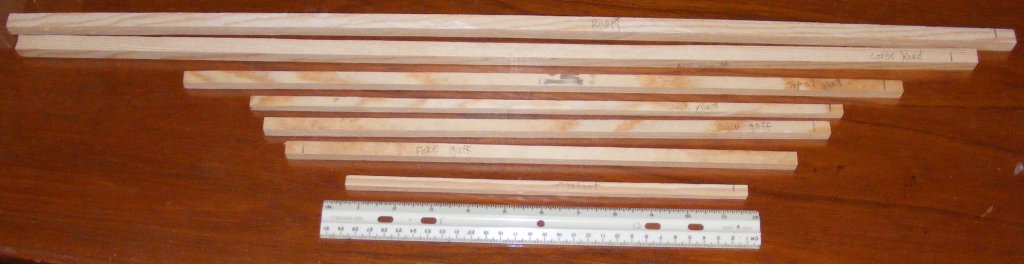
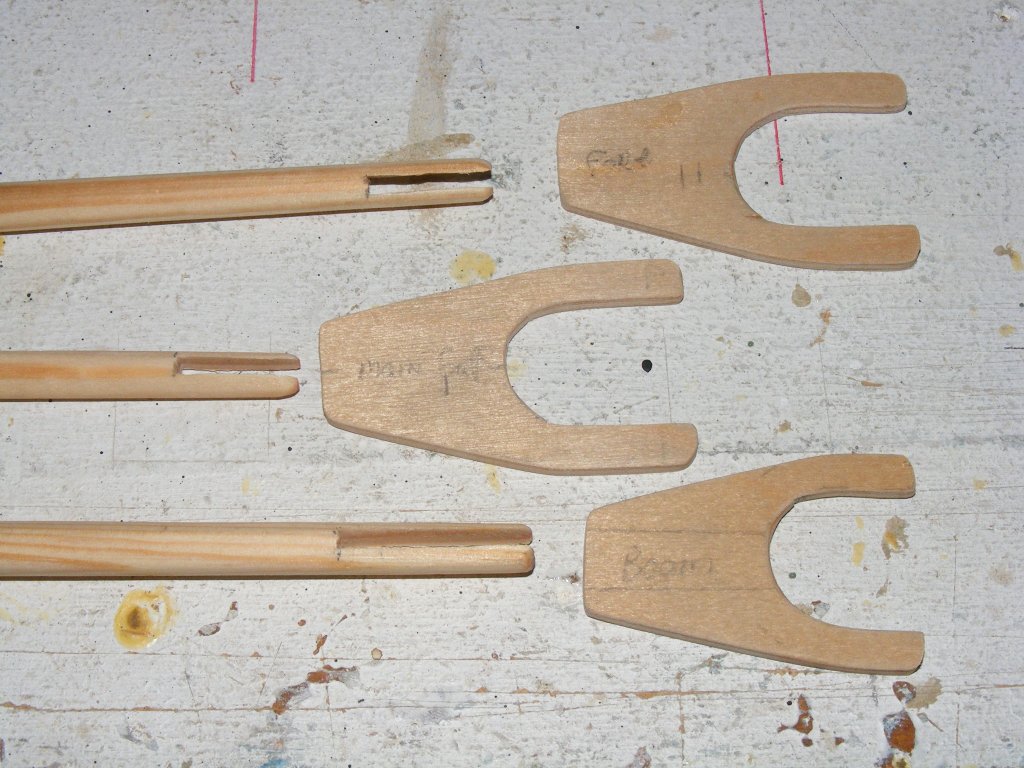
Boom, yards, gaffs. |

6/11
Boom and gaff's jaws and slots cut to receive them. |

Main mast table and boom jaws. |

Main gaff and jack-yard. |

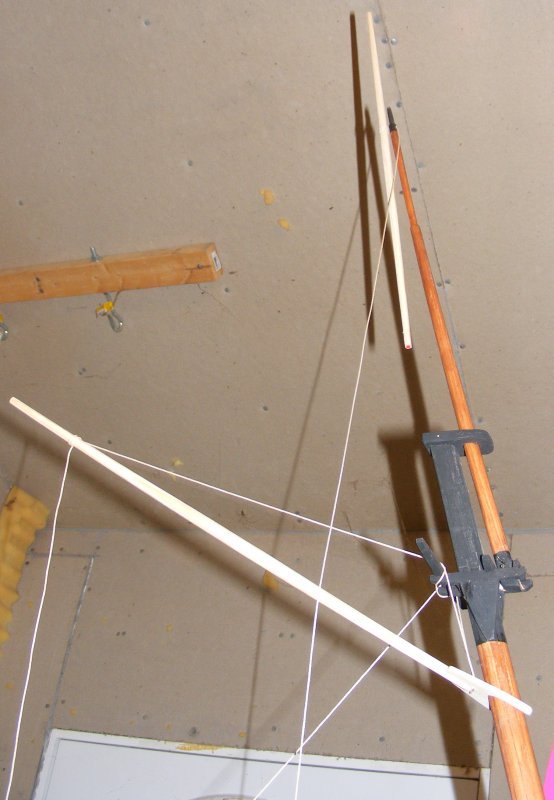
Sail hung up on the wall and the yards laying across the rail. |

6/12
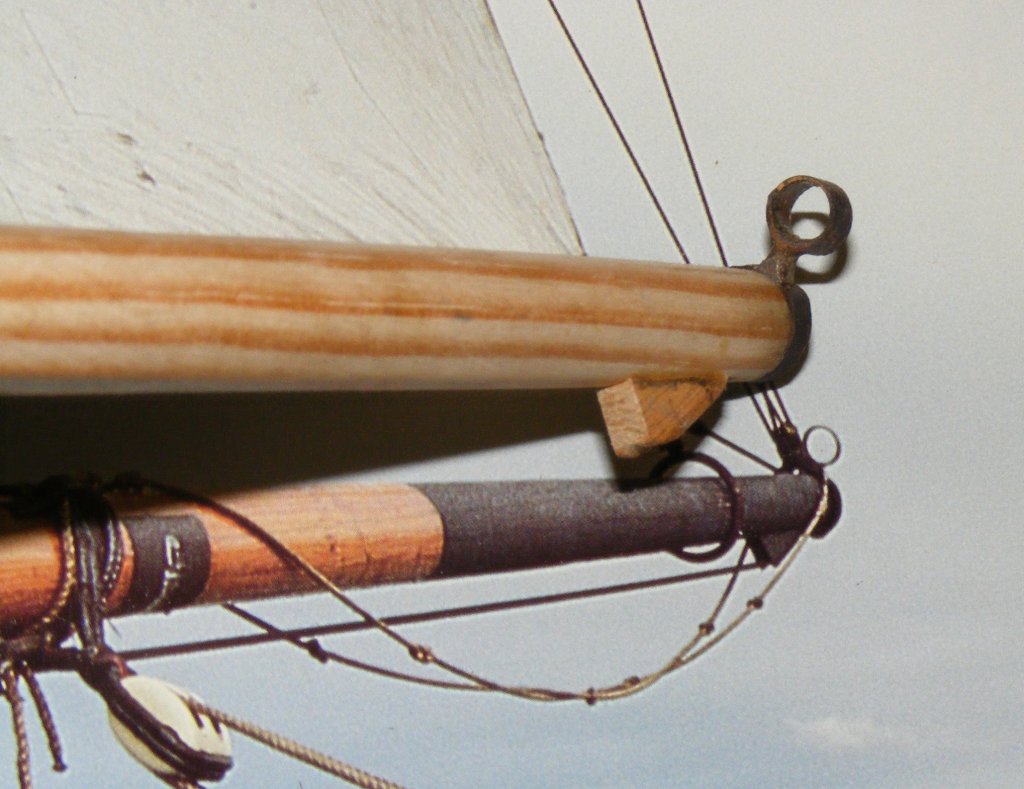
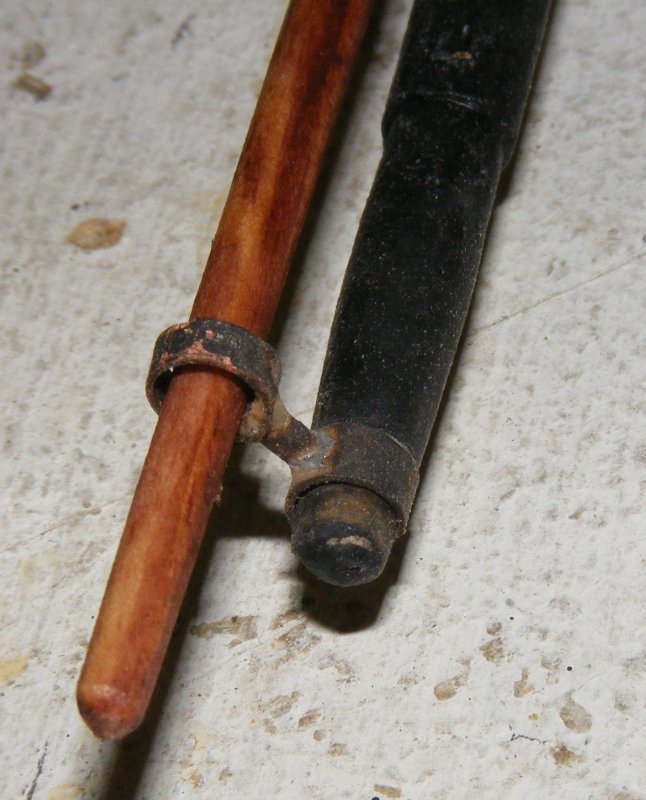
Stuns'l boom iron. |

Ring-tail boom iron on boom with a photo of the real thing below. |

6/14
Blackened stuns'l boom iron and stuns'l boom on painted yard. |

Thickened boom saddle. |

Jackstays. |

6/18
T'gallant got a bolt-rope and is attached to it's yard. |

6/30
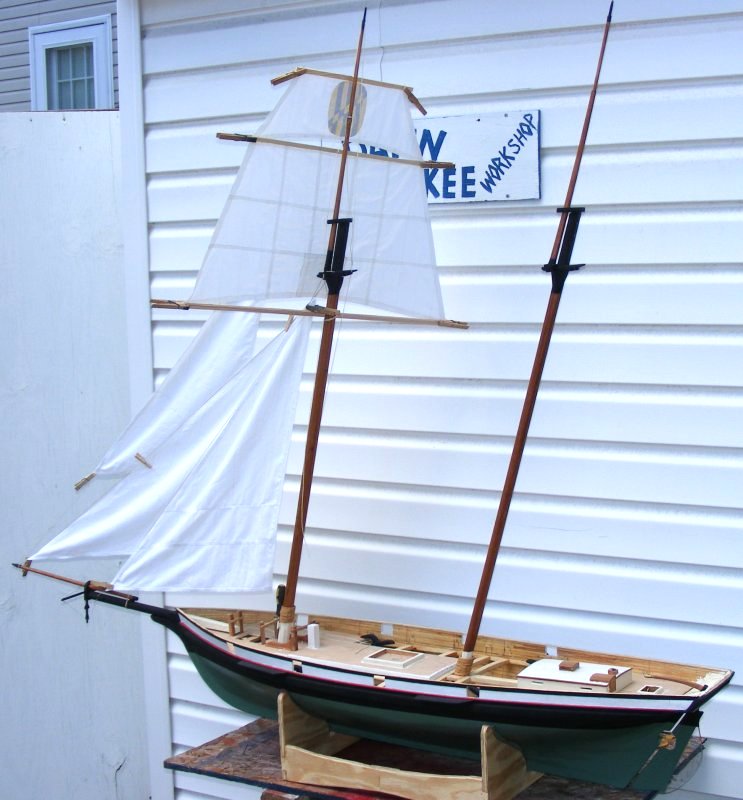
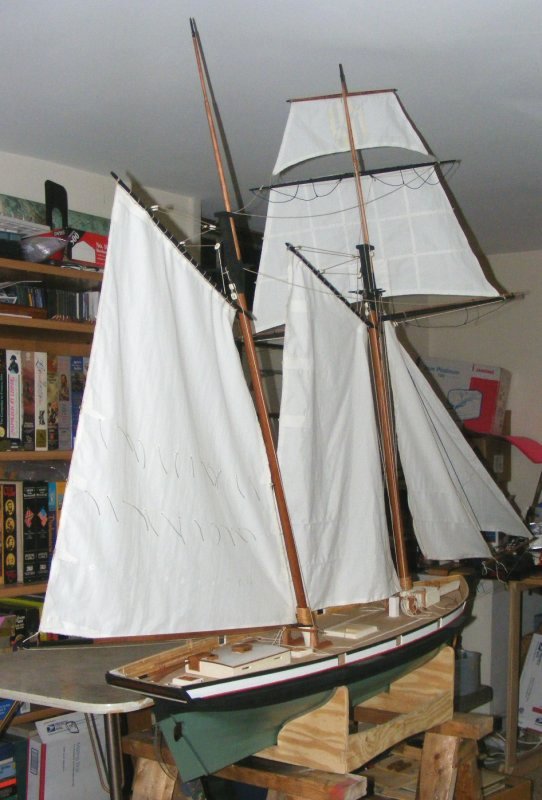
Four lowers set. |

7/1
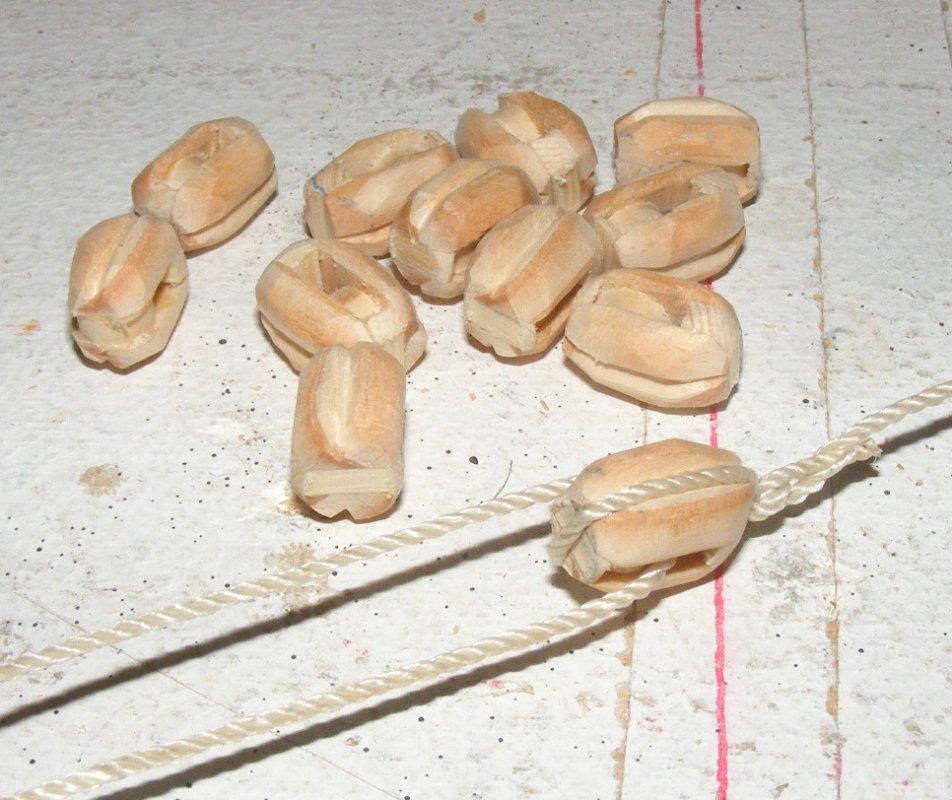
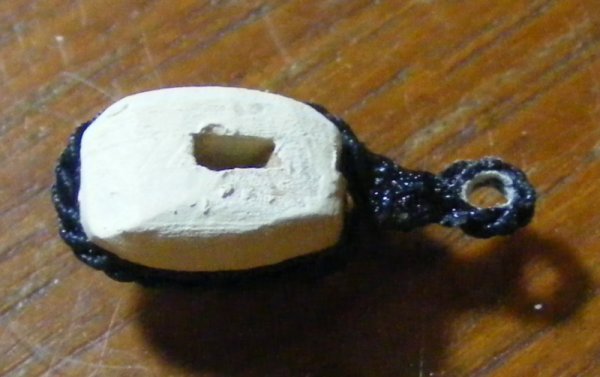
1/2" blocks. |

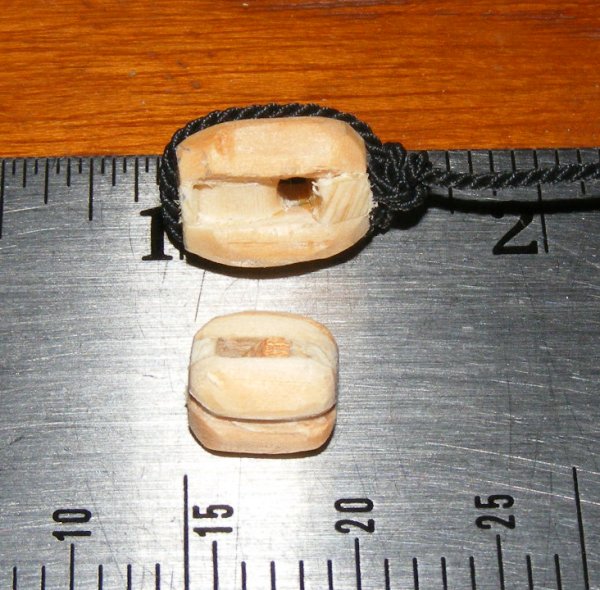
7/2
A 1/2" block and a 3/8" block. |

7/6
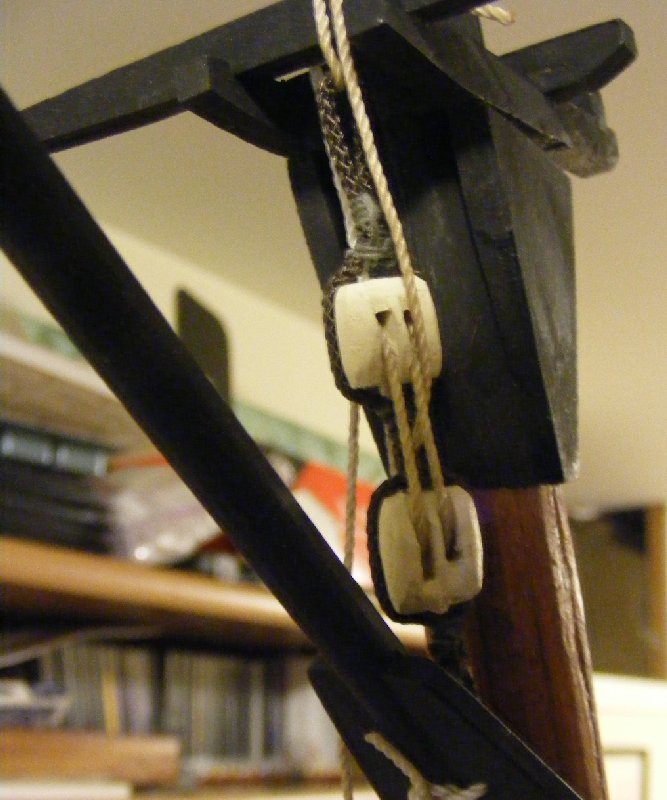
Throat halyard double blocks. |

Fore peak halyard rove through. |

7/10
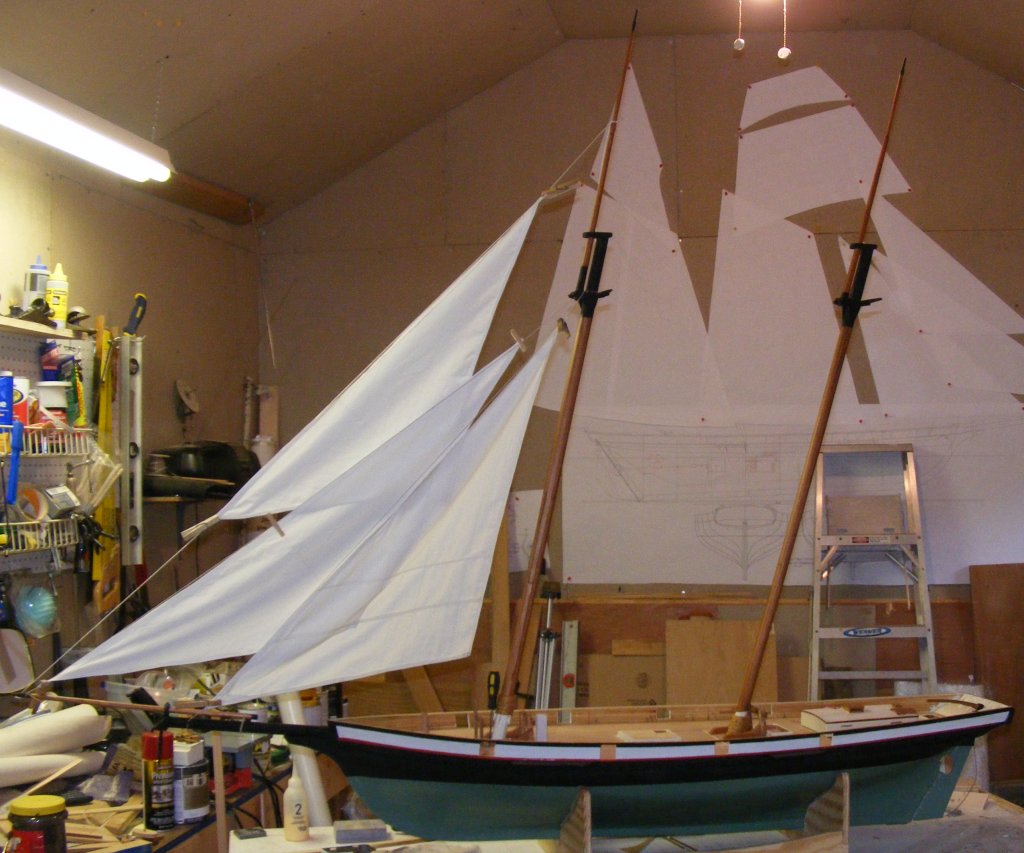
3/8" block stropped. |

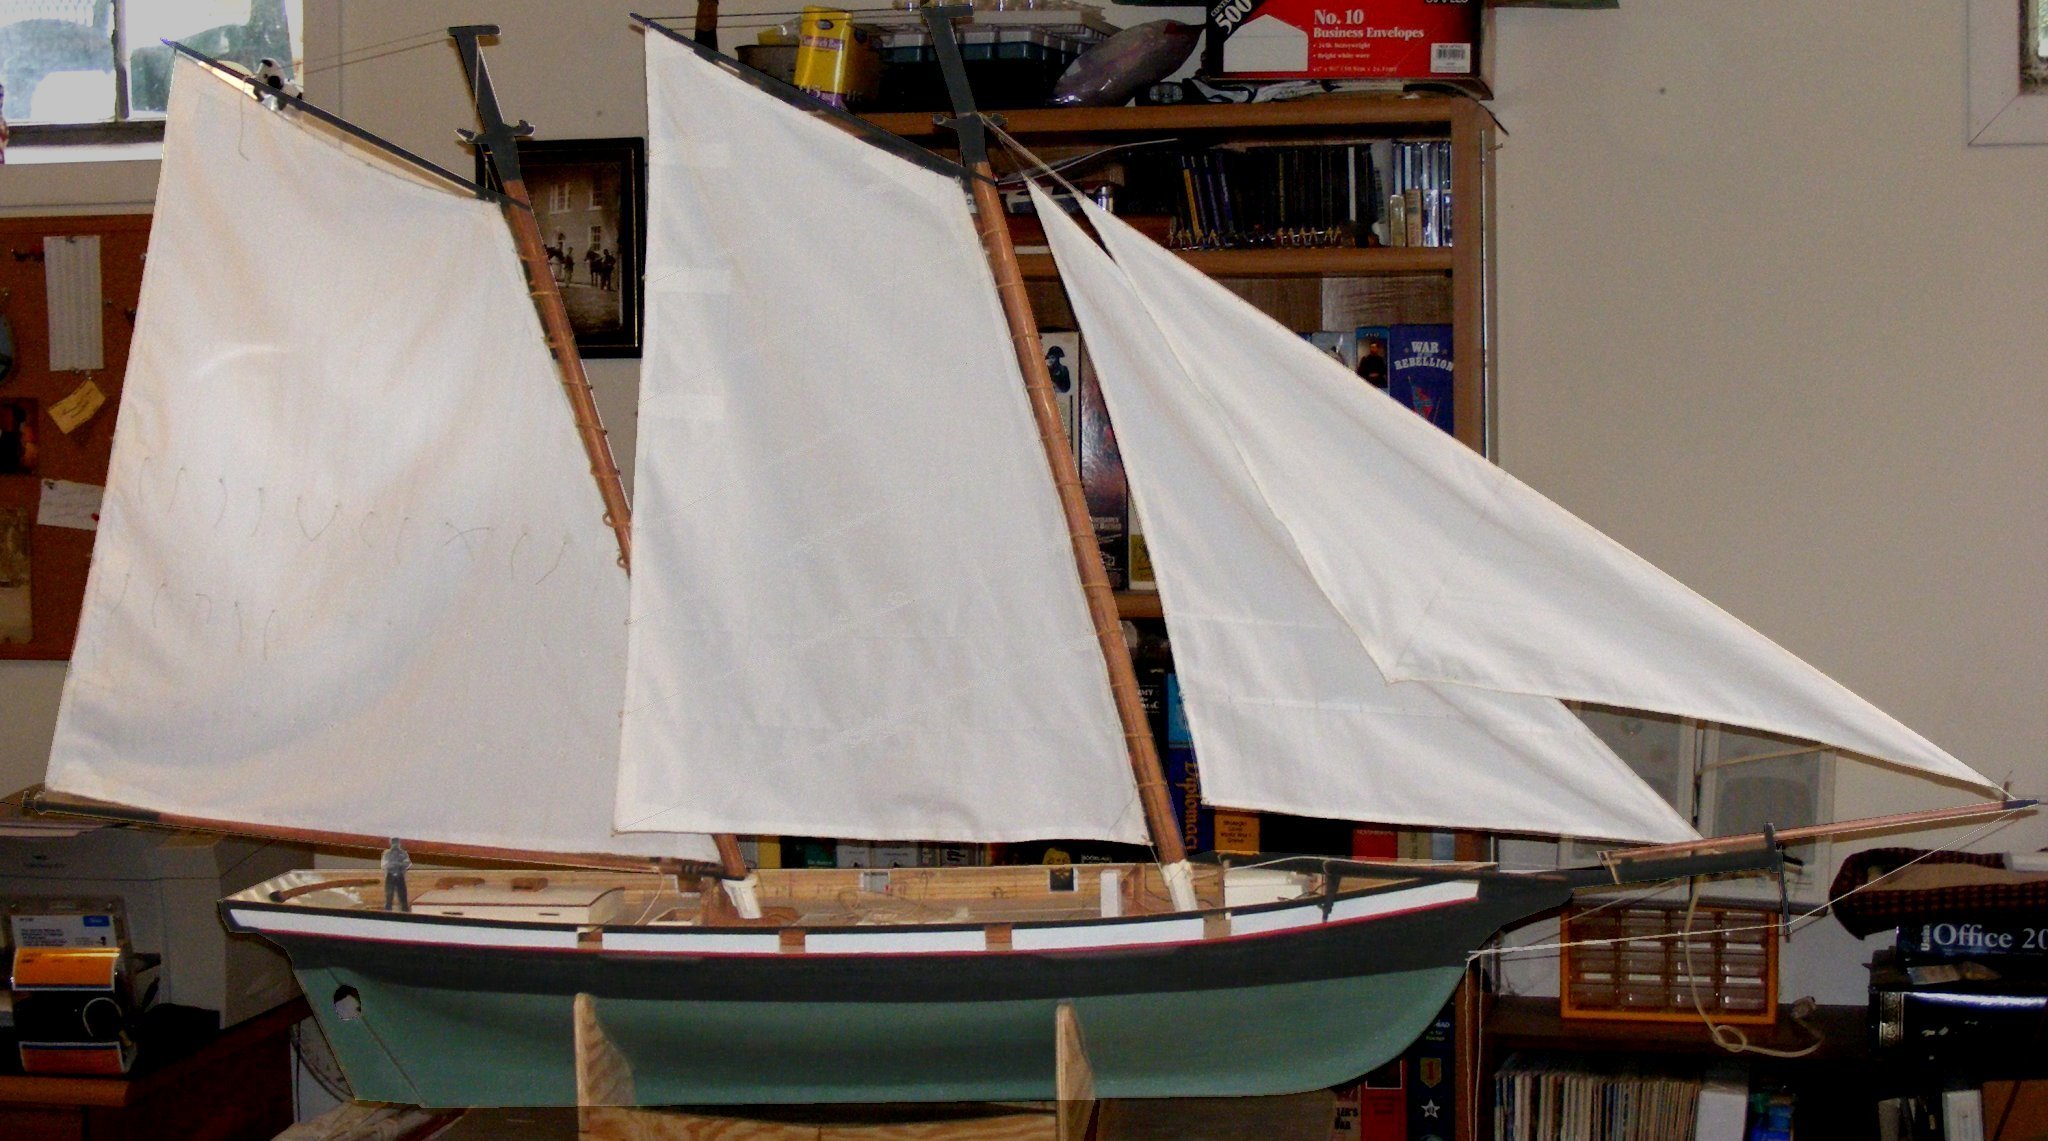
Setting sails for display next week. |

7/13
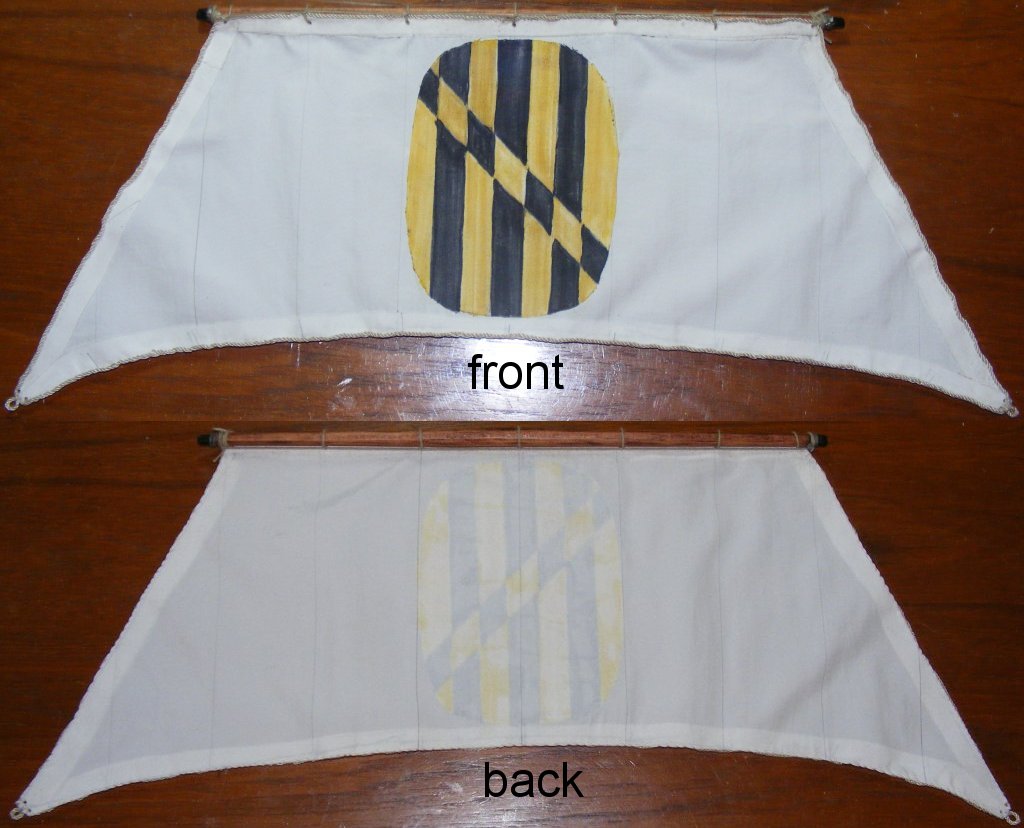
Main tops'l and flying jib bolt-roped and set. |
. |
. |