7/24/12
Previous Page | Next Page | Table of Contents
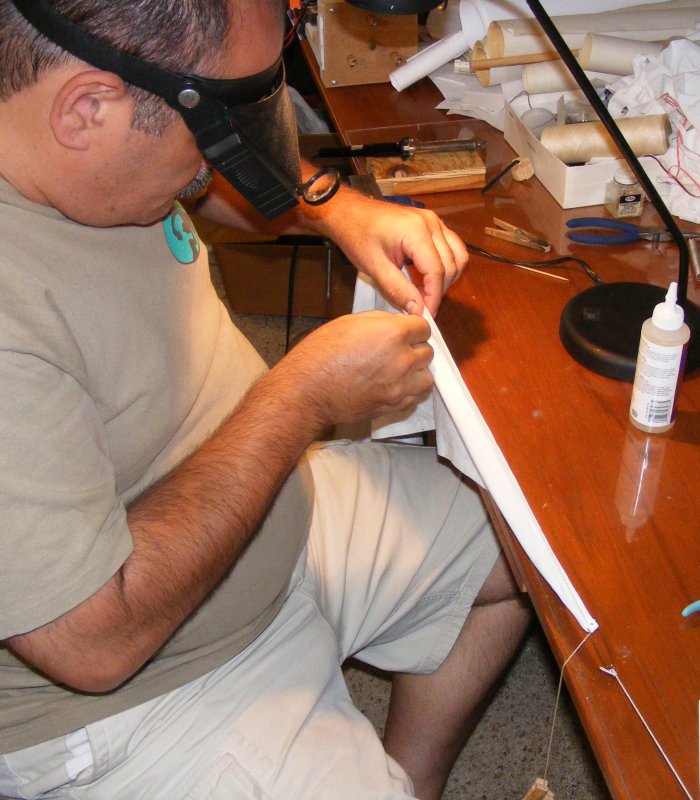
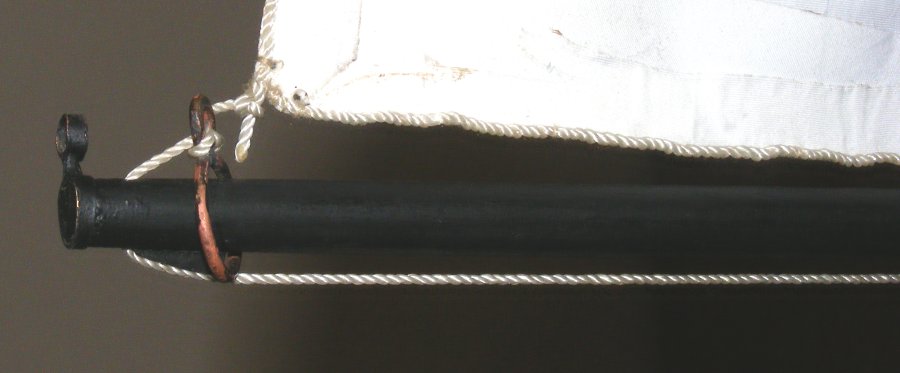
The boltropes are some white nylon cord about 1/16" in diameter, that I've had for years. I used it on Constellation's sails as well. It's nice stuff for this application.
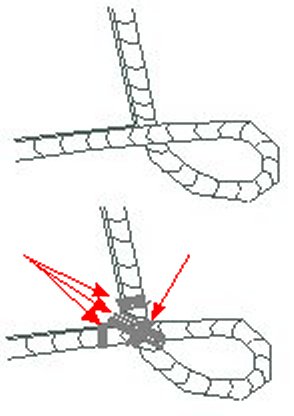
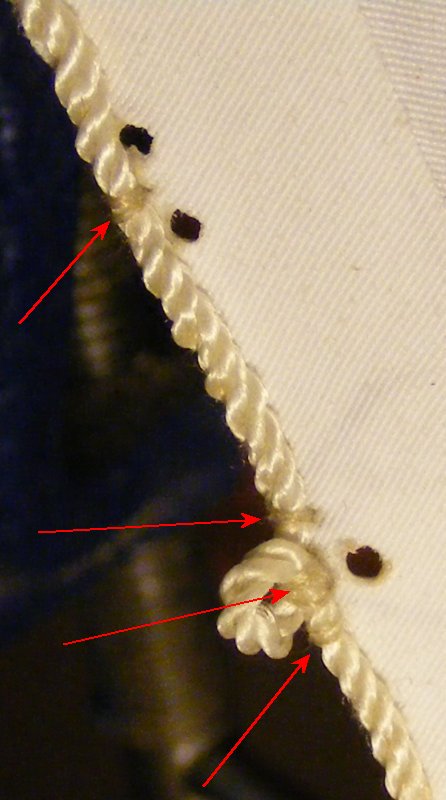
Each sail gets and eye, or cringle at each corner and at other spots around it's perimeter such as reef cringles. Each eye is crossed over itself and reenforced with several turns
and a half-hitch through the eye and on either side of it. This keeps the eye from pulling closed as well. Every two inches or so along the bolt rope, two turns and a half-hitch
creating a stopper whip which keeps any stitching that may break from coming undone along the entire edge.
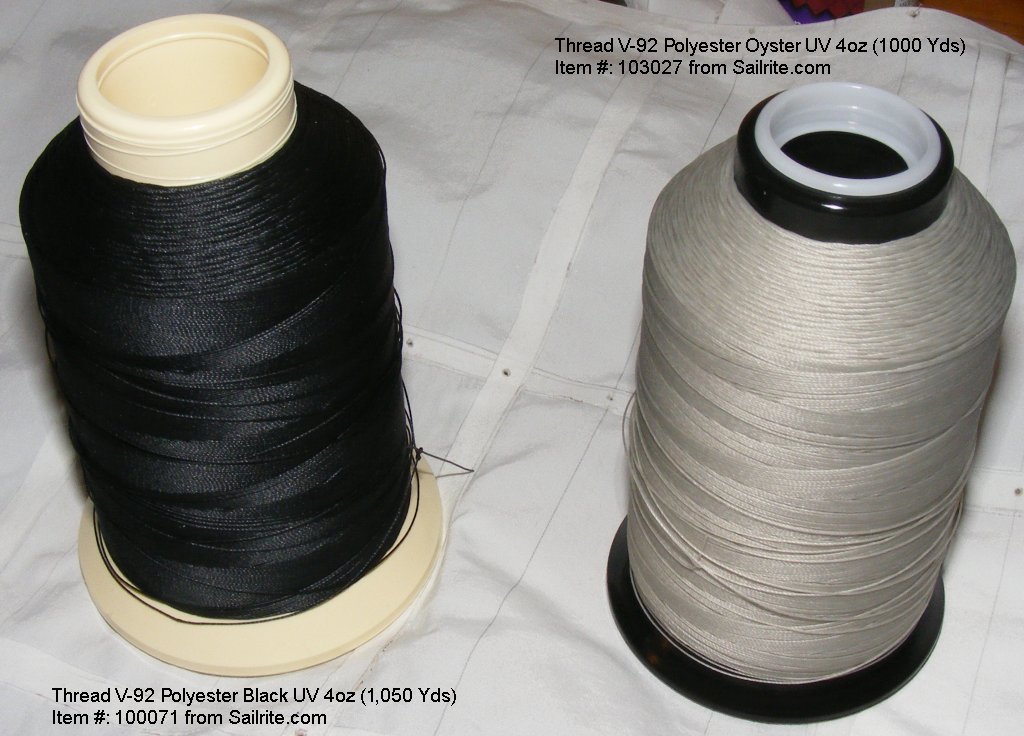
8 threads per strand gave me a line .1" in diameter. I'll use this in "oyster" to make the anchor rode. Finally, 1 threat per strand produced a line .0312" in diameter, which I'll use for flag halyards, reef-points, rat-lines, and anywhere else lighter line is needed.
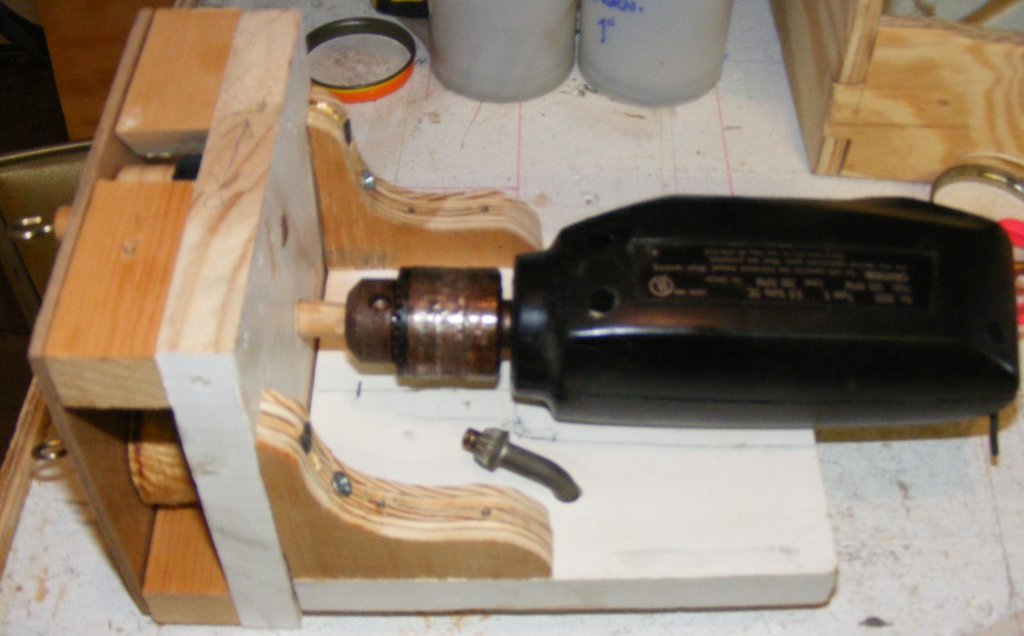
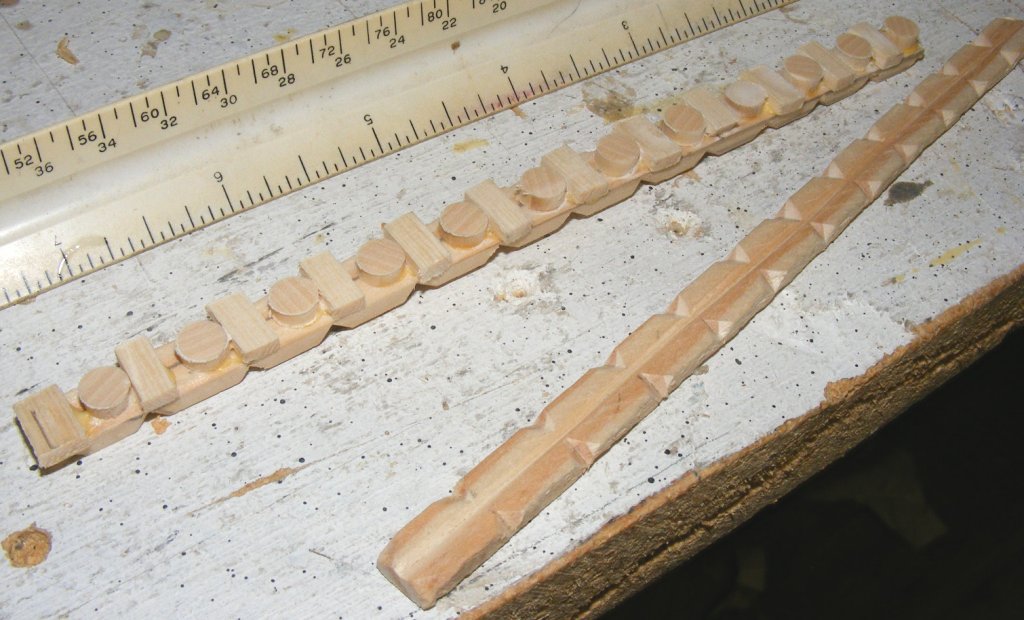
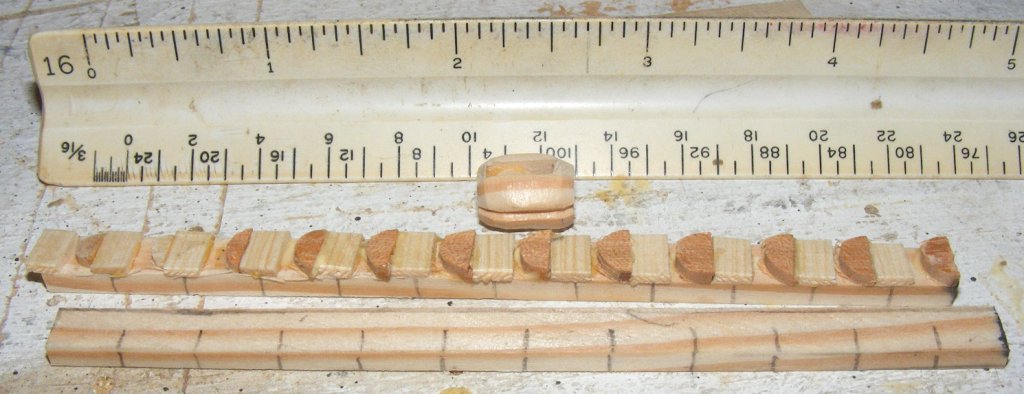
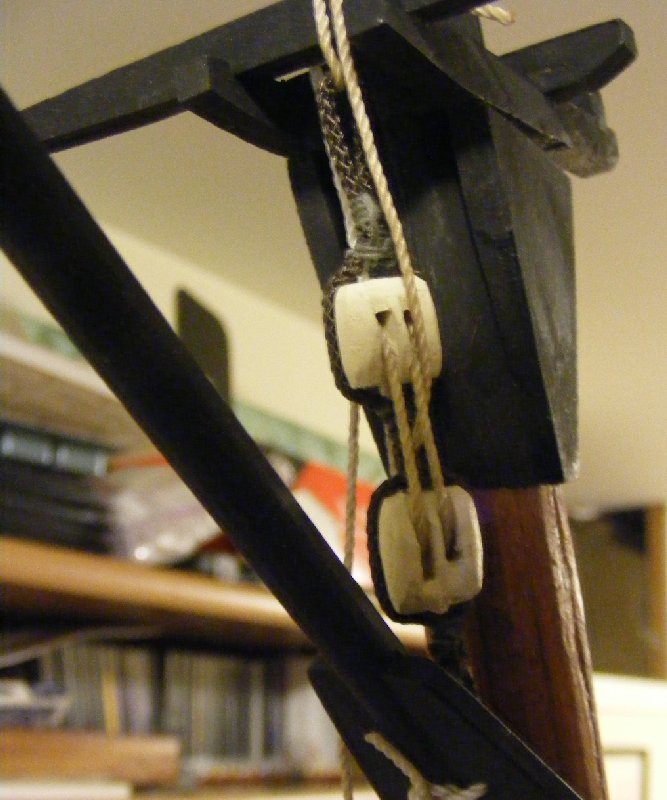
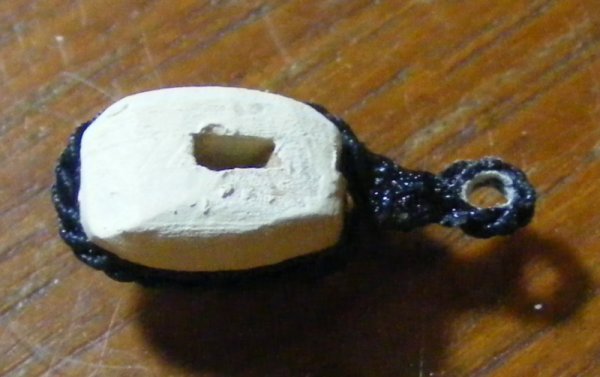
7/1: Blocks There's a lot of blocks on this schooner and there's a few things I can't move forward on until I have blocks in hand. There will be three basic sizes. The blocks are made much the way real ones are, except I worked on a strip of 12 of them at once. Two strips will make the side shells for a dozen blocks. Some bits of 1/16" thick stock get glued onto the division between blocks and form the spacers between the shells. 1/16" thick slices of dowel rod represent the sheaves, but are glued in and don't turn. Then the other shell is glued on and clamped up. A bit of sanding kncoks off whatever is sticking out and rounds the side edges, then each block is cut off. More sanding and shaping and eventually it's ready to be painted and stropped.
A dozen 3/8" single blocks were made the same way. There's more shaping and sanding to do, which means I need to make a sanding drum to get them the way I want.
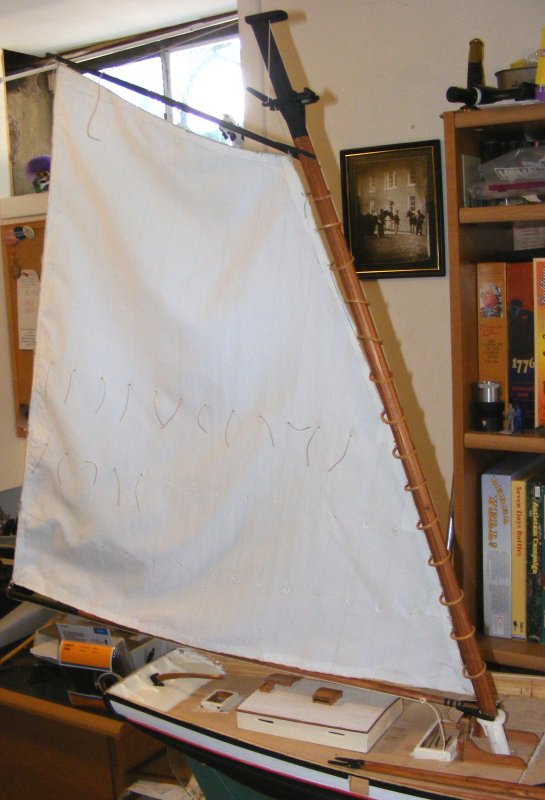
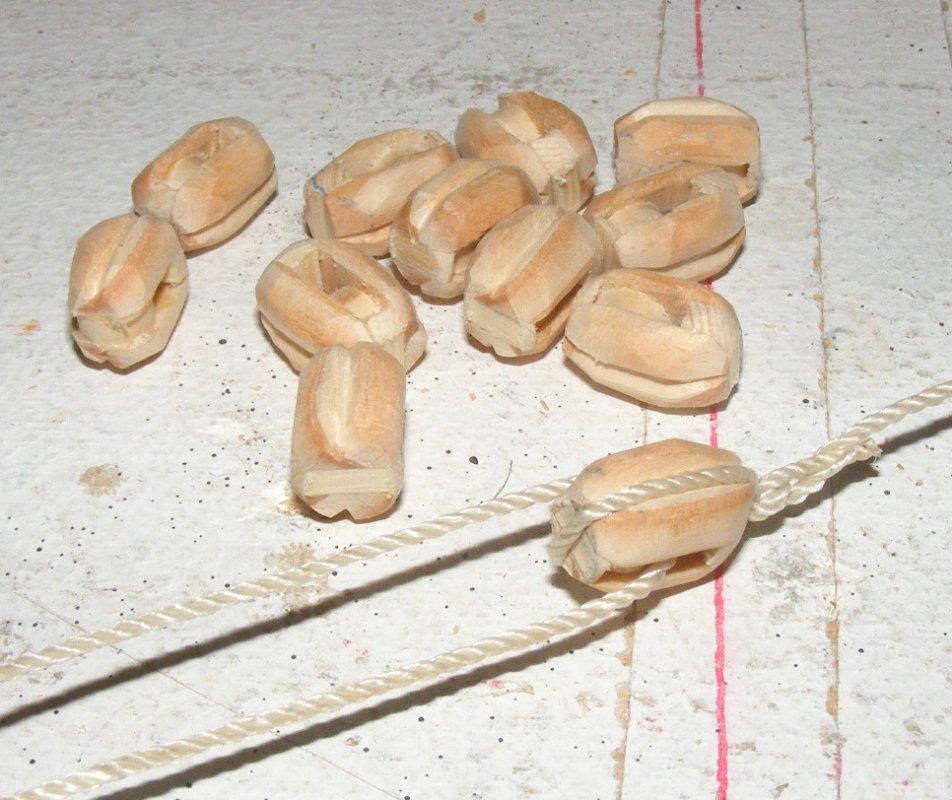
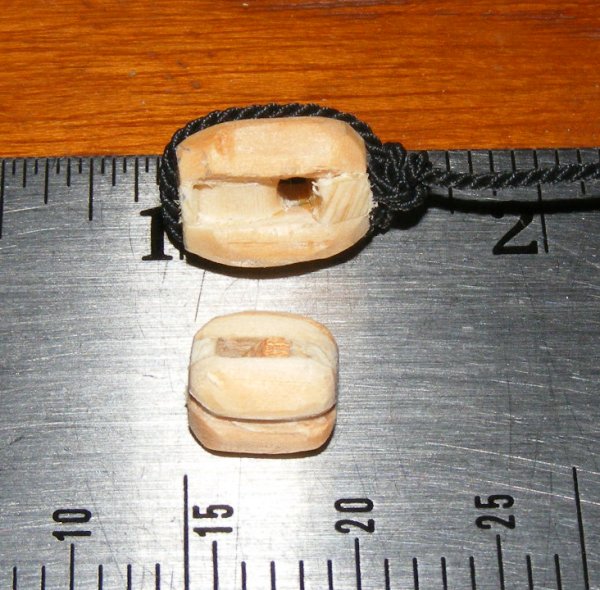
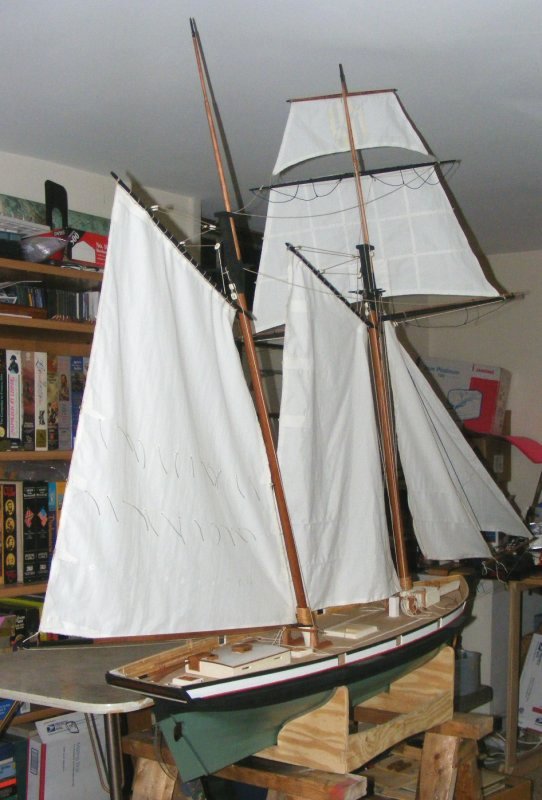
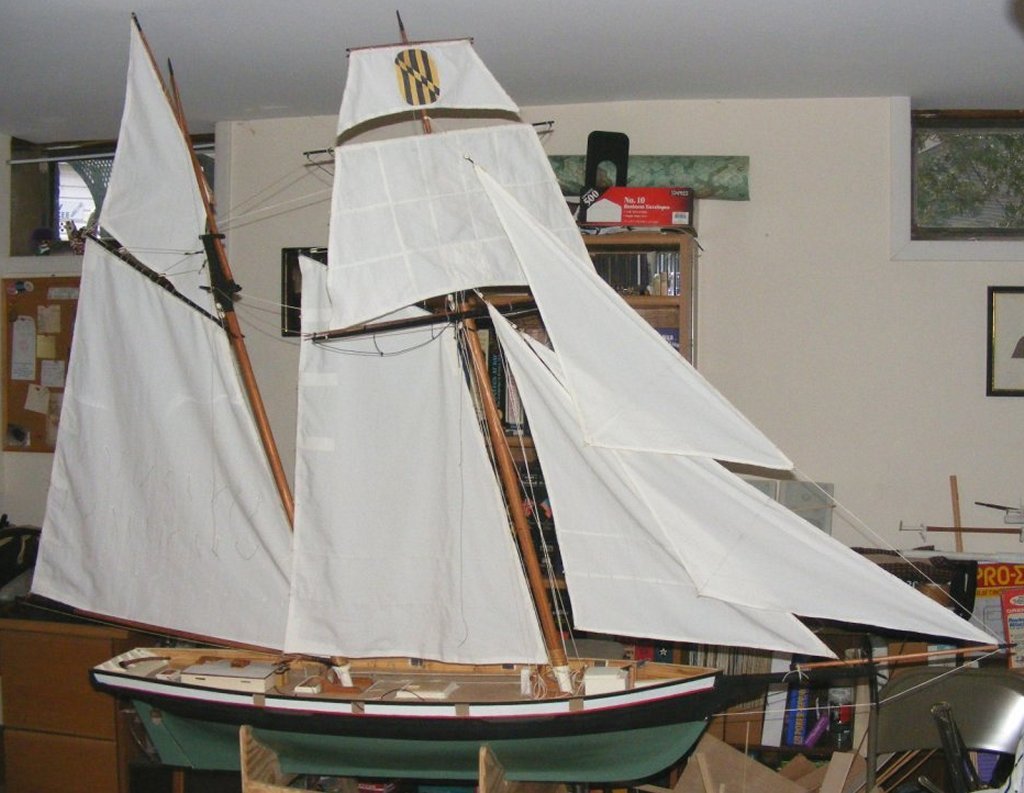
7/2-11: I've been invited to display the model at the Fells Point Visitor's Center in Baltimore on the 22nd, the anniversary of the first seven letter-of-marque privateers to sail from Baltimore during the War of 1812. Toward that end, I've been working to get the model in some sort of displayable condition; that is, put the sails up without clothes pins. I got the foot ropes onto both yards, clew blocks on the tops'l yard, sheet blocks on the corse yard, all the throat halyard double blocks, and the peak halyard blocks for both gaffs. Forestays'l and jib halyard blocks attached to their sails. The fore tops'l is lashed to it's jackstay and the fores'l and mains'l are lashed to their gaffs. I'd really like guns and carriages made in time, but I don't know if I manage that. I've been spinning line like a crazed spider to strop blocks but I need to make several long lengths of 8-10 feet for shrouds and stays. There's more blocks to make, several with working sheaves like the brace blocks and main-sheet blocks. Today I'm getting the bolt-ropes on the remaining two sails.
7/13: Yesterday the main tops'l got it's bolt rope and was lashed to it's jack-yard. Today the flying jib got it's bolt-rope and halyard block.
7/18: So, the day at the Fells Point Visitor's Center was changed, and I can't do the new day - so much for displaying the model. |
||