9/18/2014

 |
 |
|
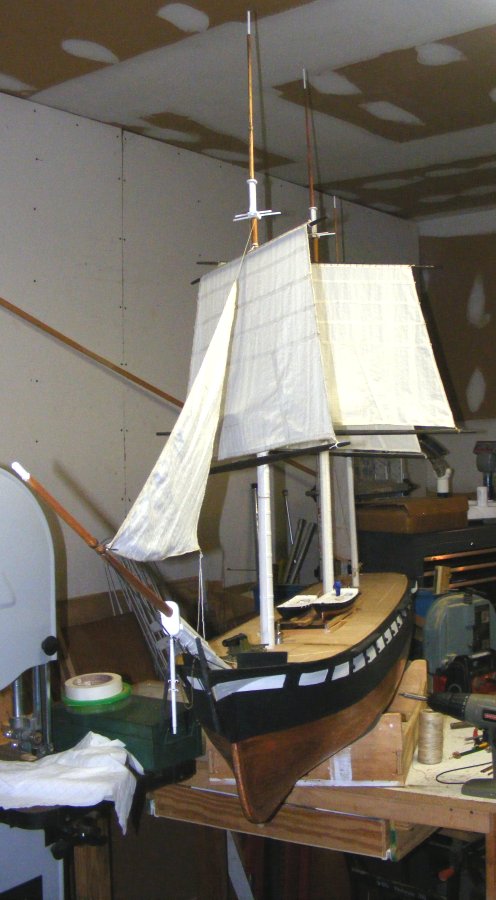
Previous Page | Next Page | Table of Contents click pictures for larger versions T'gallant Masts
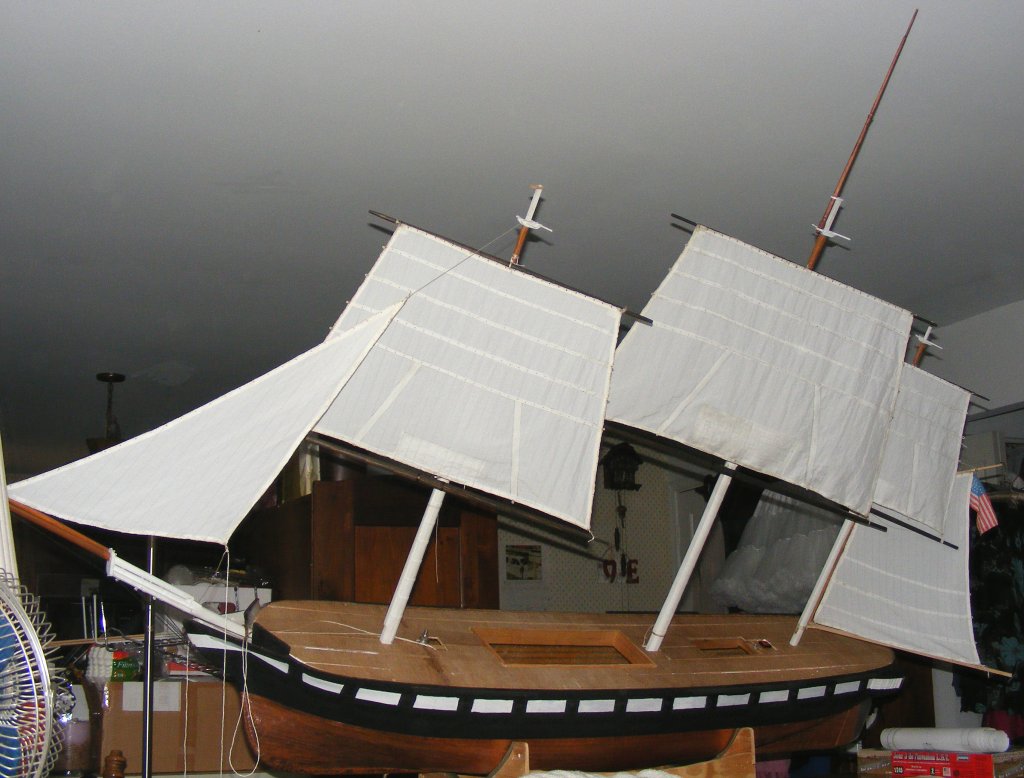
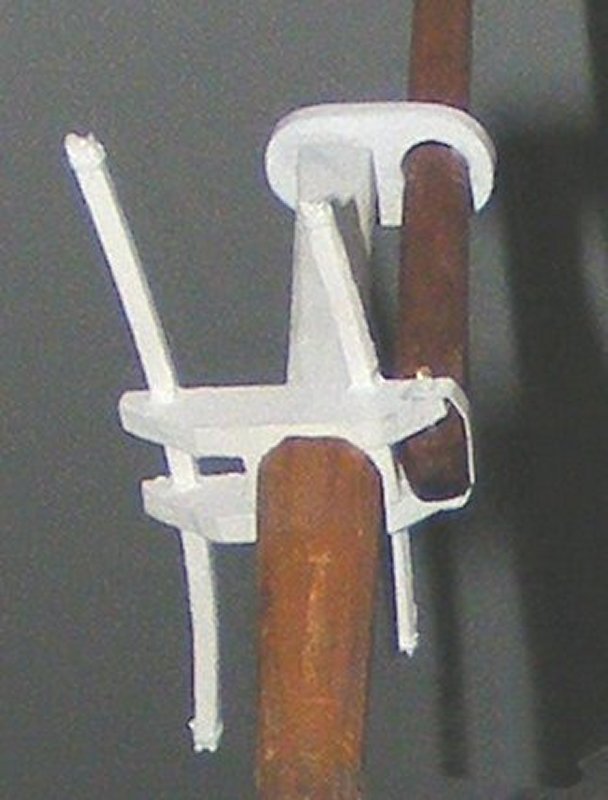
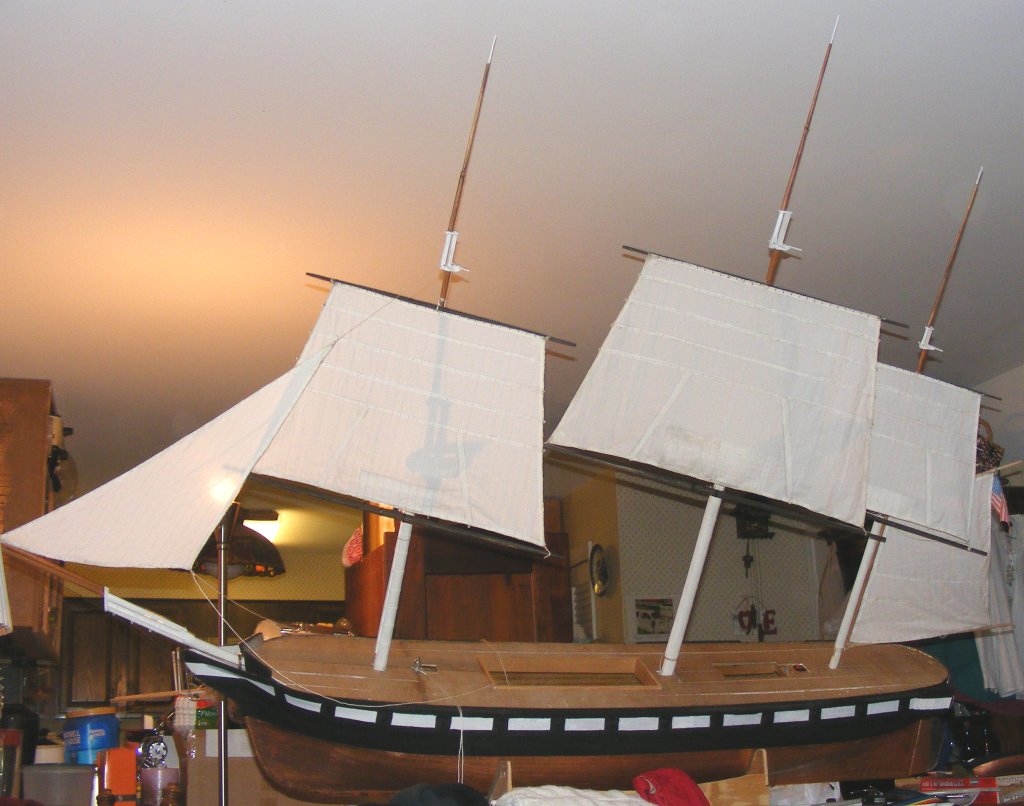
On the real ship, the heel of the t'gallant mast was retained at the topmast cross-trees by an iron strap at the front of the trestle trees that hinged open. Making something like that functional and strong enough to withstand the pressures applied by sails and stays wasn't worth the effort, so I simply made a brass strap that's CAed and pined to the trestle trees. I'm confident it's up to the job, as much as the cross-trees and trestle trees themselves are. The fid was done just like the topmast's were; with a brass tube lining the hole and a brass rod for the fid. About half way up the spar there's a bulge where the t'gallant shrouds and stays will sit. From here up it's the royal mast. When the t'gallant and royal masts are a single spar, this portion is called the "pole." The doubling and truck will be painted white, and I have to determine if there's any holes needed for haliards and the like.
There will also be a flattened ball shaped cap on the very top with a pair of flag haliards run through it - this is where her commisioning pennant will fly.
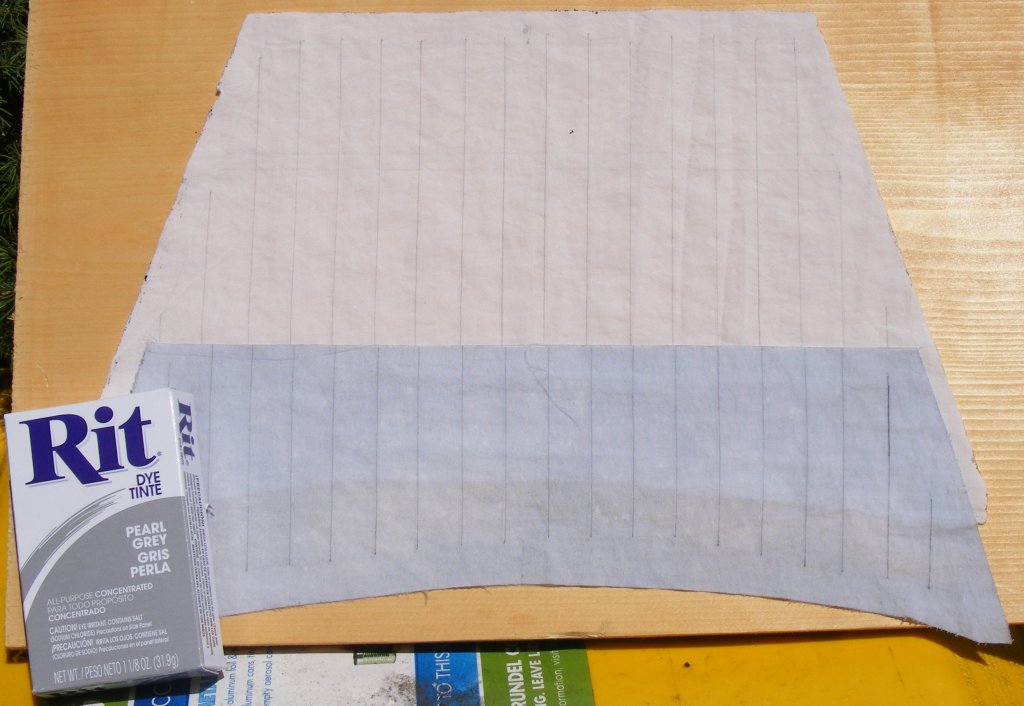
8/13: I've been meaning to do this test for some time. I was in a store when I happened on a box of Rit Pearl Gray fabric dye. A lot of modelers dye their sails to "age" them. They use coffee, tea, wood stains, all of which are fine except they all tend toward the red/brown tints. Flax sails, and military sailing vessels used flax sails, tend to age into the grays. Dying to try
So, I filled a 12oz cup with hot tap water, stirred in a teaspoon of dye, and lowered a scrap of Supplex into the mix. Stirred it around, took it out and placed it back in, and stirred it some more. I gave it a full 3 minutes on a timer, and here's what I got. This is photographed outside in bright sunlight after the sample had dried. One of Constellation's t'gallants is there for comparison. For Constellation and Pride I think I'll go for 1 minute in the vat, though I think this will be good for Macedonian and Gazela.
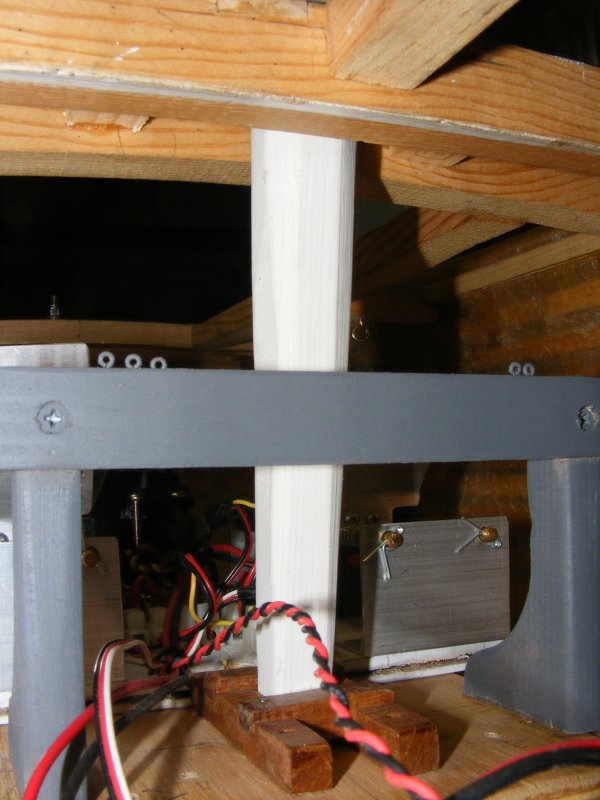
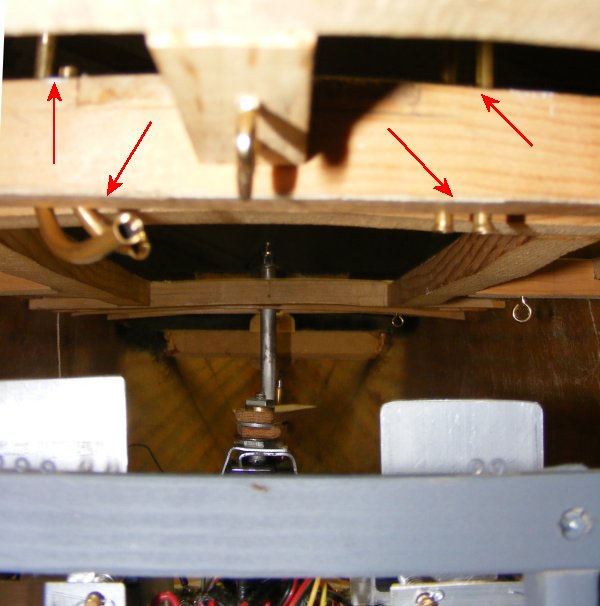
Control Line Fairleads - plumbing I made room in the shop to move the model out there so I can work at putting down the sub-deck. Slinging epoxy around shouldn't be done in the house. Besides, she can stand up right with her full masts up in here. I start cutting brass tubing and shaping it for through-deck fairleads. 8/26: Today I continued working on the spaghetti puzzle. Making up more through-deck fairleads. The trick is routing things below decks so they don't
interfere and tangle each other, so they run clear of hatches, and so I can get at them via the hatches when a worn line needs to be replaced, or some such thing.
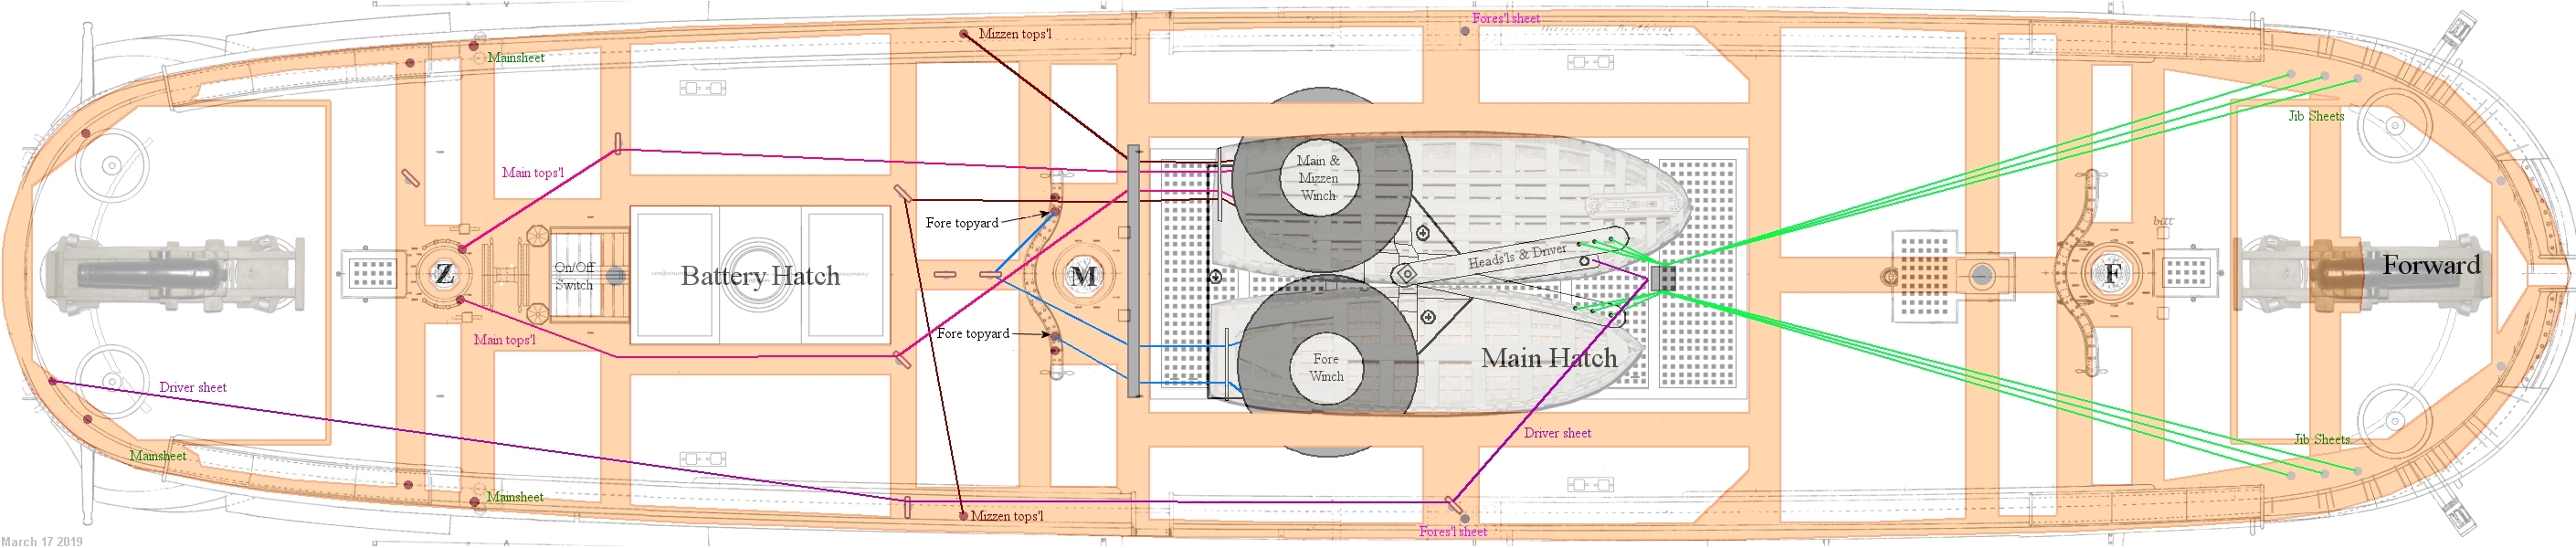
All the braces lead to a riding bit looking structure with small screw eyes along it's top edge. These guide the braces directly to the fairlead plates on the winch servos and that way all the pulling in in one basic direction.
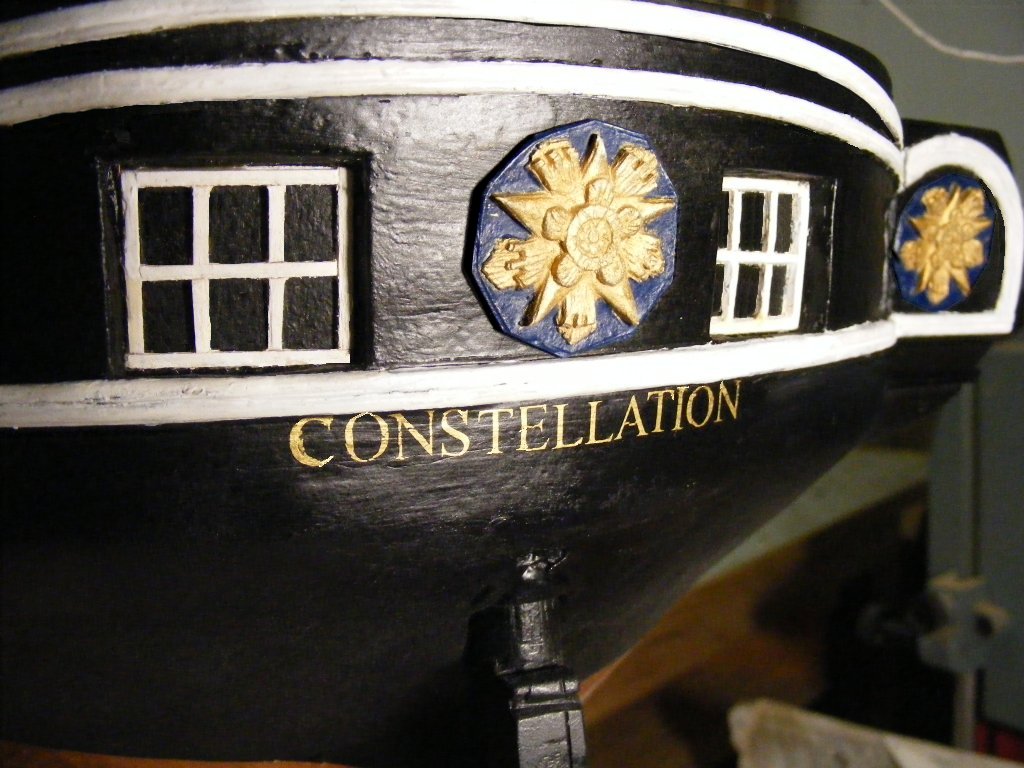
Her Name on the Stern
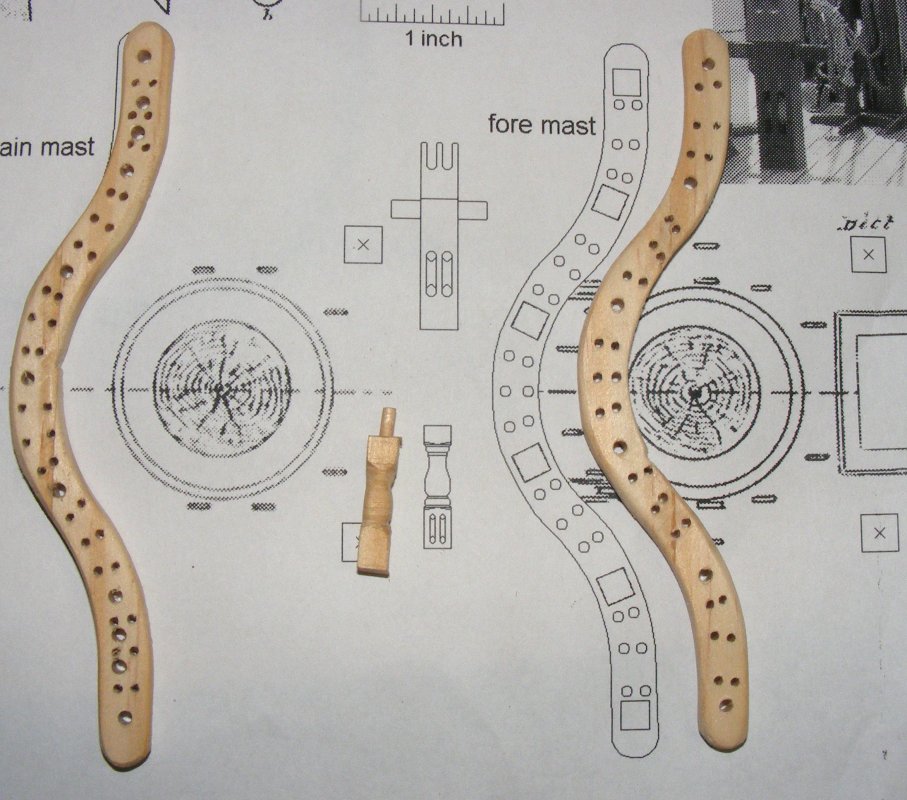
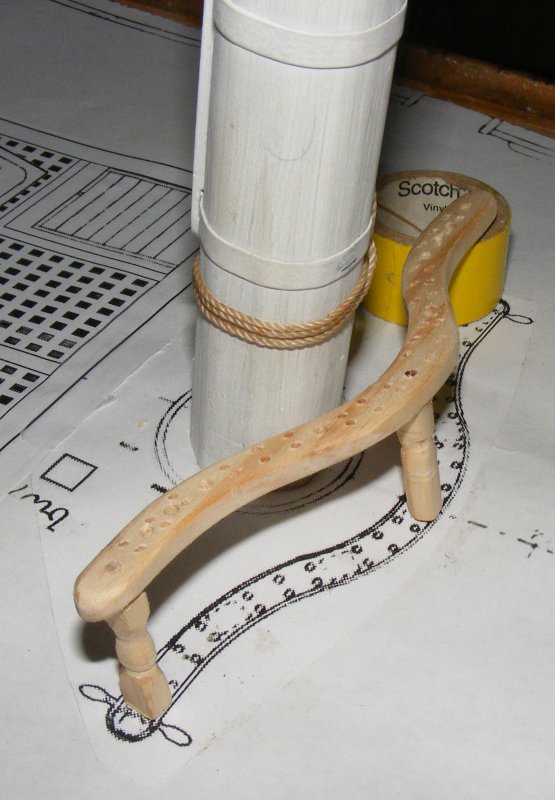
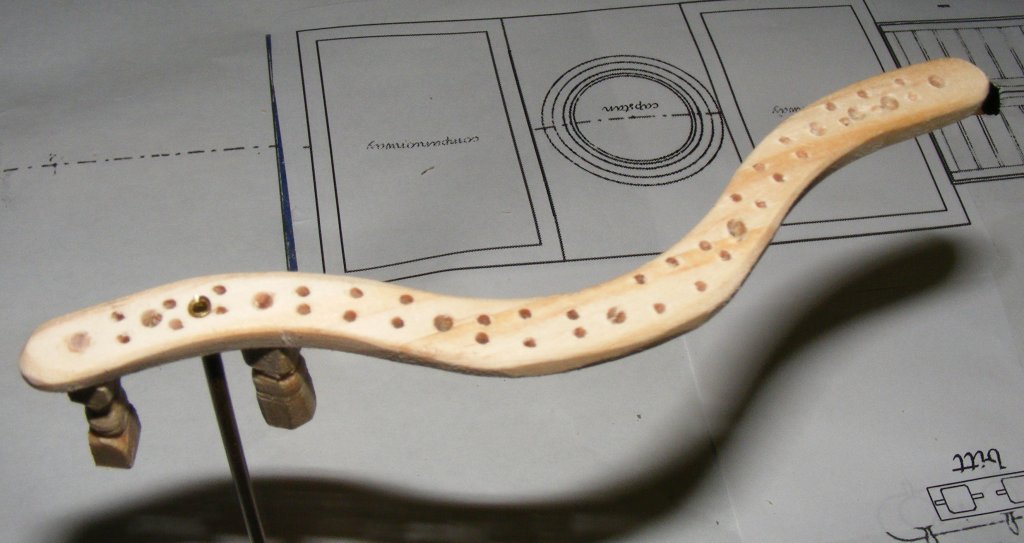
More Plumbing 9/17: Since the pipes for the fore-corse and tops'l yard braces go through the main pin rail, I need to make the thing to get everything properly lined up. (See the bracing diagram above) I recently made a sea chest for a reenactor participating in the event at Fort McHenry last weekend and have a bit of scrap "select" pine from it already cut to 3/16". I printed and pasted the paper patterns for both fore and main pin rails, cut them, and drilled them with 1/16" holes for the belaying pins. Some larger holes were drilled for the stanchions which will be fastened with wood dowels except for three or four that will have brass rod all the way through to the deck. Four additional holes were drilled in the main rail for the brace pipes.
There's 13 total stanchions between the two pin rails all of which are turned and have two sheaves in their bases - they do not pivot. They are 3/16" square and about 3/4" long (changing for the deck camber)
My lathe doesn't have a chuck; I have a big 4-jaw thing for it, but it requires shimming and balancing or it'll make the whole bench jump around the shop. So I took a shot at turning a couple of stanchions on my drill-press. That'll work, but I have to do one at a time rather than a stick of four or five. I also need to get together some implements to get a better and sharper finished turning. |
||
 |
 |