Hurricane Daphne Strikes the Yard
 10/7/2014: Going into the shop today, I was greeted with the mizzen t'gallant missing and the main sitting at an odd angle. Seems the lady needed to put something in the garage and the roll-up door
hit the masts of the model sitting on it's bench under where the door rolls up. Yeah, I got steamed, especially since I warned her not to open the garage door specifically for that reason,
but, anger only screws up the repair, so...
10/7/2014: Going into the shop today, I was greeted with the mizzen t'gallant missing and the main sitting at an odd angle. Seems the lady needed to put something in the garage and the roll-up door
hit the masts of the model sitting on it's bench under where the door rolls up. Yeah, I got steamed, especially since I warned her not to open the garage door specifically for that reason,
but, anger only screws up the repair, so...
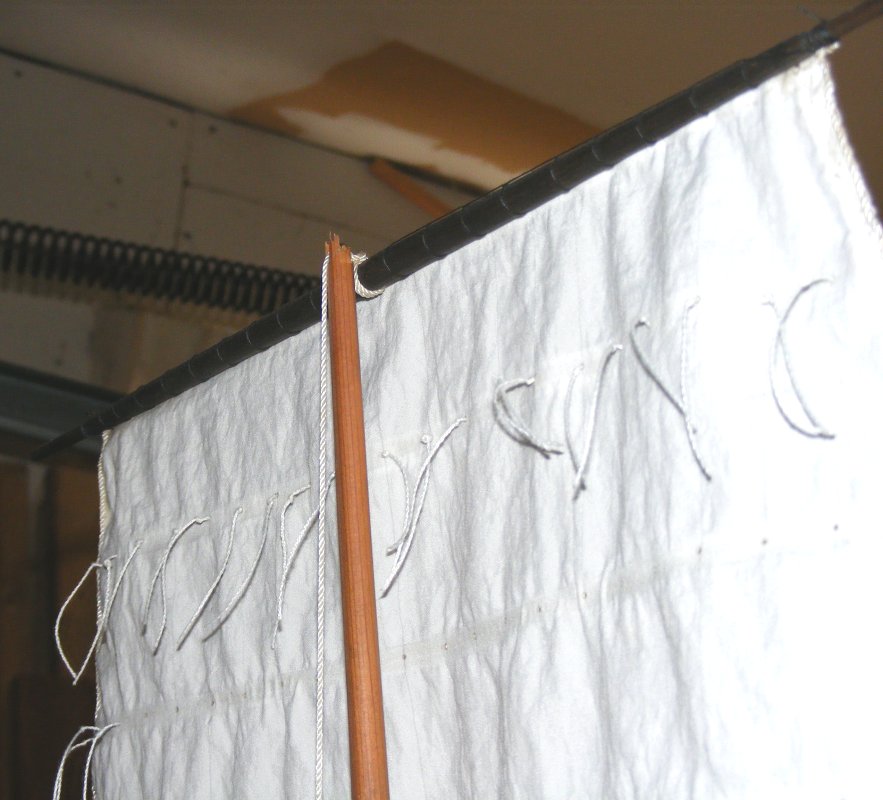
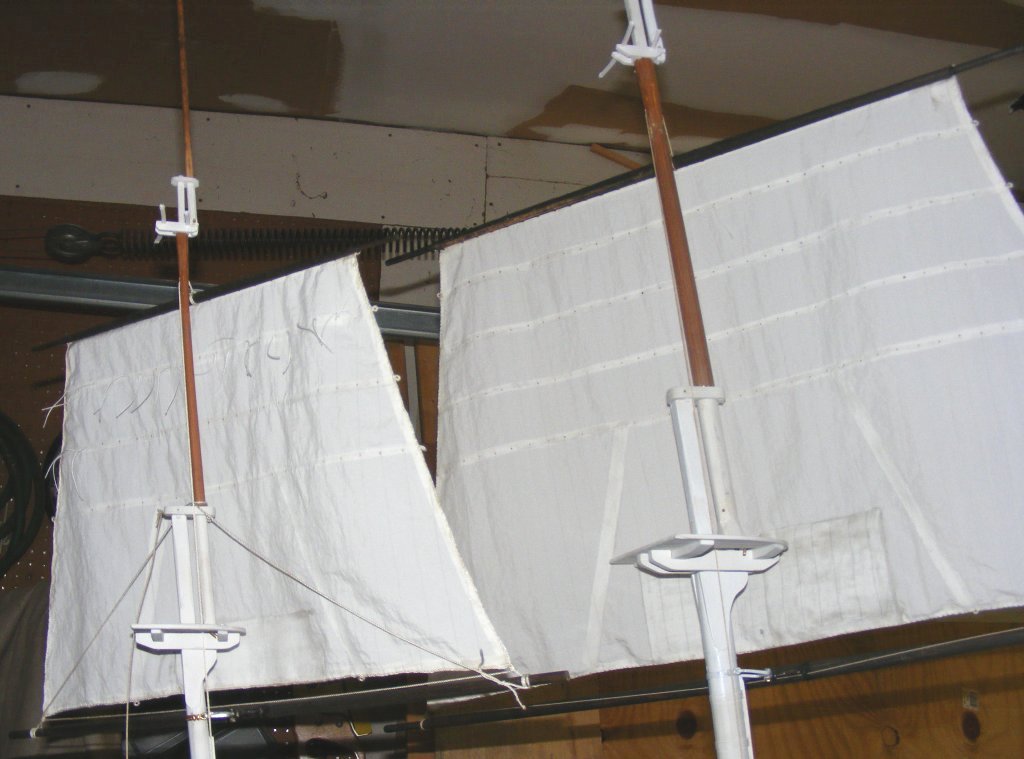
The mizzen topmast broke at the tops'l halyard sheave in a jagged break. I inserted a 2" brass rod, put a blob of epoxy putty on the end, and squeezed the two ends together.
When it set-up, I trimmed off what squeezed out, sanded it, and painted it. A new sheave hole was place further up the mast in the 8-sided swell where it should have been,
and everything seems as good as new.
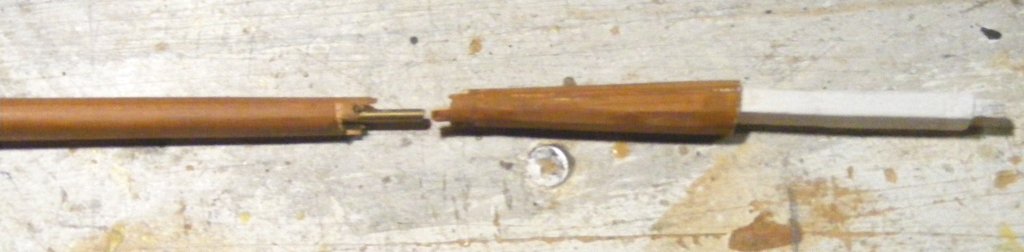
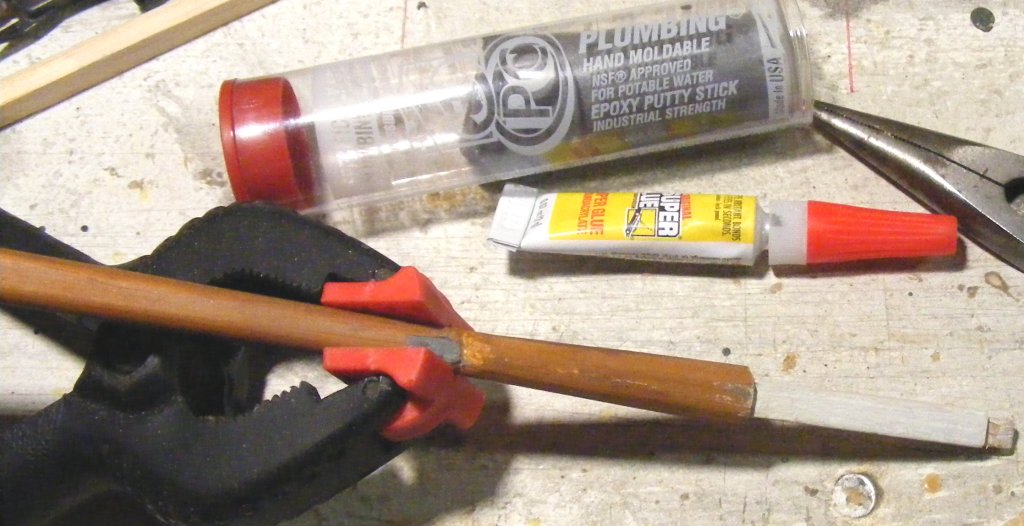
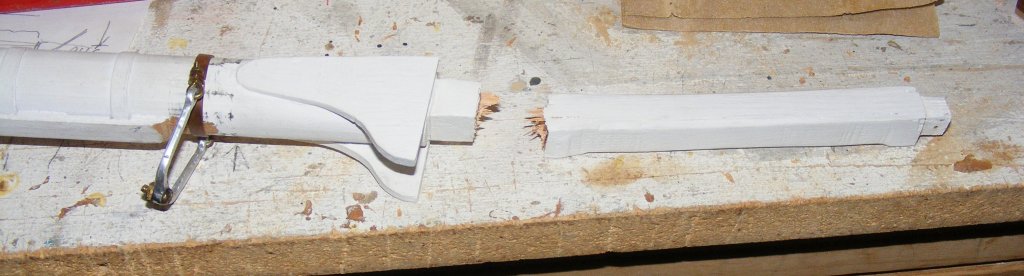
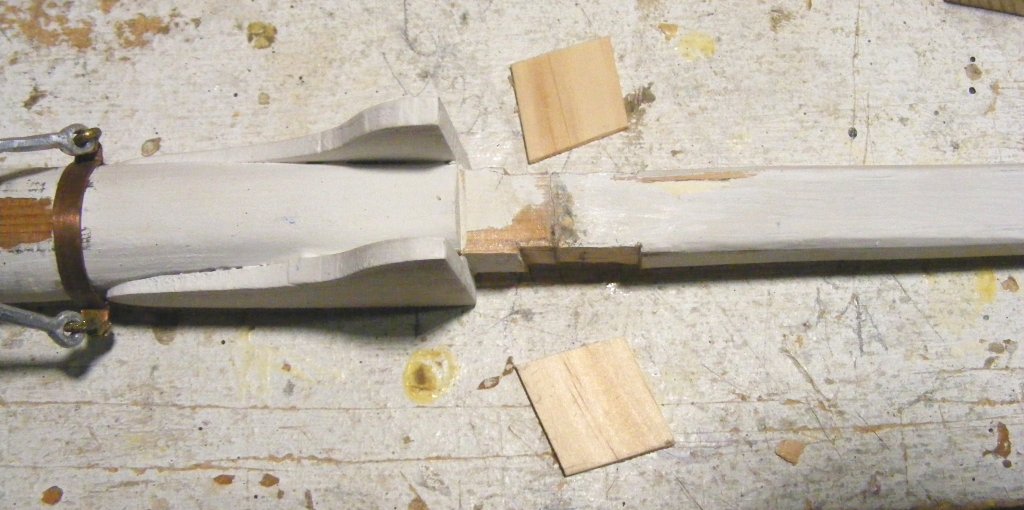
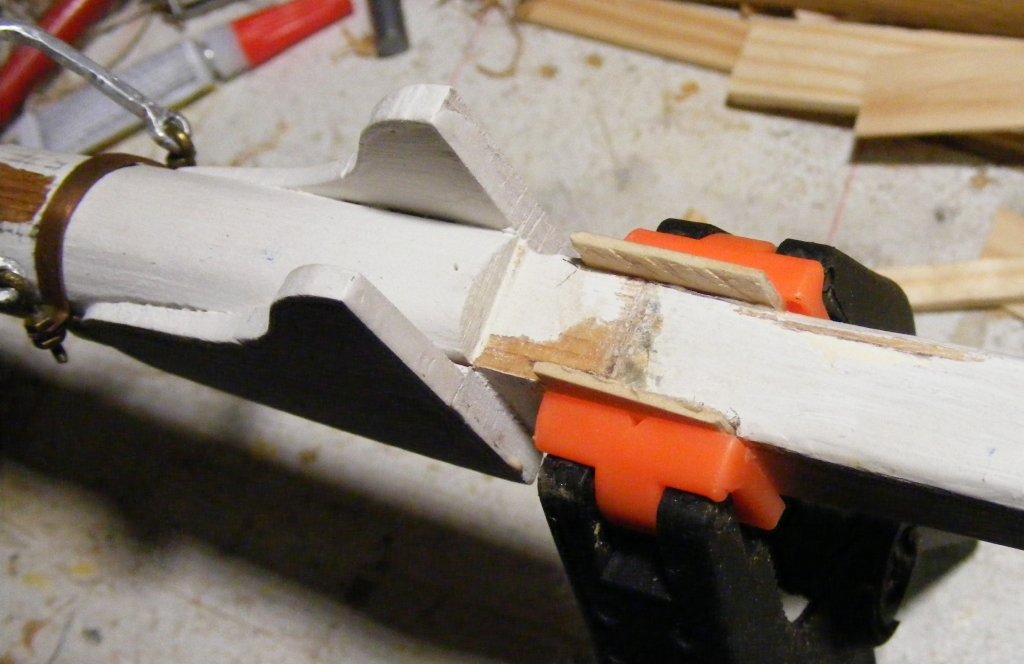
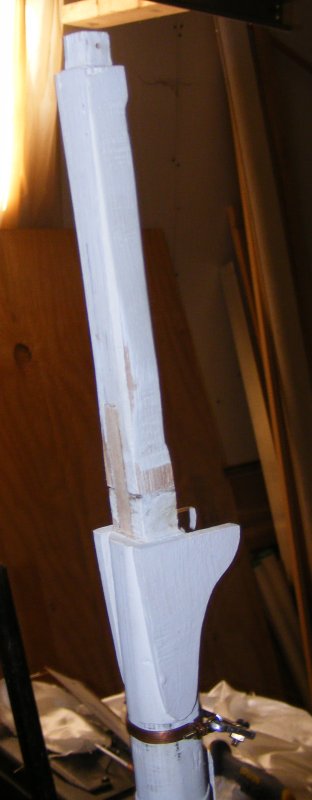 The main didn't go as easily. It got a 4" brass rod, CAed into the mast, but the epoxy putty didn't seem to stick to the end grain of the cedar. I wound up putting a Dutchman
in the back face of the mast over the break. I also inlaid two pieces on either side, like splints. This seemed to do the trick, and everything is back in order again.
I also moved the tops'l halyard sheave up into the 8-sided swell on the main and fore-topmasts while I was at it.
The main didn't go as easily. It got a 4" brass rod, CAed into the mast, but the epoxy putty didn't seem to stick to the end grain of the cedar. I wound up putting a Dutchman
in the back face of the mast over the break. I also inlaid two pieces on either side, like splints. This seemed to do the trick, and everything is back in order again.
I also moved the tops'l halyard sheave up into the 8-sided swell on the main and fore-topmasts while I was at it.
Everything repaired.
 Rudder Servo Arm and Eyes on the Boomkin
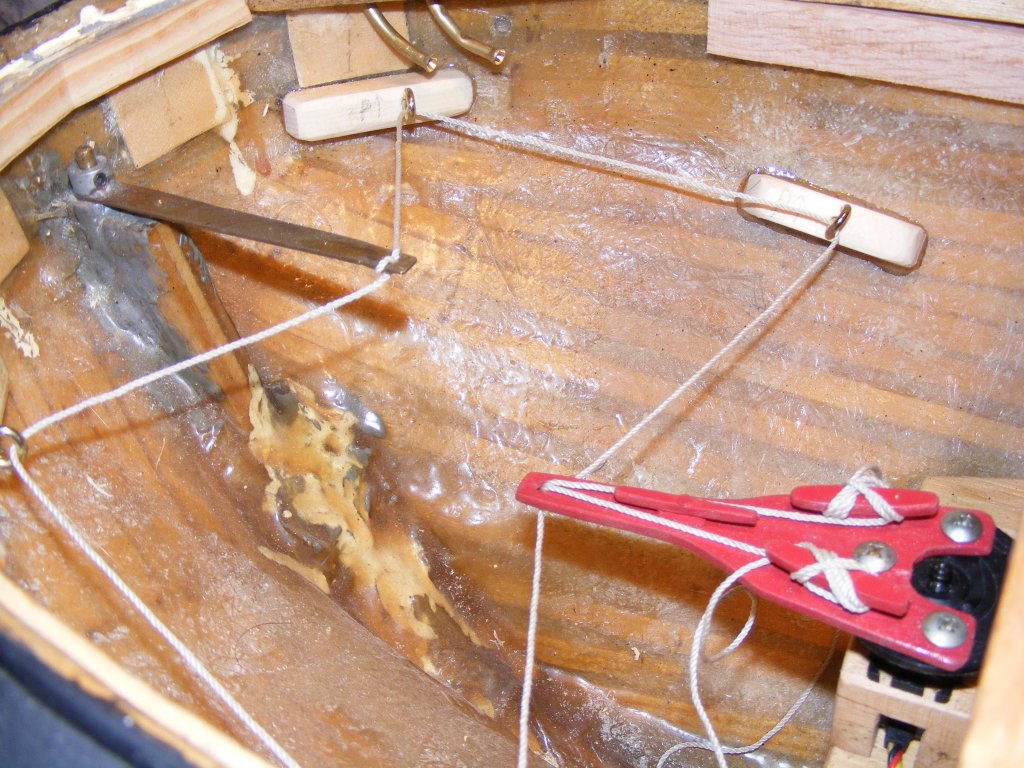
10/8: Glued in the tubes for the mains'l sheets and dealt with the driver sheet/main brace proximity issue by inserting a cuphook to carry the sheet over the brace.
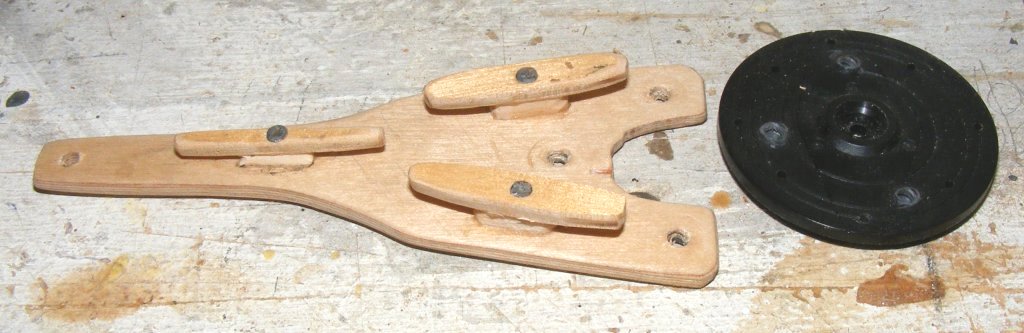
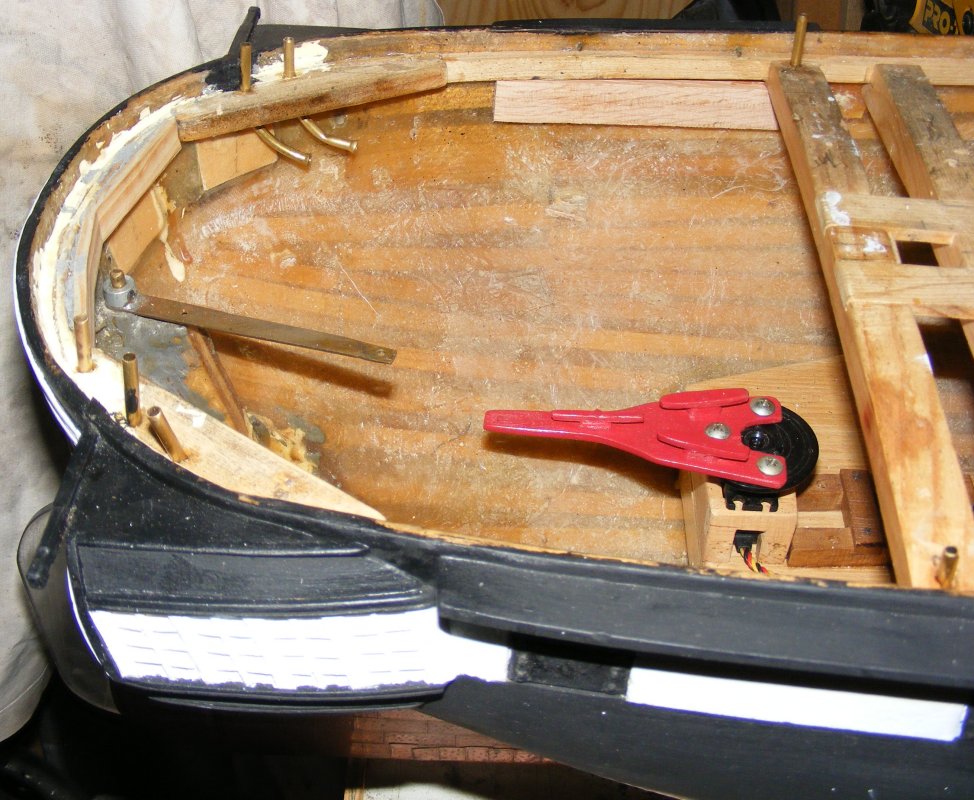 While in that area of the hull I pulled the temporary fairleads for the steering controls and spiffed up the rudder servo arm. I added three cleats to it;
two for the steering cable to allow for easy adjustment, and one for the line that will operate the ship's wheel when the servo moves.
These are glued and cinched-nailed on to the aircraft plywood arm I made a while back, and the arm was painted red.
While in that area of the hull I pulled the temporary fairleads for the steering controls and spiffed up the rudder servo arm. I added three cleats to it;
two for the steering cable to allow for easy adjustment, and one for the line that will operate the ship's wheel when the servo moves.
These are glued and cinched-nailed on to the aircraft plywood arm I made a while back, and the arm was painted red.
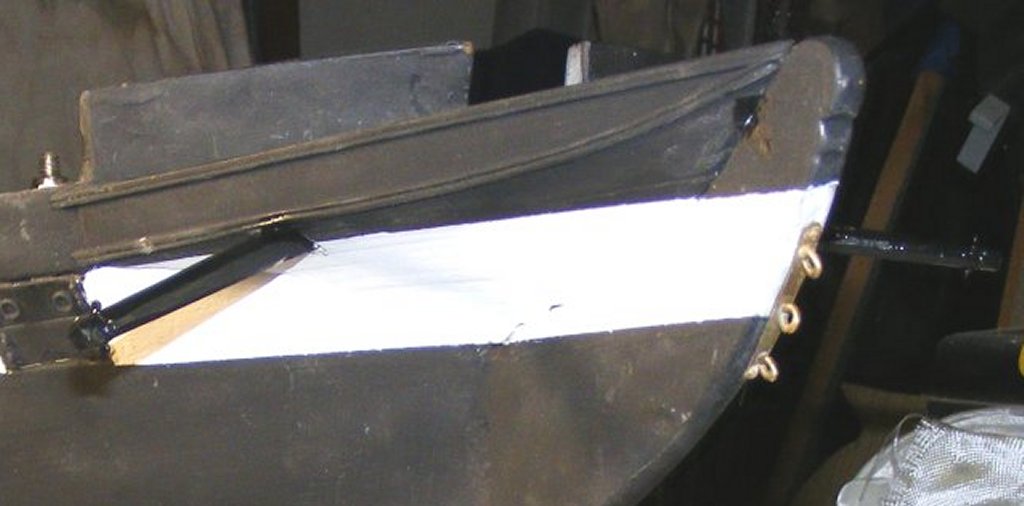
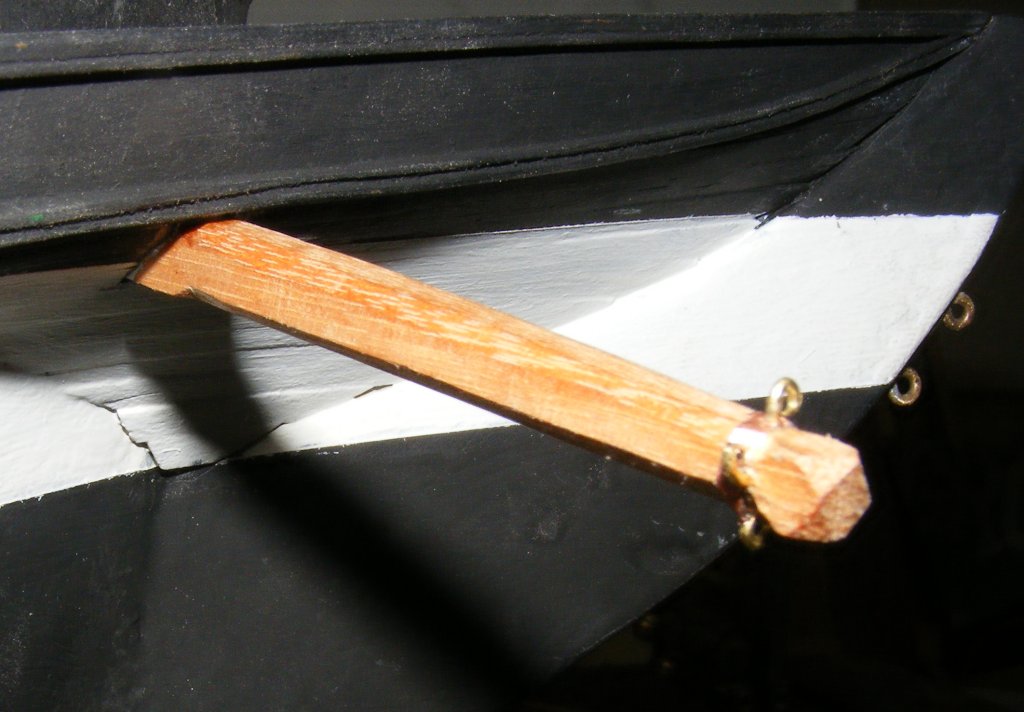 Moving to the other end of the hull, eyes were added to the boomkins for the tack block and guys. The iron band was simulated with some copper tape and the boomkin
was drilled through from two sides 90� from each other. A brass rod with an eye made in one end was passed through a hole and an eye made in the other end.
This give 4 eyes on the boomkin, three for it's guys and one for the fores'l tack block. Both were then painted black.
Moving to the other end of the hull, eyes were added to the boomkins for the tack block and guys. The iron band was simulated with some copper tape and the boomkin
was drilled through from two sides 90� from each other. A brass rod with an eye made in one end was passed through a hole and an eye made in the other end.
This give 4 eyes on the boomkin, three for it's guys and one for the fores'l tack block. Both were then painted black.
 I speant a lot of time staring at images of the ship and still cannot see the guys for the boomkin. In most photos she doesn't appear to have any, and most others, you can't see them at all.
Ever since the ship's been in Baltimore, and for some time before that, she hasn't had guys on the boomkins
There will be guys, but there's no hurry.
I speant a lot of time staring at images of the ship and still cannot see the guys for the boomkin. In most photos she doesn't appear to have any, and most others, you can't see them at all.
Ever since the ship's been in Baltimore, and for some time before that, she hasn't had guys on the boomkins
There will be guys, but there's no hurry.
.
Driver Gaff and Boom
10/10-11: Squirrel!? Yeah, there he goes off on a tangent again. Ok, fine, but it's my boat, so there. :p
 I went and made the driver gaff and boom. If you thought these were done because she has her driver set in the sailing photos, you were mistaken, those were just sticks;
these are the bonafide proper items. They're made from some of the pine I had left from a sea cheast I made for someone, in the usual way; first cut to length,
then square to it's maximum diameter. This is a good time to drill any holes needed in the end of the spars, like for the gooseneck hook on the boom.
Unlike the yards, the gaff and boom's maximum diamater isn't in the center of the spar, but off to one side a bit.
The gaff's is about a third of the way out from the jaws, and the boom's is maybe 40% of the way out. Where this maximum diamater is is marked and the diameter at the ends determined.
This is the taper and all four sides of each stick are planed to this taper.
I went and made the driver gaff and boom. If you thought these were done because she has her driver set in the sailing photos, you were mistaken, those were just sticks;
these are the bonafide proper items. They're made from some of the pine I had left from a sea cheast I made for someone, in the usual way; first cut to length,
then square to it's maximum diameter. This is a good time to drill any holes needed in the end of the spars, like for the gooseneck hook on the boom.
Unlike the yards, the gaff and boom's maximum diamater isn't in the center of the spar, but off to one side a bit.
The gaff's is about a third of the way out from the jaws, and the boom's is maybe 40% of the way out. Where this maximum diamater is is marked and the diameter at the ends determined.
This is the taper and all four sides of each stick are planed to this taper.
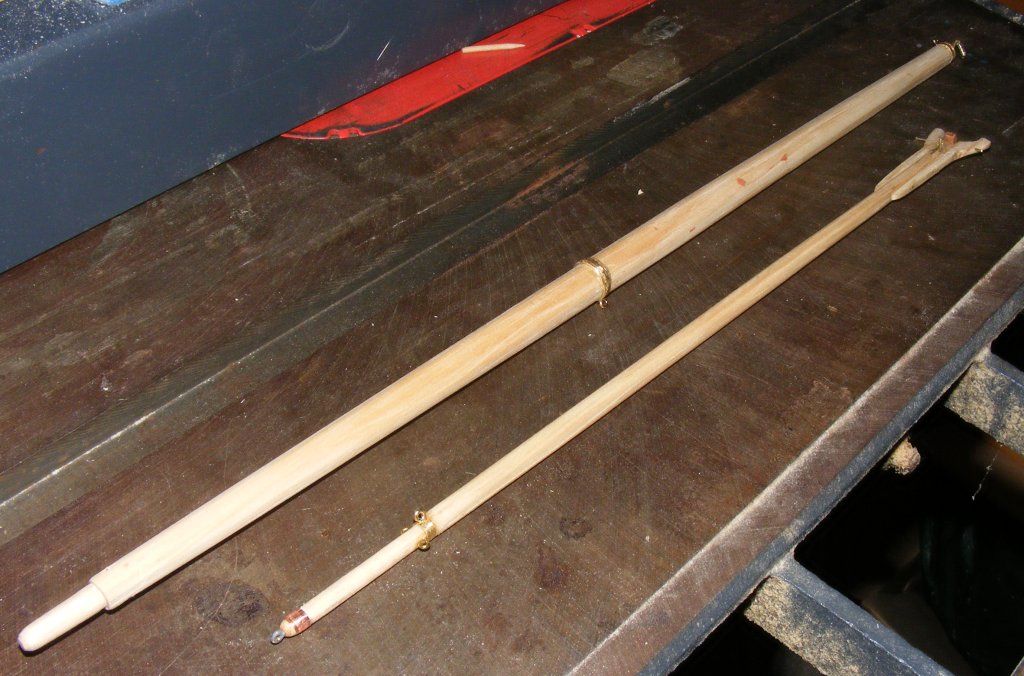
Once the sticks are tapered, they're marked to be made 8-sided. These spars are round their entire length, making things a bit easier as there's no square sections to work around.
Once the spars are 8-sided, I planed them to 16 sides by eye. Then I just knocked the corners off to sort-of 32 sides and sanded it round from there. It actually goes pretty easy
when you get the hang of it. The trick is to take off a swipe, then check the end to make sure everything is staying symmetrical and not get in a hurry - you can alway take more off
putting more on is much more difficult.
Now that the spar is round, details like the reduced ends can be cut in. I hand carve these roughly, then use a brass tube of the right i.d. to fine it up - especially where
I'll be putting a band made from that same brass tubing. I also use a metal drill index I have on smaller spars. If you have a bit of thick sheet metal, you can drill holes in it to push
the ends of the spar into. Pre-cut the shoulders, and then a bit of pushing and twisting does a nice job, but be careful to keep the piece at right-angles and feel what you're doing
so you don't snap the end of the spar off.
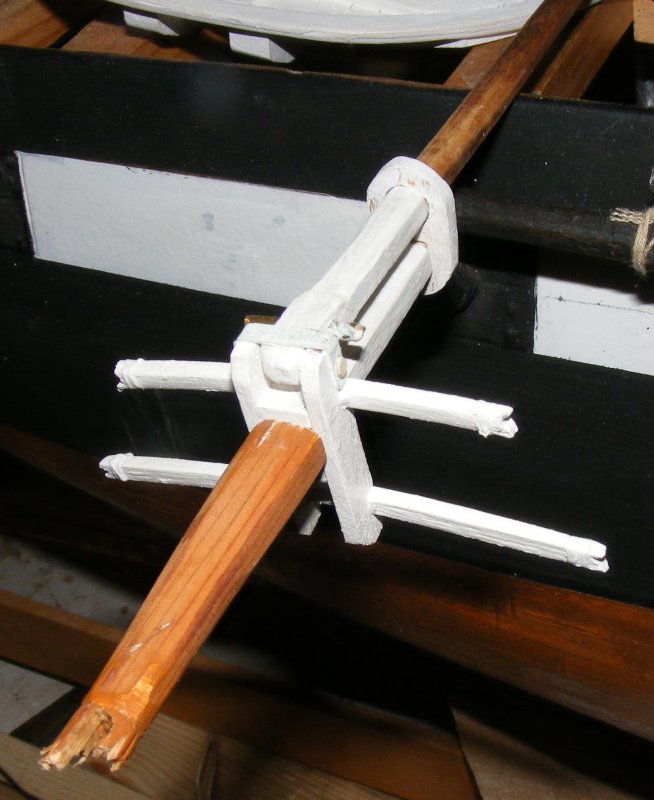
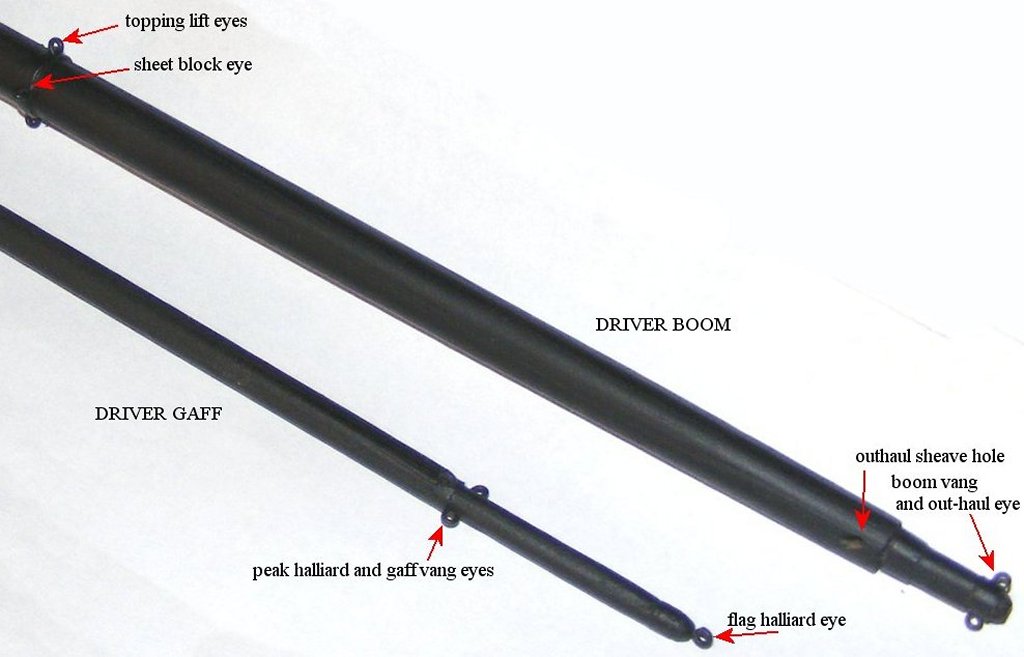
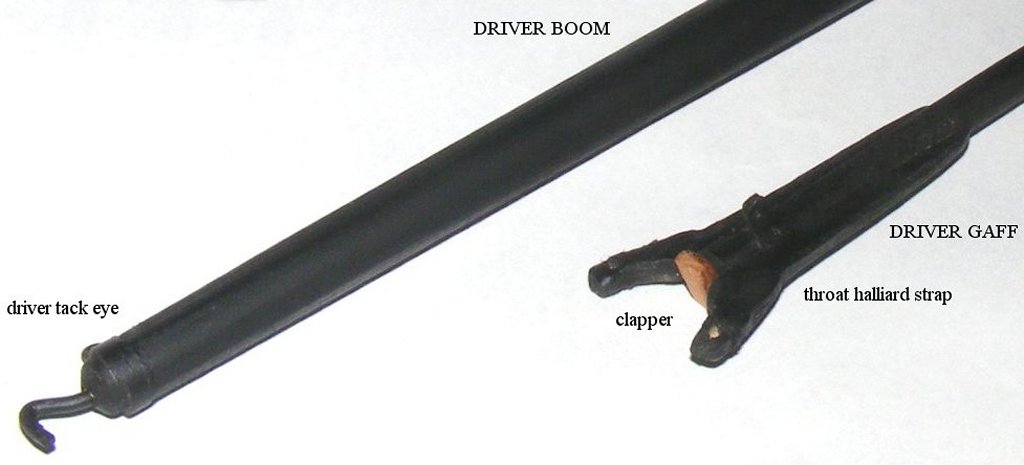
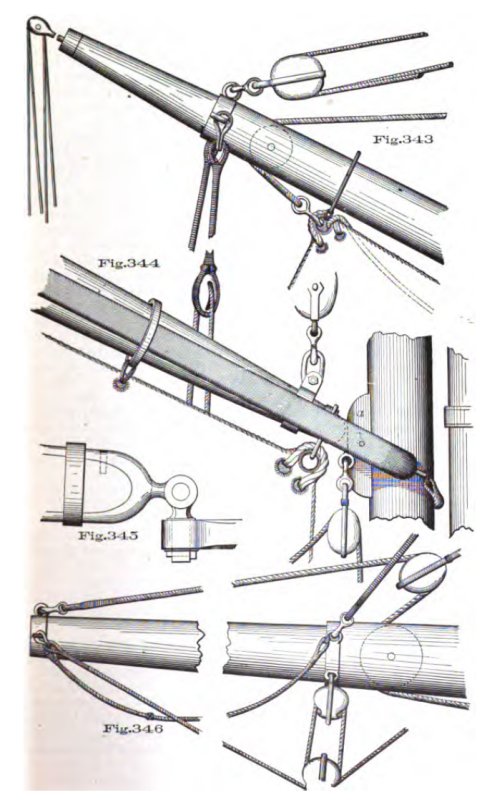 The bands, eyes, and other hardware I installed are based mostly on figures in Commodore Luce's Textbook of Seamanship, 1891 edition. The gaff and boom are basically set up
for halliards, sail attachment, vangs, sheets, outhauls, down-hauls, and the flag halliard. Where I had the right size brass tubing, I made banding from that. Where I didn't,
I wrapped copper tape and CAed the ends. Eyes are mostly brass screw eyes, though a couple are eye spikes set at an angle against the direction of pull, or pushed through and an eye
made in the portruding end, as I did with the boomkins. The gaff clapper was made from the hard wood I made the boomkins from, and pivots on a brass rod. The gaff jaws are glued and
pinned with brass rod. Where the holes for the parrel are in the jaws, I siezed it with thread soaked in CA to keep the ends from splitting. There's no sheave set in the boom for the
out-haul, just a hole coated in CA to reenforce it.
The bands, eyes, and other hardware I installed are based mostly on figures in Commodore Luce's Textbook of Seamanship, 1891 edition. The gaff and boom are basically set up
for halliards, sail attachment, vangs, sheets, outhauls, down-hauls, and the flag halliard. Where I had the right size brass tubing, I made banding from that. Where I didn't,
I wrapped copper tape and CAed the ends. Eyes are mostly brass screw eyes, though a couple are eye spikes set at an angle against the direction of pull, or pushed through and an eye
made in the portruding end, as I did with the boomkins. The gaff clapper was made from the hard wood I made the boomkins from, and pivots on a brass rod. The gaff jaws are glued and
pinned with brass rod. Where the holes for the parrel are in the jaws, I siezed it with thread soaked in CA to keep the ends from splitting. There's no sheave set in the boom for the
out-haul, just a hole coated in CA to reenforce it.
Finally everything was painted black.
Steering Gear Installation
 10/12: The steering cable guides are permanently installed. There will actually be a couple of springs on the tiller to act as shock absorbers, or "servo savers."
These blocks will get a coat of epoxy when I start laying the sub-deck to seal and reenforce them. I also glued in the oak blocking inside the hull for the fore-mast chain-plates.
The main and mizzen blocking has been in for some time. These are meant to give the fasteners for the chain-plates something to hold on to, and will also get a coat of epoxy
when it's out for the sub-deck.
10/12: The steering cable guides are permanently installed. There will actually be a couple of springs on the tiller to act as shock absorbers, or "servo savers."
These blocks will get a coat of epoxy when I start laying the sub-deck to seal and reenforce them. I also glued in the oak blocking inside the hull for the fore-mast chain-plates.
The main and mizzen blocking has been in for some time. These are meant to give the fasteners for the chain-plates something to hold on to, and will also get a coat of epoxy
when it's out for the sub-deck.


