The Sub-Deck
 Finally it's time to install the sub-deck. This is a major step in the model's construction as it's holding up decking, deck furniture, bulwarks, hatches and coamings, etc etc etc.
The sub-deck has been cut and fitted since 2009 and consist of 6 2" wide strips of 1/4" luan plywood. It will be coated with epoxy on it's underside which will seal it as well as glue it to the
deck beams. Seams and any holes or gaps will be filled with body-filler and a layer of 4oz glass cloth will be epoxied onto the sub-deck. This seals the top of the sub-deck, glues it to the
hull at the perimeter, and prevents any movement or opening of the seams in the plywood from transferring to the planked deck on top.
Finally it's time to install the sub-deck. This is a major step in the model's construction as it's holding up decking, deck furniture, bulwarks, hatches and coamings, etc etc etc.
The sub-deck has been cut and fitted since 2009 and consist of 6 2" wide strips of 1/4" luan plywood. It will be coated with epoxy on it's underside which will seal it as well as glue it to the
deck beams. Seams and any holes or gaps will be filled with body-filler and a layer of 4oz glass cloth will be epoxied onto the sub-deck. This seals the top of the sub-deck, glues it to the
hull at the perimeter, and prevents any movement or opening of the seams in the plywood from transferring to the planked deck on top.
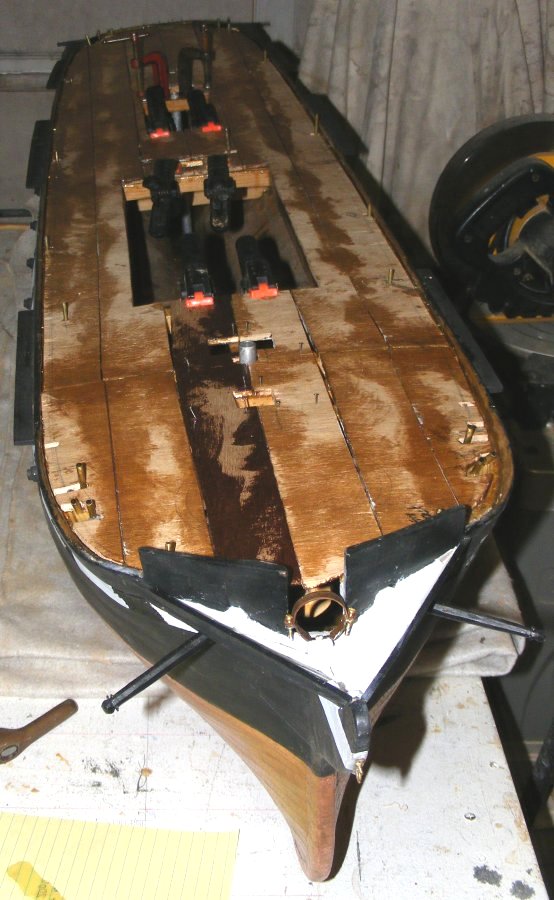
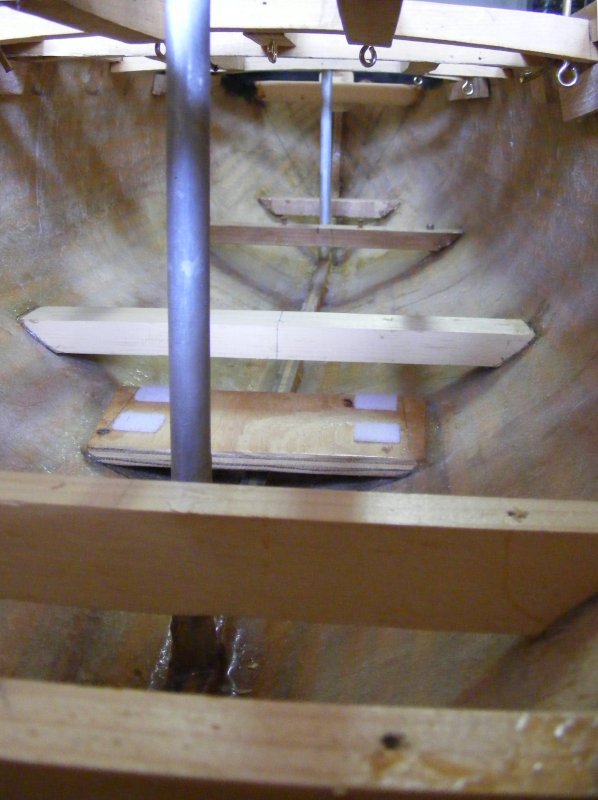 10/15/14: In prep for laying the sub-deck, I removed the equipment decks from in the hull and the steering gear, since something will no-doubt drip down here.
In the process one of the deck beams came loose under the main mast step.
10/15/14: In prep for laying the sub-deck, I removed the equipment decks from in the hull and the steering gear, since something will no-doubt drip down here.
In the process one of the deck beams came loose under the main mast step.
 The epoxy seemed oily and rubbery, so I cut a new beam that would fit better and epoxied it into place. In the meantime, I removed the mast steps and painted the plywood
equipment decks white. These decks were sealed with clear sealer, but painting them white just makes things a bit cleaner looking and may help seeing in the hull a little.
The epoxy seemed oily and rubbery, so I cut a new beam that would fit better and epoxied it into place. In the meantime, I removed the mast steps and painted the plywood
equipment decks white. These decks were sealed with clear sealer, but painting them white just makes things a bit cleaner looking and may help seeing in the hull a little.
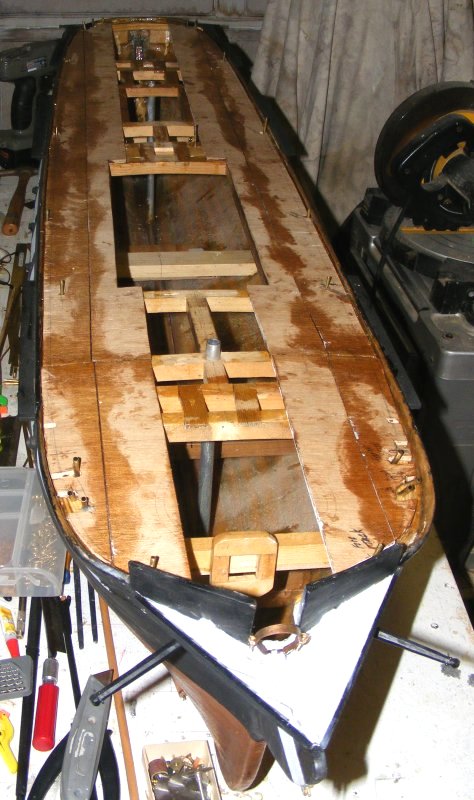
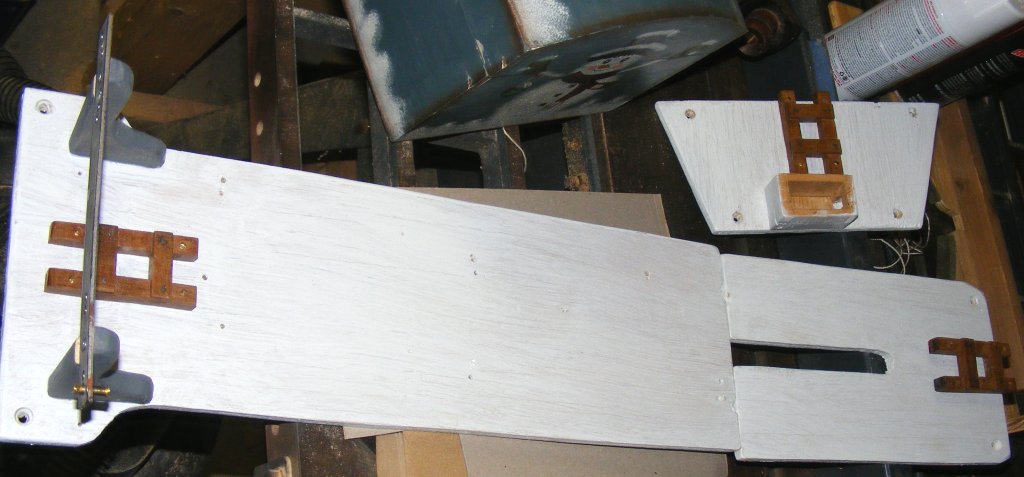
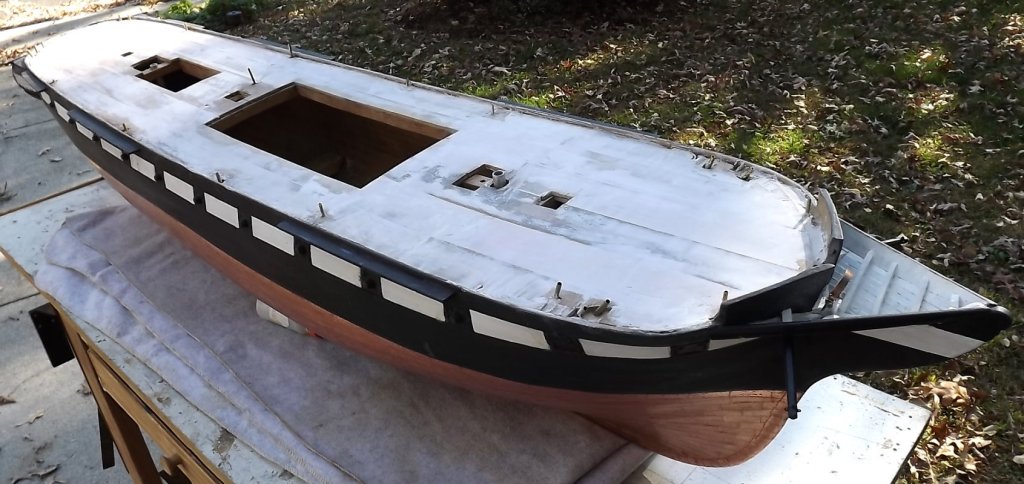
 10/18-19: After dry fitting one last time, and checking line-ups, the outboard strips of the sub-deck are epoxied down. These strips are where most of the through-deck fairleads are located.
At the same time I gave the backer-blocks for the chain-plates a coat of epoxy, and well as the steering cable blocks. The deck beams all got a coat of epoxy, especially at joints and where
they're attached to the hull. This all sat over night and then the next inboard strips were epoxied down. Here we approach the point of no return on being able access the inside of the hull -
I can't help having that feeling of locking the door and realizing the keys are still inside.
10/18-19: After dry fitting one last time, and checking line-ups, the outboard strips of the sub-deck are epoxied down. These strips are where most of the through-deck fairleads are located.
At the same time I gave the backer-blocks for the chain-plates a coat of epoxy, and well as the steering cable blocks. The deck beams all got a coat of epoxy, especially at joints and where
they're attached to the hull. This all sat over night and then the next inboard strips were epoxied down. Here we approach the point of no return on being able access the inside of the hull -
I can't help having that feeling of locking the door and realizing the keys are still inside.
Spars
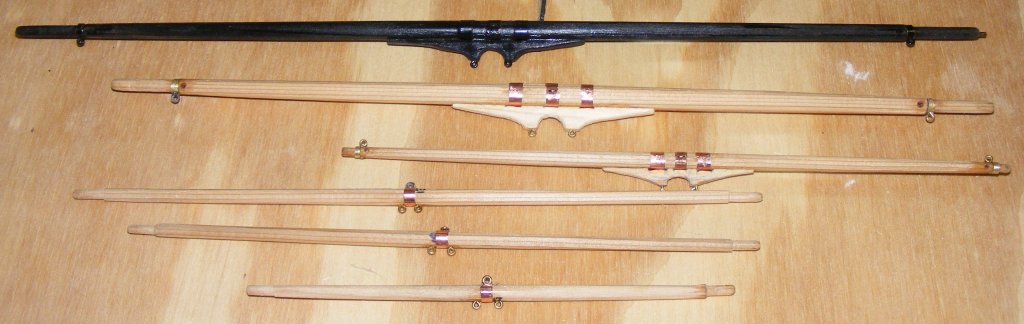
10/19: To deal with that anxiety I did some work on the spars. First I added hardware, yokes, and details to the t'gallants and royal yards, and painted everything. The eyes at the ends
are for the lifts and brace blocks, and the holes are for the sheets of the sail above. The eye at the center top is for the halliard, and the two eyes underneath for the sheet and clewline blocks.
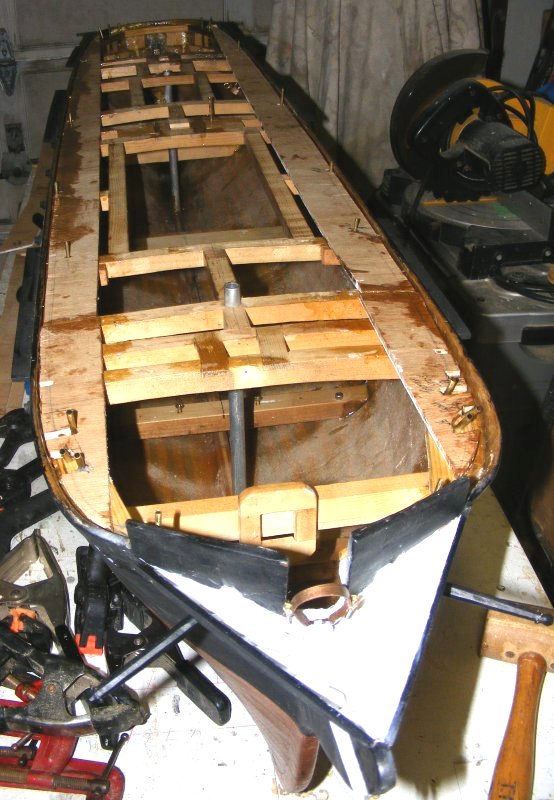
 10/20: The center two sub-deck strips were epoxied down. Since there was a lot of places I couldn't clamp on these last sections of deck, I used small nails to hold them down.
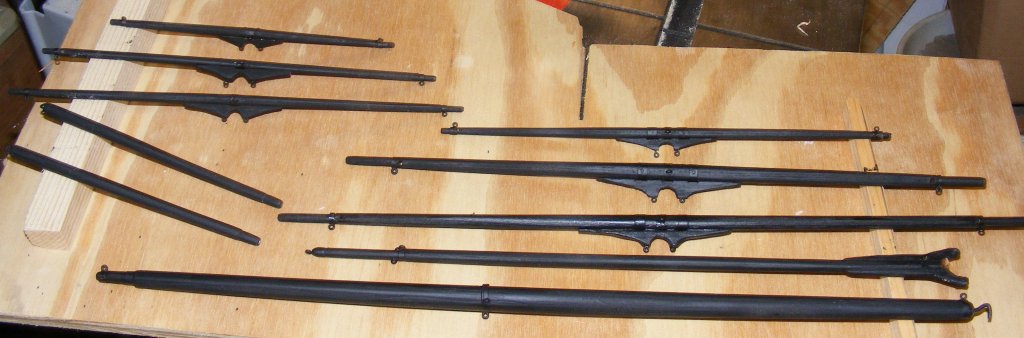
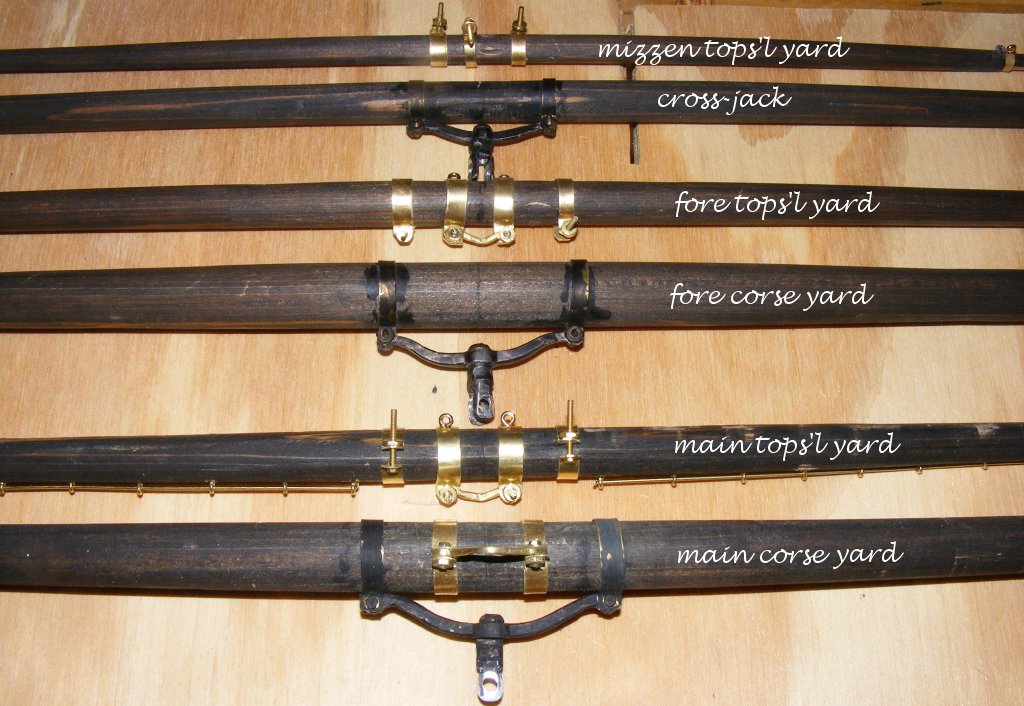
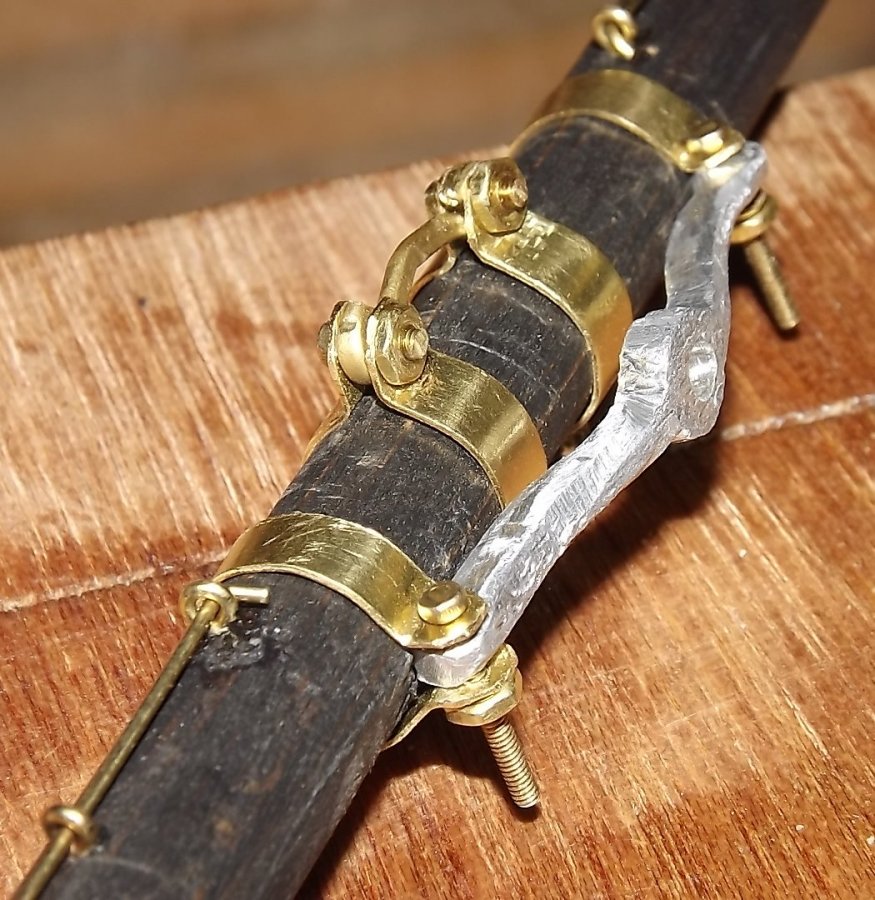
10/22: The upper yards done, except for jack-stays, I turned to the lower yards. These got lift and brace eyes and sheet holes at the ends like the upper yards.
They also got banding for the slings and halliards, and the tops'l yards got bands for attaching their trusses. The main tops'l yard actually got it's jack stays.
Filler and Fiberglass
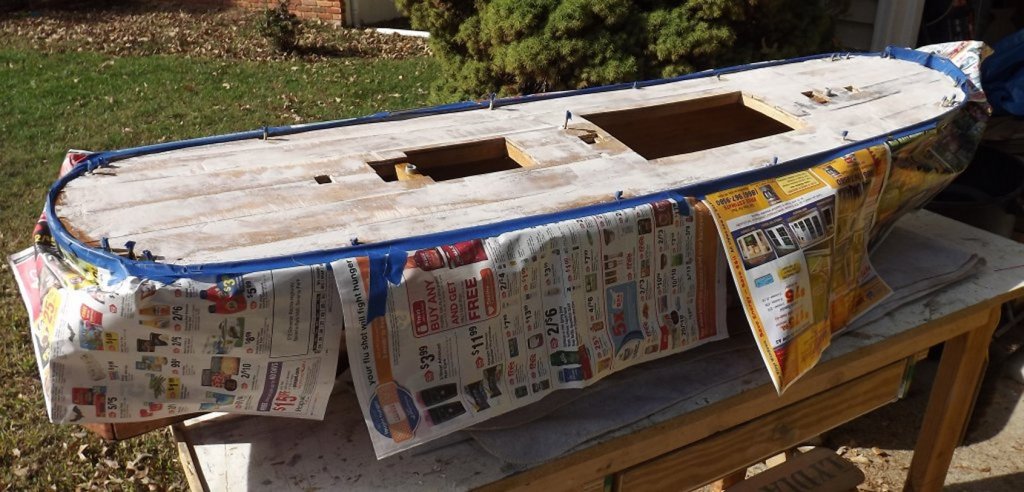
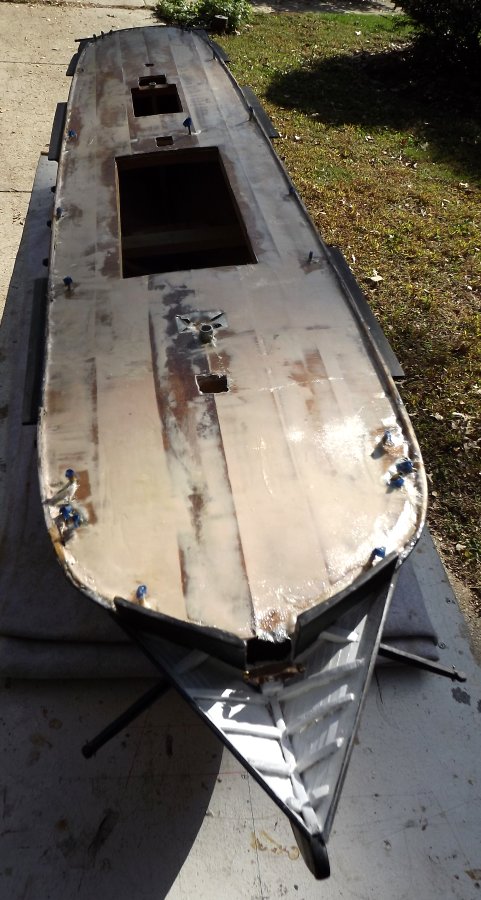 A few days of rain let up with a couple of beautiful days in the 70's which were put to good use. The model was rolled outside and after a bit of searching, the Bond0 was found and applied.
I had to mix very small batches because the stuff was setting up very fast. This was scraped and sanded and left over night. Next day the last of the epoxy Mark gave me was used to lay
the fiberglass cloth on the subdeck. This went very well, I had just enough for the job and it set up perfectly. I trimmed the excess cloth from the mast and hatch openings,
and did a bit of sanding.
A few days of rain let up with a couple of beautiful days in the 70's which were put to good use. The model was rolled outside and after a bit of searching, the Bond0 was found and applied.
I had to mix very small batches because the stuff was setting up very fast. This was scraped and sanded and left over night. Next day the last of the epoxy Mark gave me was used to lay
the fiberglass cloth on the subdeck. This went very well, I had just enough for the job and it set up perfectly. I trimmed the excess cloth from the mast and hatch openings,
and did a bit of sanding.
Now the planking for the deck needs to be milled. That's going to come from a maple board I happen to have already. I decided to use maple because I began thinking that pine would
easily dent and ding while I was working on the model and setting it up to sail and transport.
Before the planking can be laid on the sub-deck, the fore and aft hatches need to be cut out and framed, bt I want to see how the planks will fall so I can hide the seam across the deck
the best I can. That means milling some deck planking.
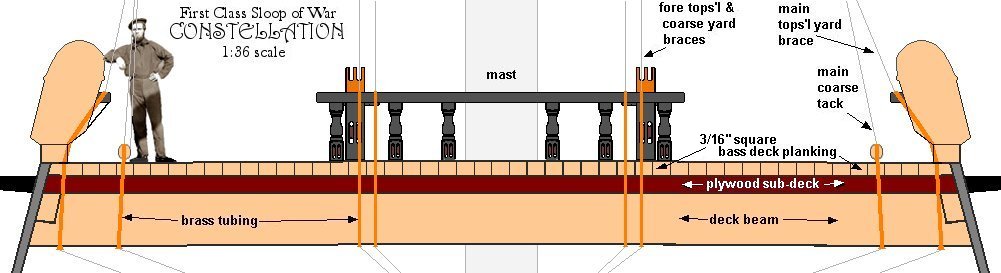
First I had to determine the size of the planks. Looking at an 1880's drawing that showed where the deck beams were, I came up with 20' planks, or 6-5/8" in 1:36 scale.
That was easy enough, but how wide? Looking at photos of the ship I found the width of her deck planking changed. The earliest image I could find looked like her deck planks were between
6" and 7" wide, based on the feet of the men standing on it in the image. 6.5" in 1:36 is about .1805" so I opted to make the deck planking 3/16" wide. As it happens, it's also 3/16" tall.
Milling square stock would make thing a bit easier - so I thought.
Milling the deck planking didn't turn out so well. I cut off a block of maple 6-5/8" long, and had no problem slicing it into 3/16" thick boards. Slicing those 3/16" x 3/4" boards into
3/16" square stick was the problem. On the tablesaw it was working very close and felt very unsafe. On the bandsaw the cut was wavy and unusable. I searched the Net for ideas on milling
small sticks on a tablesaw, but couldn't find anything. Finally, I gave up and decided to go with basswood, and ordered 35 3/16" x 3/16" x 48" sticks.
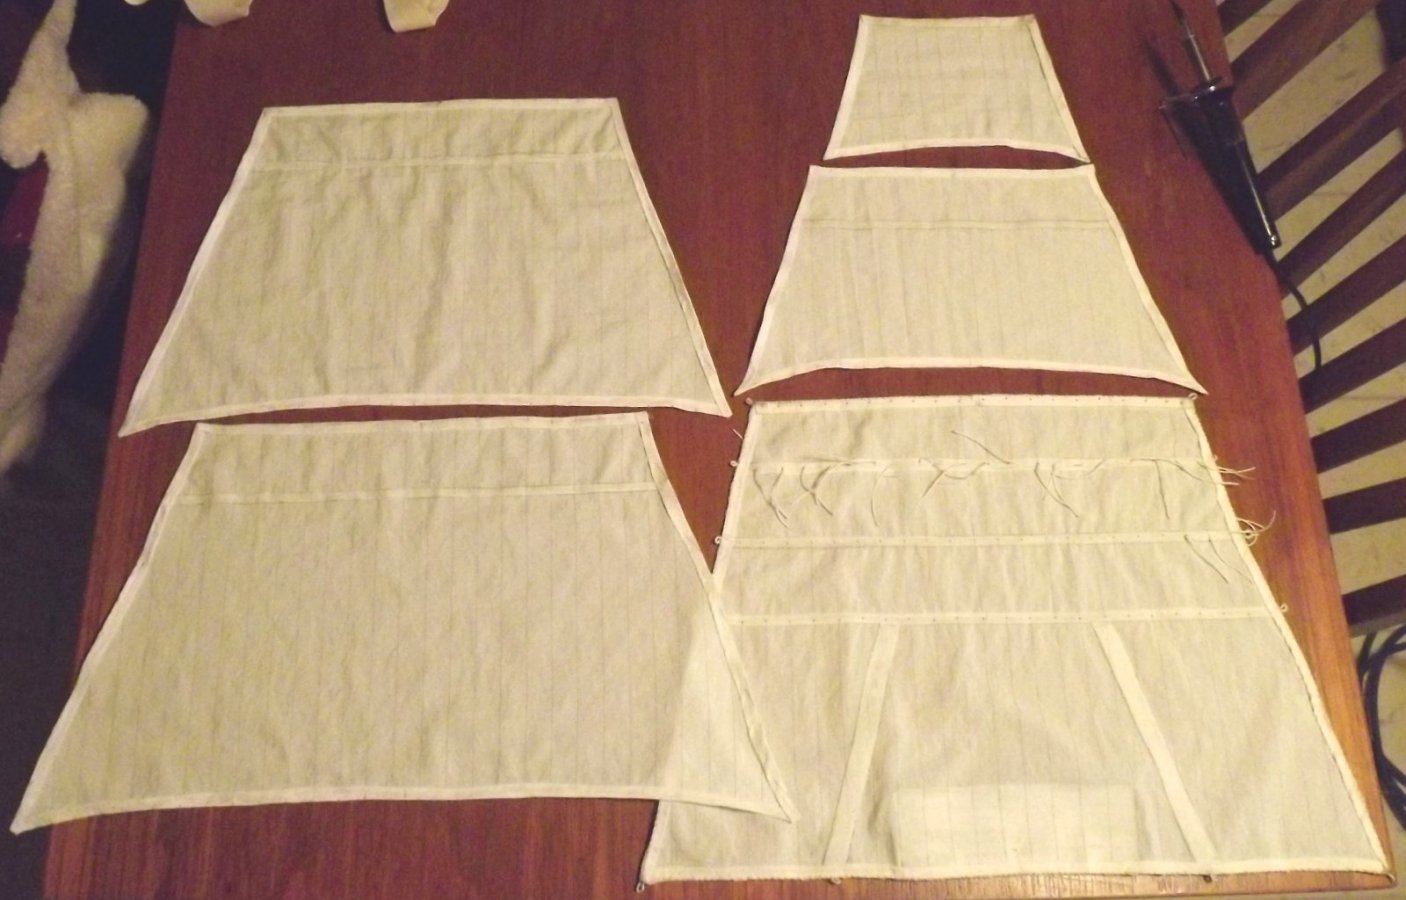
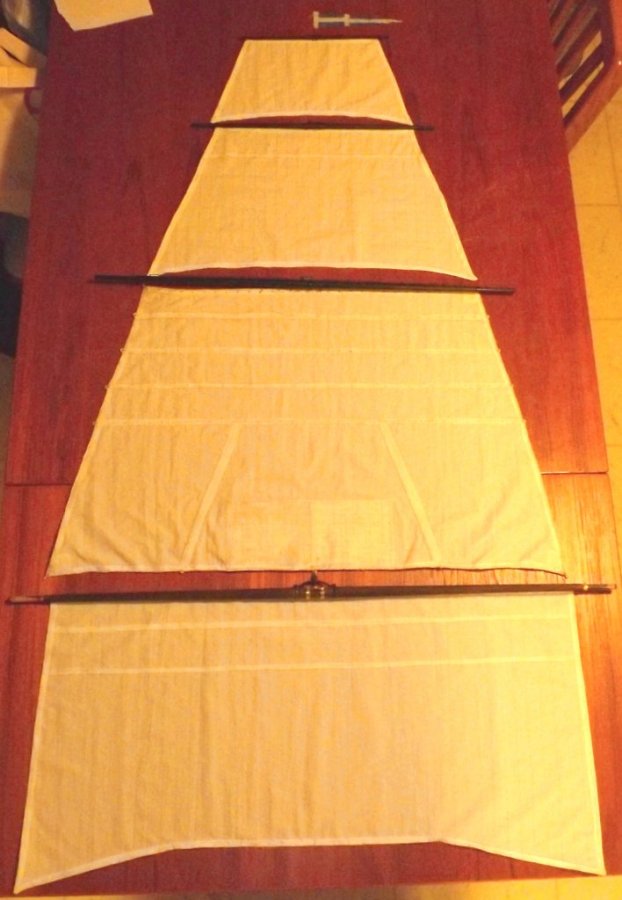
11/3-20: While I waited for the deck stock to come in, I went and hemmed up the t'gallants, royals, and mains'l.
 I ordered some brass parts from RBModel in Poland; shackles, belaying pins, and a pair of clevis parts that made a nice gooseneck fitting for the driver boom.
I also ordered taps and dies from MicroFittings in 0-80 and 1-72 so I can thread things on all three models. I still need to get a set in 2-56.
I ordered some brass parts from RBModel in Poland; shackles, belaying pins, and a pair of clevis parts that made a nice gooseneck fitting for the driver boom.
I also ordered taps and dies from MicroFittings in 0-80 and 1-72 so I can thread things on all three models. I still need to get a set in 2-56.
 An email alerted me that these 1:35 scale figures were going on sale for about $4 less than normal, so now I have a pair of naked male figures. The brothers nude here will be used
to build a crew for the model - in appropriate clothing, of course.
An email alerted me that these 1:35 scale figures were going on sale for about $4 less than normal, so now I have a pair of naked male figures. The brothers nude here will be used
to build a crew for the model - in appropriate clothing, of course.
 Using some very thin strips of wood from an old model kit, I made hoops for the driver. There's another 20 or so to make for the other two trys'ls.
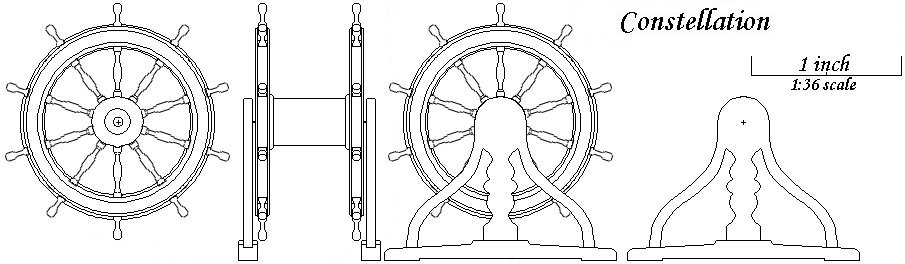
And some research went into the ship's wheel. Between photos of other ships wheels, Constitution's current wheel, the two wheels Constellation's had since her restoration,
and what I could find in modeling books and on the web - below is what I came up with. It'll be made mostly from basswood sheet, and turned down round toothpicks.