10/26/2016

CONSTELLATION
A Radio-Controlled 1:36 Scale Model

Previous Page | Next Page | Table of Contents


click pictures for a larger version

More Sails and Control Ideas

10/20/2016: I hemmed the remaining cut sails; the fore-course and the fore and main trys'ls. I hung the courses on the model and the more I look at them the more I want to set them. I had intended to keep them brailed up when sailing until I could come up with a way to control them.

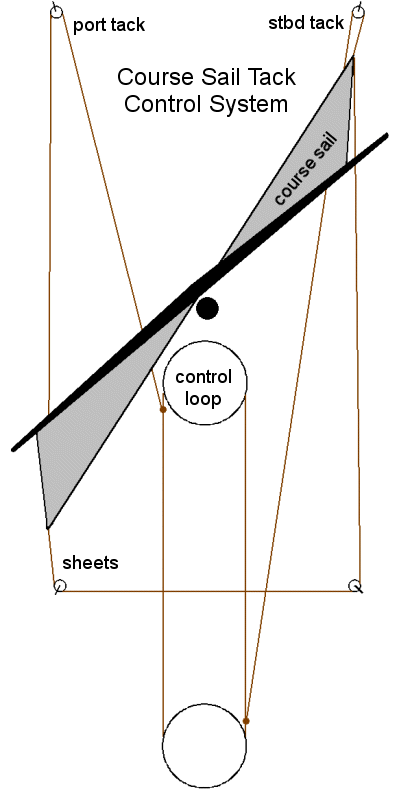
I initially considered controlling them with an additional drum on the winches, but realized that wouldn't work because of the slack - the tacks would come off the drums and tangle everything.

So I scribbled on some scratch paper a while and figured the simplest way to handle the tacks and sheets of the courses was like this: This is the same winch-loop system you see in many models. It's technically a "linear actuator" which converts rotation into linear movement. It's probably the simplest type to manufacture based on a winch servo.

Anyway, where the course sails are concerned, none of this needs constant tension to be maintained as the drawing may imply, the sheets can be given some slack, but too much slack gives the lines opportunities to snag on exterior details; anchors, catheads, etc.

I'd need two of these to separately control the main and fore. This adds two expensive servos, and the space these units would take up. The standard drum is about 2" across, and to pull the 11"-14" of my tacks, using doubling, would require the units to be about 7"-10" long, and about 3" tall at the servo end? Plus dealing with the other control lines nearby, specifically my jib-sheets. I think each unit could simply be Y-ed off the existing winches and that should synchronize the tacks and braces on each mast all by itself.

I did consider the possibility this could be built into the existing sliding winches, running a loop on the same drum with the braces and eliminating additional servos. The whole loop mechanism would move with the winch as it maintained tenson on the braces. With the braces pulling one way, the tacks pulling another, and the springs pushing yet another, I'm not sure if this would work with all that going on. I'll have to mock it up and see.


I'm not going there right now; maybe this is something that I'll retrofit later.

So, while I think that all would work quite nicely, it's far more expense and effort than I can manage right now

In the meantime; I think I will just go for the Bentinck-boom set-up. A Bentinck-boom is simply a spar attached to the clews of the course sail. They were commonly used by British merchant vessels in the second half of the 19th century. I'm not aware of it's use on warships at all. So, instead of using a spar, I would insert a stiff wire rod into the foot of the sail, bent to match the sail's shape. etc. This basically places a yard at the bottom of the course, and is how the SC&H models handled the course sails.

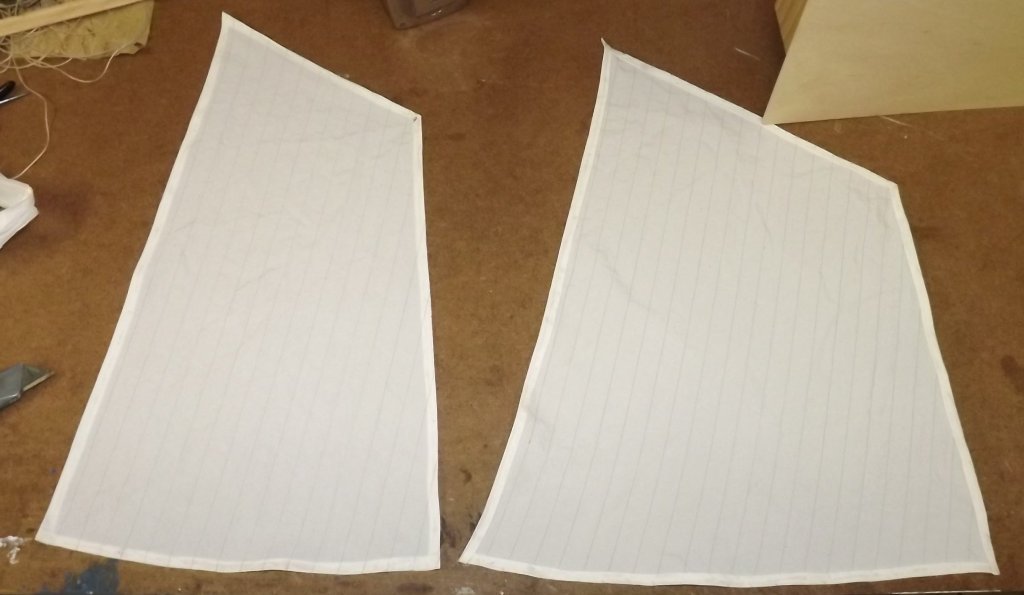
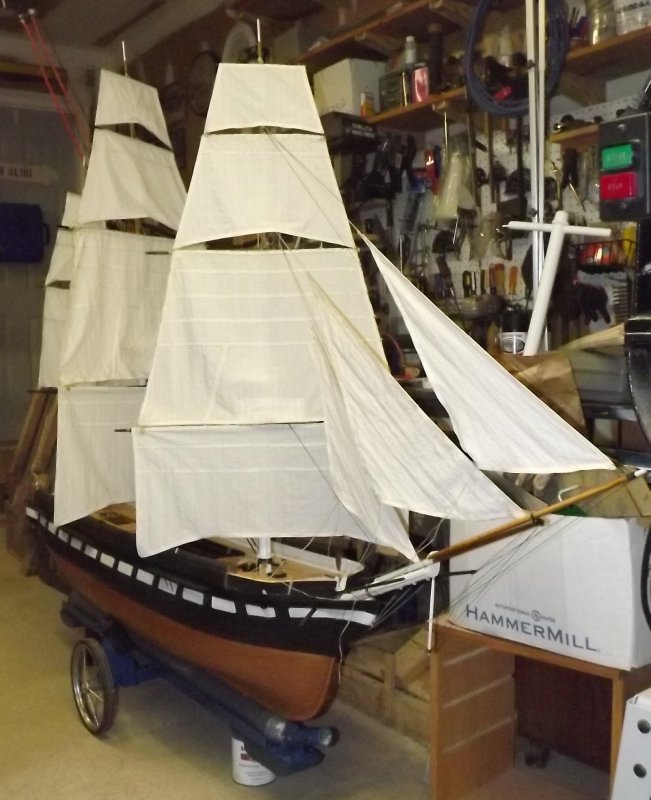
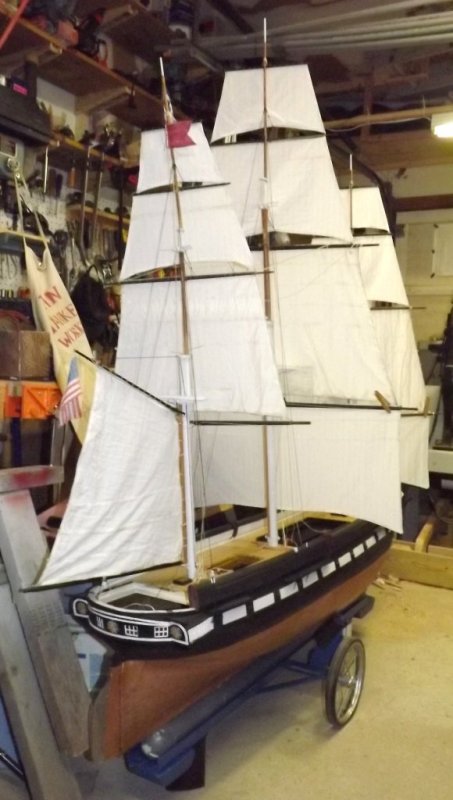
There are two other options I can think of. Dan used two rods from the center of the course yard down to the clews, disguised as clew garnets, to hold the clews out on his Syren's fore course. The other variant of this is to insert rods into both side seams of the sail, anchored in the course yard. The issue with both of these methods is they don't allow the sail to billow up or lift.

I'm not really sure which option I'll go with at the moment - I want something I can easily undo to let me bunt up the courses to shorten sail, so I'll have to experiment a little to decide.

Prep to Sail

10/24: I really want to sail the model before it gets cold, so I've been jury rigging her not only to test fit and function, but to get her operational enough to, well, operate.

This was going to be the first sail with separate controls for fore and main/mizzen, but I don't have two winch drums, so I'm falling back on my mock-up drum again. This sail will have several "goals;"

  • Test fit in car; she hasn't been in my Matrix yet.
  • Test the new launch cart.
  • With the royals set, she'll be sailing with the most sail so far.
  • Test fore tops'l yard brace routing.
  • See how self-tending bowlines rigged on the main tops'l work out.
  • Actually sail the model in open water instead of bumping the bottom in a shallow pool.
  • Get some pictures and video of the model sailing.

The fore tops'l yard braces were a problem, not because of how they worked or were routed through the model, but the line I was using generated too much friction going through the fairleads. It took some effort, but I finally managed to spin up some Dacron line on the rope-walk that was usable, and that made a huge difference. The Dacron fairly glides through the fairleads.

The fore-tops'l braces don't run direct to the yard but to a block on the yard and then anchor at the main topmast head, the yard is controlled by the bight of the brace, and not the end. This is how the actual ship was braced and means the winch has to draw nearly twice the length of line than it would have if it ran straight to the yard.

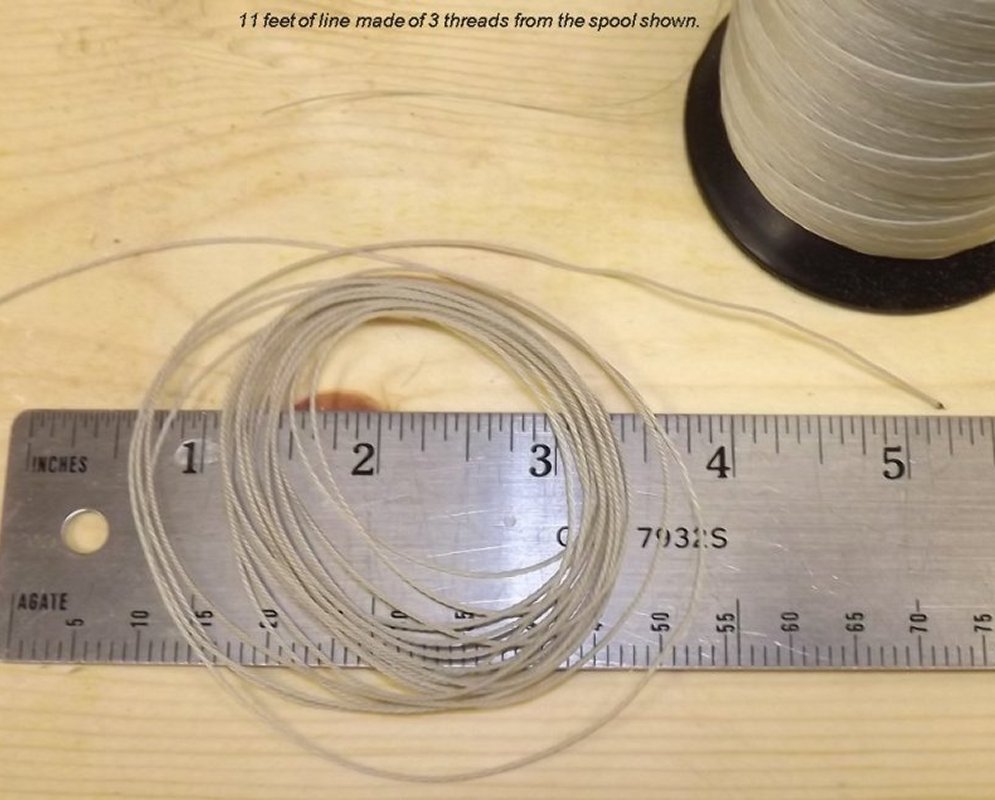
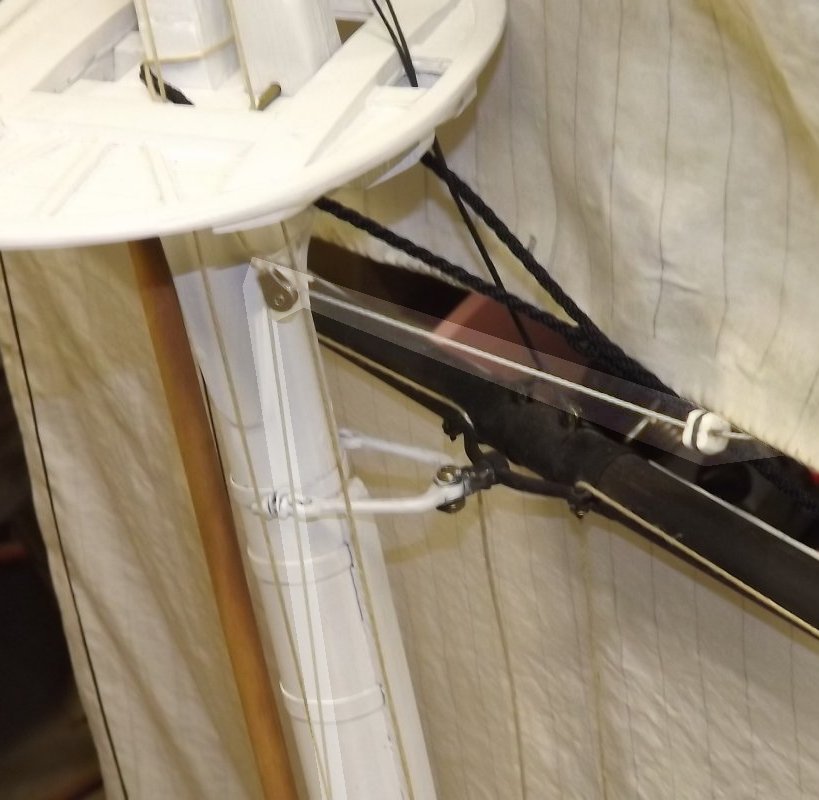
As the brace comes down from the yard it goes to a block on the mainstay that turns it down toward the deck. I found this routing interfered with the travel of the main yard and corrected this by hanging a pair of blocks under the main top to clear the yard.

I spun up more Dacron line for the heads'ls and got two more 12 foot lengths before the rope-walk broke. As a result I just used one strand of Dacron thread for the driver sheet, and just sheeted the fore-topmast-stays'l to center. Once in place, and appearing to work, I made a couple of quick videos to demonstrate it:

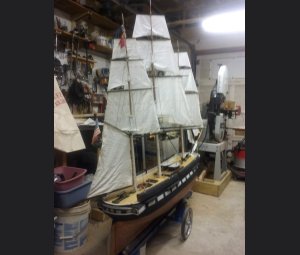
Today the wind is supposed to be Northerly at 5 mph, though it looks like more than that in the trees outside my window. It's time to try and stuff the old girl into the car and take her over to Mark's where we'll put her in Rock Creek and see how she does.


Previous Page | Top | Next Page