New Winch Drums - Again
 10/29/2016: An order of some aircraft plywood came in yesterday, and I set about making the new brace winch drums. I never had active braces running to the mizzen tops'l yard, just the cross-jack,
so I needed an accurate measurement of the brace to make the correct sized drum. While at it, I decided to remeasure the main and for top'sl yard braces as well. Glad I did.
While the fore top'sl yard brace's routing was good, I discovered the I had been mistaken about the main top'sl yard brace. It was anchored on the mizzen topmast stay, ran to blocks at the end
of the yard, then to a pair of blocks half-way down the lower mizzen mast. With the correct routing of the braces determined, I set up enough rig to measure the pull for each brace and determined
the drum size needed.
10/29/2016: An order of some aircraft plywood came in yesterday, and I set about making the new brace winch drums. I never had active braces running to the mizzen tops'l yard, just the cross-jack,
so I needed an accurate measurement of the brace to make the correct sized drum. While at it, I decided to remeasure the main and for top'sl yard braces as well. Glad I did.
While the fore top'sl yard brace's routing was good, I discovered the I had been mistaken about the main top'sl yard brace. It was anchored on the mizzen topmast stay, ran to blocks at the end
of the yard, then to a pair of blocks half-way down the lower mizzen mast. With the correct routing of the braces determined, I set up enough rig to measure the pull for each brace and determined
the drum size needed.
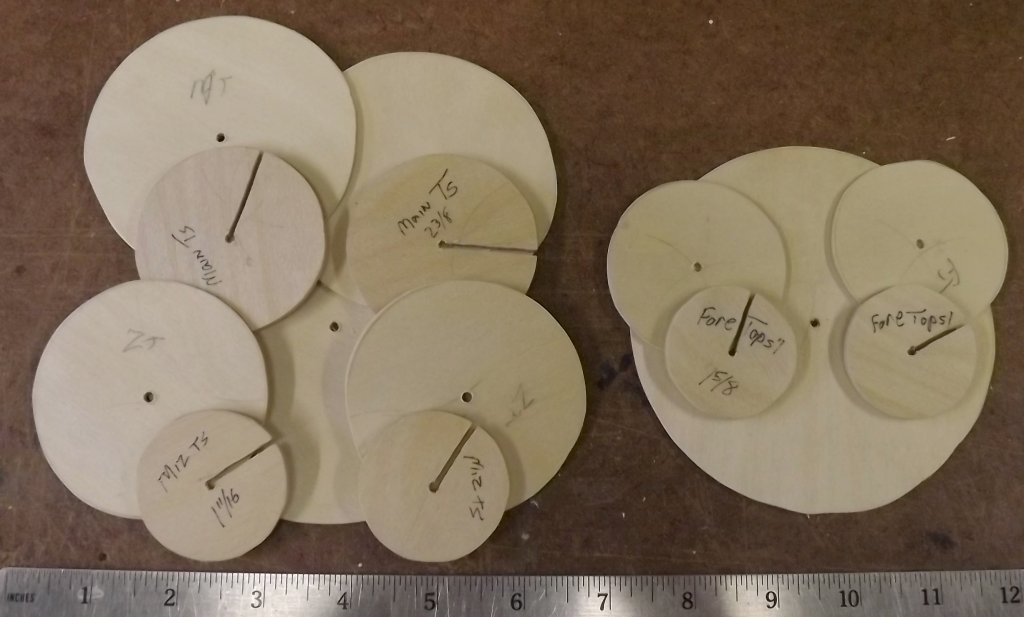 With the sizes figured out, I cut the drums from 1/8" ply, and the flanges from 1/16" ply. After cutting the slots, sanding, and gluing up, I gave each drum a couple of coats of spray lacquer
just to be safe. Then I reused the servo disks and threaded rods from the last failed set of drums, also reusing the previous holes and their whacked-out placement.
With the sizes figured out, I cut the drums from 1/8" ply, and the flanges from 1/16" ply. After cutting the slots, sanding, and gluing up, I gave each drum a couple of coats of spray lacquer
just to be safe. Then I reused the servo disks and threaded rods from the last failed set of drums, also reusing the previous holes and their whacked-out placement.
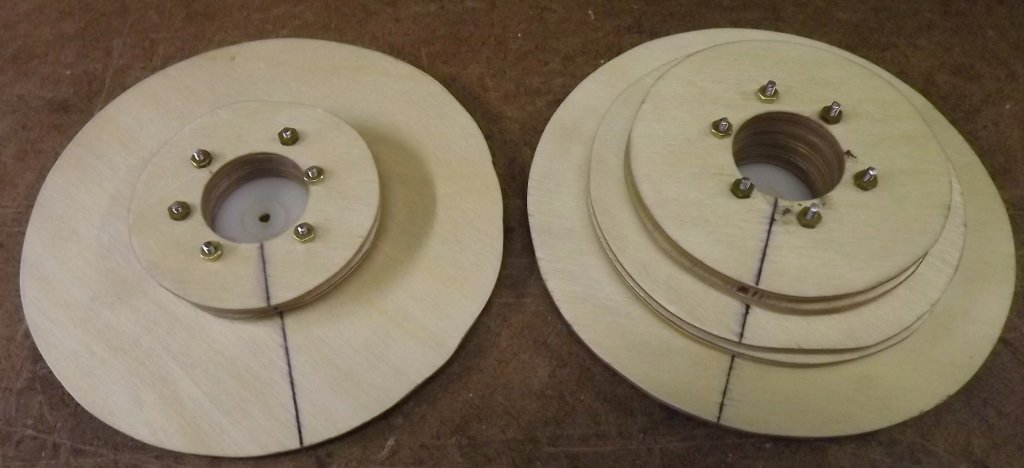
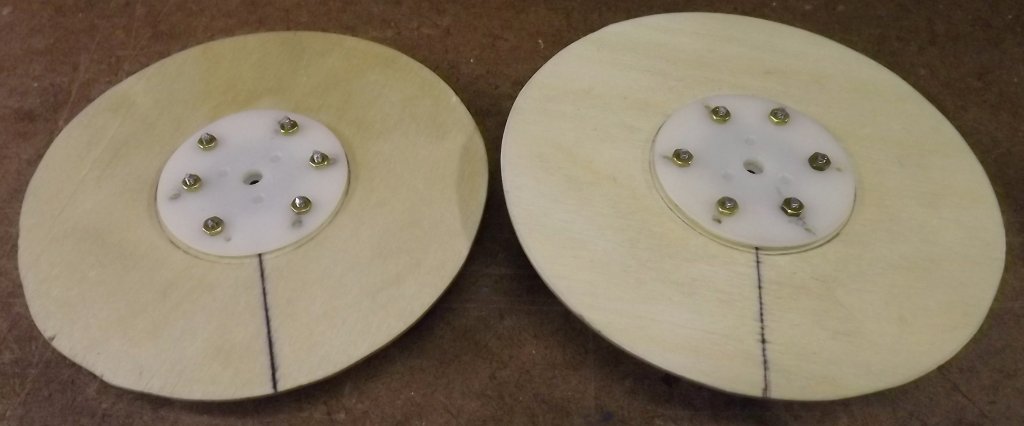
And so, a new set of brace winch drums.

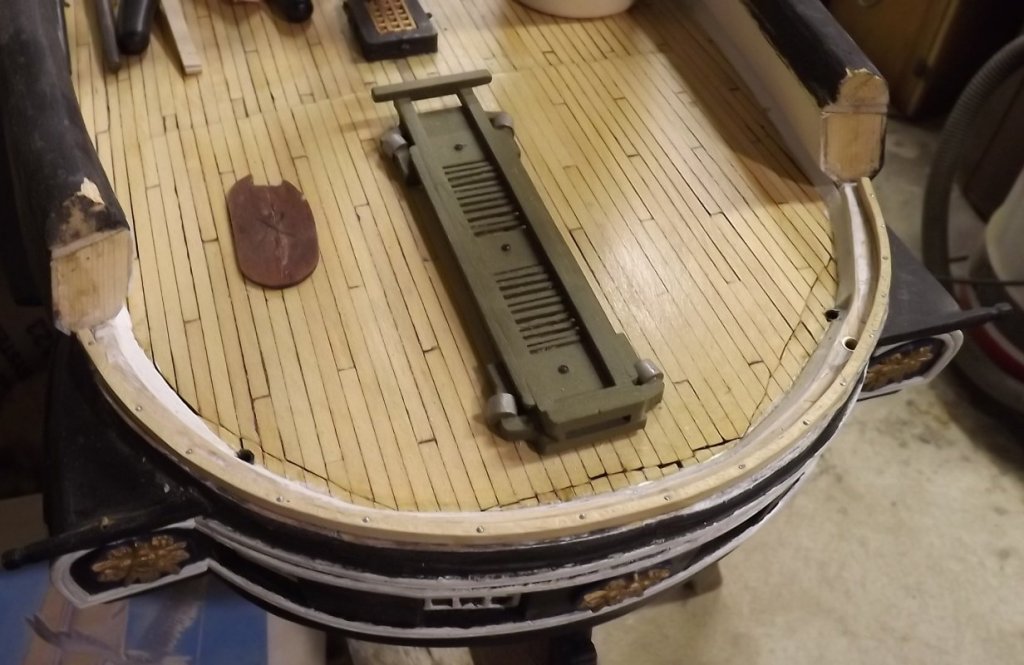
Jack Stays
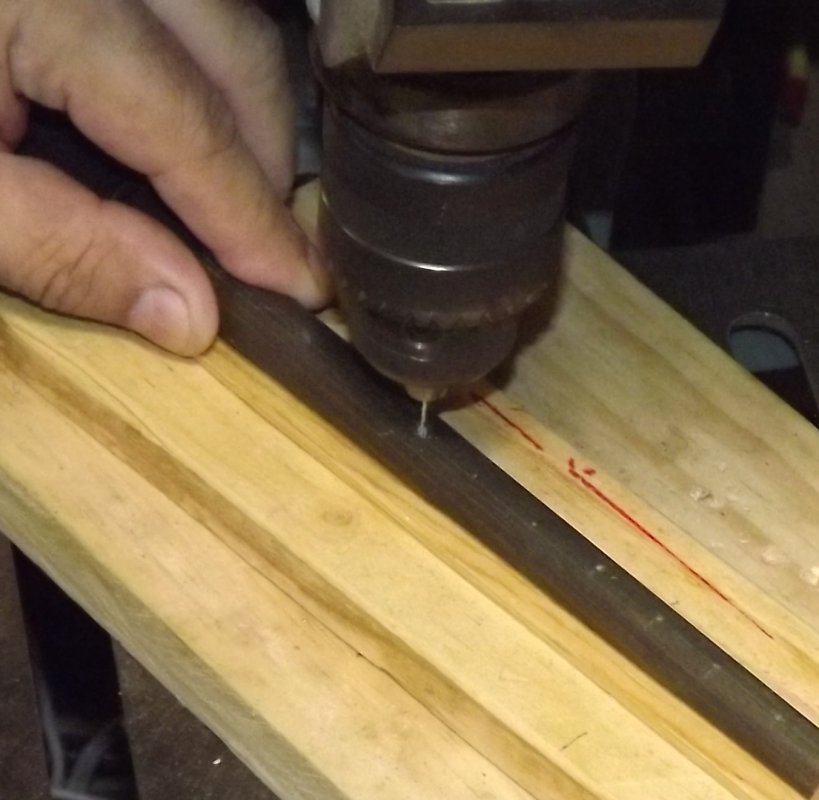
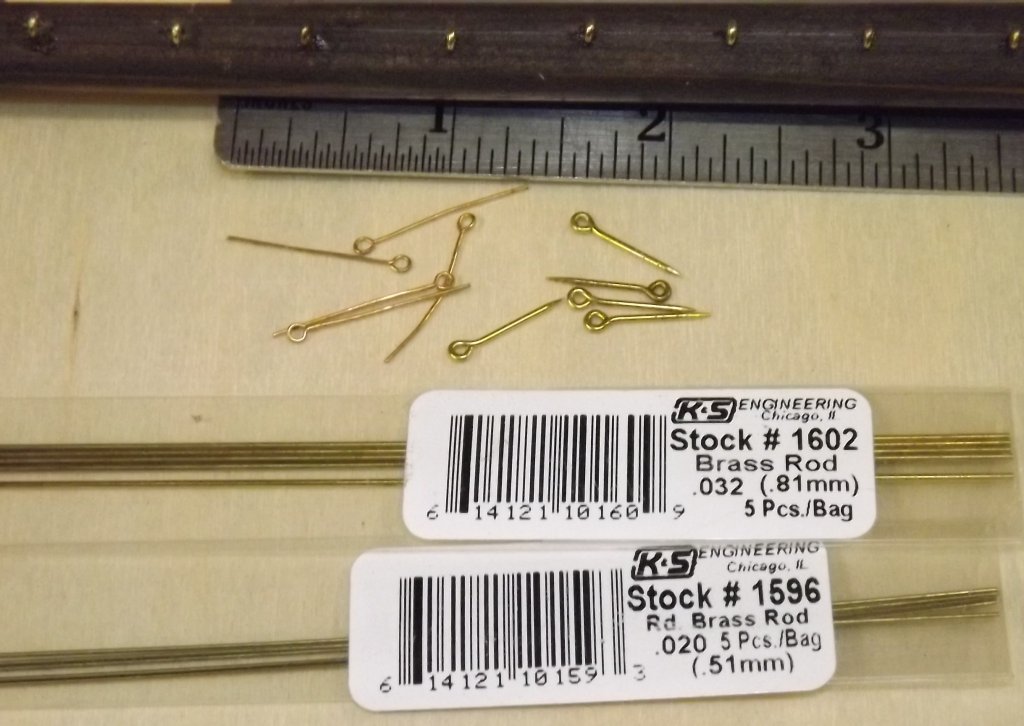
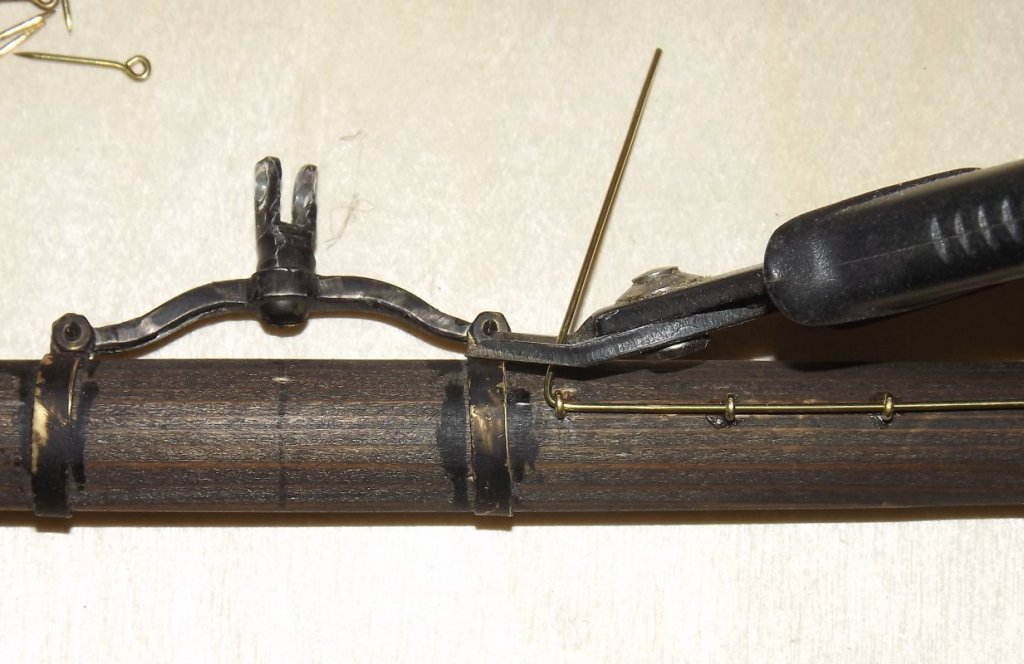
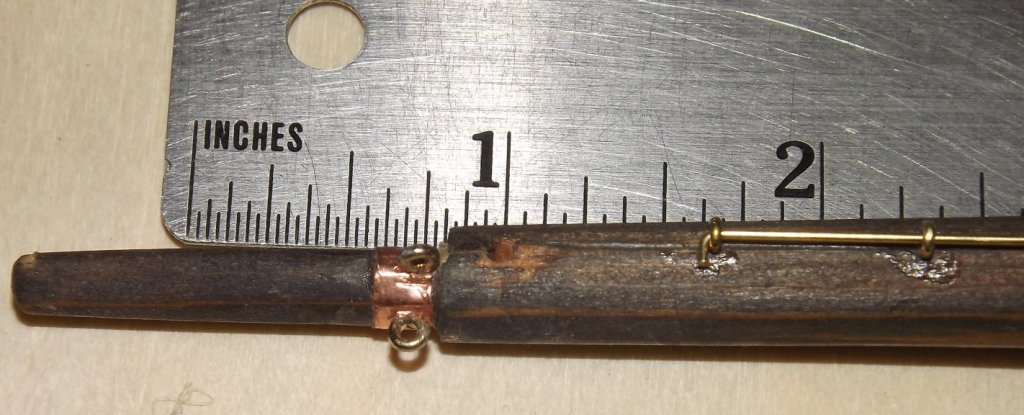
11/5: Started installing jack-stays on the rest of the yards (only the main tops'l yard had them). Drilling 1/32" holes 5/8" (24 scale inches) apart. Inserting brass eye-pins, and running
a .032" brass rod through the eyes. .020 wire and eyes would probably more appropriately scaled, but I don't this would be strong enough for working jack-stays.
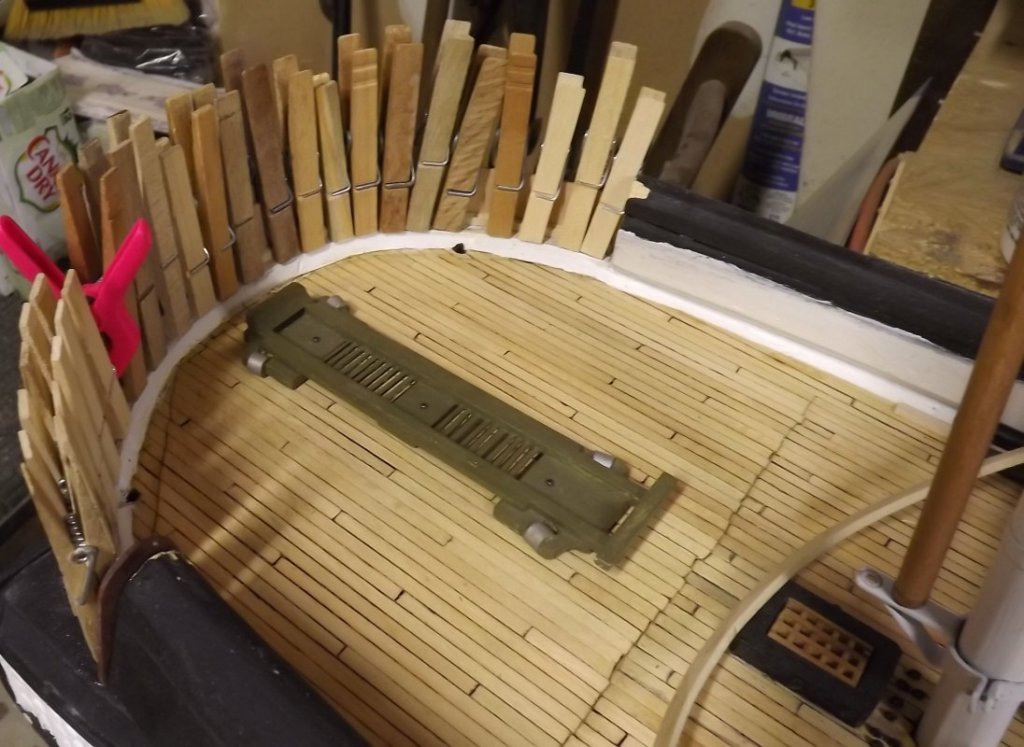
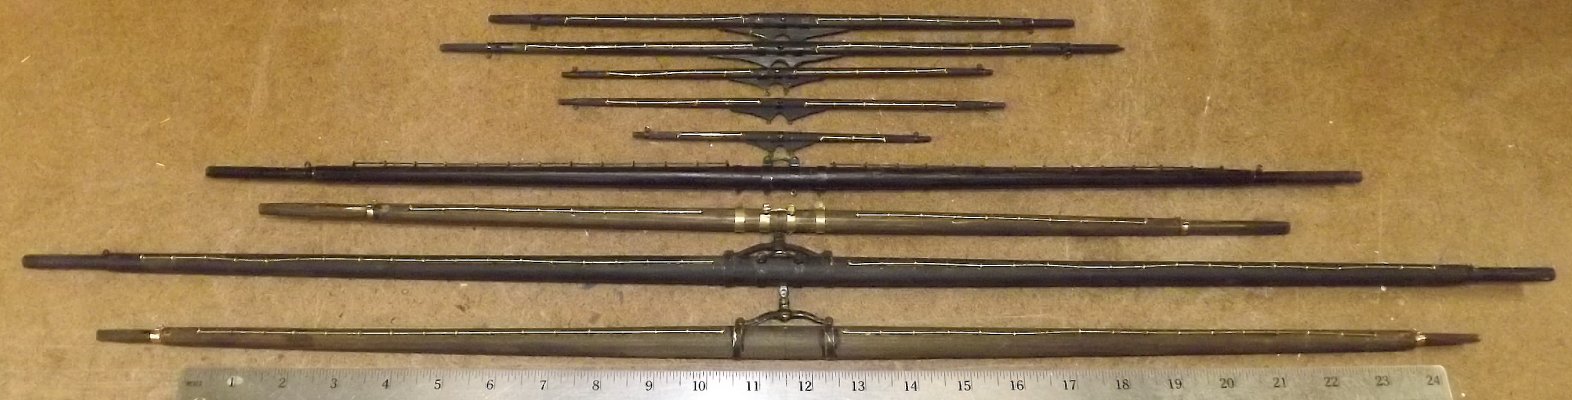 11/9: Worked the polls on election day. Not to get into politics, but I half expected to hear FDR on the radio this morning talking about infamy. At any rate, there's jack stays on all but three
of the yards - I ran out of eye-pins. I got them in packs of 12 from Bluejacket last time, as part of a larger order, but they want way too much for shipping just this alone. I looked around and
finally found them at Micro-Mark. They had packages of 144 pins, and while the shipping was still high, it was less than Bluejacket.
11/9: Worked the polls on election day. Not to get into politics, but I half expected to hear FDR on the radio this morning talking about infamy. At any rate, there's jack stays on all but three
of the yards - I ran out of eye-pins. I got them in packs of 12 from Bluejacket last time, as part of a larger order, but they want way too much for shipping just this alone. I looked around and
finally found them at Micro-Mark. They had packages of 144 pins, and while the shipping was still high, it was less than Bluejacket.
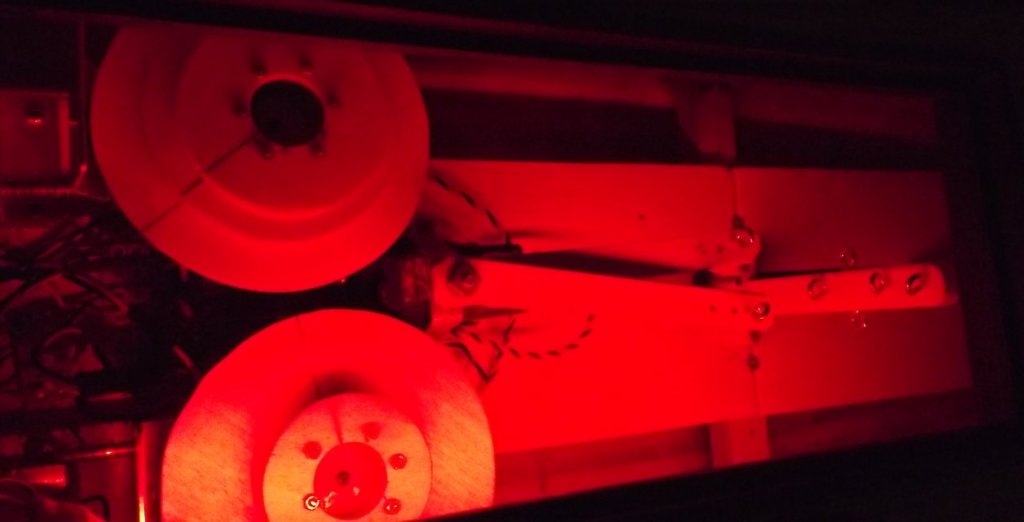 Mark gave me a bit of LED strip left over from something he did to his old truck's dashboard. I hooked them up to ta 12volt battery and stuck them in the model.
I've been thinking about some sort of lighting inside the model, I'm finding I need more light to see anything, as well as reading glasses for things close up.
The LEDS are red which lit up the inside alright, but everything is red. I'm not trying to preserve night vision, but I may need to see colors when digging around in the model's guts.
So, while I like this LED light strip, I don't think red LEDs are gonna do it for me.
Mark gave me a bit of LED strip left over from something he did to his old truck's dashboard. I hooked them up to ta 12volt battery and stuck them in the model.
I've been thinking about some sort of lighting inside the model, I'm finding I need more light to see anything, as well as reading glasses for things close up.
The LEDS are red which lit up the inside alright, but everything is red. I'm not trying to preserve night vision, but I may need to see colors when digging around in the model's guts.
So, while I like this LED light strip, I don't think red LEDs are gonna do it for me.
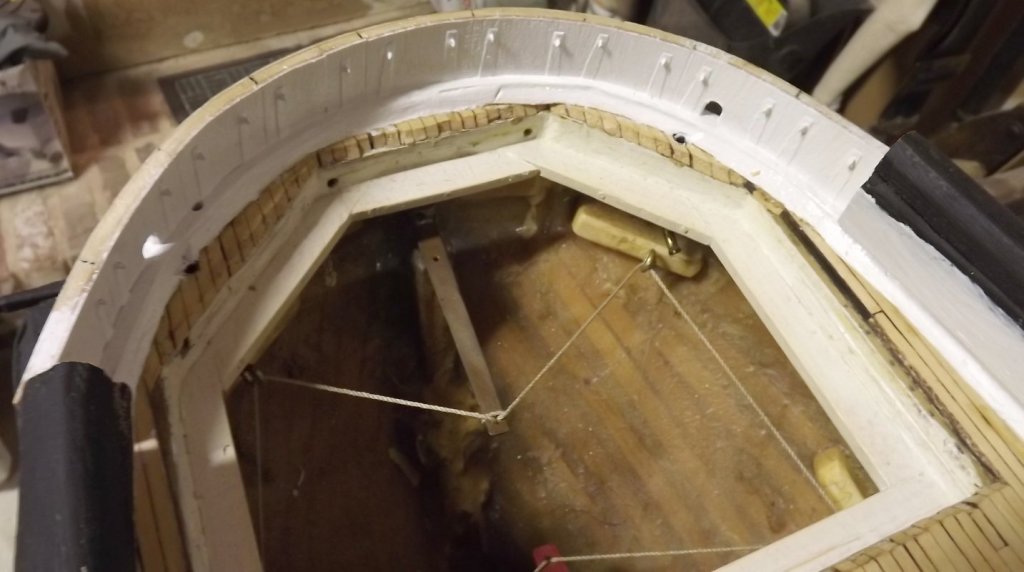
Aft Bulwarks
11/18-22: I began building the aft drop-bulwarks. Like the forward bulwarks, I'm not modeling the nine or so separate panels that make it up, rather I'm building it as a single unit
and engraving the seams to imply the separate panels. Unlike the forward bulwarks, I'm building this one in place.
I dipped a cut-off strip of poplar from another project in some ammonia and bent it around the stern cap-rail. Then I glued and nailed it down. Then I cut off sections of 1/32 bass sheet,
with the grain vertical, and glued it on the outside edge of the strip I just nailed down. This is the outer sheathing of the bulwark.
Another strip was dipped in ammonia and clamped on top of the lower strip to take the shape. Then it was glued at the top of the sheathing.
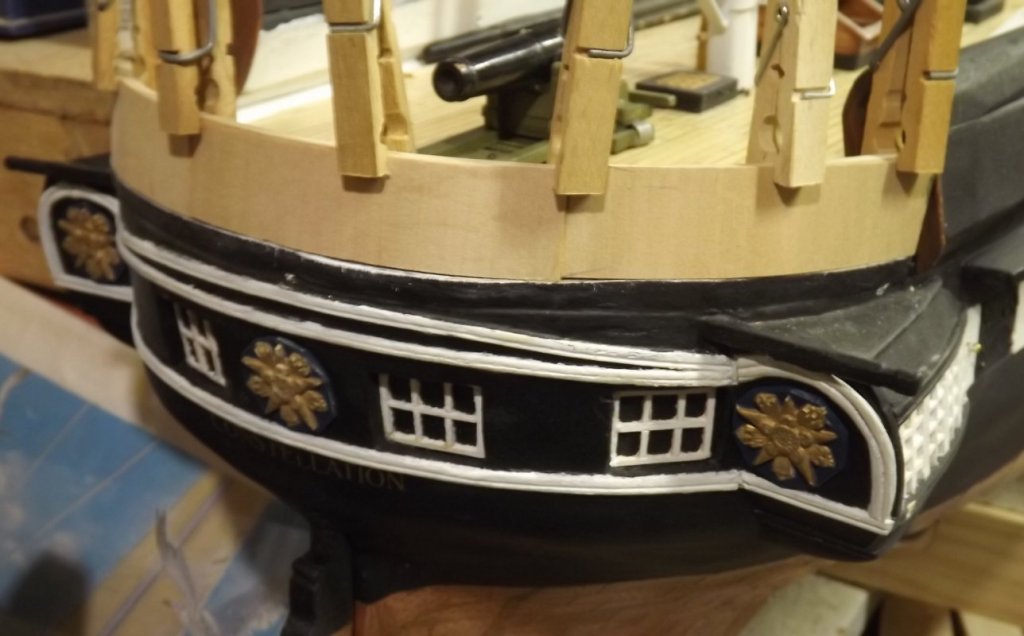
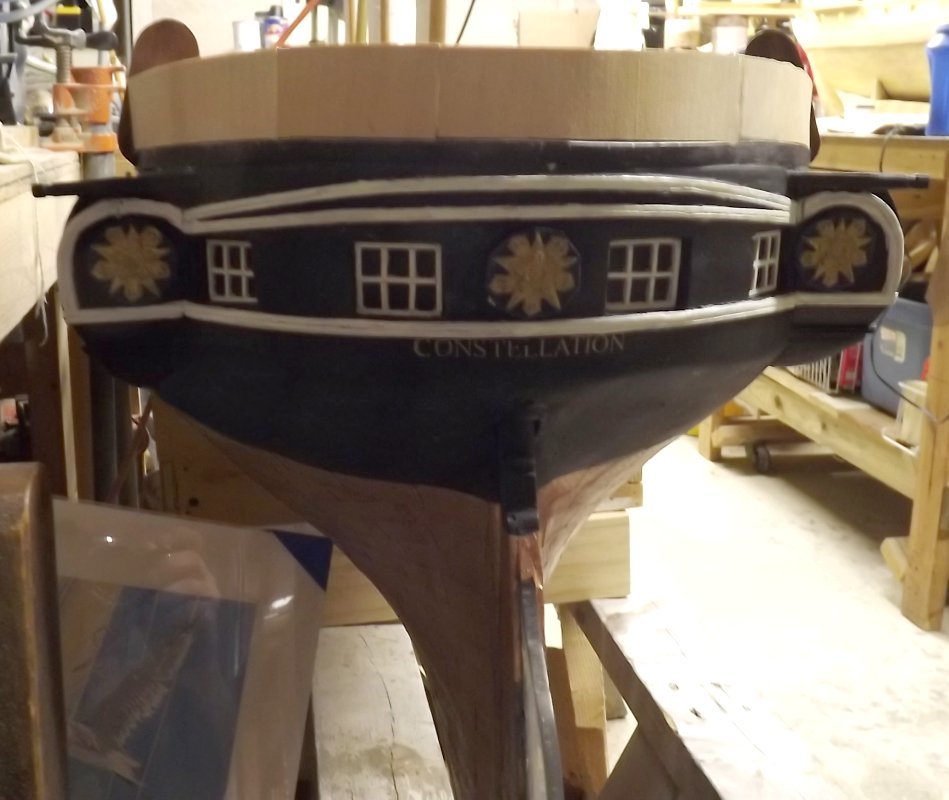
Blocked and cut the holes for the braces and sheathed the inboard side.
The bulwark panels have bronze hinges just like the forward bulwarks. Just like the forward bulwarks, I represented them with card. After gluing on the hinges I drilled and installed the eyes
for the support rods. Next day this all got a coat of white paint inside, and black outside.