7/18/2018

 |
 |
|
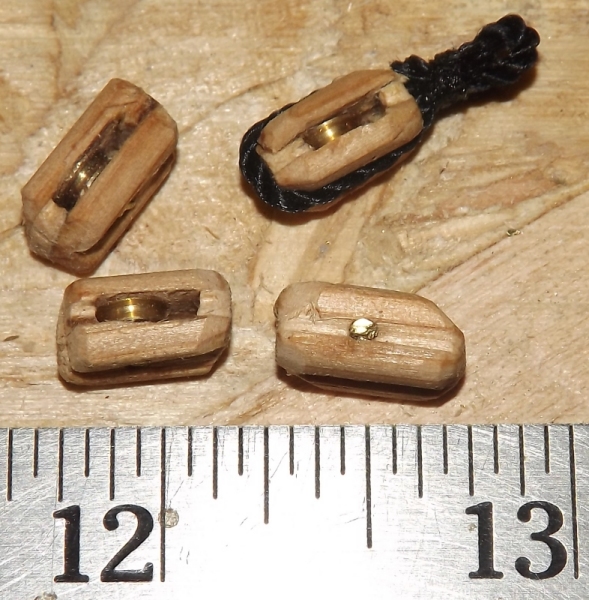
Previous Page | Next Page | Table of Contents click pictures for a larger version 6/4/2018: I've been using some brass frame blocks for brace blocks on the yards, they aren't the correct style for the ship, but I needed functional blocks on the braces. I also only have so many of them, so to free a few up for duty below deck, I made up 6 functional wood-shell blocks for the braces. They're ok, and they work, but I don't care for how they turned out. I used some white cedar for the shell, which is too soft and open-grained. I have some branches from a fruit tree, though I don't know what fruit, and I'm going to try and mill some of it to use for blocks. Till then, these will do.
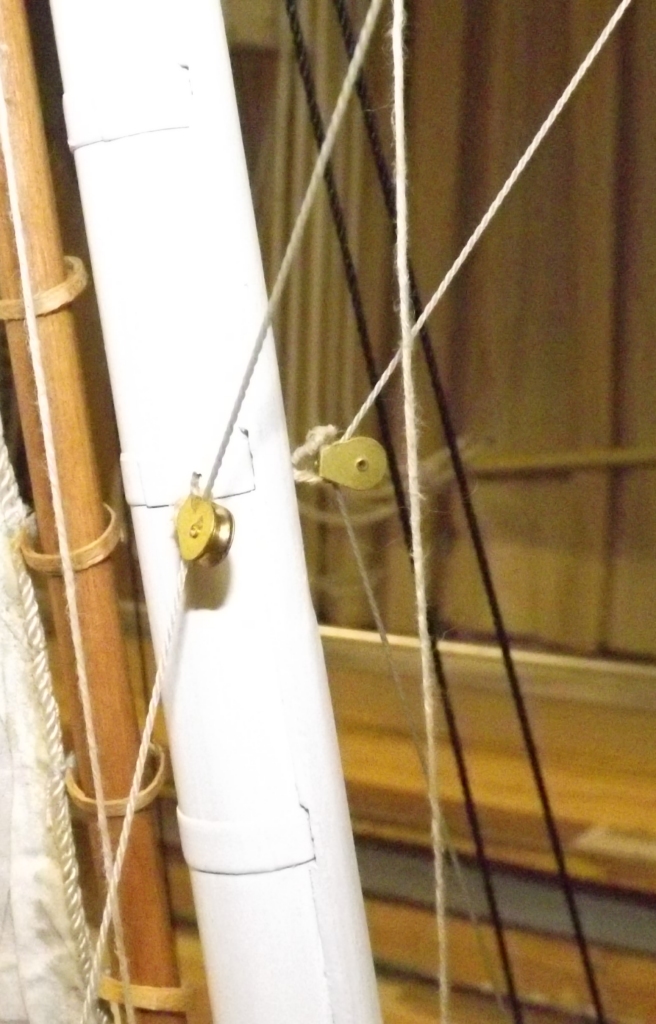
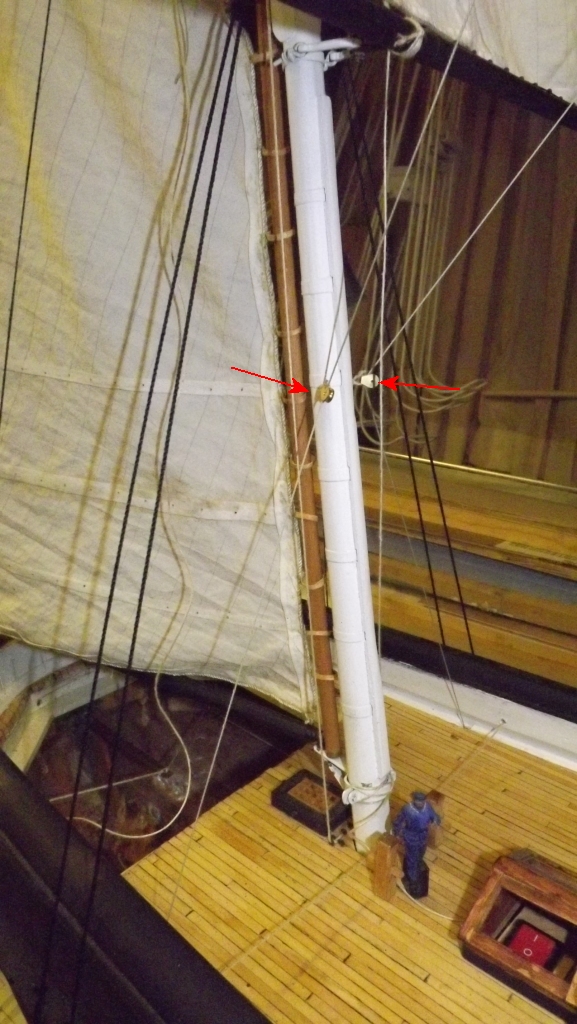
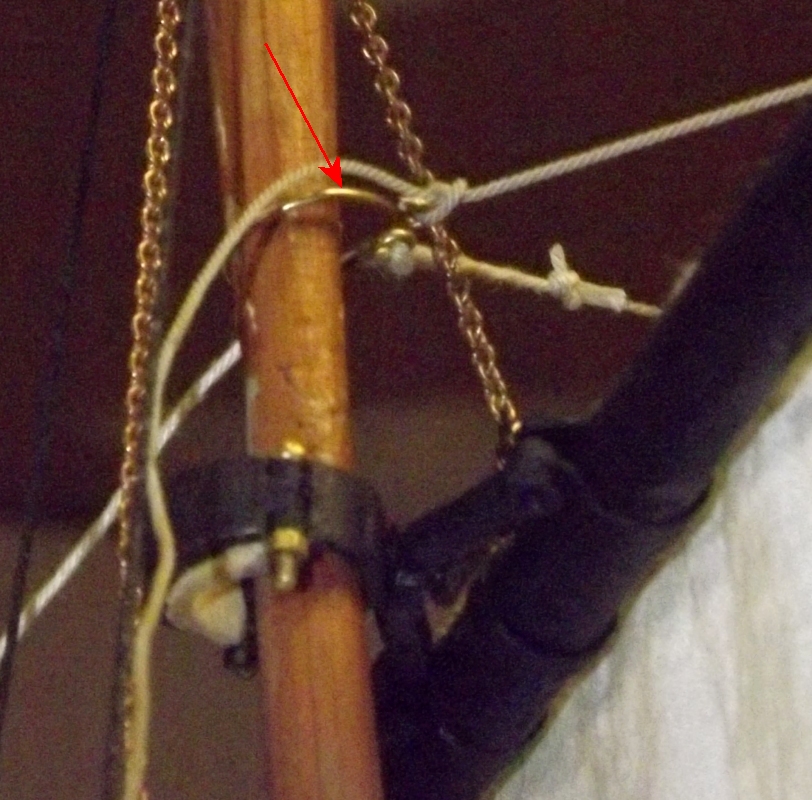
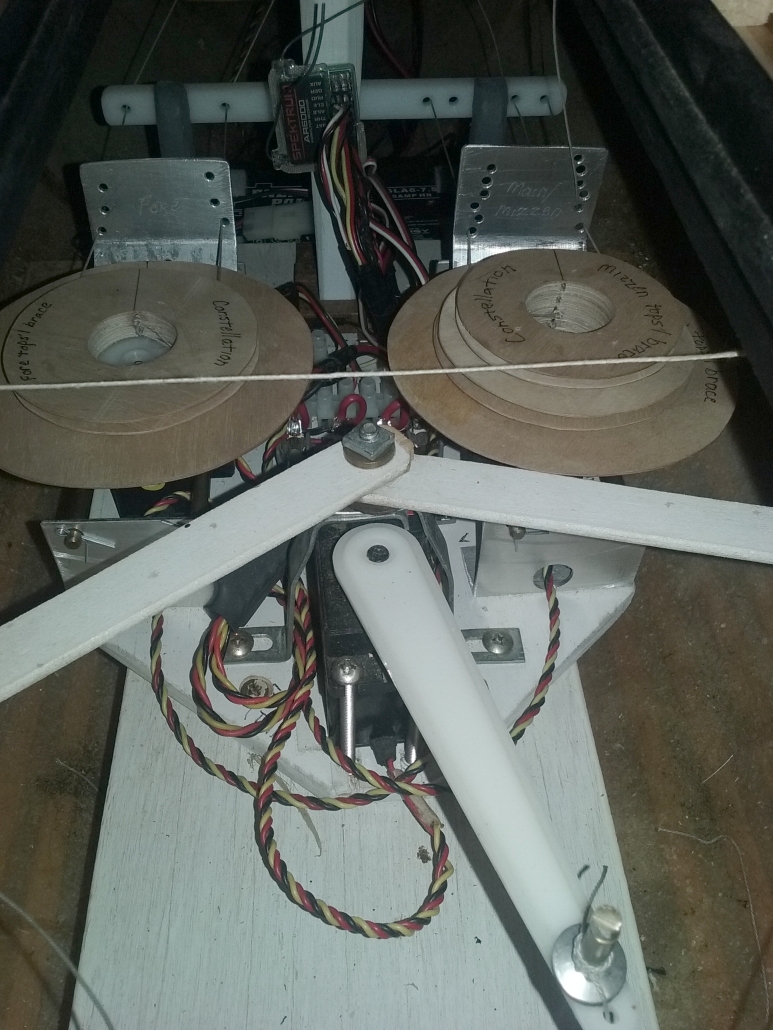
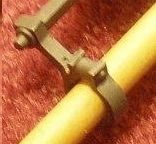
6/23: Somehow, the rotation of the winches changed and I couldn't figure it out. There was no setting on my transmitter to change servo-travel, which is why I got a servo-stretcher for the sail-arm a while back. I searched the manual for the radio years ago hoping to find just such a setting. But somehow, one wich made 4.5 rotations, and the other made 4.25 while all my calculations were based on the servo's stock 3.5 rotations. I couldn't figure it out, so I made yet another new set of winch drums based on the number of rotaions the winches made. Mean-while, I posted my cunnundrum on RCGroups forums and Dan came back with a link to a PDF manual for a newer version of the DX6 transmitter pointing out where this setting was. I've mislaid my paper manual somewhere, so I found a PDF for the older DX6 I have, and wouldn't you know it - it does have a setting for servo-travel on all 6 channels! I can't understand how I never found this, especially when I was specifically looking for it, but thanks to Dan, I found it. fiddling with these settings I got the new winch-drums dailed in, and the yards bracing correctly. I installed two eye-spikes into the mizzen mast to mount a pair of brace "span-blocks," and made a brass ring for the main tops'l braces to attach too as was on the real ship - noted a few pages back in this log.
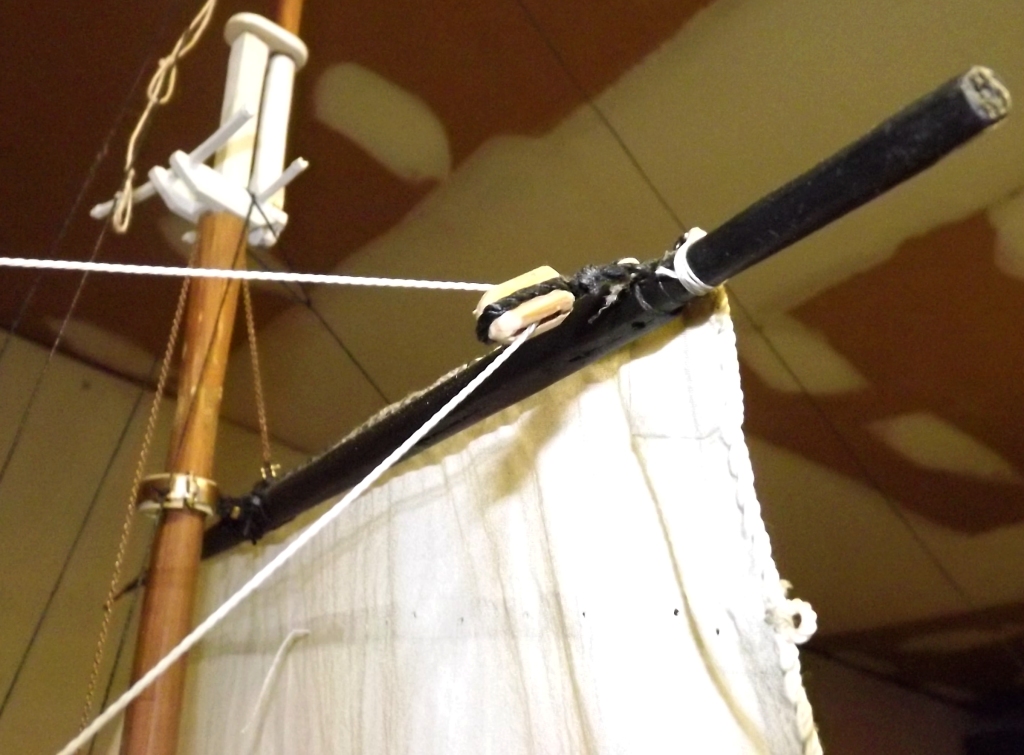
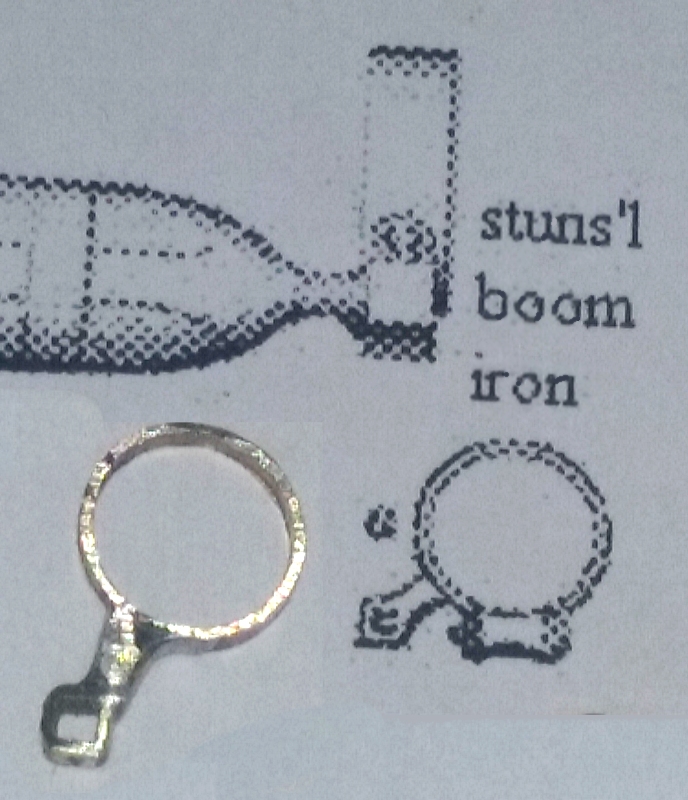
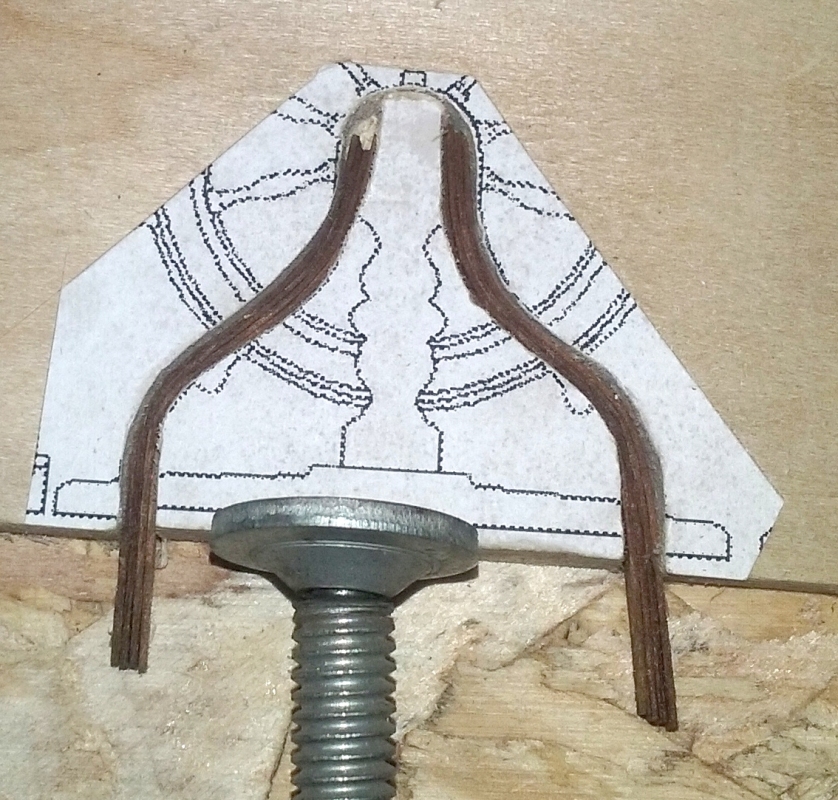
6/28: Regarding that thing the main tops'l brace ties to talked about back on page 34, I found the following in the 1891 edition of Luce's Seamanship: Main-topsail Braces. Standing part hooks to an iron traveler, which moves up and down the mizzen topmast to shift the strain lower down as it becomes greater (if the mizzen-topsail is reefed or taken in), thence to the yard and down to hanging blocks on the mizzen-mast, about half way between the top and the deck. Earlier edition's of Luce's I have PDF's of (1863, 1868, 1877) have the braces hitched to the mizzen topmast head and seized to the stay-collar, or they might lead through thimbles at the mizzen topmast head and down to the chains, but says many ships now do the above. At any rate, there's some documentation verifying what I was seeing in the photos. Personally, I like the thimble to the chains set-up myself, as it would give me a really nice way to incorporate a way to make adjustments, but that's not what the ship had, so... Unfortunately no edition of Luce's shows this fitting in any of it's plates or figures.
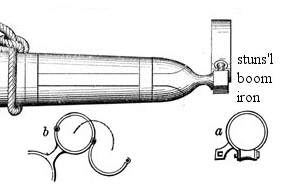
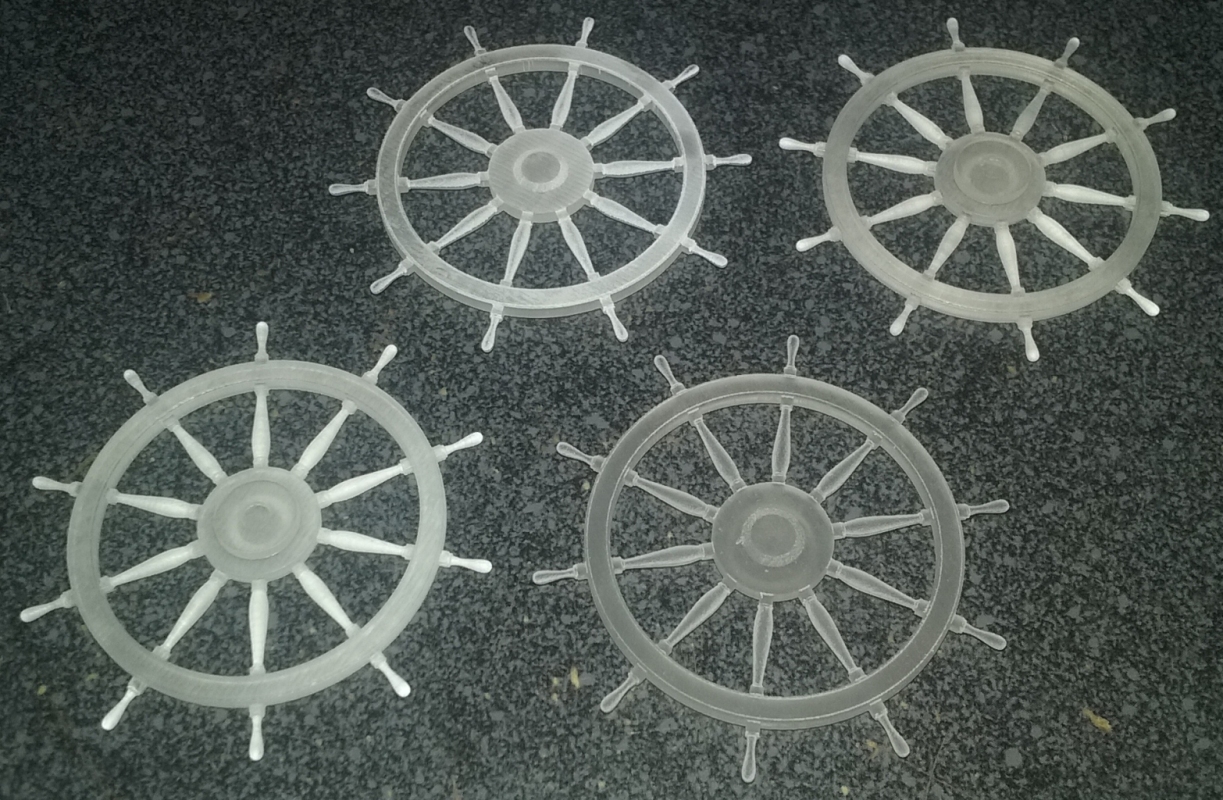
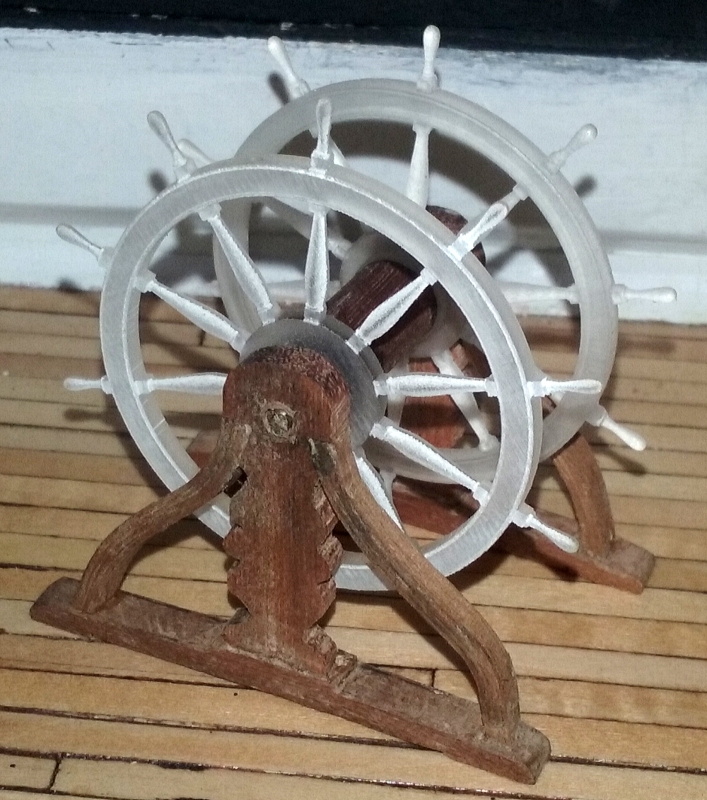
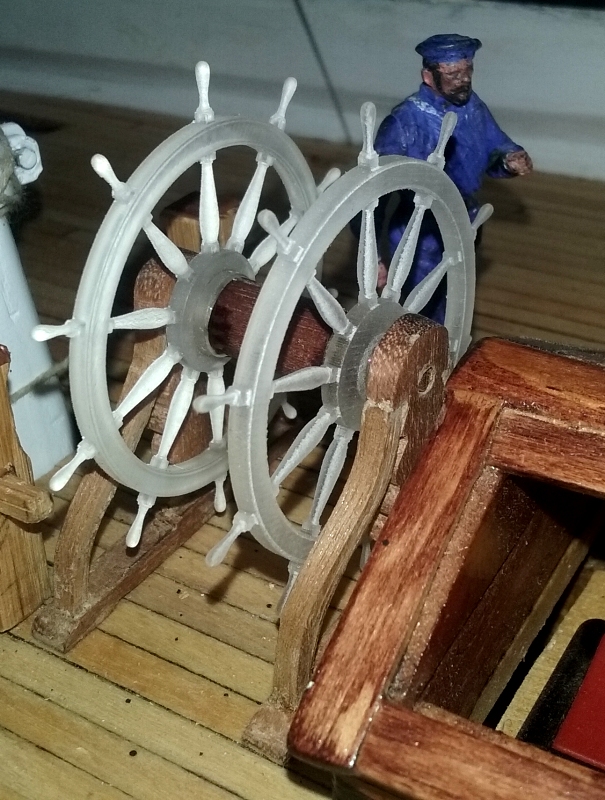
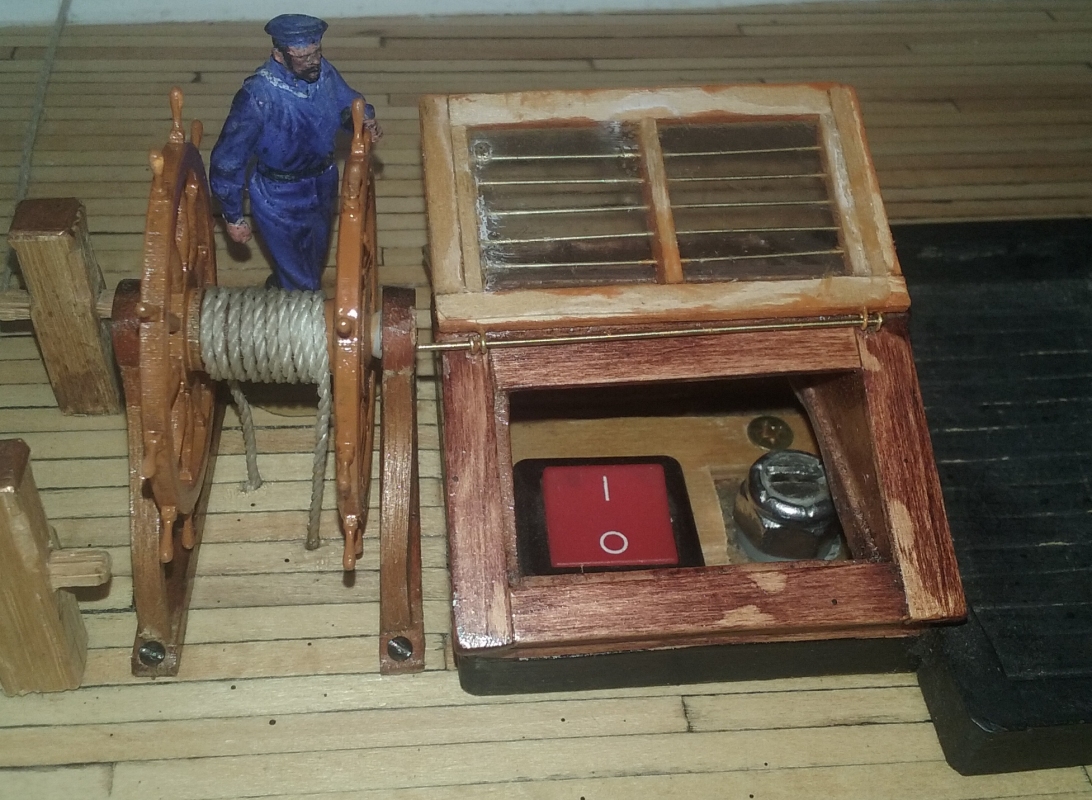
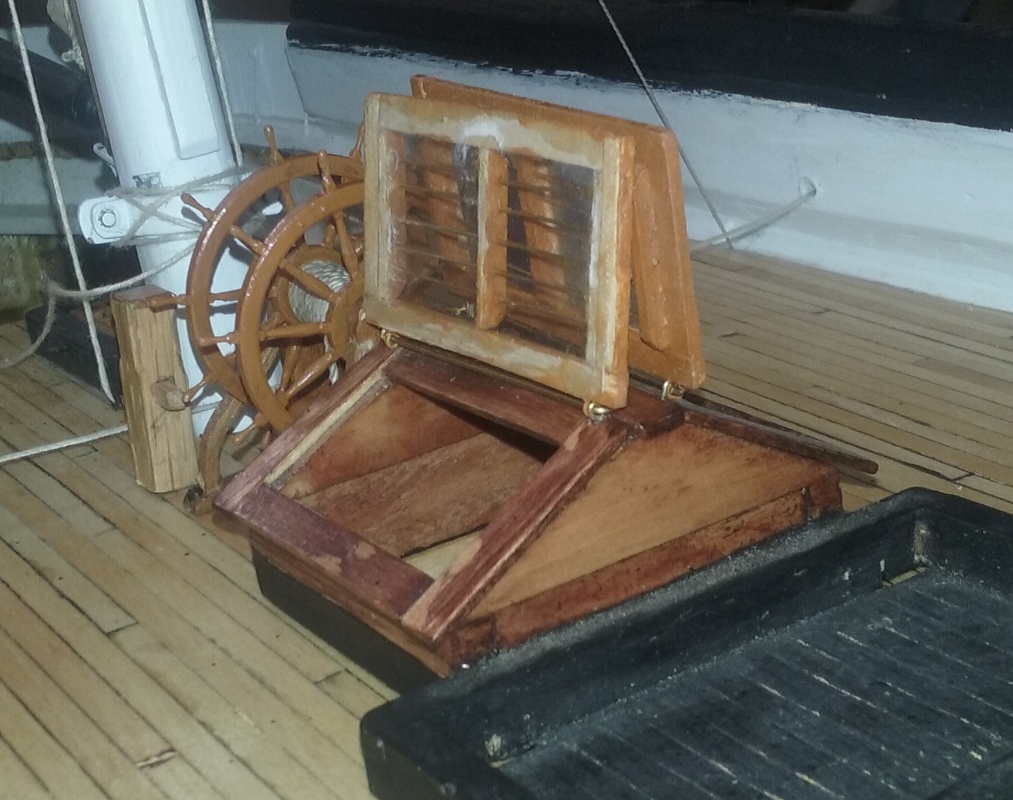
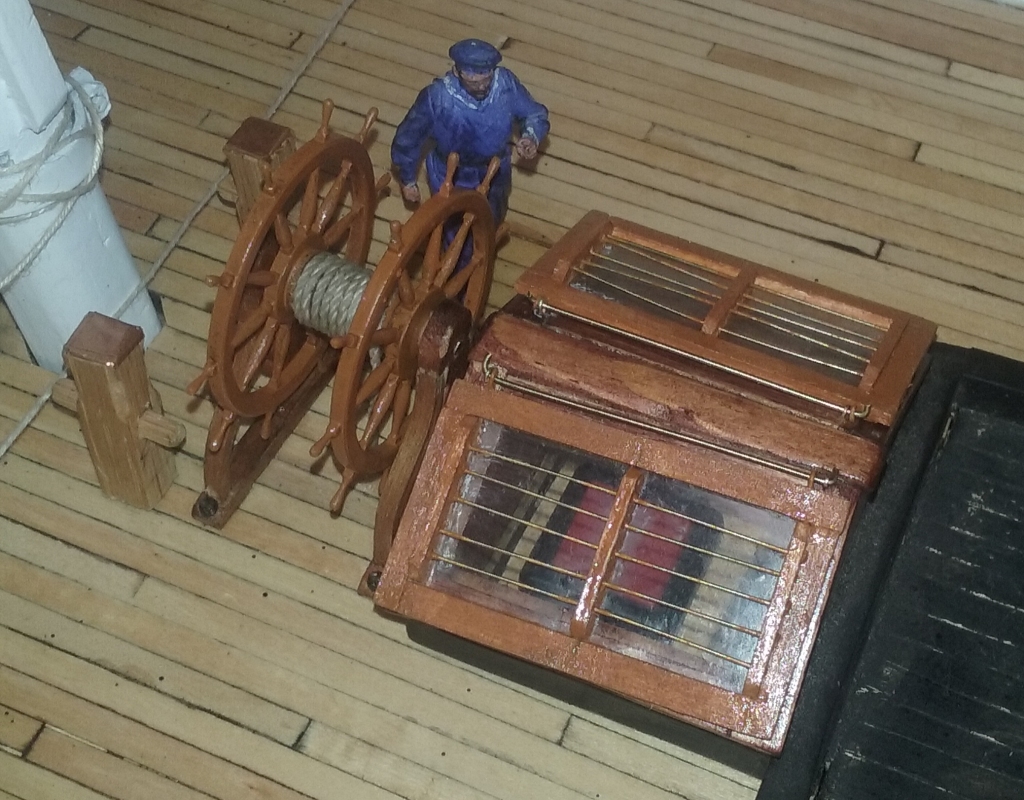
6/30: Found a hobby shop that carried brass and got a couple of pieces of square tube. Using a slice of round tube, and a bit of rod, I took a shot at making a stuns'l boom iron. I'm not especially pleased with it, but it's not as bad as I thought. I use one of those alligator-clip extra hands things to hold it all, and I think I need to figure out a jig of some sort because making 12 of these things in this way isn't gonna cut it. 7/10: Today is the 7th anniversary of the model's forst sailing. It would be nice to have taken her out again, but she's not in any condition for that at the moment. Instead, I've been working On the ship's wheel. I tried making spokes for it with various materials, but everything I tried was too frial or too clunky, so I contacted "Model Monkey" via Shapeways and he scaled one of his ship's wheels up to 1:36 scale for me which Shapeways printed. I got 4 wheels, two for Constellation, and two for Macedonian, since they're basically the same.
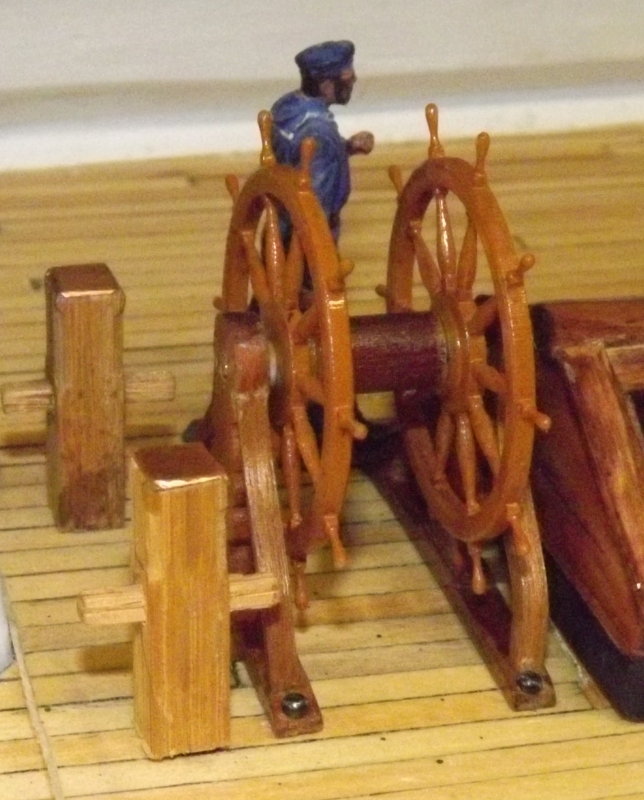
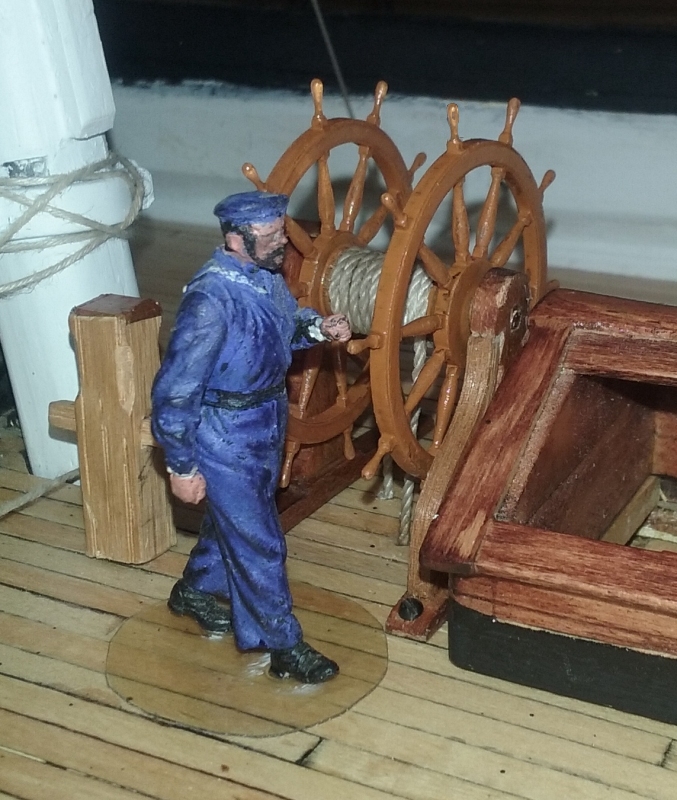
7/10: Painted the wheels and clear-coated everything, then attached it to the deck. 7/12: With the rudder ropes attached, the thing is done...and Ivan got a new stand.
7/18: The skylight got it's glass today
|
||
 |
 |