7/30/2011

 |
 |
|
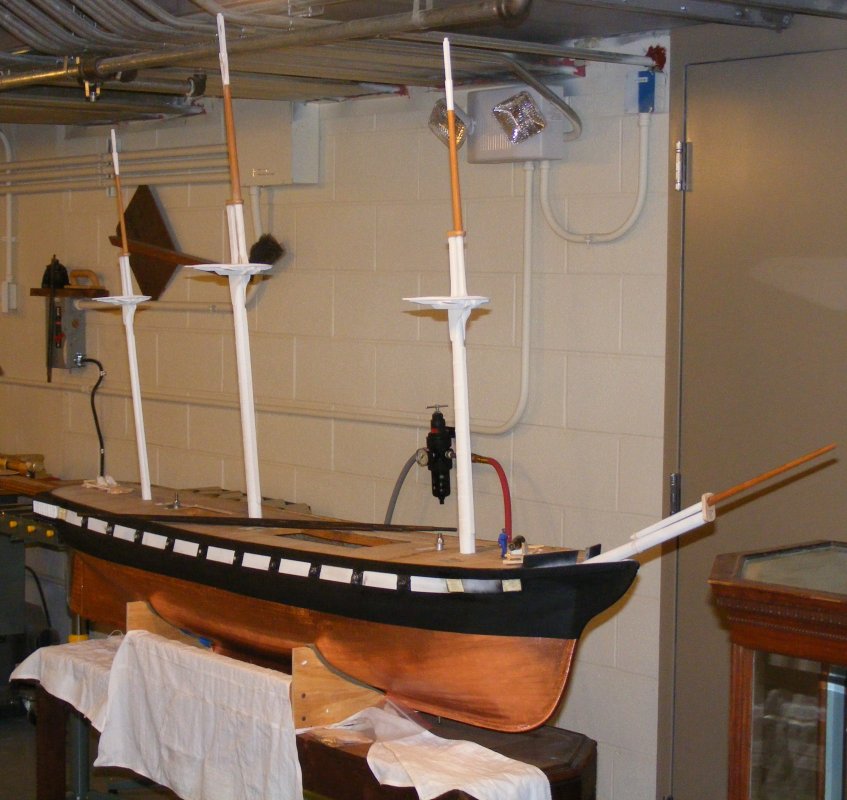
Previous Page | Next Page | Table of Contents click pictures for a larger version May 2010: I was tired of the model looking like a log and wanted to get some paint on her - so outside she went with a roll of masking tape, some newspaper and some Krylon spray paint.
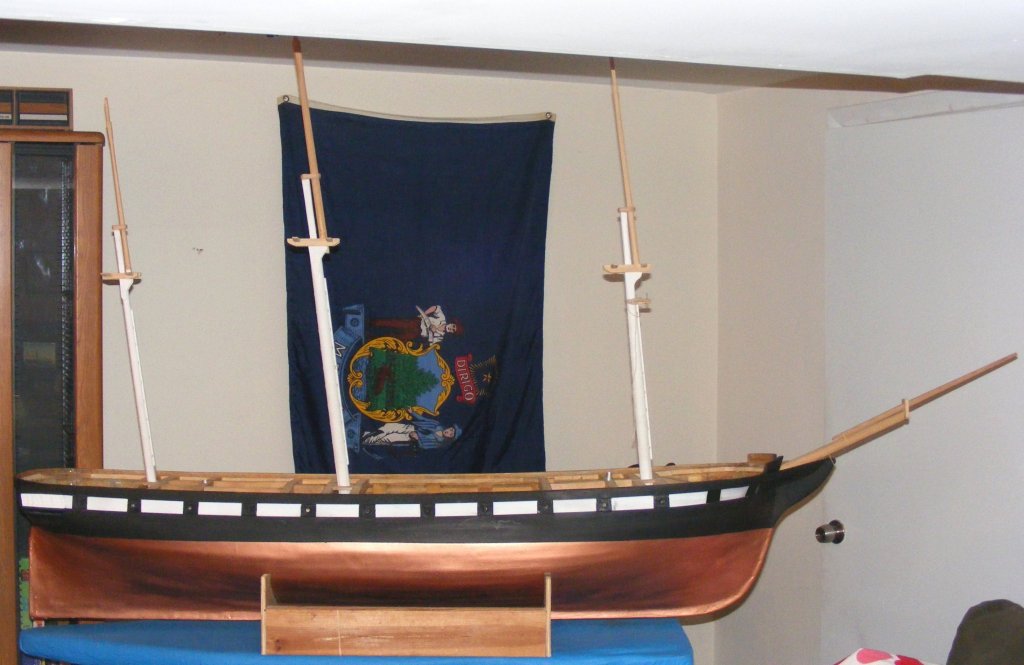
A long time ago I sprayed some paint on the hull to see how it would wear with all the handling during construction (that's the scorch mark on the hull in the float photos) there was some copper paint on the bottom also - all of which held up pretty well - so I washed the hull with dish-washing detergent, wiped it off with degreaser, masked, and sprayed away. The hull turned from a log into a ship instantly. It's amazing what a bit of fresh paint can do. The reason for getting on with painting was, the copper tape arrived the day before.
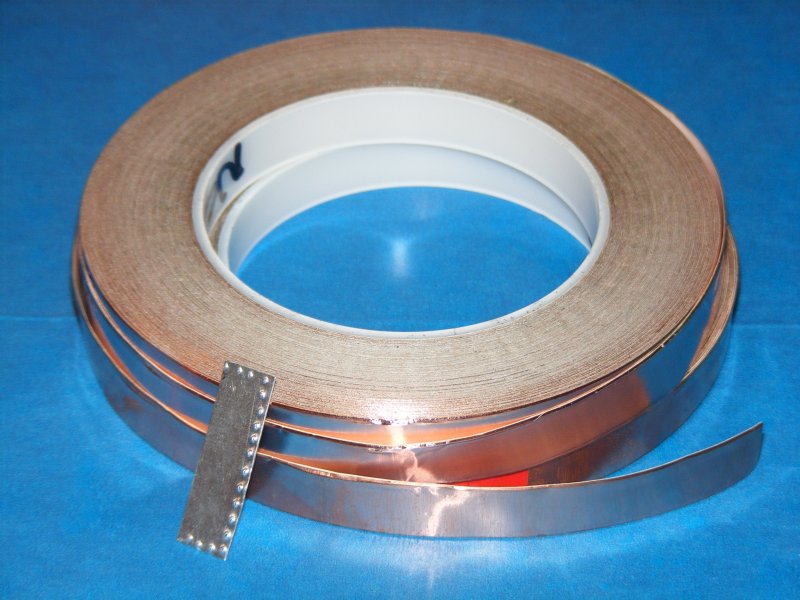
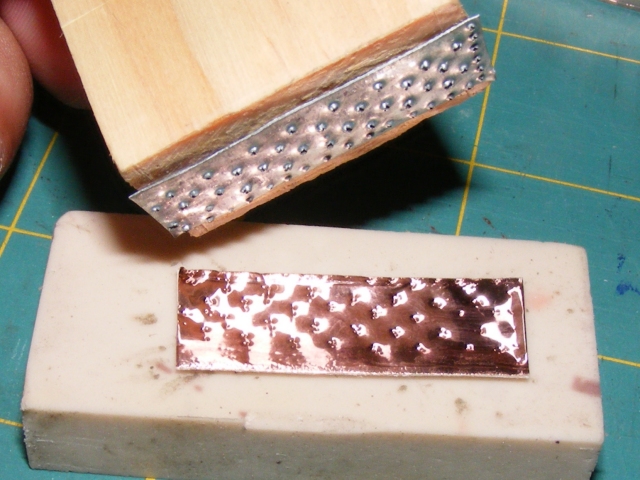
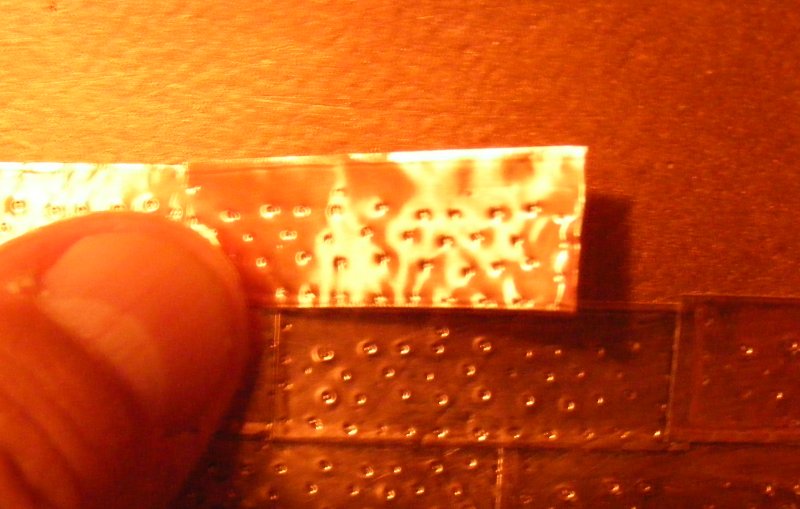
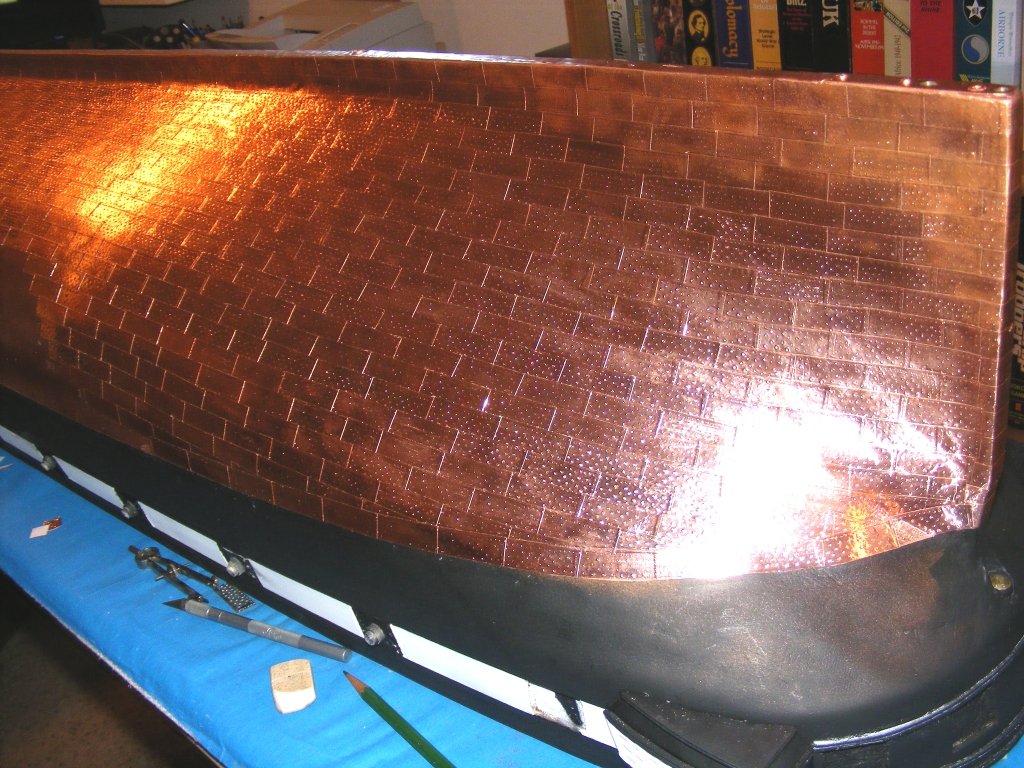
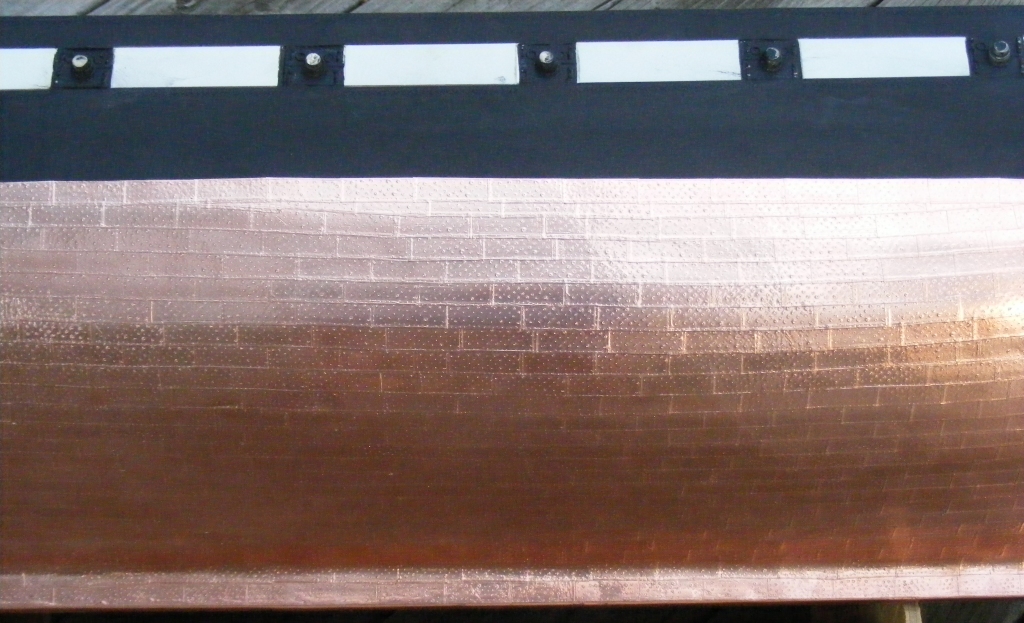
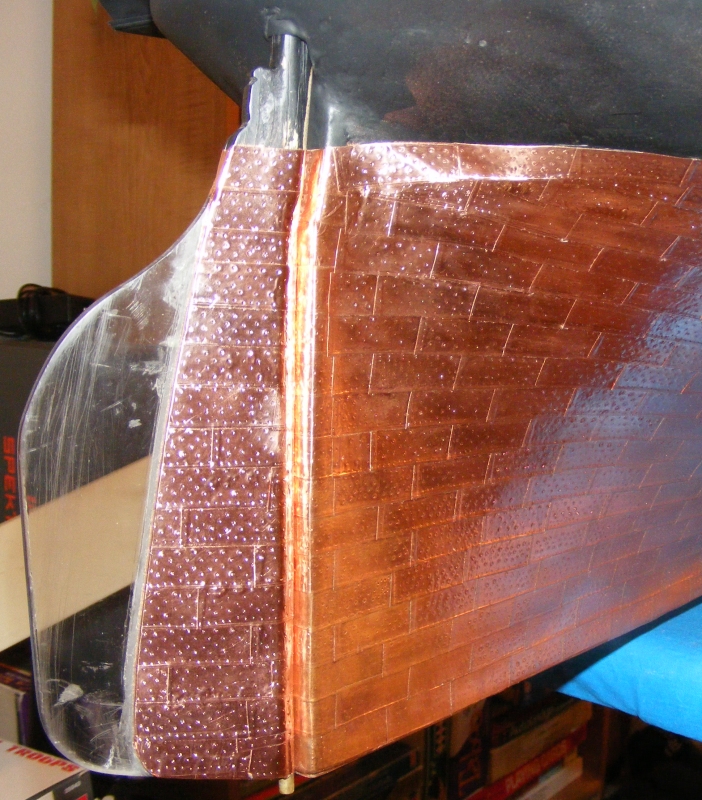
The Copper Bottom June-July: When I look at ship models with coppered bottoms I notice that many of them emboss the nail pattern in them from the back side of the copper to create a raised nail head effect. I don't know why, because from what I gather copper sheets were nailed on using flat headed nails, counter sunk flush with the sheet. Constellation is in 1:36th scale, which is fairly large and means that details like nail patterns in her coppering are pretty apparent, the lack of them would also be pretty apparent, but I didn't want the round headed rivet effect I see so often. I'm using 2 mil thick, 1/2" self-adhesive copper tape with a paper backing that is peeled off to expose the adhesive. My solution to embossing the nail pattern was simply to emboss the pattern from the front of the copper rather than from the back. Using a bit of sheet metal I punched dings into with a small dulled nail, I press this on the copper backed up by an eraser. Without an eraser, the divets aren't deep enough to work well at this scale.
When the piece is pressed onto the hull, the bottom of the dimple is pushed back up creating a tiny ring of raised copper that, in my opinion, looked more like the nail pattern of real ships copper.
A YouTube Video on sticking little bits of copper to a great big hull. Then it was a road trip to the United States Naval Academy Museum Workshop for some show-n-tell.
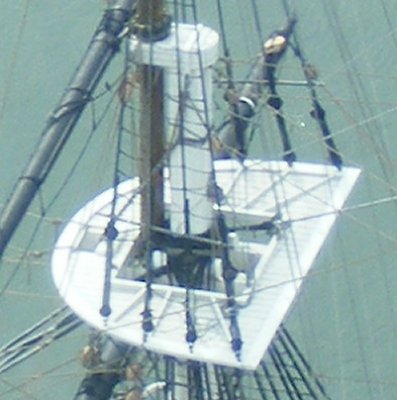
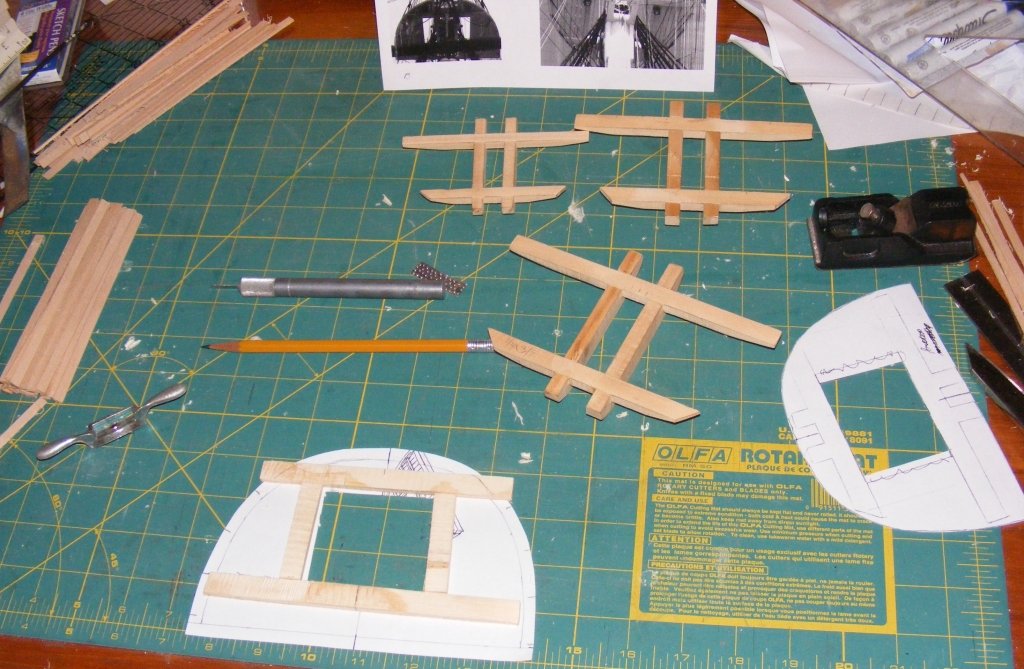
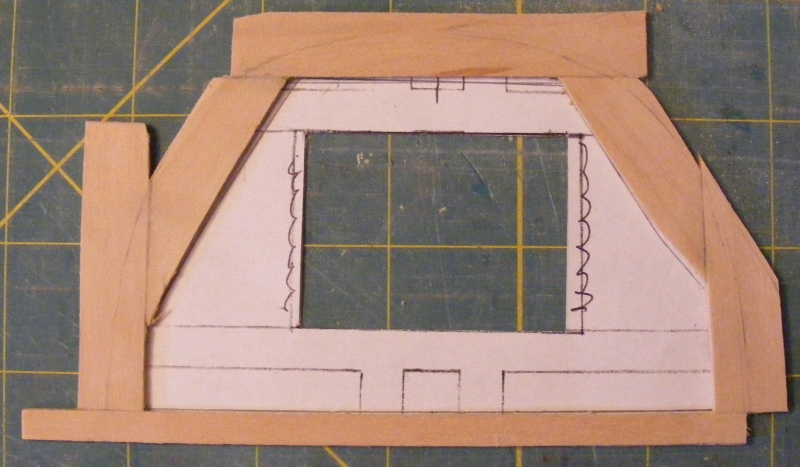
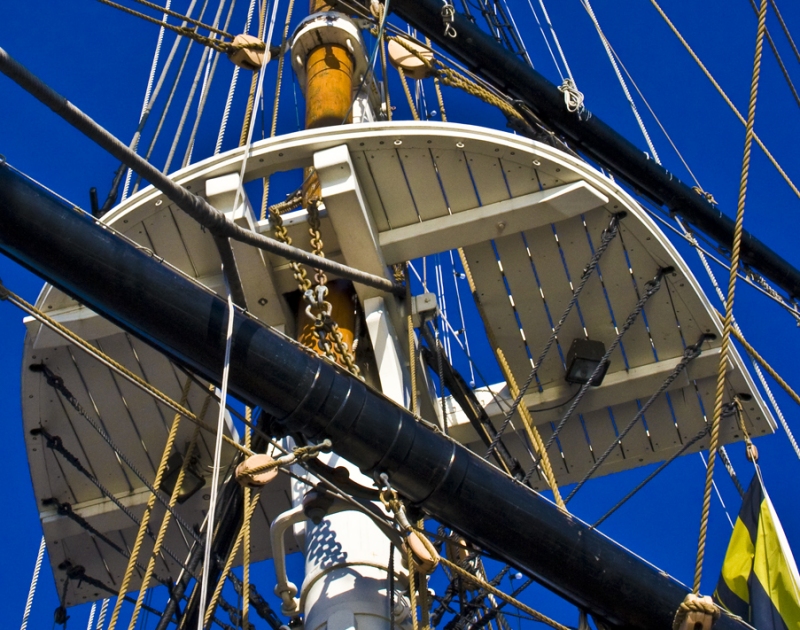
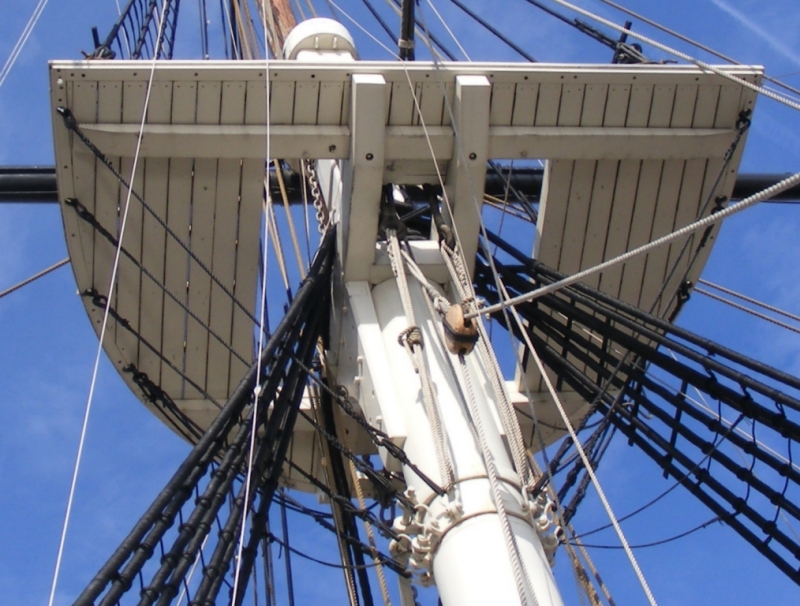
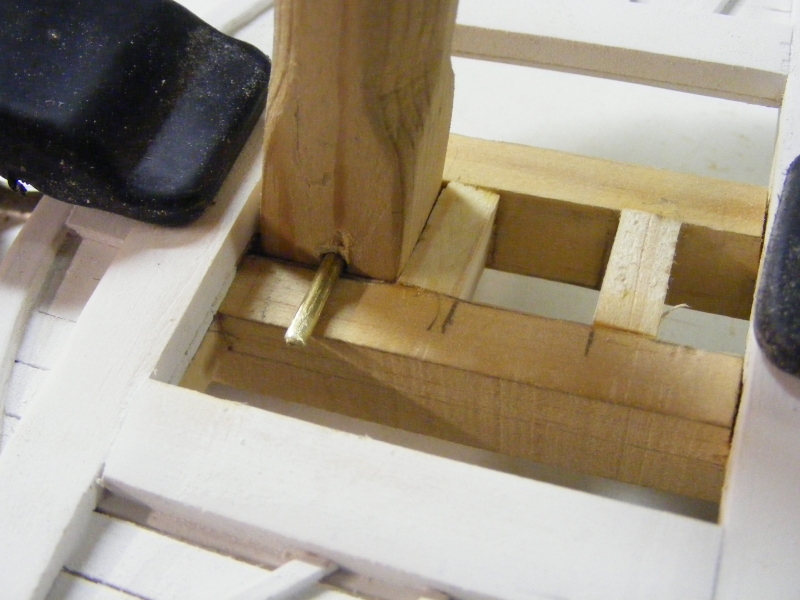
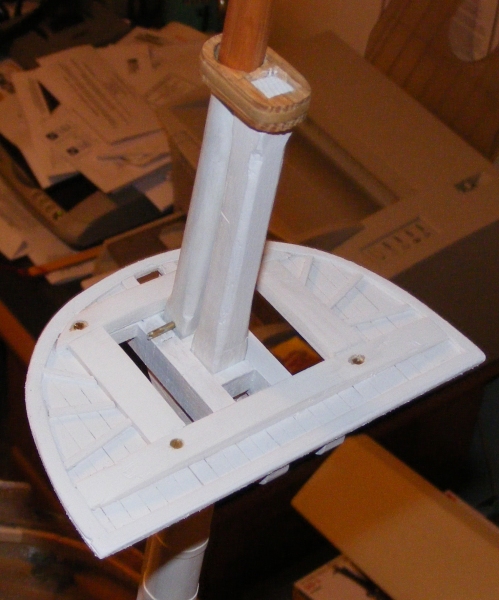
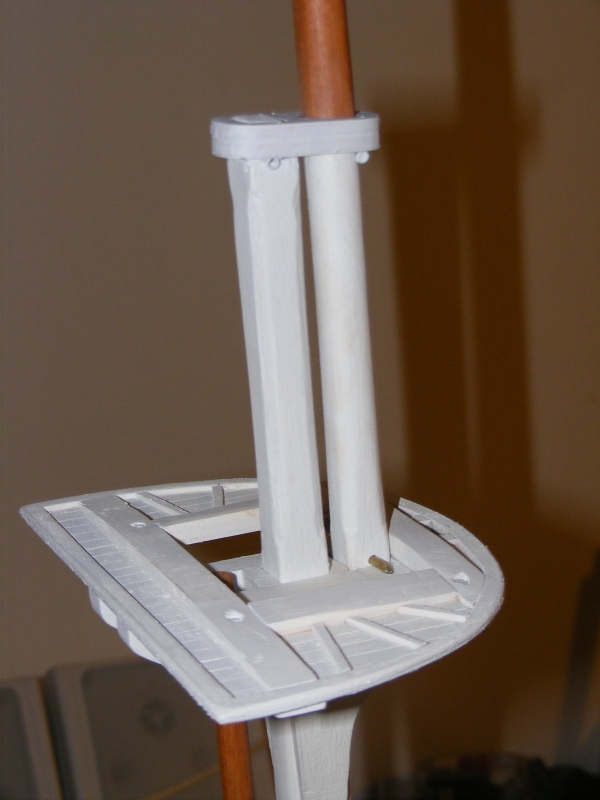
The Three Tops! After one side of the hull had been coppered, I needed a break from cutting, stamping, peeling, and sticking all those little copper plates; so I decided to make the fighting tops. I had just restocked my basswood sheet inventory and proceeded to rip a collection of strips from the 1/16" bass for planking the tops. I had the basic size and shape for them worked out when I made the cross-trees and trestle-trees, but I needed to determine their construction. As with everything involving Constellation; plans don't show, paintings don't reveal, and photos don't match what's on the ship today; so I have to play detective again. Consistently you'll see in paintings and photos that the tops on Constellation are thin. In a couple of old photos, and on the ship today, I could make out their basic construction; what I couldn't determine was what was on top, um, of the tops. So, more digging turned up some information on masting and rigging of ships around "Stella's" time period calling for "sleepers" that sandwich the top between them and the cross-trees - stiffening it. A couple of photos taken from aloft around 1914 barely show what's on the top, but do seem to confirm the masting data. Photos of the ship today show she has no sleepers on her tops.
So, data in hand, I cut sleepers from the same wood the crosstrees were made from, and began making the tops.
The tops are basically a wooden frame with battens, planks, that don't quite come to the edge of the frame, laid underneath. A covering frame wraps around the battens covering the end grain. The sleepers mount on top, mirroring the cross-trees below.
The underside of the maintop on the real ship today:
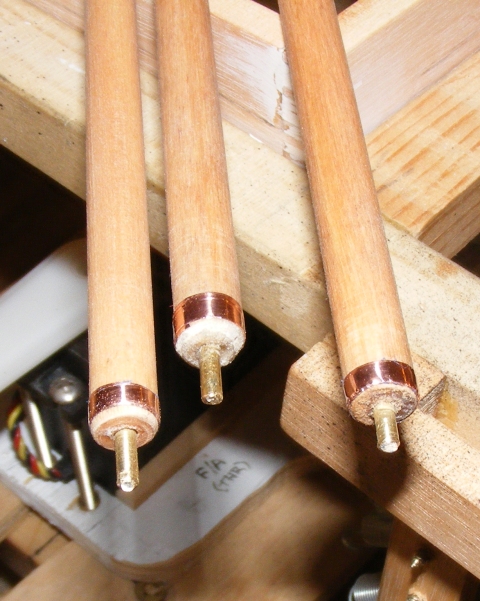
In the meantime, the topmasts were drilled, fitted with a brass tube, and a bit of rod as fids to hold them up on the cross-trees.
The tops were each attached to the cross trees with 4 flat-head brass wood screws through the sleepers.
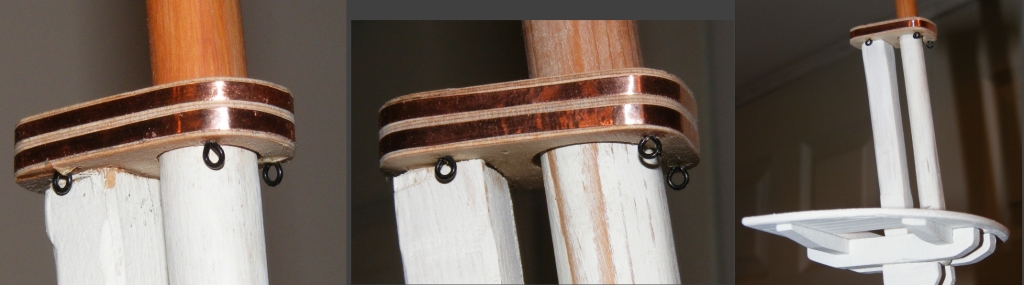
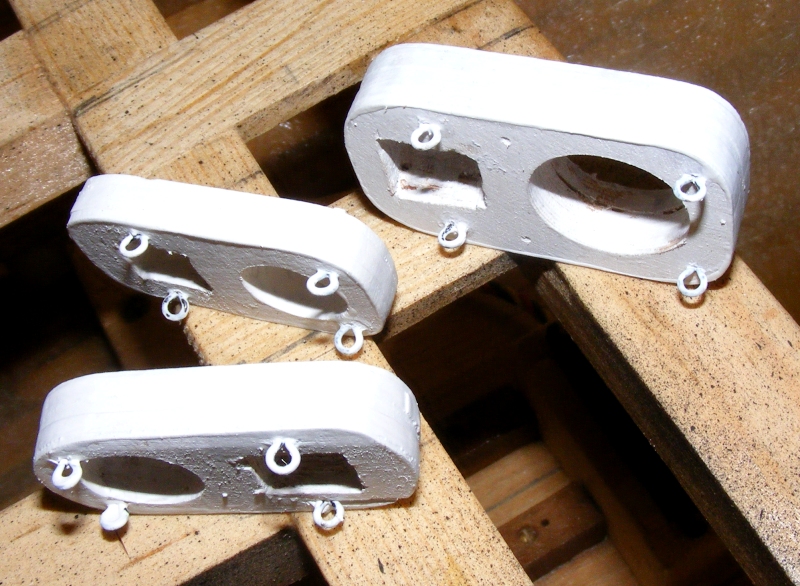
I never liked the red oak caps I made initially, so I made new ones from several layers of birch aircraft plywood, which came out much better.
2011: These were banded with the copper tape used on the hull, eye-bolts made from sewing hooks added, and painted white.
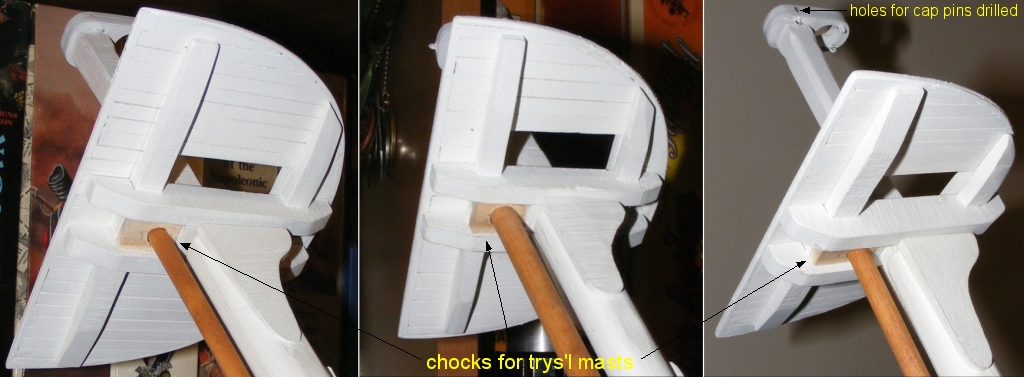
Chocks were set in the tresle-trees to hold the heads of the trys'l masts. I don't have a solution for the steps as yet, that'll have to come later. The trys'ls themselves Got a bit of brass rod set into their heels, and were banded with copper tape.
With the doublings dealt with, I finished coppering the other side of the hull. Then it was on to the bowsprit.
|
||
 |
 |