8/11/2011

 |
 |
|
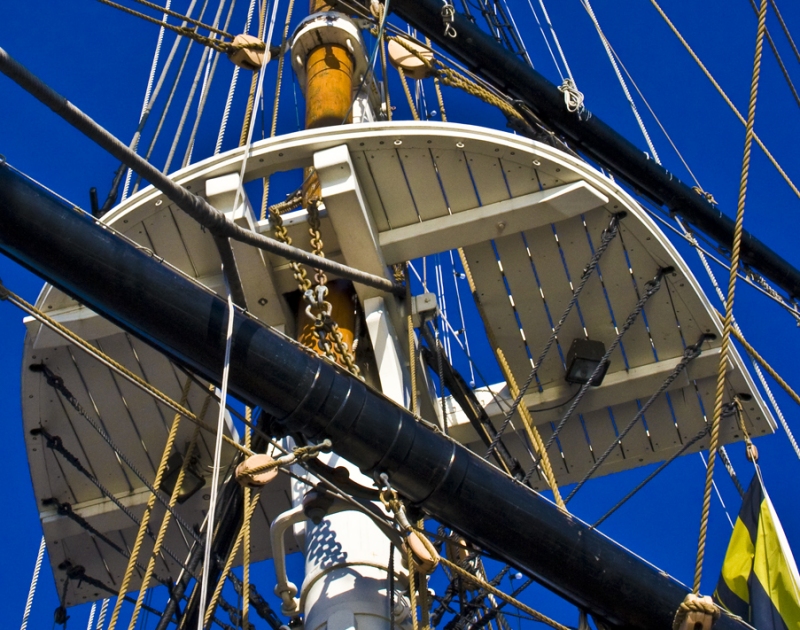
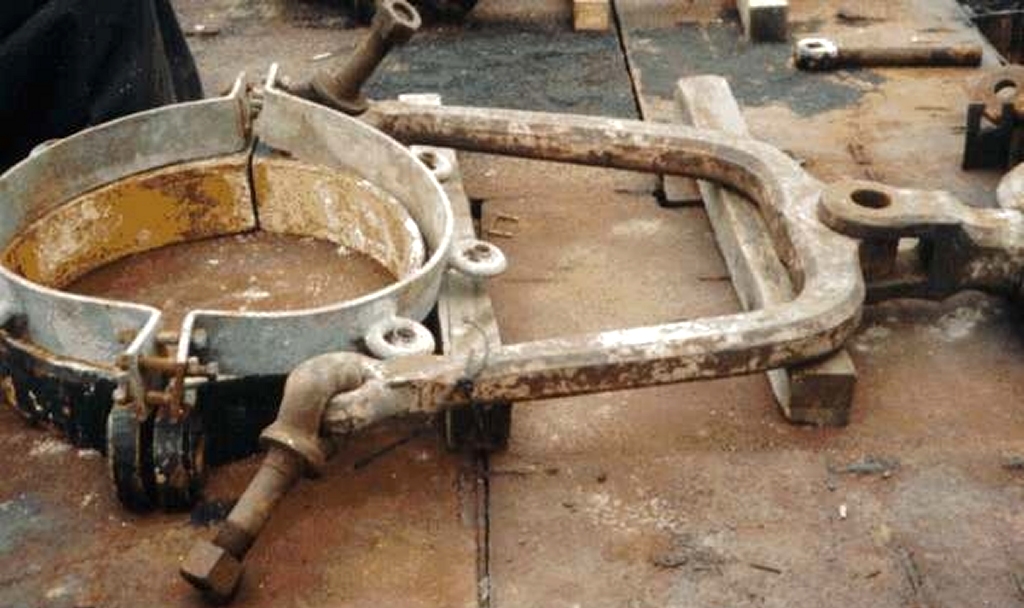
Previous Page | Next Page | Table of Contents click pictures for a larger version Ironwork There are several things about Constellation that are un-warship like, according to the ship modeling books. One of these things are her iron yard trusses. Almost exactly what is shown in Spars and Rigging: From Nautical Routine, 1849, Constellation retains her original trusses.
Her trusses hold the yard out from the mast further than the yoke and parrels would have, and move the yards pivot point further out too - allowing the yard to be braces sharper before coming against the shrouds. Another feature of the trusses is they allow the topmasts to be brought down behind them without affecting the course yard. They're an important feature of the ship, so I had to figure out how to make them look right and yet be strong enough to function on the model.
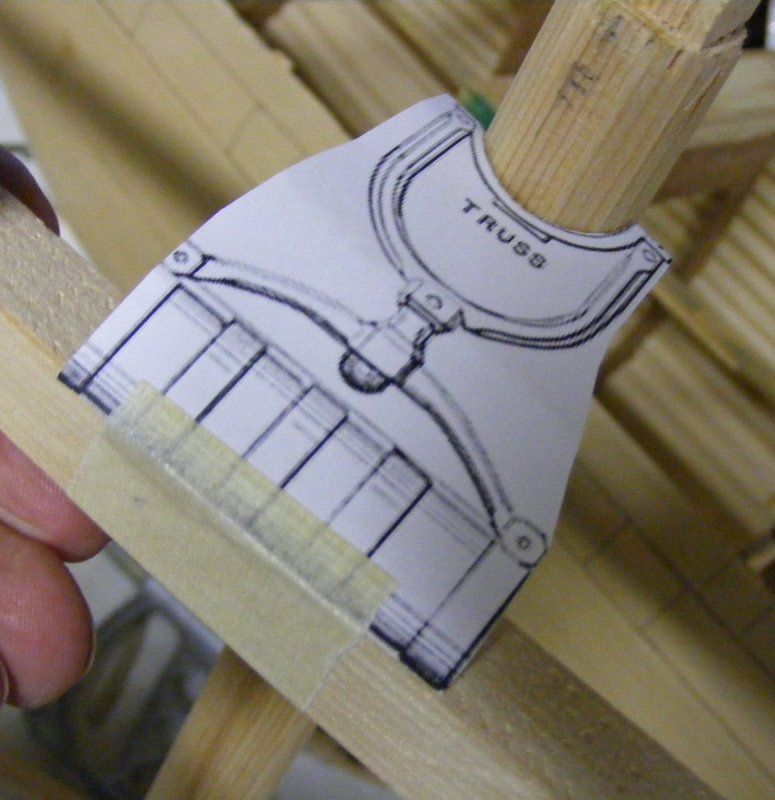
I couldn't get to them to measure them, so I photographed them from as directly below as I could manage; traced the photo in Paintshop Pro; and scaled it to the diameter of my mast where they would mount. Now I had a 1:36 scale drawing of them I had to figure out what to make them of.
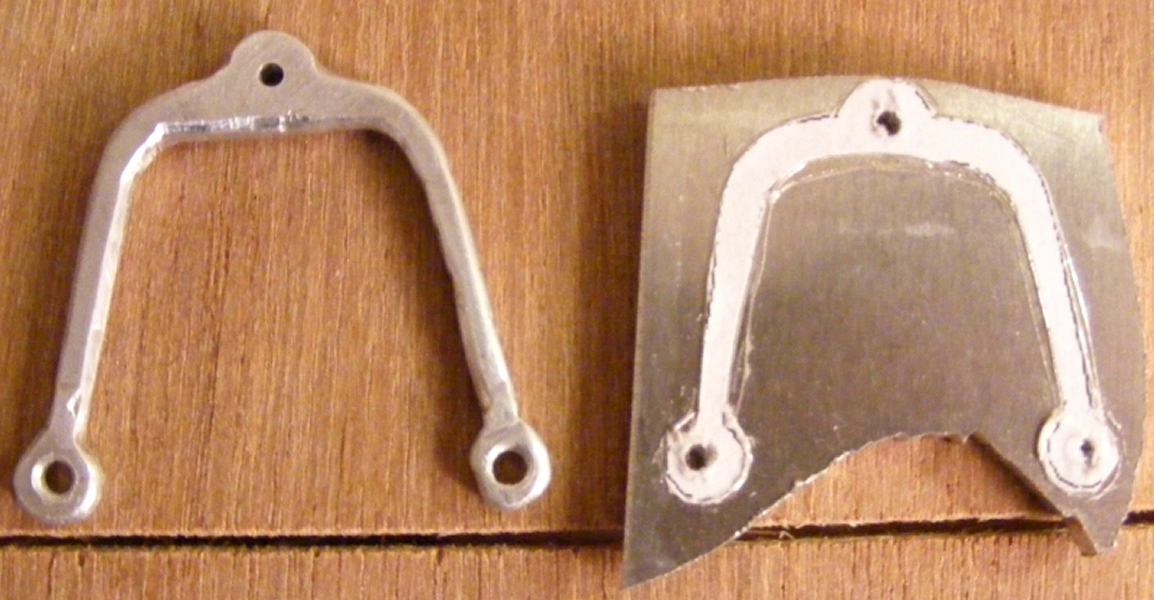
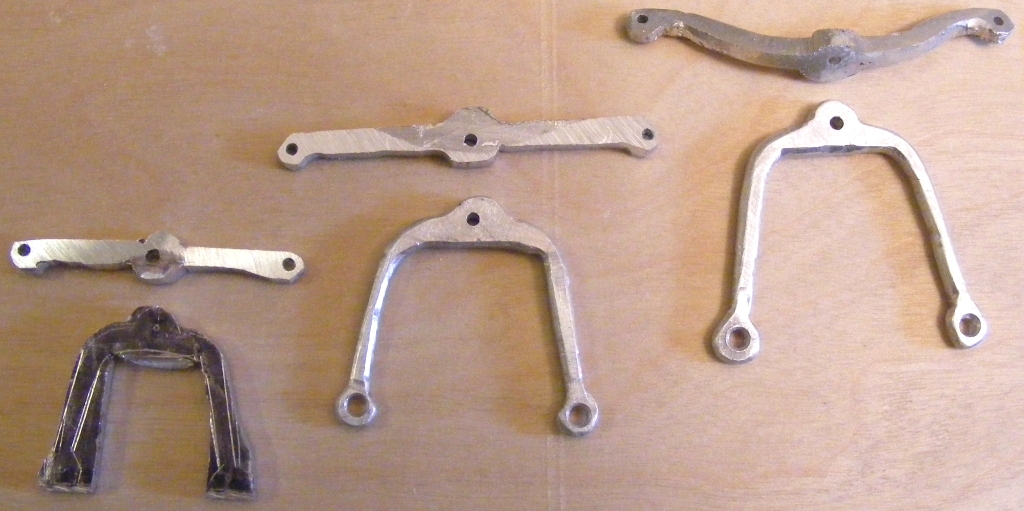
I considered molding them in resin with a wire armature, layers of wood, again, with an armature, but it just seemed I was over thinking it. The difficult part was the bow shaped portion that attached to the yard. The ends have vertical holes for the bolts that hold it to the yard bands, but the center has a horizontal hole for the bolt that it pivots on and holds it to the truss on the mast. I knew I would make the bow flat and bend it into the bow shape, but I wondered if I could heat and twist the ends to get the vertical holes I needed there, and should I use brass or aluminum? I had a small piece of 1/8" thick aluminum handy to test on and I figured aluminum would be easier to cut. The heating and twisting test worked well, but I didn't have enough to make all the parts, so a 12" x 6" x 1/8" sheet was ordered. I opted to stick with aluminum because it was much cheaper than the same size sheet in brass. The first truss I roughed out with a hacksaw and shaped with a Dremel. That got the job done, but it was difficult and the Dremel ate the first one. On a whim I cut the next one on the band saw and that worked out much better. A more appropriate blade in the bandsaw would have made it a breeze. I used a file and the disk sander to fine shape the parts.
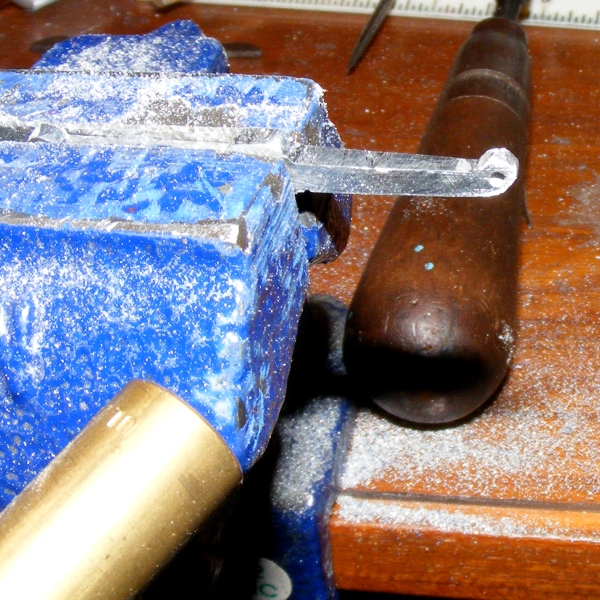
Then I cut out the three bows. I cut them flat, then heated and twisted the ends 90°. Then I bent them into their bow shape. That worked fine until I got to the mizzen's bow.
Two times the ends broke off not while twisting, but while bending it into the bow shape. On the third try I bent the bow shape first, then twisted the ends and that got it. A bit of sanding, rubbing, and buffing and I had three trusses and bows, now I needed the clevis' that connected the two parts.
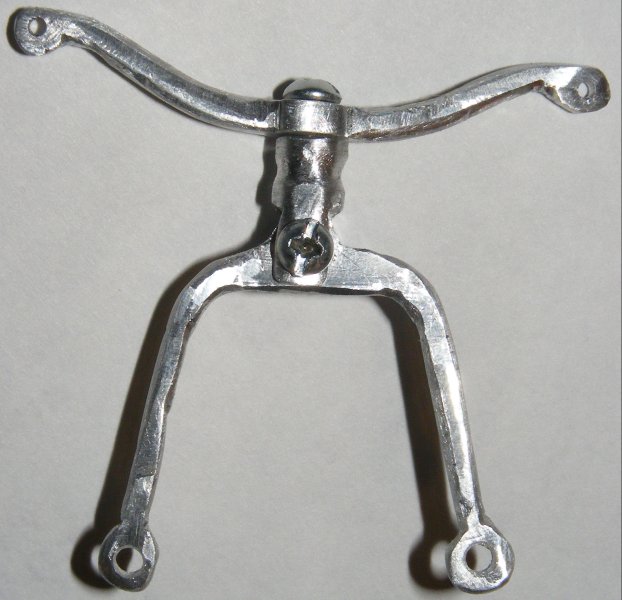
To make the clevis' I got a 1/4" aluminum rod from the local mega-hardware-warehouse store. I cut a piece about 4" long and drilled it through the side - this is the hole the vertical bolt goes through. Then I cut the notch in the end on the bandsaw, using the truss to size it. Then I drilled the end for the horizontal hole in the drill press and tapped that hole using a steel #2-40 machine screw. The clevis was then filed to shape and cut off to length. Did that two more times and they were done.
Brass #2-40 screws were used to hold it all together. 1/16" brass rod was formed into eye-bolts attached to the eyes in the truss and threaded to be bolted to the mast band.
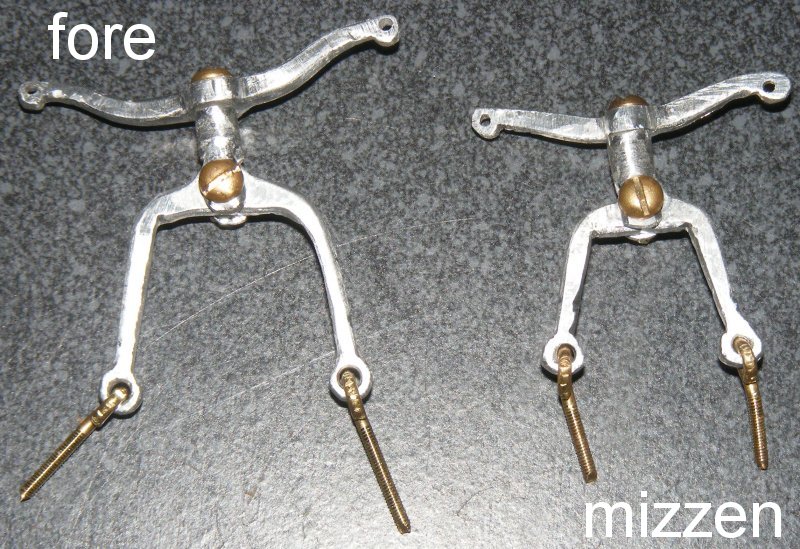
The bows are attached to the yards with brass bands, nuts, and bolts.
And the topmasts can be dropped behind them.
|
||
 |
 |