5/1/2018

 |
 |
|
Previous Page | Next Page | Table of Contents click pictures for a larger version 5/21/2017: Almost half way into this year already and not much to show for it. Last Sunday, May 21st, was the Baltimore Port Expo and I threw some sails on the model, but I didn't get braces on, so she didn't sail. Just sat on her cart and looked pretty. I put the courses on, brailed up in their bunts, and bent on the trys'ls, also brailed up, so she was carrying all the sails she'll carry.
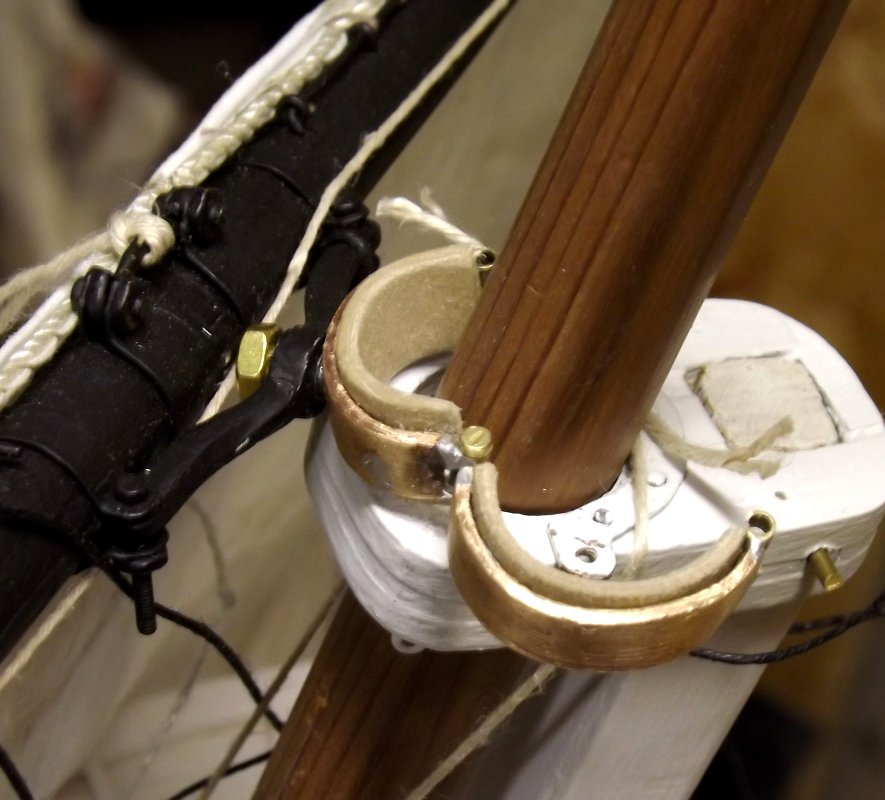
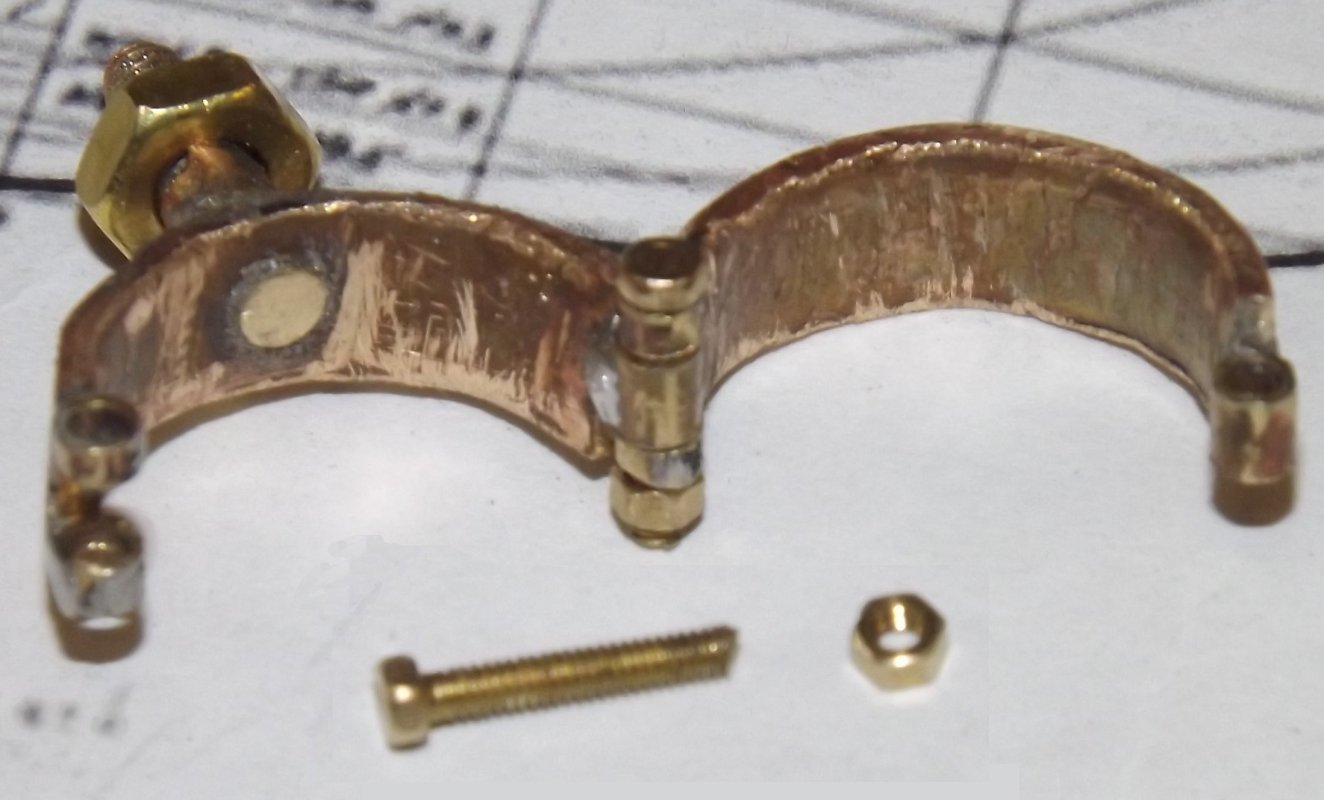
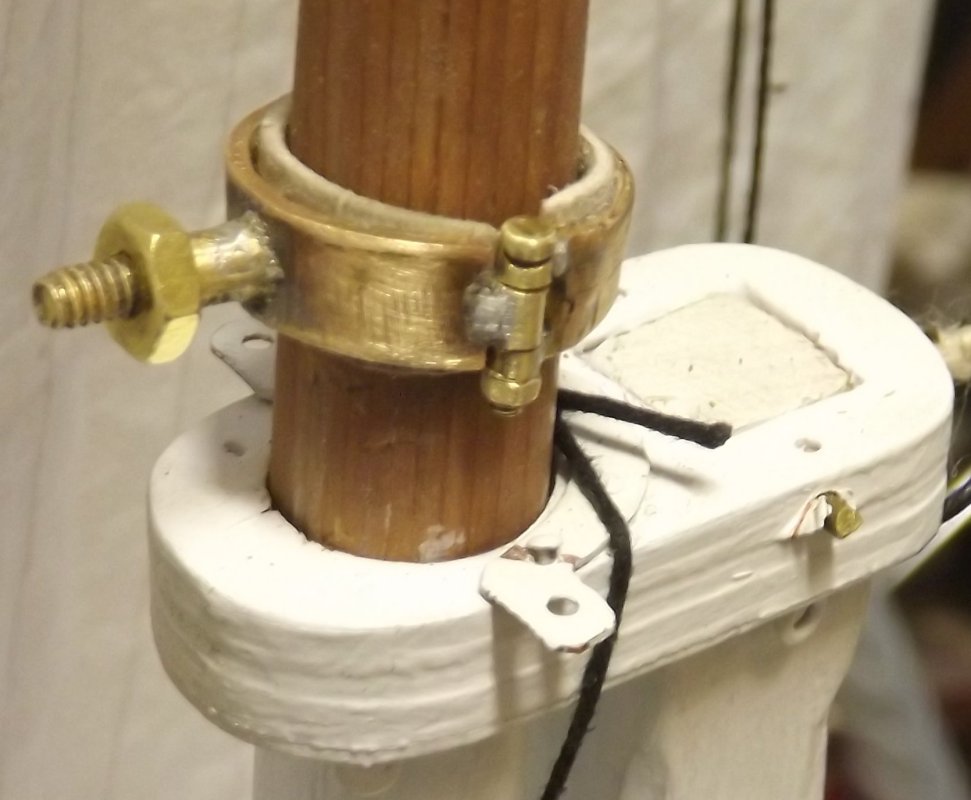
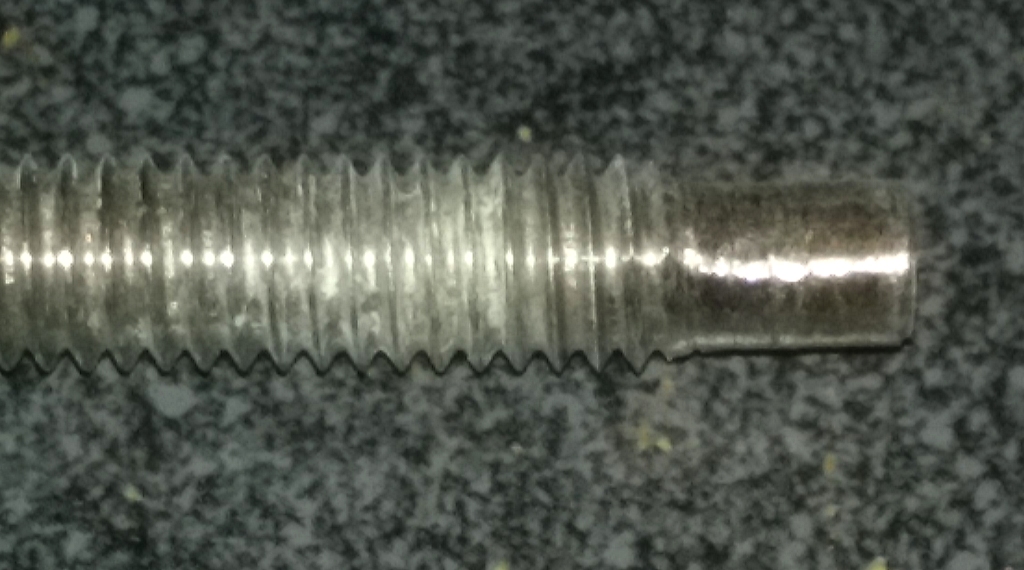
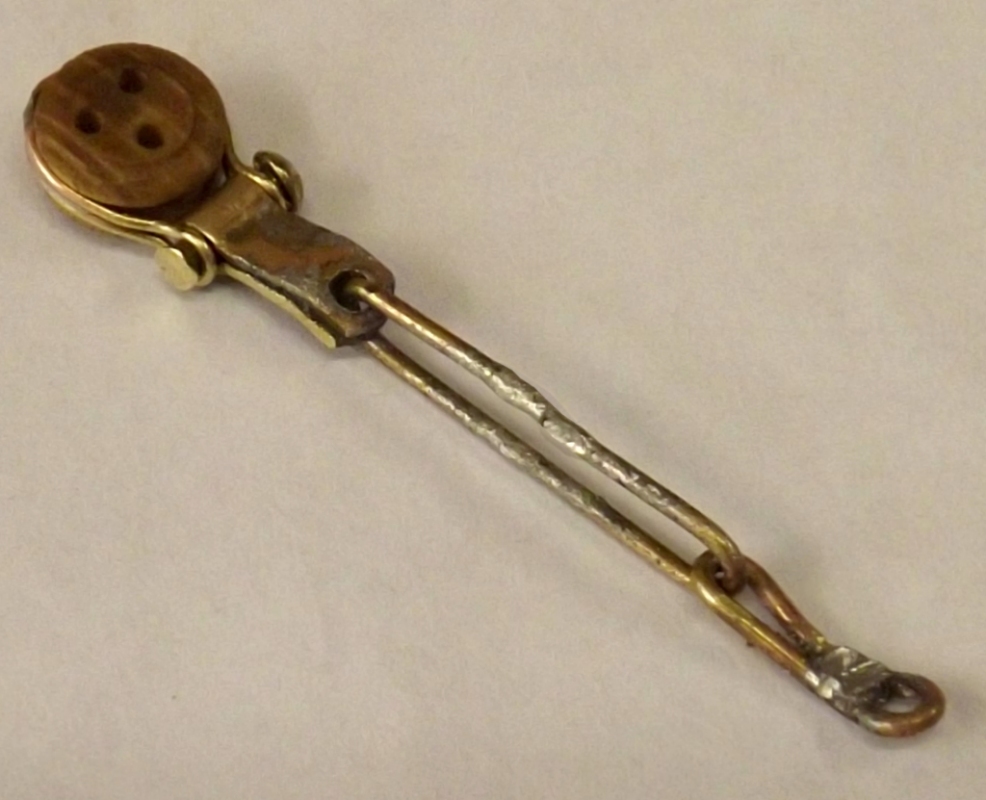
5/23: Today I took another crack at making tops'l yard parrels and finally got the main parrel made. The post that the yard yoke rides on is a bit of #4 brass screw threaded into the collar, with a section of brass tube threaded onto the screw to cover the threads where the yoke will ride so they don't chew up the yoke. All of it is soldered. The sleeve is a little longer than the yoke's thickness, so it keeps the nut from getting tightened too much and binding things up. A drop of CA will keep the nut from rattling off. It's all lined with a cross-grain cut of 1/16" bass 3/8" wide, CAed inside the parrel. The hinge-pins are #80 hex-head bolts and nuts. Some filing and clean up and then there's only two more to go.
5/27-28: Made the fore tops'l parrel just like the main's. I think I'm getting better at this soldering thing, so I got cockey and made a new wythe for the jib-boom. The old one was soft from being over heated when I made it and it finally cracked and was about to fail. My photography, on the other hand, still needs work.
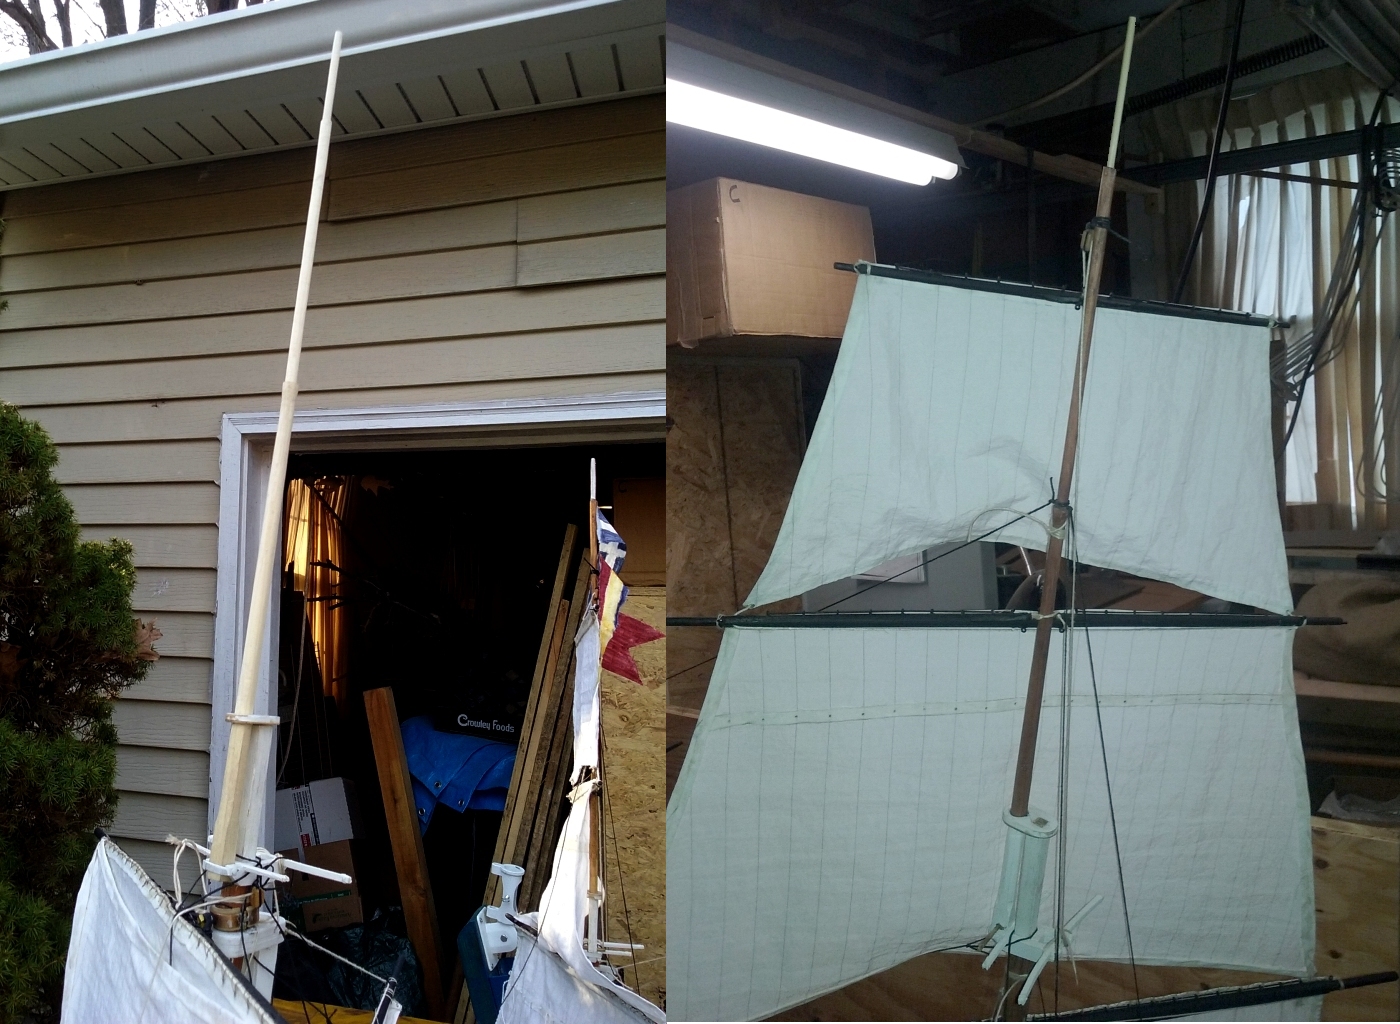
2018 4/13: Finally Spring showed up, well, for a day. Till now it's been cold and wet. I haven't done a thing on any model in months and when I do get into the shop, it's do do work for other folks. But the Chesapeake Bay Maritime Museum is holding their Model Expo the weekend of May 19th, and I want to sail the model in the Miles River instead of the pond, which she's too deep for. So I rolled the model into the driveway to work om other folks stuff, and later took inventory of what I needed to do to get her sailable again. It's hard working on her down on the cart, so I put her on her cradle on saw-horses to save my back. Putting her in the shop that evening, I snapped the truck off the main mast, again. I didn't think a repair would stick, so, next day I set about making a new main t'gallant pole. That made, I took a shot at repairing the old one. I flattened the tip on the sander, then drilled a hole in a block of wood the mast would fit snugly into. This would support the spar from splitting when drilled and hold it verticle on the drill press. I drilled a 1/8" hole about 1/2" into the end of the spar. Into this I glued a bamboo skewer which I cut to length after the glue dried. I was actually surprised that this worked, so now I have a spare main t'gallant pole.
4/19: A problem I've run into when putting to model onto it's ballast on the cart is its tendency to teeter and try to turn, slipping off the ballast. I considered installing a more cradle-like support on the cart, but wanted to try something simpler first. I groud the threads off the bottom of the threaded rods that hold the ballast on for about 1/2". This allows a little of the rod to drop into the holes in that ballast preventing the model from moving around before I have a chance to screw them in, especially when I'm operating alone.
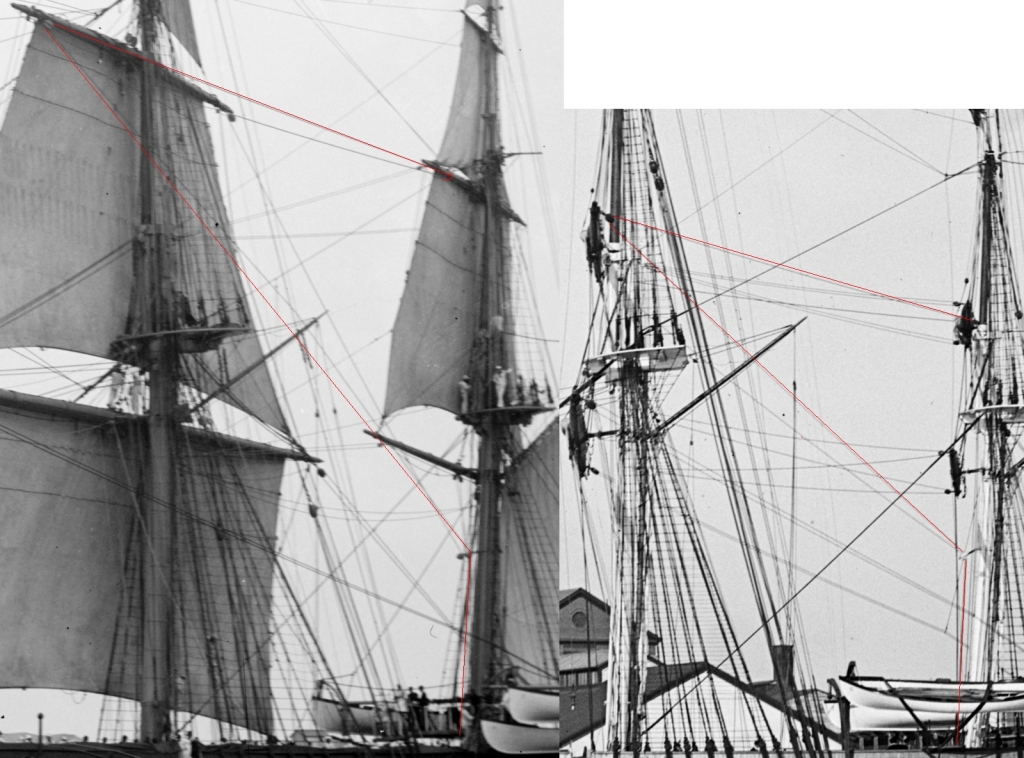
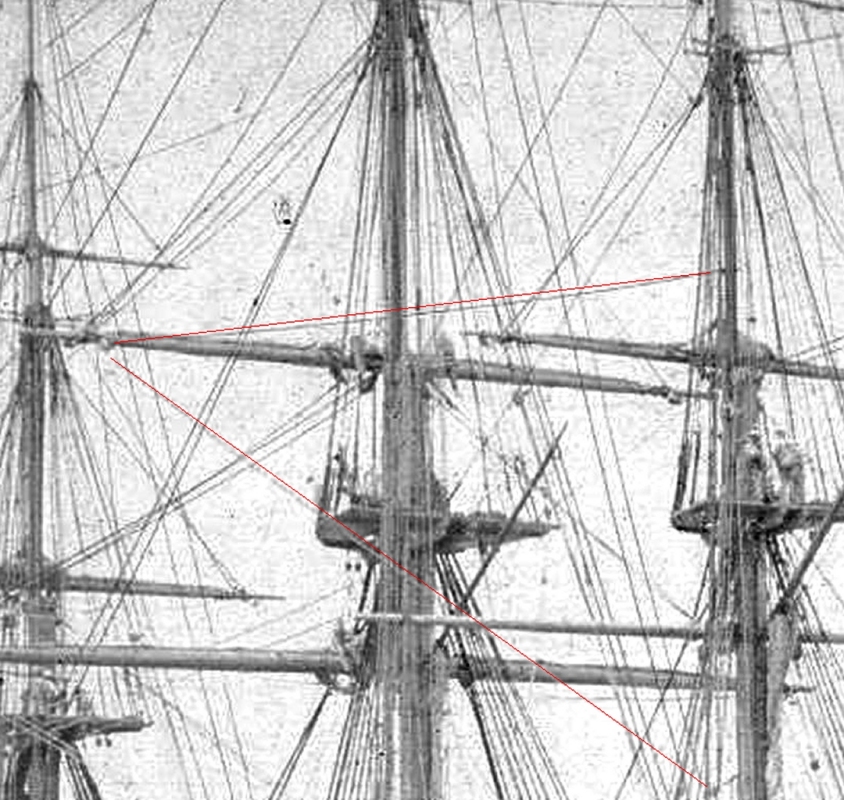
4/22: When she sails again, I want to use the other winch this time, and separately control the main and mizzen as they should be. To refresh my memory. I went to look at images of the ship
to see where exactly these braces anchored. I thought the main tops'l brace anchored to the mizzen topmast stay, and it looked like it in images of the ship under sail, but in photos of the
ship without sails, it appeared to anchor to the mast right at the mizzen tops'l yard. That was weird, so I went looking at some more pictures (I save every one I find) and it looks like it
was anchored right to the mizzen tops'l yard, maybe where the halyard attached? but it also looks like there's something on top of the parrell and there's something attached there that I
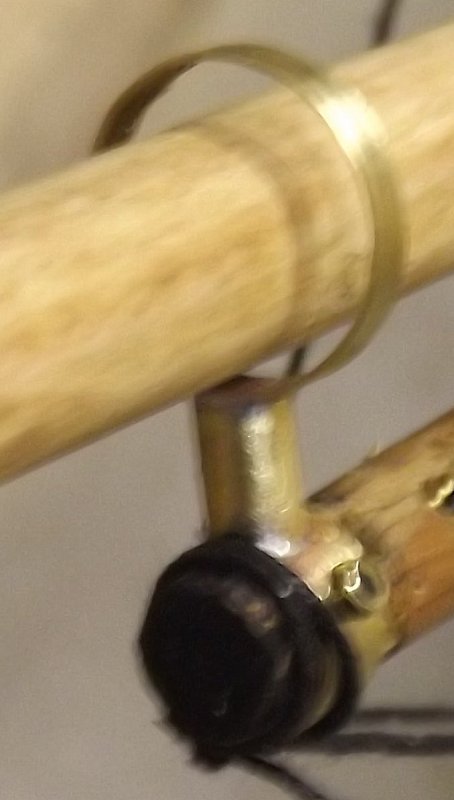
don't see on the other top'sl yards. Maybe a ring that rides on top of the parrell?
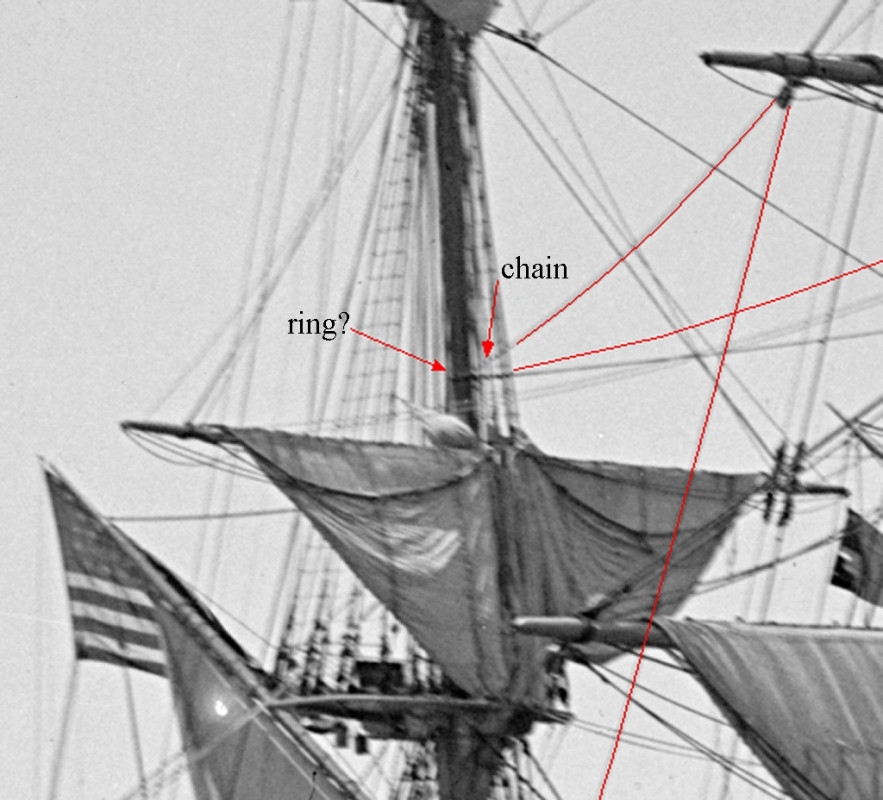
So, it turns out there is indeed a ring that slides up and down the mast, and as seen here, doesn't always slide down completely. The left image in 1892, the right image in 1888.
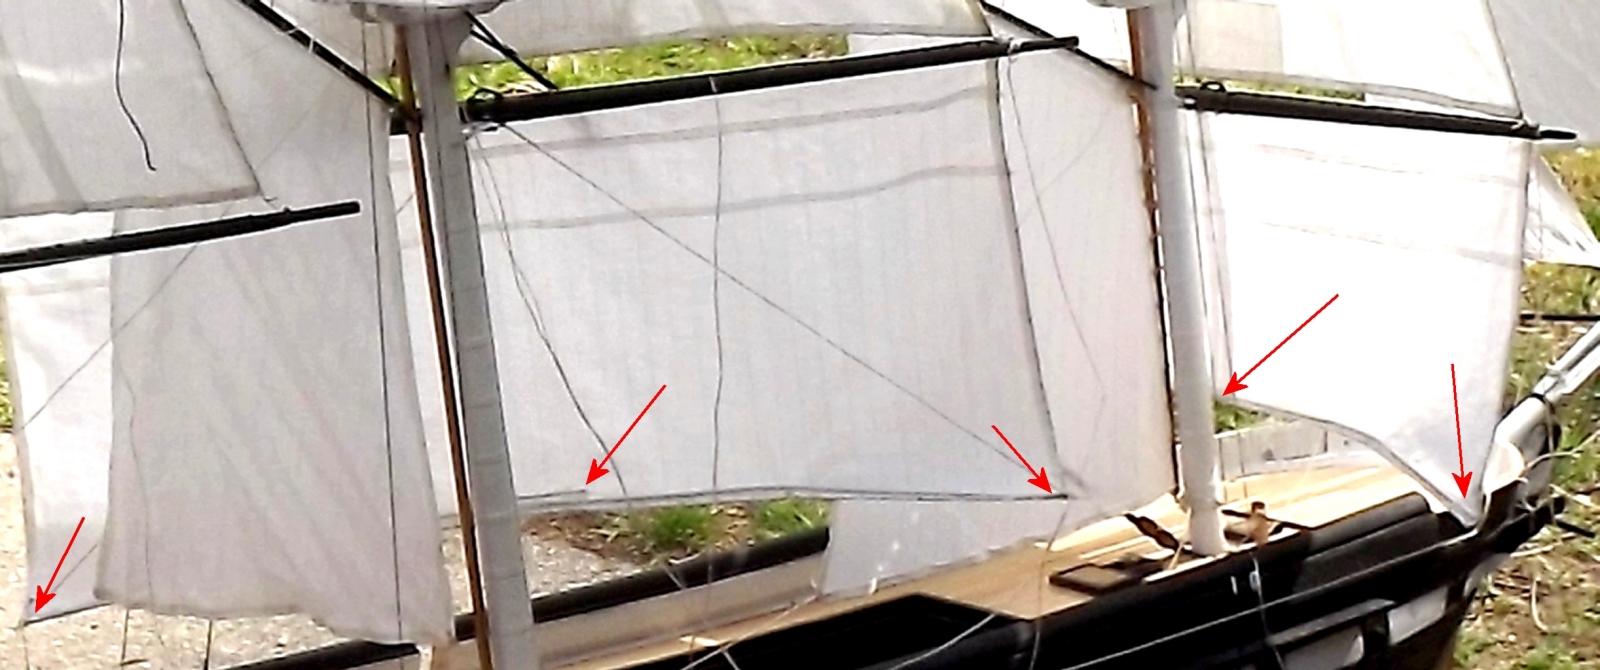
I don't know what it's made of. A hinged iron ring that a pin or bolt holds closed so it can be removed, or maybe a leather covered rope grommet which would explain those chains as giving it weight to make slide down the mast. (note: there's no chains,it's just an artifact in the scanned photo) Looking at photos of other ship's contemporary to Constellation, it does appear that other sloops were rigged this way; Savannah, Macedonian, St Marys, Saratoga, and Portsmouth all were, that I've been able to discern from photos. While I haven't confirmed this ring thing anywhere but on Constellation, but I did notice that the main tops'l brace is routed to blocks partway down the mizzen mast on every American warship of this period (1850+) where I could see it, including frigates. In the painting of Constellation at anchor in Naples that I'm basing my model on, you can't see how the main tops'l yard is braced, but in the painting of her under sail by the same artist in 1862, those braces are visible, and deSimone does show those blocks on the mizzen mast. How does all this affect the model? Not much really. I wondered if it would affect the geometry of the bracing system, but the tops'l on the model will rarely be lowered so I only have to deal with it being in the set position. 4/30: I sewed the bolt-ropes onto both courses, and pockets onto their clews, and a sleeve in the center along the foot, all designed to hold the rod made from a couple of vinyl-coated clothes-hangers. These items are pointed out in the photo below.
Being in a sewing mood, I attached the hoops to both trys'ls, though they didn't get bolt-ropes yet. I intend to sail her with all 17 sails set, weather permitting.
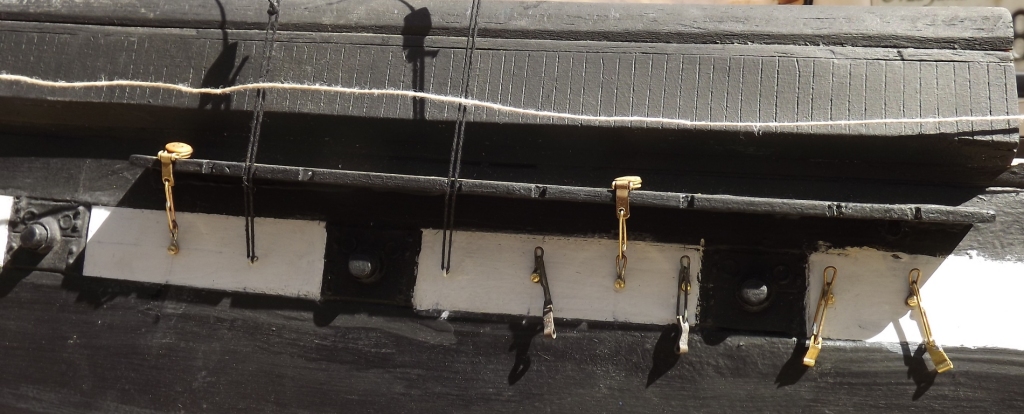
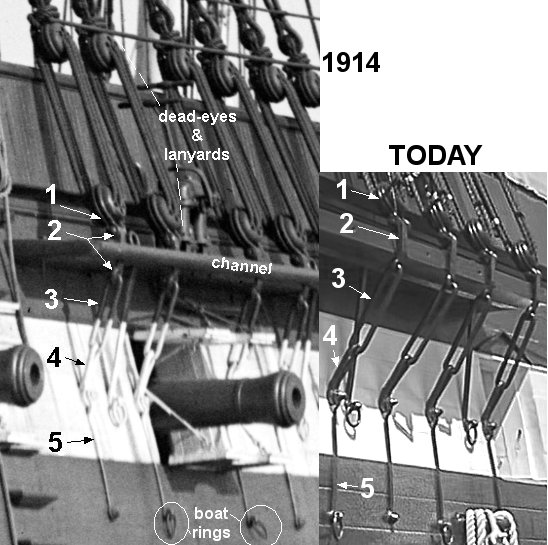
I attached some of the chain-plates using the #1 round-head brass wood screws. My new-found soldering skills came in real handy in soldering some sets I had made up but was having trouble soldering. The really tedious part is making the strop for the dead-eye, and there's over 100 of those to make, not to mention the topmast shroud deadeyes! I started these back on page 12 of this log, but I don't expect to get them all done for St Michaels, I'd like maybe the main chain-plates installed at least. There's another strap, #5 in the image, that I haven't figured out how I'm going to make yet.
|
||
 |
 |